Last November, I stood in the pharmacy aisle staring at a tiny $14 bottle of “premium immunity tonic.” It had a label that looked like it was designed by a witch who went to art school, and the ingredients list was shorter than my grocery receipt. I bought it out of sheer panic because my kids had been coughing up a storm, and I was desperate for something to help.
Two sips later, I nearly gagged. It tasted like watered-down vinegar with a hint of regret. And the worst part? It was gone before my immune system even had a chance to wake up.
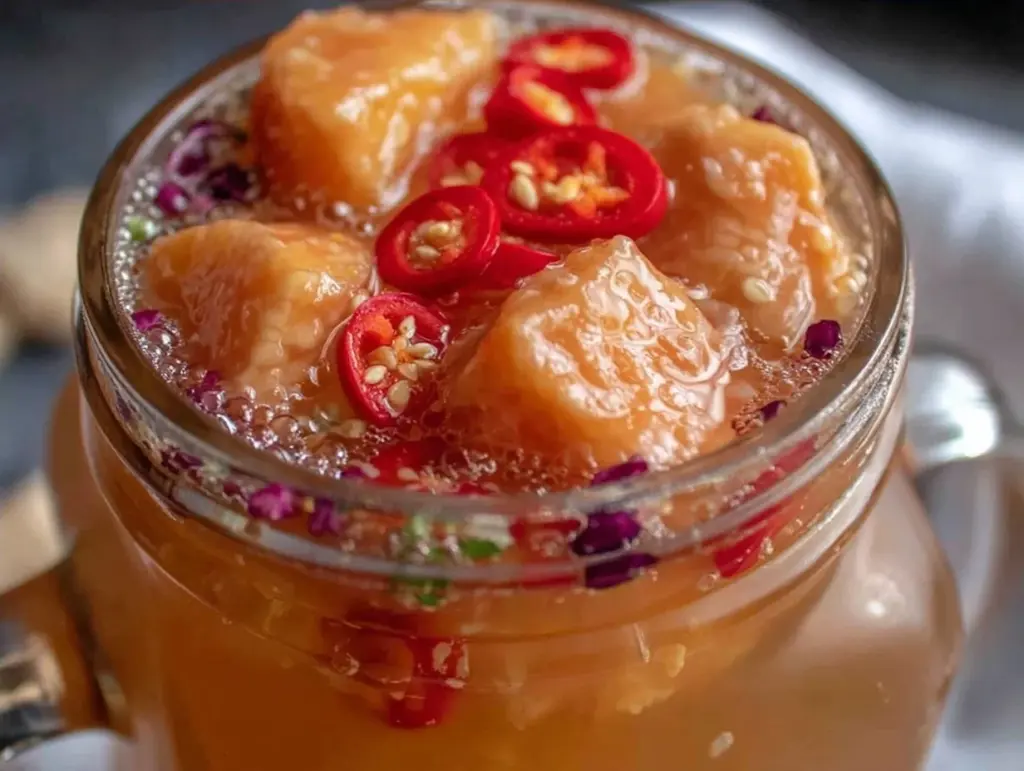
That was the day I decided to stop paying for overpriced marketing and start making my own Fire Cider Immunity Tonic with Horseradish and Fresh Ginger. I’m not talking about a delicate, floral herbal tea. I’m talking about a zesty, throat-clearing, nose-opening powerhouse that costs less than a dollar per bottle and actually tastes like something worth drinking (if you like bold flavors).
I’ve been making this fire cider every fall and winter for the past six years. It’s become a ritual in our house. When the first chill hits the air, I pull out my sharpest knife, grab a bunch of horseradish, and start chopping. It’s messy, it’s pungent, and it’s incredibly satisfying. My kids roll their eyes when I pull out the jar, but they’re the first to ask for a “shot” when they feel a tickle in their throat. And honestly? It works way better than anything I’ve bought at the store.
If you’re tired of spending a fortune on supplements that do nothing, or if you just want a natural way to support your family’s health without breaking the bank, this recipe is for you. It’s simple, it’s cheap, and it’s ready in just a few days. Let me show you how to make it right.
Why You’ll Love This Fire Cider
There are a million reasons to make this tonic, but I’ll keep it real with you. Here’s why this Fire Cider Immunity Tonic with Horseradish and Fresh Ginger has earned a permanent spot in my pantry alongside my creamy butternut squash soup and my keto cauliflower soup during cold season.
- It’s Dirt Cheap — You can make a full quart jar for under $10, usually less. That’s about 20 servings for the price of one pharmacy bottle. I stretch every ingredient because I’m a parent, and I like my money to work hard.
- It Uses Pantry Staples — You probably already have the apple cider vinegar, honey, and garlic in your kitchen. You just need to hit the produce aisle for the fresh stuff. No weird supplements to order online.
- It’s Actually Effective — I’m not a doctor, but my family’s immune systems have never been stronger since we started this tradition. The horseradish clears sinuses instantly, and the ginger settles stomachs. It’s like a hug for your insides.
- It’s Make-Ahead Friendly — You mix it once, and it sits in the back of your fridge for weeks. When flu season hits, you don’t have to lift a finger. Just grab a spoon.
- It’s Versatile — While I love it as a health shot, you can also use it in salad dressings. In fact, I often whisk it into a vinaigrette for my vegan fall harvest grain bowl for an extra kick.
This isn’t just a drink; it’s peace of mind. And for a budget-conscious family, that’s priceless.
Ingredients You’ll Need
Here’s the best part: the ingredient list is short, but the flavor profile is huge. I’m particular about three things here: the vinegar, the horseradish, and the honey. Get these right, and you’re golden.
The Base
Raw Apple Cider Vinegar (1 quart / 950ml) — This is your foundation. Make sure it says “with the mother.” That cloudy stuff at the bottom is where all the good bacteria and enzymes live. Don’t use clear, distilled vinegar; it’s too harsh and lacks flavor. Bragg’s is my go-to brand because it’s affordable and everywhere.
Raw Honey (½ cup / 170g) — This balances the heat and acidity. Raw honey has its own antibacterial properties, which is a nice bonus. If you’re strict on sugar, you can skip it, but the fire cider will be *fiery*. I like the balance.
The “Fire” Team

Fresh Horseradish Root (1 cup, chopped / about 150g) — This is the star. You want fresh root, not the jarred stuff in the condiment aisle (that stuff has preservatives and tastes flat). Look for it near the ginger and garlic in the produce section. It’s usually in a bag with the ginger. If you can’t find it fresh, you can use prepared horseradish, but reduce the amount by half and add it at the end. Fresh is best for potency.
Fresh Ginger Root (1 large knob, about 4 inches / 50g) — Peel it and chop it. Ginger is anti-inflammatory and great for nausea. The bigger the knob, the spicier your cider will be. I use a big knob because I like it hot.
Garlic (1 full head / about 10-12 cloves) — Don’t be shy. Garlic is a natural antimicrobial. Peel the cloves and leave them whole or smash them slightly. If you’re worried about the smell lingering in your house, open a window. It’s worth it.
The Flavor Boosters
Fresh Turmeric Root (1 large knob / 30g) — Or 2 tablespoons of dried turmeric powder. Fresh turmeric looks like ginger but is orange inside. It’s earthy and powerful. If you can’t find fresh, dried works, but the flavor is less vibrant.
Hot Peppers (2-3 Thai chilies or jalapeños, sliced) — This adds the “fire.” Thai chilies are hotter and smaller; jalapeños are milder and easier to handle. Adjust based on your spice tolerance. I use two Thai chilies because I like to feel the heat.
Dried Oregano (2 tablespoons) — A classic immune-boosting herb. It adds an earthy, herbal note that rounds out the sharpness of the horseradish.
Optional: Lemon (1 lemon, sliced) — For extra vitamin C and brightness. I often add this if I have a ripe lemon in the fridge.
Equipment Needed
You don’t need fancy gadgets for this. Here’s what I actually use:
Quart-Sized Glass Jar — I use a Ball mason jar. It needs to have a wide mouth so you can get your hand in there to pack the ingredients. Make sure it’s clean and dry. Any moisture can cause mold.
Sharp Knife and Cutting Board — Chopping horseradish and ginger requires a sharp knife. Dull knives slip, and you don’t want that near your eyes when the horseradish fumes start.
Funnel — Not strictly necessary, but it saves the mess. I keep a small plastic funnel in my kitchen specifically for bottling things.
Strainer (Optional) — If you want a smooth liquid to drink, you’ll need a fine-mesh strainer or cheesecloth. If you don’t mind chewing on the bits, you can skip this.
How to Make It: Step-by-Step
Alright, let’s make this! I’m walking you through exactly how I do it, including the little tricks I’ve picked up over the years.
Step 1: Prep Your Produce (15 minutes)
Wash everything thoroughly. Scrub the ginger, turmeric, and horseradish under cold water. You don’t need to peel the ginger or turmeric—the skin has nutrients—but do peel the horseradish if it looks dirty. Chop the horseradish and ginger into small, rough chunks. The smaller they are, the more flavor they’ll release into the vinegar. Slice the peppers and lemon (if using). Peel the garlic cloves.
Pro Tip: Wear gloves if you have sensitive skin. Horseradish and chili peppers can irritate your hands. I learned this the hard way one winter and ended up with itchy fingers for two days.
Step 2: Pack the Jar
Start layering the ingredients into your clean quart jar. I like to pack them in tight. Put the garlic and horseradish in first, then the ginger, turmeric, peppers, and oregano. If you’re using lemon, add the slices last. Pack it down gently with a spoon. You want to get as much air out as possible.
Step 3: Add the Vinegar
Pour the raw apple cider vinegar over the ingredients. Make sure everything is completely submerged. This is crucial. If any piece of vegetable is above the liquid, it can mold. If you need more vinegar, just top it off. Leave about an inch of headspace at the top of the jar.
Step 4: Add the Honey
Pour in the raw honey. You don’t need to stir it yet. The honey will slowly dissolve and infuse over the next few days. Seal the jar tightly with the lid.
Step 5: The Wait (2-4 Weeks)
Store the jar in a cool, dark place like your pantry or fridge. Shake it gently every day or two. This helps distribute the honey and keeps the ingredients moving. After 2 weeks, it’s drinkable. After 4 weeks, it’s peak potency. I usually wait a full month because I like the flavors to meld.
Step 6: Strain and Serve
When you’re ready to drink it, strain the liquid through a fine-mesh strainer or cheesecloth into a clean bottle or jar. Discard the solids (or compost them). You can store the strained fire cider in the fridge for up to 6 months.
How to Drink It: Take 1-2 tablespoons daily as a preventative measure. When you feel sick, take 1-2 teaspoons every 2-3 hours. It’s strong, so start small!
Expert Tips & Tricks
Here’s everything I’ve learned from making this dozens of times. These tips will save you from my mistakes.
Don’t Skip the “Mother”
That sediment in your apple cider vinegar? That’s the mother. It’s full of probiotics and enzymes. If you buy clear vinegar, you’re missing out on half the benefits. It’s worth the extra few dollars for the raw stuff.
Fresh vs. Dried Herbs
Fresh turmeric and ginger are superior, but if you’re stuck in a rural area with no produce options, dried turmeric powder and ground ginger work. Just reduce the amount by half, as dried spices are more concentrated. The flavor won’t be as bright, but it’ll still work.
Storage is Key
Because of the high acidity, fire cider is self-preserving. But if you leave it on the counter for months, it might ferment further. I prefer storing mine in the fridge after straining. It keeps the flavor crisp and stops any further fermentation.
Double the Batch
This recipe makes a quart, which lasts my family about a month. In peak cold season, I double or triple the recipe. I use two large jars. It takes almost the same amount of time to chop the veggies, so you’re just saving trips to the store.
Variations & Substitutions
Once you’ve nailed the basic version, here’s how you can mix it up. I’ve tried all of these.
Spice It Up
Add a slice of fresh cayenne pepper or a pinch of black pepper. Black pepper helps your body absorb the curcumin in the turmeric, so it’s a smart addition for health benefits.
Sweeter Version
If you’re making this for kids, add an extra ¼ cup of honey or a splash of maple syrup. It masks the horseradish heat a bit more. My kids tolerate it better when it’s sweeter.
Herbal Boost
Add a few sprigs of fresh thyme or rosemary. These are great for respiratory health. I sometimes add this when I’m feeling congested.
No Horseradish?
If you can’t find fresh horseradish, you can use prepared horseradish from the jar, but add it after straining or in smaller amounts. The fresh root is what gives it that unique sinus-clearing punch.
Serving & Storage
How to Serve:
I keep a small shot glass or a teaspoon in my kitchen for daily doses. In the morning with breakfast, or at night before bed. If you’re feeling sick, I keep it on my nightstand and take a teaspoon every few hours. It’s not pleasant, but it works.
Storage Instructions:
Unstrained: Keep in a cool, dark place for up to 3 months. Shake daily.
Strained: Keep in the fridge for up to 6 months. The potency might fade slightly after 4 months, but it’s still good.
Freezing: You can freeze fire cider in ice cube trays for easy dosing. Just pop a cube into your tea or smoothie when you need a boost.
Nutrition Information
I’m not a nutritionist, but here’s the breakdown if you’re tracking. Note that this is per 1 tablespoon serving.
- Calories: 15
- Carbs: 3g
- Sugar: 2g (from honey)
- Sodium: 1mg
- Fat: 0g
It’s virtually calorie-free and low-sugar. The real value is in the phytonutrients and antioxidants from the garlic, ginger, and turmeric. It’s a functional food, not a snack.
Final Thoughts
So that’s my go-to Fire Cider Immunity Tonic with Horseradish and Fresh Ginger! I’ve probably talked your ear off at this point, but when you make a recipe this often, you have a lot to say about it.
This has saved us from getting sick more times than I can count. It’s my answer to “how do I boost our immunity” without spending a fortune on vitamins. My kids are used to it, my husband loves the kick, and I love the peace of mind. It’s simple, it’s cheap, and it’s powerful.
Make it yours! Try different peppers, add extra garlic, or tweak the honey. The best recipes are the ones you adapt to your family’s tastes. If you make this, drop a comment and let me know what you think! I love hearing how recipes turn out in your kitchen.
Happy cooking! And I hope your kitchen smells half as good as mine does right now (okay, maybe not. It smells like garlic. But a good kind of garlic).
Frequently Asked Questions
Can I use distilled white vinegar instead of apple cider vinegar?
You can, but I don’t recommend it. Distilled vinegar is too harsh and lacks the beneficial enzymes found in raw apple cider vinegar. The taste is also much sharper and less pleasant. Apple cider vinegar adds a nice fruity undertone that balances the heat.
Why did my fire cider turn cloudy?
This is normal! The particles from the herbs and vegetables will cloud the vinegar. It doesn’t mean it’s bad. If you want clear cider, just strain it through a cheesecloth. The cloudiness is actually a sign of all those nutrients floating around.
Can I give this to my kids?
Yes, but start with a tiny amount. A half-teaspoon is plenty for a child. The heat from the horseradish can be intense for little ones. You can also increase the honey to mask the spice. My kids take it like a shot, and they’re used to the taste now.
How long does it take to work?
It’s not a magic cure, but many people feel a difference within 24 hours when taken consistently during illness. As a preventative, it helps support your immune system over time. Think of it as maintenance, not a quick fix.
Can I make this without alcohol?
Traditional fire cider uses vinegar, not alcohol. Some recipes use vodka, but this version is vinegar-based, so it’s naturally alcohol-free. It’s safe for everyone, including kids and pregnant women (though consult your doctor if you have specific health concerns).
What if I don’t like horseradish?
Then skip it! You can substitute it with extra ginger and black pepper. It won’t have the same sinus-clearing power, but it will still be a great immunity booster. The key ingredients are garlic, ginger, and turmeric.
Can I use this in cooking?
Absolutely! It makes an amazing salad dressing base. Whisk it with olive oil and a little honey for a zesty vinaigrette. It’s also great in marinades for chicken or fish. I use it in my maple Dijon chicken thighs sometimes for an extra tang.
Pin This Recipe!


Fire Cider: Budget-Friendly Immunity Tonic
- Total Time: 2-4 weeks (infusion time)
- Yield: 20 servings 1x
Description
A zesty, budget-friendly immunity tonic made with raw apple cider vinegar, horseradish, ginger, and spices. This make-ahead recipe supports immune health and costs less than store-bought alternatives.
Ingredients
- 1 quart (950ml) Raw Apple Cider Vinegar (with the mother)
- ½ cup (170g) Raw Honey
- 1 cup (150g) Fresh Horseradish Root, chopped
- 1 large knob (50g) Fresh Ginger Root, peeled and chopped
- 1 full head (10–12 cloves) Garlic, peeled
- 1 large knob (30g) Fresh Turmeric Root (or 2 tbsp dried turmeric powder)
- 2–3 Hot Peppers (Thai chilies or jalapeños), sliced
- 2 tablespoons Dried Oregano
- 1 Lemon, sliced (optional)
Instructions
- Wash all produce thoroughly. Peel horseradish if dirty, but leave skins on ginger and turmeric. Chop horseradish and ginger into small chunks, slice peppers and lemon, and peel garlic cloves.
- Pack the chopped ingredients tightly into a clean, dry quart-sized glass jar, starting with garlic and horseradish, followed by ginger, turmeric, peppers, oregano, and lemon slices.
- Pour the raw apple cider vinegar over the ingredients, ensuring everything is completely submerged. Leave about an inch of headspace at the top.
- Add the raw honey to the jar. Seal tightly with the lid.
- Store the jar in a cool, dark place for 2-4 weeks. Shake gently every day or two to help dissolve the honey and infuse flavors.
- Strain the liquid through a fine-mesh strainer or cheesecloth into a clean bottle or jar, discarding the solids.
- Store the strained fire cider in the refrigerator for up to 6 months.
Notes
Wear gloves when handling horseradish and chili peppers to avoid skin irritation. Ensure all ingredients are fully submerged in vinegar to prevent mold. For a milder taste, reduce the amount of horseradish or peppers. Can be frozen in ice cube trays for easy dosing.
- Prep Time: 15 minutes
- Cook Time: 0 minutes
- Category: Beverage
- Cuisine: American
Nutrition
- Serving Size: 1 tablespoon
- Calories: 15
- Sugar: 2
- Sodium: 1
- Carbohydrates: 3
Keywords: fire cider, immunity tonic, horseradish, ginger, apple cider vinegar, natural remedies, budget recipes, immune support, DIY health tonic


