
There’s a specific kind of magic that happens when the first real chill hits the air and your windows start fogging up. For me, it’s the signal that it’s time to turn off the overhead lights, light a candle, and pull out the biggest pot I own. I’ve been making soup for dinner since I was a teenager trying to survive on ramen and hope, but this roasted butternut squash soup is the one that actually made me feel like a grown-up cook. It’s the dish that saved my dinner party last November when I realized I’d bought too much wine and not enough appetizers.
I pulled this out of the freezer (yes, I make a big batch) and reheated it in twenty minutes. My guests sat down with bread and wine, and within ten minutes, the conversation slowed down. People got quiet. Not the awkward kind of quiet, but the good kind—the kind where everyone is just savoring the warmth spreading through their chests. That’s the power of a really good squash soup. It’s not just food; it’s a hug in a bowl.
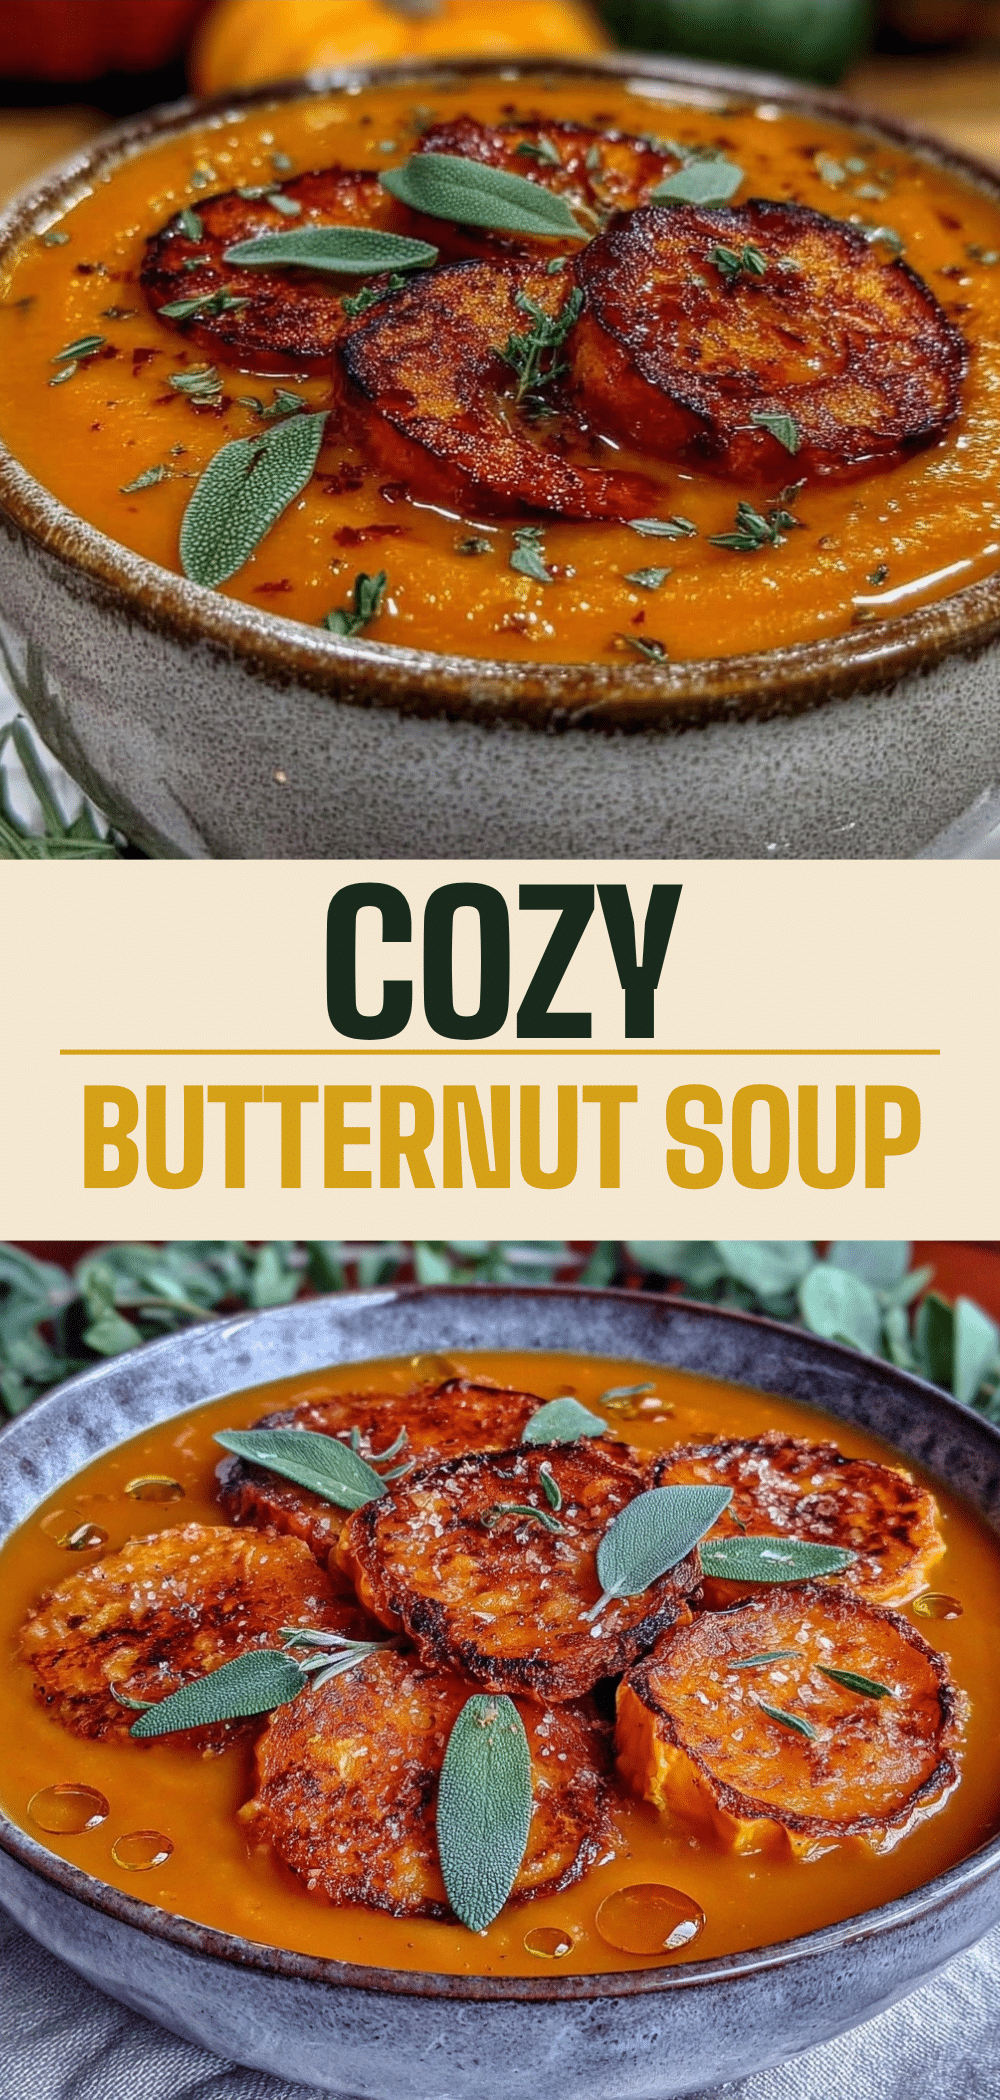
What makes this version different from the hundreds of others out there? It’s the roasting. I don’t boil my squash. I roast it until the edges caramelize and get slightly charred, which adds a depth of flavor that boiling just can’t touch. Then, I finish it with brown butter and crispy sage leaves. Those crispy sage leaves are the non-negotiable part. They add texture, aroma, and that earthy, peppery bite that cuts through the sweetness of the squash. It’s simple, but it’s elegant enough to serve to company and cheap enough to make on a Tuesday.
I’ve tested this recipe probably a dozen times, tweaking the spice ratios and the roasting time, until I landed on this perfect balance. It’s creamy without being heavy, savory without being boring, and it smells like autumn the second it hits the stove. If you’re looking for a way to feel cozy, this is it. It’s my go-to for roasted butternut squash soup for a reason, and I think once you try it, you’ll understand why.
Why You’ll Love This Recipe
I know, I know—there are a million squash soup recipes on the internet. But this one has earned its spot in my weekly rotation for a few very specific reasons. It’s not just about the taste (though that’s huge); it’s about the experience of making it and serving it.
- Roasting Adds Serious Flavor — Boiling squash is fine, but roasting it concentrates the sugars and creates those beautiful caramelized edges. I’ve done side-by-side tastings, and the roasted version is infinitely richer and more complex. It tastes like you spent hours simmering it, even though the active time is minimal.
- Crunchy Sage is a Game-Changer — Most people just sprinkle dried sage on top. I fry fresh sage leaves in butter until they’re crisp. It adds a savory, peppery crunch that contrasts with the smooth soup. It’s the garnish that makes people ask, “What is that? It’s amazing.”
- It’s Naturally Creamy (No Heavy Cream Needed) — I use a little bit of heavy cream for richness, but the real creaminess comes from blending the roasted squash itself. It’s velvety and thick without feeling heavy on the stomach. If you want to skip the dairy, you can easily swap the cream for coconut milk, though the brown butter still works beautifully.
- Perfect for Meal Prep — This soup tastes even better the next day. The flavors meld together overnight. I make a big pot on Sunday and eat it for lunch all week. It reheats beautifully in the microwave or on the stove, and it freezes well if you want to stock your freezer for those busy winter weeks.
- Impressive Yet Effortless — You can serve this in fancy bowls with a drizzle of olive oil and extra sage, and it looks like it came from a high-end restaurant. But honestly? It’s just roasted vegetables and broth. It’s the kind of dish that makes you look like a culinary genius without the stress.
This isn’t just a recipe; it’s a mood. It’s for those nights when you want to feel cozy, when you want to share something warm with people you love, or when you just need a little comfort after a long day. It’s my answer to “what’s for dinner” when I want something that feels special but doesn’t require a lot of active work. And if you’re looking for other ways to use squash or fall flavors, you might also enjoy my pumpkin sage pasta for a quicker weeknight option.
Ingredients You’ll Need
One of the best things about this roasted butternut squash soup is how simple the ingredient list is. You don’t need anything exotic. Most of this is probably already in your pantry or fridge. Here’s what you need to make it right.
For the Roasted Squash Base
Butternut squash (1 large, about 3-4 lbs) — Peel it, remove the seeds, and cube it into 1-inch pieces. I buy them pre-peeled sometimes if I’m feeling lazy, but nothing beats peeling it yourself for the freshest taste. Look for one that feels heavy for its size—that means it’s dense and sweet.
Extra virgin olive oil (2 tablespoons) — For roasting the squash. I use a good quality oil here because you’ll taste it. Don’t skimp on the olive oil; it adds fruitiness that balances the sweetness.
Garlic (4 cloves, peeled) — I roast the garlic cloves whole with the squash. They turn soft, sweet, and spreadable. It’s like roasted garlic confit. Don’t skip this; it adds a savory backbone.
Yellow onion (1 medium, chopped) — Adds sweetness and body. I usually chop it roughly and roast it along with the squash. It softens and caramelizes in the oven.
Vegetable or chicken broth (4 cups) — I use low-sodium broth so I can control the saltiness. Chicken broth adds a bit more savory depth, but vegetable broth keeps it vegetarian. Both work great.
Apple (1 medium, peeled and diced) — This is my secret weapon. A Granny Smith apple adds a bright acidity that cuts through the richness. It’s subtle, but it keeps the soup from tasting too one-dimensional.
For the Creamy Finish

Heavy cream (½ cup) — Optional, but I recommend it. It adds a luxurious mouthfeel. If you’re dairy-free, use full-fat coconut milk.
Salt and black pepper — To taste. I usually start with 1 teaspoon of salt and adjust from there.
Nutmeg (¼ teaspoon, freshly grated) — Freshly grated nutmeg is non-negotiable for me. Pre-ground nutmeg is dusty and weak. Fresh nutmeg adds a warm, spicy note that screams “fall.”
For the Brown Butter Sage Topping
Butter (3 tablespoons, unsalted) — This is for browning. I use unsalted butter so I can control the salt. Salted butter can make the soup taste too salty if you’re not careful.
Fresh sage leaves (12-15 leaves) — Look for bright green, unblemished leaves. They’ll turn crispy and fragrant in the butter. If you can’t find fresh sage, dried sage won’t give you the same crunch, so I’d skip the topping or use dried sage as a garnish only.
Optional: Crème fraîche or sour cream — For dolloping on top. It adds a tangy contrast to the sweet soup. I love this for dinner parties.
Optional: Toasted pepitas or pumpkin seeds — For extra crunch. I usually buy them pre-toasted to save time.
Pro Tip: I always keep a bag of frozen sage leaves in my freezer. They’re not as aromatic as fresh, but they work in a pinch. But for the best result, go fresh. Also, if you’re worried about the squash being too sweet, add a splash of apple cider vinegar at the end to brighten it up. I learned that trick from a chef friend, and it’s been a game-changer.
Equipment Needed
You don’t need a fancy kitchen to make this soup. Here’s what I actually use, along with some alternatives.
Large rimmed baking sheet — I use a half-sheet pan. You need enough space to spread the squash in a single layer so it roasts instead of steams. If you have a small oven, you might need two pans.
Sharp chef’s knife — Cutting a butternut squash can be tricky. A sharp knife makes it safer and easier. I always cut the squash in half lengthwise first, scoop out the seeds, then peel it. It’s much easier than trying to peel it whole.
Large stockpot or Dutch oven — I use a 6-quart pot. It needs to be big enough to hold the roasted squash, onions, garlic, and broth. A Dutch oven is great because you can go from roasting to simmering if you want, but a regular pot works fine too.
Immersion blender or regular blender — An immersion blender is ideal because you can blend the soup right in the pot. Less cleanup. If you use a regular blender, let the soup cool slightly before blending and vent the lid to avoid explosions. I’ve had soup fly out of my blender before. Don’t be like me.
Small skillet — For frying the sage leaves in butter. A small non-stick or cast-iron skillet works best.
Microplane or grater — For the fresh nutmeg. If you don’t have a microplane, you can use a fine grater, but a microplane gives the best texture.
How to Make It: Step-by-Step
Alright, let’s make this! I’m walking you through exactly how I do it, including the little tricks I’ve picked up over the years.
Step 1: Roast the Squash (45-50 minutes)
Preheat your oven to 400°F (200°C). Peel the butternut squash, remove the seeds, and cube it into 1-inch pieces. Toss the squash cubes with the chopped onion and whole garlic cloves on a large baking sheet. Drizzle with olive oil and toss to coat. Season with salt and pepper. Spread everything out in a single layer. You want space between the pieces so they roast and caramelize instead of steaming. Roast for 45-50 minutes, stirring halfway through, until the squash is tender and the edges are browned. The garlic should be soft enough to squeeze out of its skin.
Step 2: Sauté the Aromatics (5 minutes)
While the squash roasts, heat a tablespoon of olive oil in your large stockpot over medium heat. Add the diced apple and cook for 3-4 minutes until it starts to soften. This builds a flavor base for the soup. If you’re feeling fancy, you can add a pinch of cinnamon here, but I like to keep it simple.
Step 3: Simmer the Soup (20 minutes)
Once the squash is roasted, scoop it out of the skins (if you didn’t peel it before roasting, this is when you do it) and add it to the pot with the apples. Pour in the broth. Bring to a boil, then reduce the heat to low and simmer for 15-20 minutes. This lets the flavors meld together. The soup should smell incredible by now. If it looks too thick, add a little more broth.
Step 4: Blend Until Smooth (2 minutes)
Remove the pot from the heat. Use an immersion blender to blend the soup until it’s completely smooth. If you’re using a regular blender, blend in batches. Be careful with the hot liquid. Blend until there are no lumps. The soup should be velvety and thick. If it’s too thick, add more broth. If it’s too thin, let it simmer for a few more minutes.
Step 5: Add Cream and Season (2 minutes)
Stir in the heavy cream, nutmeg, salt, and pepper. Taste and adjust the seasoning. This is the moment where you decide if it needs more salt or a pinch of sugar. I usually add a tiny pinch of sugar if the squash isn’t sweet enough, but it’s rare. Let it warm through for a minute.
Step 6: Make the Brown Butter Sage (5 minutes)
In a small skillet, melt the butter over medium heat. Let it bubble and foam. Keep stirring. The butter will turn golden brown and smell nutty. This is called “beurre noisette.” Be careful not to burn it. Once it’s brown, immediately remove it from the heat and toss in the sage leaves. They’ll fry for just a few seconds until they’re crispy. It’s fast, so watch it closely.
Step 7: Serve
Ladle the soup into bowls. Drizzle with the brown butter and crispy sage. Add a dollop of crème fraîche if you’re feeling fancy. Serve with crusty bread or crispy air fryer potato skins on the side for a fun appetizer. Enjoy immediately while it’s hot.
Expert Tips & Tricks
Here’s everything I’ve learned from making this dozens of times. These tips will save you from my mistakes.
Roast, Don’t Boil — I cannot stress this enough. Roasting the squash concentrates the flavor and adds a caramelized depth that boiling just can’t match. It’s the secret to a restaurant-quality soup.
Don’t Skip the Apple — The apple adds acidity and brightness. It balances the sweetness of the squash. If you’re allergic to apples, you can use a pear, or add a splash of apple cider vinegar at the end.
Fresh Nutmeg is Key — Pre-ground nutmeg is weak. Freshly grated nutmeg adds a warm, spicy aroma that elevates the soup. It’s worth the extra minute.
Brown Butter Carefully — Brown butter burns easily. Once it starts foaming, keep a close eye on it. It’s done when it smells nutty and turns golden brown. If it turns dark brown, it’s burnt and will taste bitter.
Fry Sage in Hot Butter — The sage leaves should be added to the hot butter and removed immediately. They only need a few seconds to crisp up. Overcooking them will make them bitter.
Make It Ahead — This soup tastes better the next day. Make it up to 3 days ahead and store in the fridge. Reheat gently on the stove, adding a splash of broth if it’s too thick.
Freezing Tips — This soup freezes well. Store in airtight containers for up to 3 months. Thaw in the fridge overnight and reheat on the stove. The texture might change slightly, but it’s still delicious.
Variations & Substitutions
Once you’ve nailed the basic version, here’s how you can mix it up. I’ve tried all of these.
Spicy Version — Add a pinch of red pepper flakes or a diced jalapeño when sautéing the apples. It adds a nice kick that contrasts with the sweetness.
Curry Twist — Add 1 tablespoon of curry powder when sautéing the apples. It changes the flavor profile completely but is still delicious. Serve with coconut milk instead of cream.
Maple Glaze — Drizzle a little maple syrup on top before serving. It enhances the sweetness and pairs well with the sage.
Vegetarian/Vegan — Use vegetable broth and coconut milk instead of heavy cream. The brown butter can be replaced with olive oil or vegan butter. It’s still creamy and delicious.
Gluten-Free — This recipe is naturally gluten-free. Just make sure your broth is gluten-free.
Dairy-Free — Use coconut milk and olive oil for the sage topping. It’s still rich and flavorful.
Other Squashes — You can use acorn squash, pumpkin, or sweet potato instead of butternut squash. Acorn squash is sweeter and nuttier. Pumpkin is more earthy. Sweet potato is sweeter and thinner. Adjust the cooking time as needed.
Serving & Storage
How to Serve: I usually serve this straight from the pot in large bowls. It’s rustic and cozy. For dinner parties, I serve it in smaller bowls with a dollop of crème fraîche and extra sage. It looks elegant and feels special.
Side Dishes: Crusty sourdough bread is a must. I also love serving it with a simple green salad or roasted Brussels sprouts. For a heartier meal, add some grilled chicken or sausage.
Storage: Store leftovers in an airtight container in the fridge for up to 4 days. The soup will thicken as it cools. Reheat gently on the stove, adding a splash of broth or water to thin it out.
Freezing: This soup freezes well. Store in airtight containers for up to 3 months. Thaw in the fridge overnight and reheat on the stove. The texture might change slightly, but it’s still delicious.
Pro Tip: If you’re making this for a party, keep the soup warm in a slow cooker on the “warm” setting. It stays hot and ready to serve. Add the brown butter sage just before serving to keep it crispy.
Nutrition Information
I’m not a nutritionist, but here’s the breakdown if you’re tracking. This is per serving (based on 6 servings).
- Calories: 180
- Protein: 3g
- Carbs: 25g
- Fiber: 4g
- Sugar: 10g
- Fat: 8g
- Saturated Fat: 4g
- Cholesterol: 15mg
- Sodium: 350mg
What’s Good: It’s a great source of vitamin A and fiber from the squash. It’s naturally gluten-free and can be made vegan.
What to Know: It’s higher in sugar from the squash and apple, but it’s natural sugar. The fat content comes from the cream and butter, which adds richness.
My Take: This is comfort food. It’s not a diet recipe, but it’s made from whole foods and is packed with nutrients. I enjoy it in moderation and pair it with a salad or veggies for a balanced meal.
Final Thoughts
So that’s my go-to roasted butternut squash soup! I’ve probably talked your ear off at this point, but when you make a recipe this often, you have a lot to say about it. This has saved weeknight dinners more times than I can count. It’s my answer to “what’s for dinner” when I’m tired, don’t want takeout, and still want something that tastes really good. My kids are happy, my husband’s happy, and I’m happy because I’m not stressed about cooking.
Make it yours! Try different add-ins, swap in your favorite vegetables, adjust the spices. The best recipes are the ones you adapt to your family’s tastes. If you make this, drop a comment and let me know what you think! I love hearing how recipes turn out in your kitchen. And if something doesn’t work, tell me that too—I’m here to help troubleshoot.
Happy cooking! And I hope your kitchen smells half as good as mine does right now.
Frequently Asked Questions
Can I use frozen butternut squash?
Yes, you can use frozen butternut squash. It’s actually very convenient. Just thaw it slightly before roasting, and pat it dry to remove excess moisture. It might take a few minutes longer to roast, so keep an eye on it.
Why is my soup too thin?
If your soup is too thin, let it simmer on the stove for a few more minutes to reduce. You can also add a little more roasted squash or a splash of heavy cream to thicken it. If you’re in a hurry, you can blend in a small potato or carrot for thickness.
Can I make this in a slow cooker?
Yes, you can. Roast the squash first, then add it to the slow cooker with the broth and other ingredients. Cook on low for 6-8 hours or high for 3-4 hours. Blend and add cream at the end. It’s a great option for busy days.
How do I store leftovers?
Store leftovers in an airtight container in the fridge for up to 4 days. Reheat gently on the stove, adding a splash of broth or water to thin it out. It freezes well for up to 3 months.
Can I use regular butter instead of brown butter?
You can use regular butter, but browning it adds a nutty, rich flavor that elevates the soup. It’s worth the extra minute. If you’re short on time, just use melted butter, but you’ll miss out on that special taste.
Is this soup gluten-free?
Yes, this recipe is naturally gluten-free. Just make sure your broth is gluten-free and you’re not adding any thickeners with gluten. It’s a great option for gluten-free diets.
Can I add protein to this soup?
Absolutely! Add cooked chicken, turkey, or sausage for extra protein. You can also add white beans or lentils for a vegetarian protein boost. It makes the soup more filling and satisfying.
Pin This Recipe!

Roasted Butternut Squash Soup: Best Creamy Recipe for Fall
- Total Time: 90 minutes
- Yield: 6 servings 1x
Description
A cozy, creamy roasted butternut squash soup finished with brown butter and crispy sage leaves. This recipe uses roasting to concentrate flavors and offers a naturally thick texture without needing heavy cream.
Ingredients
- 1 large butternut squash (about 3–4 lbs), peeled, seeded, and cubed into 1-inch pieces
- 2 tablespoons extra virgin olive oil
- 4 cloves garlic, peeled
- 1 medium yellow onion, chopped
- 4 cups vegetable or chicken broth (low-sodium)
- 1 medium Granny Smith apple, peeled and diced
- 1 tablespoon olive oil (for sautéing)
- ½ cup heavy cream (or full-fat coconut milk for dairy-free)
- 1 teaspoon salt (plus more to taste)
- Black pepper (to taste)
- ¼ teaspoon freshly grated nutmeg
- 3 tablespoons unsalted butter (for browning)
- 12–15 fresh sage leaves
- Optional: Crème fraîche or sour cream for serving
- Optional: Toasted pepitas or pumpkin seeds for garnish
Instructions
- Preheat oven to 400°F (200°C). Toss squash cubes, chopped onion, and whole garlic cloves with olive oil, salt, and pepper on a large rimmed baking sheet. Spread in a single layer.
- Roast for 45-50 minutes, stirring halfway, until squash is tender and edges are caramelized. Garlic should be soft enough to squeeze out of skins.
- While squash roasts, heat 1 tablespoon olive oil in a large stockpot over medium heat. Add diced apple and cook for 3-4 minutes until softened.
- Add roasted squash, onions, garlic, and broth to the pot. Bring to a boil, then reduce heat and simmer for 15-20 minutes to meld flavors.
- Remove from heat and blend soup until smooth using an immersion blender or regular blender.
- Stir in heavy cream, nutmeg, salt, and pepper. Taste and adjust seasoning.
- In a small skillet, melt butter over medium heat until it turns golden brown and smells nutty (beurre noisette). Immediately remove from heat and toss in sage leaves until crispy.
- Ladle soup into bowls, drizzle with brown butter and crispy sage, and serve immediately.
Notes
Roasting the squash concentrates the flavor and adds caramelization compared to boiling. Fresh nutmeg is preferred over pre-ground for better aroma. The soup tastes even better the next day as flavors meld. It freezes well for up to 3 months. For a vegan version, use vegetable broth, coconut milk, and olive oil instead of butter.
- Prep Time: 15 minutes
- Cook Time: 75 minutes
- Category: Main Course
- Cuisine: American
Nutrition
- Serving Size: 1 bowl
- Calories: 180
- Sugar: 10
- Sodium: 350
- Fat: 8
- Saturated Fat: 4
- Carbohydrates: 25
- Fiber: 4
- Protein: 3
Keywords: butternut squash soup, roasted squash soup, fall recipes, creamy soup, vegetarian soup, gluten-free soup, brown butter sage, cozy dinner


