It was 5:45 PM on a Tuesday, and I was staring at the fridge like it owed me money. The light flickered, half a jar of pickles sat lonely on the middle shelf, and I had zero energy for anything that required chopping, sautéing, or pretending I cared about “balanced nutrition.” My kids were already arguing over who got the good spot on the couch, and my husband was hovering near the car keys, ready to drive us to the nearest drive-thru. We’ve all been there. That specific kind of hunger where you’re not just hungry for food—you’re hungry for a solution that doesn’t involve cleaning a sink full of dishes later.
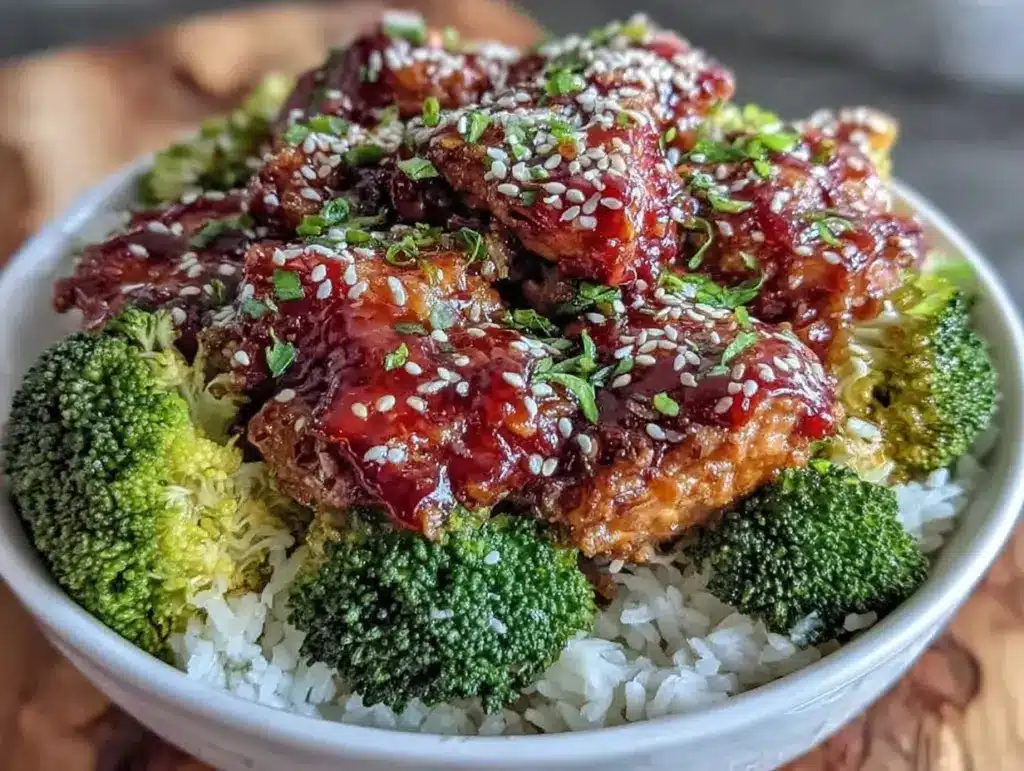
That night, I threw together what I thought would be a mediocre, rushed dinner. I had some chicken thighs, a bag of broccoli, and a bottle of teriyaki sauce in the back of the pantry. Thirty minutes later, I had four beautiful bowls of steaming rice, glossy chicken, and bright green veggies. My kids actually stopped arguing long enough to eat. My husband didn’t even mention the drive-thru. That was the moment I realized I didn’t need a fancy recipe to save my weeknights. I just needed a system.
This is the recipe that saved my sanity. These meal prep chicken teriyaki rice bowls are now the backbone of my Wednesday and Thursday dinners. They’re gluten-free, they taste like something from a restaurant (but with way better ingredients), and best of all, they make lunch effortless for the rest of the week. If you’ve been looking for a way to eat healthy without spending your entire evening in the kitchen, this is it. It’s proof that you don’t need to sacrifice flavor for convenience.
Why You’ll Love This Recipe
I’ve made these bowls at least once a week for the past six months. Sometimes twice, because my kids treat them like a game and ask for “double chicken.” Here’s why this gluten-free chicken teriyaki bowl has earned a permanent spot in our weekly rotation:
- Actually Tastes Like Takeout — Seriously. The homemade sauce is richer, less sugary, and more savory than anything from a carryout box. My son once asked if I ordered from that Japanese place downtown. I didn’t. I made it in 20 minutes.
- Zero Stress Lunches — I cook the chicken and rice on Sunday, and for the rest of the week, lunch is just “grab a container, microwave for 2 minutes, done.” No more digging through the fridge at noon wondering what to eat.
- Gluten-Free Without the Guilt — I know how hard it is to find GF meals that don’t taste like cardboard or sad lettuce. These bowls are hearty, savory, and satisfying. You won’t feel like you’re missing out.
- Customizable for Everyone — My daughter likes hers with extra sauce. My husband likes his with extra broccoli. I like mine with a little sesame seed crunch. Everyone wins because the base is so good.
- Uses Simple Ingredients — You probably have most of this in your pantry already. Soy sauce (or tamari), rice, chicken, broccoli, and a few pantry staples. No weird health food store runs required.
It’s not just about saving time. It’s about knowing that no matter how tired you are, dinner is already handled. You just heat it up. It’s the ultimate peace of mind.
Ingredients You’ll Need
Here’s the best part: this list is short. I’m not asking you to buy five types of exotic flours or obscure sauces. Most of this is standard pantry fare, with just a few tweaks to keep it gluten-free and delicious.
For the Chicken & Sauce
Chicken thighs (1.5 pounds / 680g) — I use boneless, skinless thighs because they stay juicy even if you overcook them slightly. Breast meat dries out too fast in meal prep. If you must use chicken breast, cut it into smaller pieces so it cooks faster.
Tamari (½ cup / 120ml) — This is your gluten-free soy sauce. I always use tamari because it has a deeper, richer flavor than regular soy sauce, and it’s naturally gluten-free. Don’t use regular soy sauce unless you’re using a certified GF brand. It makes a huge difference.
Maple syrup (3 tablespoons / 45ml) — Real maple syrup, not pancake syrup. It adds a natural sweetness that balances the salty tamari. Honey works too, but maple gives it that authentic teriyaki depth.
Rice vinegar (1 tablespoon / 15ml) — Adds a little tang to cut through the richness. If you don’t have this, white vinegar works, but rice vinegar is milder and more traditional.
Garlic (4 cloves, minced / about 2 tablespoons) — Fresh garlic is non-negotiable. Jarred garlic has a metallic taste that really shows up in a simple sauce like this. Mince it yourself—it takes 30 seconds.
Ginger (1 teaspoon fresh, grated / ½ teaspoon ground) — Fresh grated ginger is best, but ground works in a pinch. It adds that warm, spicy kick that defines teriyaki.
Cornstarch (1 tablespoon / 8g) — This is what thickens the sauce into that glossy, clingy glaze. Mix it with a little cold water first to make a slurry, or it will clump.
Vegetable oil (1 tablespoon / 15ml) — For cooking the chicken. I use avocado oil or canola oil. Olive oil works but has a stronger flavor.
For the Bowls
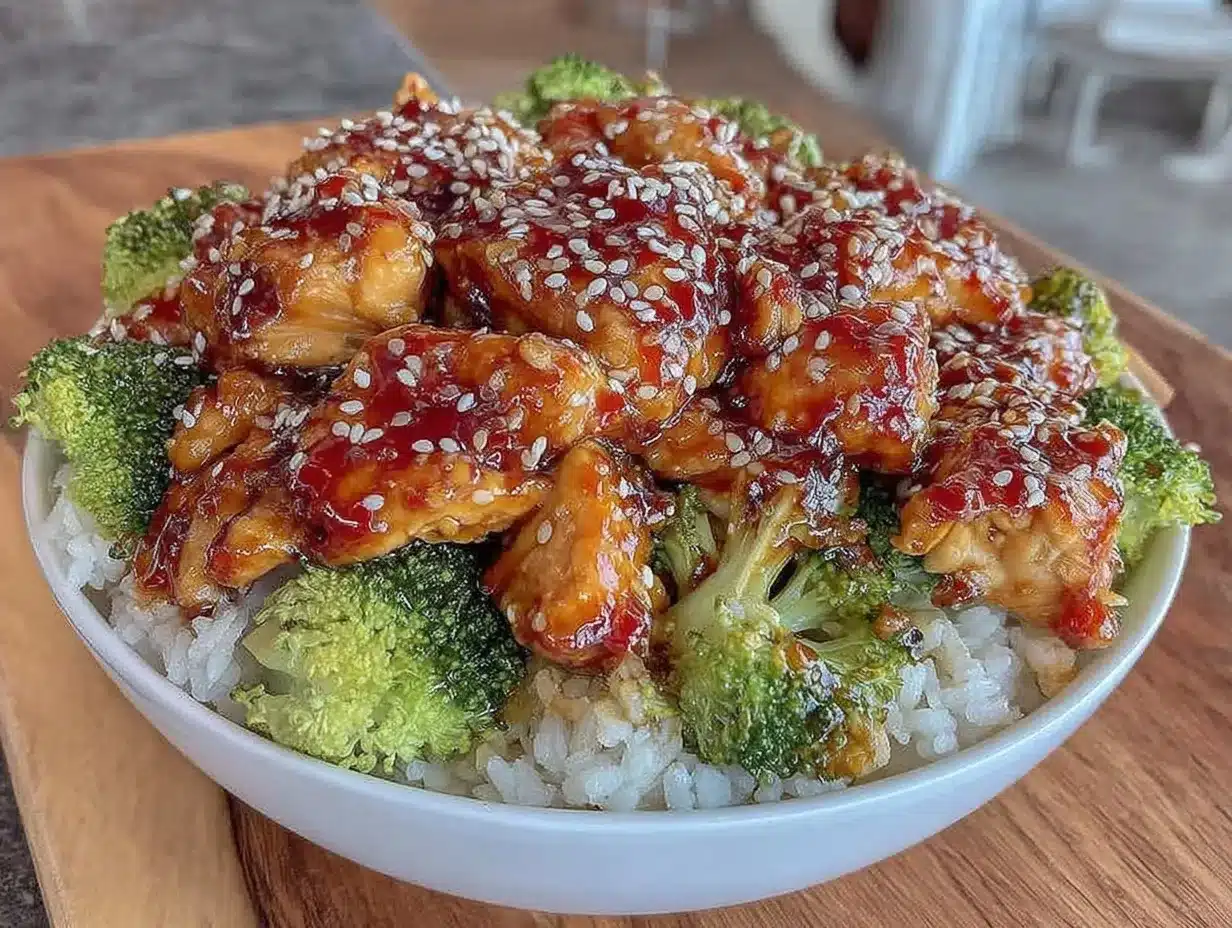
White rice (2 cups dry / 400g) — I use short-grain Japanese rice (like Koshihikari or Sushi rice) because it’s sticky and holds up well in the fridge. Jasmine rice works too, but it’s fluffier and less cohesive. Brown rice is healthier but changes the texture significantly.
Broccoli florets (2 large heads / about 600g) — Cut into bite-sized pieces. I steam them until they’re bright green and tender-crisp. They add color, crunch, and nutrition.
Sesame seeds (2 tablespoons / 15g) — Toasted sesame seeds are key. They add a nutty flavor and visual appeal. You can buy them pre-toasted or toast them yourself in a dry pan for 2 minutes.
Green onions (2 stalks, sliced thinly) — For garnish. Adds a fresh, sharp bite to cut through the rich sauce.
Personal Tip: I buy my broccoli in florets if I’m being lazy, but cutting it from a head tastes fresher and has less waste. And always toast your sesame seeds! Raw sesame seeds are bland. Toasted ones smell amazing and taste like a restaurant.
Equipment Needed
You don’t need fancy gadgets for this. Here’s what I actually use:
Rice cooker — I use a basic one. It makes perfect rice every time with zero effort. If you don’t have one, a medium saucepan with a tight lid works fine. Just follow the package instructions.
Large skillet — 12-inch stainless steel or cast iron. You need space to sear the chicken. A small skillet will crowd the chicken, and it’ll steam instead of brown.
Steamer basket — Fits inside your rice cooker pot or a large pot. Makes steaming broccoli super easy. If you don’t have one, just boil water and use a colander over the top, or microwave the broccoli with a splash of water for 3 minutes.
Small bowl — For mixing the sauce. Any small bowl works.
Meal prep containers — Glass containers with locking lids are my preference. They don’t stain, they don’t smell, and they reheat evenly. Plastic works too, but glass feels more “pro.”
Sharp knife & cutting board — For chopping chicken and broccoli. Keep your knife sharp—it makes chopping safer and faster.
How to Make It: Step-by-Step
Alright, let’s make this! I’m walking you through exactly how I do it, including the little tricks I’ve picked up over months of testing.
Step 1: Cook the Rice (15-20 minutes active)
Rinse your rice! This is crucial. Put it in a fine-mesh strainer and rinse under cold water until the water runs clear. This removes excess starch and prevents gummy rice. Then, cook it according to your package directions. If using a rice cooker, just add water and press start. If using a pot, bring to a boil, reduce to low, cover, and simmer for 18 minutes. Let it sit off heat for 10 minutes before fluffing. Fluff it with a fork to release steam.
Step 2: Prep the Chicken (5 minutes)
Pat the chicken thighs dry with paper towels. Moisture is the enemy of a good sear. Cut them into 1-inch cubes. Season lightly with salt and pepper. It’s not much, but it builds flavor from the inside out.
Step 3: Make the Sauce (2 minutes)
In a small bowl, whisk together the tamari, maple syrup, rice vinegar, minced garlic, grated ginger, and cornstarch slurry (mix cornstarch with 2 tablespoons of cold water until smooth). Set aside. It should look like thin soy sauce. If it’s too thick, add a splash of water.
Step 4: Sear the Chicken (8-10 minutes)
Heat oil in your large skillet over medium-high heat. Once the oil shimmers, add the chicken in a single layer. Don’t crowd the pan! If you’re cooking for meal prep, you might need to do two batches. Sear for 3-4 minutes per side until golden brown and cooked through (internal temp of 165°F / 74°C). You want some nice char on the edges.
Step 5: Glaze the Chicken (3 minutes)
Reduce heat to medium-low. Pour the sauce over the chicken. It will bubble and hiss. Stir constantly for 1-2 minutes until the sauce thickens and coats the chicken in a glossy glaze. The sauce should be thick enough to cling to the chicken but still fluid enough to drizzle. If it gets too thick, add a teaspoon of water.
Step 6: Steam the Broccoli (3-4 minutes)
While the chicken is glazing, steam the broccoli. I put it in a steamer basket over the rice cooker pot or a pot of boiling water. Steam until bright green and tender-crisp (about 3-4 minutes). Don’t overcook it! Mushy broccoli is sad. It should have a slight crunch.
Step 7: Assemble the Bowls
Divide the rice among your meal prep containers. Top with the glazed chicken and steamed broccoli. Drizzle any extra sauce from the pan over the top. Sprinkle with toasted sesame seeds and sliced green onions. That’s it. Close the lids and refrigerate.
Total Time: About 35 minutes (mostly hands-off while rice cooks).
Expert Tips & Tricks
Here’s everything I’ve learned from making this dozens of times. These tips will save you from my mistakes.
Don’t Skip the Rinse — I know it’s annoying, but rinsing the rice is the difference between fluffy, separate grains and a sticky brick. Trust me.
Toast Your Sesame Seeds — Raw sesame seeds are bland. Toast them in a dry pan over medium heat for 2-3 minutes, shaking constantly so they don’t burn. They’ll turn golden and smell nutty. This one step elevates the whole dish.
Sauce Consistency — The sauce will thicken as it cools. When you reheat it, it might look thick. That’s normal. Just add a splash of water or broth when reheating to loosen it up.
Cut Chicken Uniformly — Try to make all your chicken pieces the same size. This ensures they cook evenly. If you have big chunks and tiny chunks, the tiny ones will dry out before the big ones are done.
Store Sauce Separately (Optional) — If you’re meal prepping for more than 3 days, store the sauce in a separate small container. Pour it over when you reheat. This prevents the rice from getting soggy. For 3-4 days, it’s fine to mix it all together.
Common Mistakes
- Crowding the pan: If you put too much chicken in the skillet, it steams instead of sears. You won’t get that delicious brown crust. Cook in batches.
- Overcooking broccoli:
- Using low-sodium tamari without adjusting: Tamari is salty. If you use low-sodium, you might need to add a pinch more salt to the chicken or sauce.
Variations & Substitutions
Once you’ve nailed the basic version, here’s how you can mix it up. I’ve tried all of these.
Protein Swaps
- Salmon: Use salmon fillets instead of chicken. Glaze them in the last 2 minutes of cooking. Delicious and omega-3 rich.
- Shrimp: Large shrimp cook in 3-4 minutes. Add them to the sauce at the very end. They get sweet and succulent.
- Tofu: Press extra-firm tofu, cube it, and pan-fry until crispy. Then glaze. It absorbs the sauce beautifully.
Veggie Swaps
- Asparagus: Steam or roast asparagus spears instead of broccoli. Tastes great with teriyaki.
- Snap Peas: Quick to cook and add a nice crunch.
- Carrots: Julienne carrots and sauté them with the chicken for extra sweetness.
Rice Swaps
- Cauliflower Rice: For a low-carb option. Sauté it briefly so it’s warm. It won’t hold the sauce the same way, but it’s lighter.
- Quinoa: Higher protein. Works well, but has a different texture. Mix half quinoa, half rice if you want both.
Dietary Modifications
- Whole Wheat Rice: For more fiber. Cooks longer, so plan accordingly.
- Coconut Aminos: For soy-free or lower-sodium versions. Slightly sweeter and less salty than tamari.
Serving & Storage
How to Serve
I usually serve these straight from the container. Just microwave for 2-3 minutes until hot. The steam makes the rice fluffy again. If you want to get fancy, add a soft-boiled egg on top. The runny yolk mixes with the rice and sauce—it’s incredible.
Side Dishes: These bowls are complete meals, so you don’t need much else. But if you want, add some edamame or a simple cucumber salad.
Wine Pairing: Not a wine expert, but a crisp Sauvignon Blanc or a light Pinot Grigio works well. Or just stick with green tea—it’s traditional and refreshing.
Storage Instructions
Refrigerator: Store in airtight containers for up to 4 days. The flavors actually meld and get better after day 1. I find day 3 is often the tastiest.
Reheating: Microwave is best. Add a splash of water to the rice to keep it moist. Heat in 1-minute intervals, stirring in between, until hot throughout. If using a skillet, heat gently with a splash of water and cover to steam.
Freezing: Honestly, I don’t recommend freezing these. The broccoli gets mushy, and the rice texture changes. It’s better fresh. Make small batches so you only make what you’ll eat in 4 days.
Meal Prep Strategy: Cook rice and chicken on Sunday. Steam broccoli right before eating or store it separately and steam fresh on Wednesday/Thursday. This keeps the veggies vibrant.
Nutrition Information
I’m not a nutritionist, but here’s the breakdown if you’re tracking. This is per serving (based on 4 servings).
| Nutrient | Amount |
|---|---|
| Calories | 480 |
| Protein | 35g |
| Carbs | 55g |
| Fiber | 4g |
| Fat | 12g |
| Sodium | 680mg |
What’s Good: High protein from chicken, good carbs for energy, and fiber from broccoli. It’s a balanced meal.
What to Know: Sodium is moderate due to tamari. If you’re watching salt, use low-sodium tamari and reduce the amount slightly. The maple syrup adds some sugar, but it’s natural and balanced by the savory sauce.
My Take: This is real food. It’s not diet food, but it’s nutritious and filling. It’s better than takeout because you control the sugar and sodium. When I make this, I feel good about what I’m eating.
Final Thoughts
So that’s my go-to meal prep chicken teriyaki rice bowl! I’ve probably talked your ear off at this point, but when you make a recipe this often, you have a lot to say about it. This has saved my weeknights more times than I can count. It’s my answer to “what’s for dinner” when I’m tired, don’t want takeout, and still want something that tastes really good.
My kids are happy, my husband’s happy, and I’m happy because I’m not stressed about cooking. Make it yours! Try different veggies, swap the protein, adjust the sauce. The best recipes are the ones you adapt to your family’s tastes.
If you make this, drop a comment and let me know what you think! I love hearing how recipes turn out in your kitchen. And if something doesn’t work, tell me that too—I’m here to help troubleshoot. Happy cooking! And I hope your kitchen smells half as good as mine does right now.
Frequently Asked Questions
Can I use soy sauce instead of tamari?
Regular soy sauce contains wheat, so it’s not gluten-free. If you have celiac disease or gluten sensitivity, you must use tamari or coconut aminos. If you’re just avoiding gluten for health reasons and not an allergy, some regular soy sauces are labeled gluten-free, but tamari is the safest bet.
Why is my rice gummy?
You probably didn’t rinse it enough. Rinsing removes surface starch. Also, don’t lift the lid while it’s cooking! Steam needs to stay in. If you lift the lid, the temperature drops and the rice cooks unevenly.
Can I make this in an Instant Pot?
Yes! Cook rice and chicken together in the Instant Pot. Add chicken on top of rice and water. Cook on high pressure for 6 minutes, then quick release. Make the sauce separately in a pan, then combine. Steam broccoli in the steamer basket during the last 3 minutes of pressure cooking.
How do I keep the broccoli green?
Don’t overcook it! Steam it for just 3-4 minutes. It should be bright green and tender-crisp. If you let it sit in the fridge too long, it can turn dull. If you’re prepping for 4 days, consider steaming the broccoli fresh on Wednesday and Thursday instead of prepping it all on Sunday.
Can I freeze this meal?
I don’t recommend it. The broccoli gets mushy, and the rice texture changes. It’s better to freeze the cooked chicken and rice separately if you must, but the overall quality drops. Make small batches for 3-4 days.
What if I don’t have a rice cooker?
No problem. Use a medium saucepan with a tight lid. Rinse rice, add water (usually 1:1.5 ratio), bring to boil, reduce to low, cover, simmer 18 minutes, then rest 10 minutes. It works just as well.
Can I use brown rice?
Yes, but it takes longer to cook (about 40-45 minutes) and has a nuttier, chewier texture. Adjust your cooking time accordingly. The sauce will cling differently to brown rice, so you might want to make a little extra sauce.
Pin This Recipe!
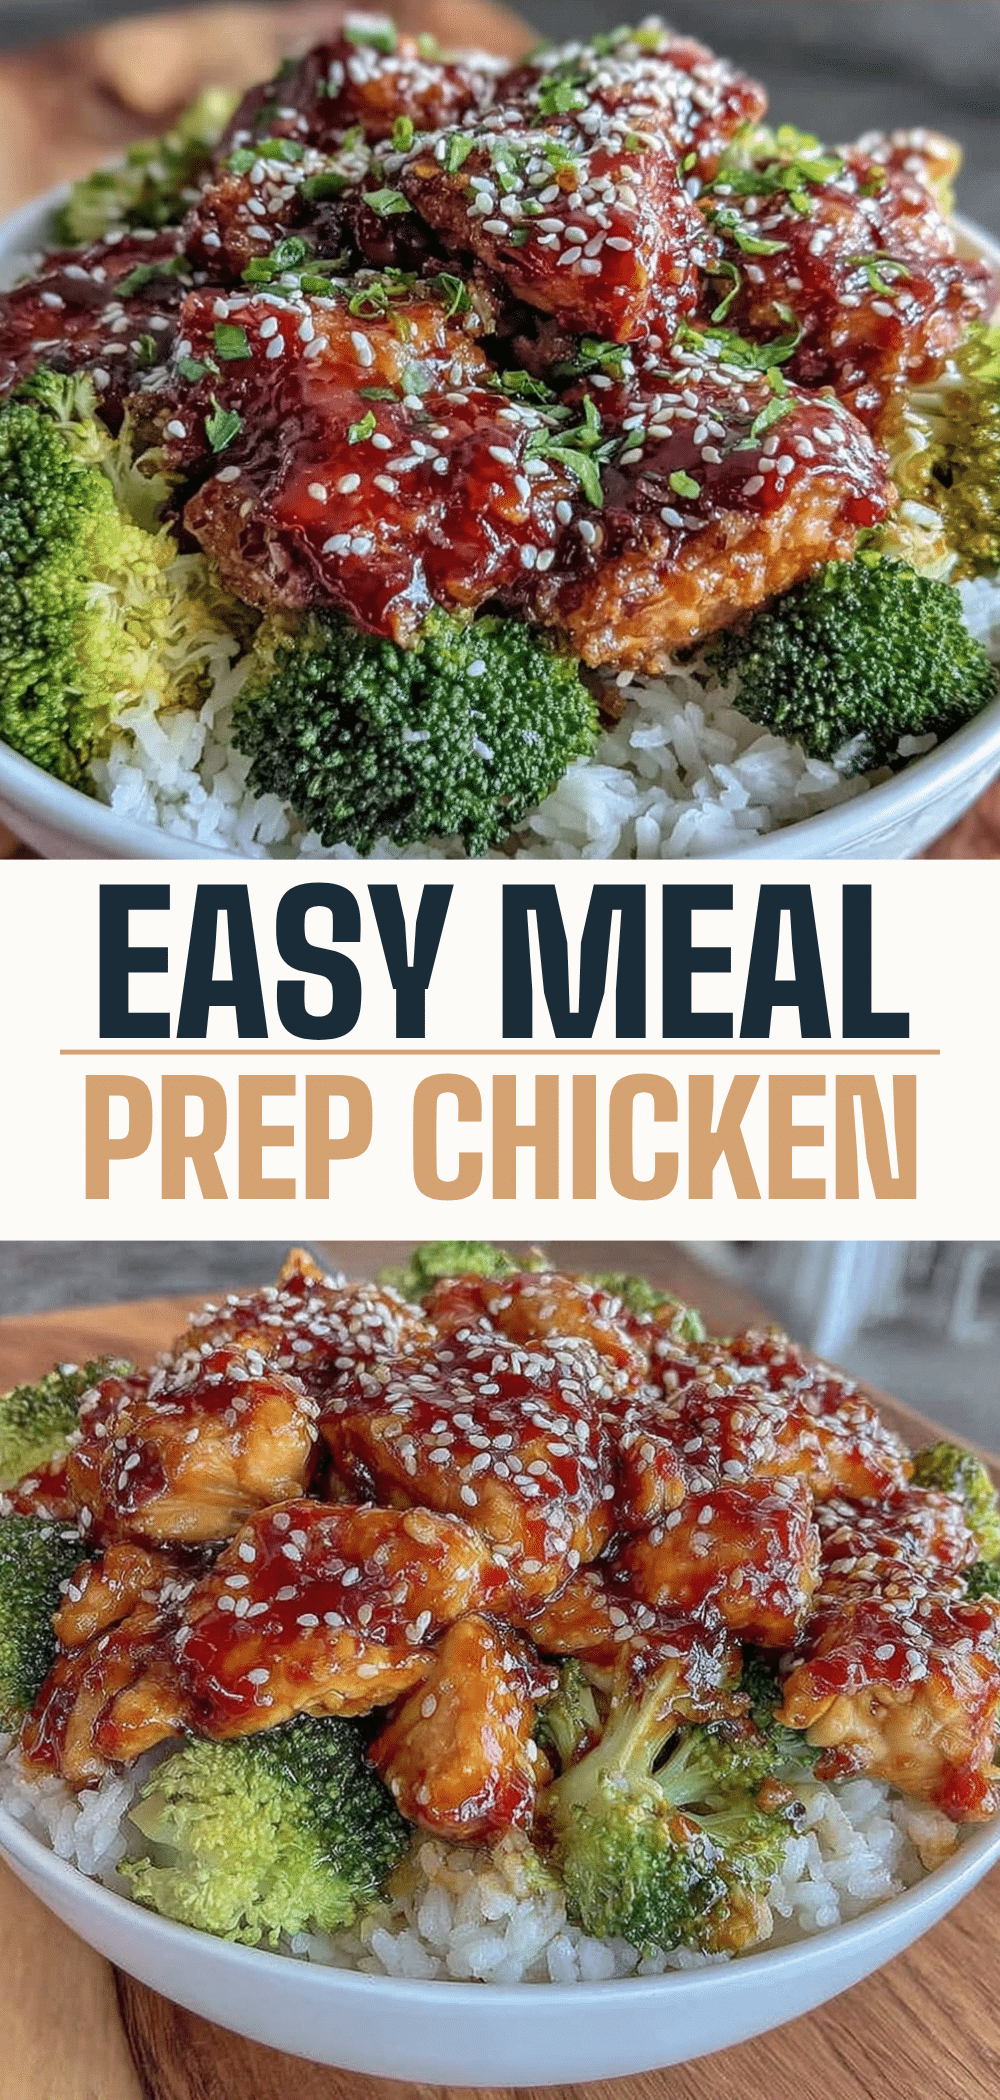
Meal Prep Chicken Teriyaki Rice Bowls: Easy Gluten-Free
- Total Time: 35 minutes
- Yield: 4 servings 1x
Description
A quick, gluten-free meal prep dinner featuring juicy chicken thighs glazed in a homemade teriyaki sauce, served over fluffy rice with steamed broccoli. Perfect for busy weeknights and makes effortless lunches for the rest of the week.
Ingredients
- 1.5 pounds boneless, skinless chicken thighs, cut into 1-inch cubes
- 2 cups dry short-grain Japanese rice (or sushi rice)
- 2 large heads broccoli, cut into bite-sized florets
- ½ cup tamari (gluten-free soy sauce)
- 3 tablespoons real maple syrup
- 1 tablespoon rice vinegar
- 4 cloves garlic, minced
- 1 teaspoon fresh ginger, grated (or ½ teaspoon ground)
- 1 tablespoon cornstarch mixed with 2 tablespoons cold water (slurry)
- 1 tablespoon vegetable oil (or avocado/canola oil)
- 2 tablespoons toasted sesame seeds
- 2 stalks green onions, sliced thinly
- Salt and pepper to taste
Instructions
- Rinse the rice under cold water until the water runs clear to remove excess starch. Cook according to package directions (rice cooker or pot method). Let sit off heat for 10 minutes, then fluff with a fork.
- Pat chicken thighs dry and cut into 1-inch cubes. Season lightly with salt and pepper.
- In a small bowl, whisk together tamari, maple syrup, rice vinegar, minced garlic, grated ginger, and the cornstarch slurry until smooth.
- Heat vegetable oil in a large skillet over medium-high heat. Sear chicken in a single layer (cook in batches if necessary) for 3-4 minutes per side until golden brown and cooked through (165°F).
- Reduce heat to medium-low. Pour the sauce over the chicken. Stir constantly for 1-2 minutes until the sauce thickens and coats the chicken in a glossy glaze. Add a teaspoon of water if too thick.
- While chicken glazes, steam broccoli in a steamer basket over boiling water or rice cooker for 3-4 minutes until bright green and tender-crisp.
- Divide rice among meal prep containers. Top with glazed chicken and steamed broccoli. Drizzle with extra sauce, then sprinkle with toasted sesame seeds and sliced green onions.
- Refrigerate in airtight containers for up to 4 days.
Notes
Rinsing the rice is crucial to prevent gummy texture. Toast sesame seeds in a dry pan for 2 minutes for better flavor. If meal prepping for more than 3 days, store sauce separately to prevent rice from getting soggy. Do not freeze as broccoli becomes mushy and rice texture changes. For low-sodium needs, use low-sodium tamari and adjust salt.
- Prep Time: 15 minutes
- Cook Time: 20 minutes
- Category: Main Course
- Cuisine: Japanese
Nutrition
- Serving Size: 1 bowl per serving
- Calories: 480
- Sugar: 18
- Sodium: 680
- Fat: 12
- Saturated Fat: 2
- Carbohydrates: 55
- Fiber: 4
- Protein: 35
Keywords: meal prep, chicken teriyaki, gluten-free, rice bowls, easy dinner, healthy lunch, chicken thighs, broccoli, teriyaki sauce


