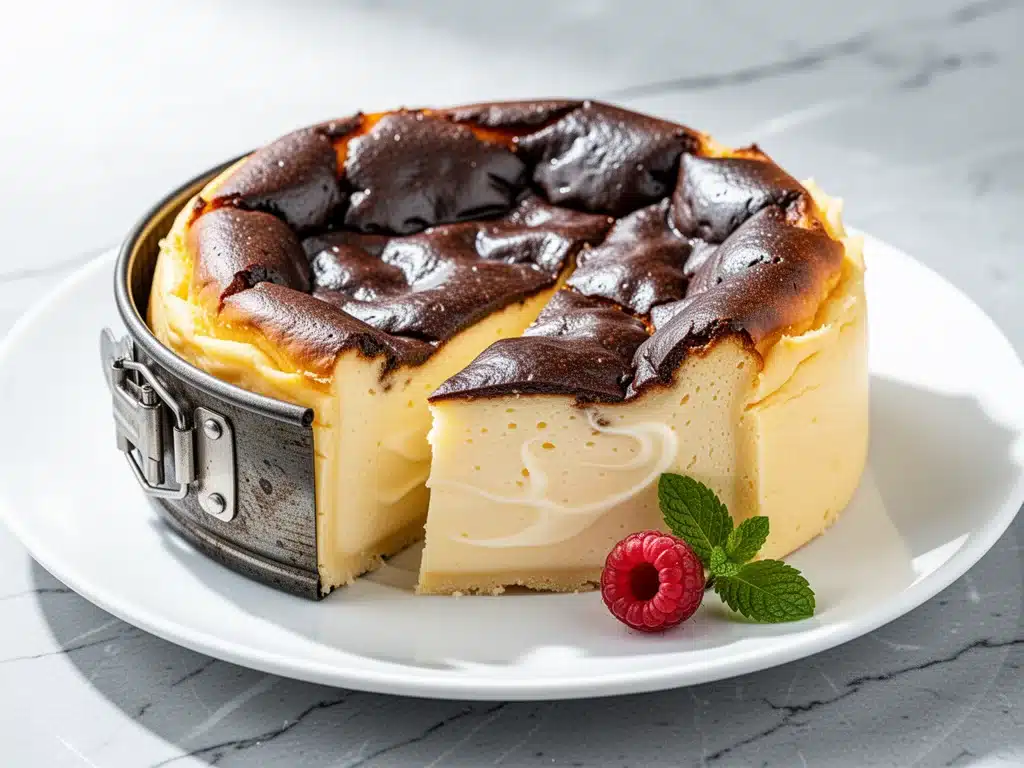
I made a mistake last Tuesday. A big one. I turned my oven up to 450°F (230°C) when it should have been 400°F, walked away to answer a work email, and came back fifteen minutes later to find a cheesecake that looked like it had been through a fire. I was ready to throw it in the trash. It was black. Charred. Unrecognizable.
But then I tasted it. And that’s when everything changed. The outside was a deep, bitter crust—almost like dark chocolate—and the inside was impossibly creamy, warm, and rich. It tasted like a high-end Parisian bakery, but it took me 10 minutes to mix and zero hours of worrying about water baths or cracks. That accidental disaster became the Crispy Basque Burnt Cheesecake I make on repeat now.
There’s something deeply satisfying about this dessert. It’s not fussy. It doesn’t care if you overmix it slightly (though you shouldn’t). It doesn’t care if your springform pan leaks a little. It thrives on chaos. The name “Basque Burnt” comes from the fact that the top is intentionally burnt, creating a caramelized, crispy shell that contrasts with the custard-like center. It’s messy, it’s bold, and it’s hands-down the easiest cheesecake you’ll ever make.
I’ve tested this recipe at least twelve times. Some batches are lighter, some are darker. Some are firmer, some are more jiggly. But they all share that same magic quality: a crispy, charred exterior and a center so smooth it feels like eating cloud custard. If you’ve ever been intimidated by traditional cheesecakes—the graham cracker crusts, the water baths, the constant checking—this is your entry point. This Basque Burnt Cheesecake is the answer to “I want to bake something impressive but I don’t have all day.” It’s my go-to when I need to impress guests without stressing, and honestly? It’s become the star of my dessert rotation.
Why You’ll Love This Recipe
Look, I’ve made the classic New York cheesecake before. It’s delicious, but it’s a commitment. You need a water bath, you need to chill it for hours, and if you open the oven door too early, it cracks. This Crispy Basque Burnt Cheesecake? It’s the anti-cheesecake. Here’s why it’s taken over my kitchen:
- Zero Crust Stress — No graham crackers, no butter, no pressing. Just straight batter. If you can whisk cream cheese and sugar, you can make this. I’ve made it while holding a toddler on my hip.
- Forgiving Texture — Traditional cheesecakes demand perfection. This one loves imperfection. The “burnt” top hides every flaw. If it looks ugly? Good. That’s the point. It’s rustic and chic.
- Restaurant-Quality Richness — The high heat creates a Maillard reaction that gives it a deep, caramelized flavor you just can’t get from a low-and-slow bake. It tastes expensive.
- Minimal Active Time — 10 minutes of mixing. 50-60 minutes of baking (mostly hands-off). You’re done before dinner starts.
- Make-Ahead Friendly — It actually tastes better the next day. The flavors meld, the texture firms up slightly, and it’s even easier to slice. I make it on Sunday for Wednesday dinner parties.
- Gluten-Free Naturally — No crust means no gluten. It’s inherently gluten-free, which saves me from having to buy special flour or worry about cross-contamination for my GF friends.
This isn’t just a dessert; it’s a confidence booster. You pull it out of the oven looking like a disaster, but once it cools and you take that first bite, everyone at the table is asking for the recipe. It’s my secret weapon for effortless entertaining.
Ingredients You’ll Need
The beauty of this recipe is that the ingredient list is short. Like, shockingly short. You probably have most of this in your fridge already. But because there are only four main components, the quality of each one matters more than usual. Here’s what you need:
For the Batter
Full-fat cream cheese (32 oz / 900g) — This is non-negotiable. I use Philadelphia or a high-quality block cream cheese. Low-fat or spreadable tubs have too much water and air, and your cheesecake will be dense and rubbery. Let it sit on the counter for 30 minutes before you start. Cold cream cheese is the enemy of smooth batter.
Granulated sugar (¾ cup / 150g) — Yes, it’s sweet. But the high heat caramelizes it, balancing the richness. Don’t reduce it too much or you won’t get that signature burnt top.
Large eggs (4 large / about 200g) — Room temperature eggs blend better. If you add cold eggs to room-temp cream cheese, you might get curdling. I take them out of the fridge while the cheese softens.
Heavy cream (½ cup / 120ml) — This gives it that custard-like texture. Whole milk works but it’s less rich. Sour cream or crème fraîche can be substituted for half the cream for a tangier profile (like a cheesecake from a fancy bakery).
All-purpose flour (1 tablespoon / 8g) — Just a little bit. It stabilizes the batter so it doesn’t collapse completely. Don’t skip it, but don’t add more or it becomes a cake.
Vanilla extract (1 teaspoon / 5ml) — Pure vanilla, not imitation. It adds warmth and depth. If you want to get fancy, use vanilla bean paste, but it’s not necessary.
Salt (½ teaspoon / 3g) — Just a pinch to balance the sweetness. I use kosher salt.
For the Pan
Parchment paper — You’ll need a large sheet. This is crucial for lining the pan. It creates the “burnt” edges and makes cleanup a breeze.
Butter or oil — Just enough to grease the pan slightly so the parchment sticks.
Optional Add-ins
Fresh berries — Strawberries or raspberries added on top before baking create a jammy, fruity contrast. I love this with the burnt flavor.
Lemon zest — A teaspoon of zest brightens it up if you find it too heavy.
Coffee — A teaspoon of espresso powder enhances the chocolatey notes of the burnt top without making it taste like coffee.
Equipment Needed
You don’t need a mixer. You don’t need a water bath. Here’s what I actually use:
8-inch springform pan — This is the standard size. It needs to be at least 2 inches deep. If you only have a 9-inch pan, the cheesecake will be thinner and bake faster (check it at 40 minutes). If you use a 6-inch pan, it’ll be taller and need more time.
Parchment paper — Don’t use wax paper. It will melt. Get the real deal. I tear off a large sheet, crumple it into a ball, and then smooth it out. It fits the pan better that way.
Hand mixer or whisk — I use a hand mixer for the first step to soften the cheese, then switch to a whisk for the eggs to avoid incorporating too much air. Air bubbles can cause cracks or uneven baking.
Large mixing bowl — Something big enough to handle the thick batter.
Offset spatula — To smooth the top before baking. A regular spatula works too.
Cooling rack — Essential for letting it cool gradually.
Knife or thin spatula — To run around the edges after baking so it doesn’t stick to the pan as it contracts.
How to Make It: Step-by-Step
Alright, let’s make this! I’m walking you through exactly how I do it, including the little tricks I’ve picked up so you get that perfect crispy edge and gooey center.
Step 1: Prep Your Pan (5 minutes)
Preheat your oven to 450°F (230°C). This high heat is what creates the burn. While it heats, take your 8-inch springform pan and line it with parchment paper. Tear a large sheet of parchment, crumple it up, then unfold it and press it into the pan. It doesn’t need to be pretty; in fact, the wrinkles add texture. Grease the parchment lightly with butter or oil so it stays in place. This is crucial because the cheesecake will stick to the paper as it bakes, and you want that paper to peel away cleanly later.
Step 2: Mix the Cream Cheese (2 minutes)
In your large bowl, combine the softened cream cheese and sugar. Beat on medium speed until smooth and creamy. This takes about 2-3 minutes. Scrape down the sides of the bowl. You want no lumps. If you’re using a whisk, this will take longer, so be patient. The base needs to be silky.
Step 3: Add Eggs One at a Time (3 minutes)
Turn the mixer down to low. Add the eggs one at a time, mixing just until combined after each addition. Do not overmix here. Once the egg is in, stop mixing. Overmixing adds air, which can cause the cheesecake to rise and then fall, creating a cracked top. We want dense and creamy, not fluffy and airy. Add the vanilla extract and salt now.
Step 4: Fold in the Flour and Cream (2 minutes)
Pour in the heavy cream and sprinkle the flour over the top. Gently fold them in with a spatula or whisk until just incorporated. The batter should be thick but pourable. If it looks too thick, add a splash more cream. If it’s too thin, add a teaspoon more flour.
Step 5: Bake (50-60 minutes)
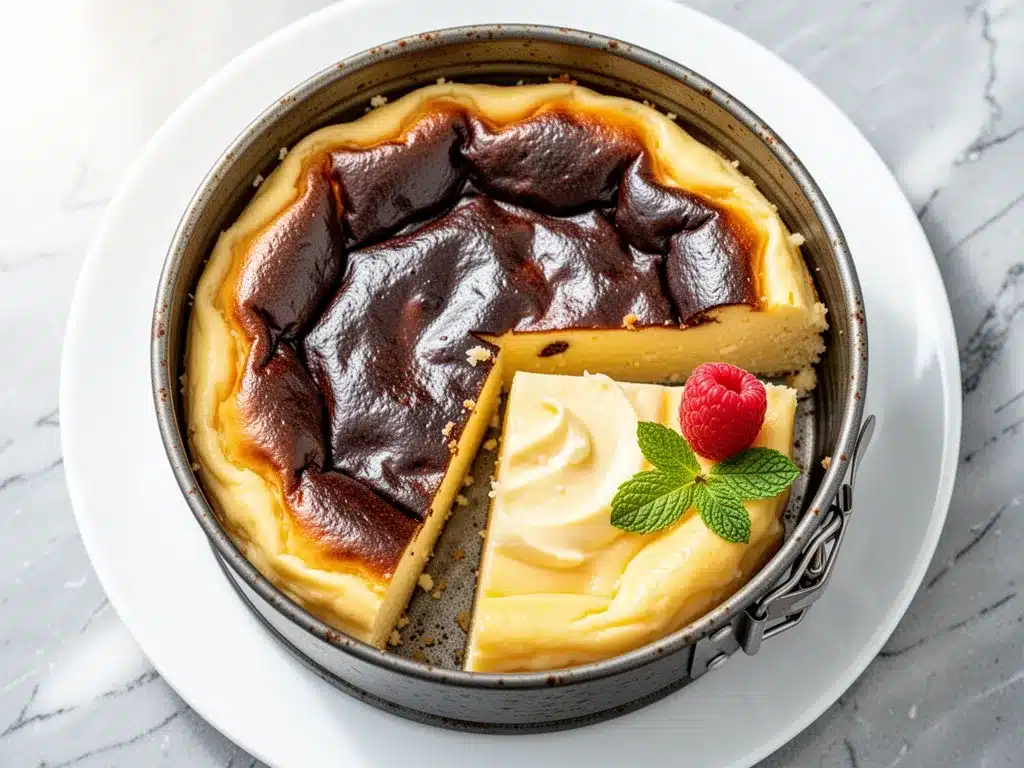
Pour the batter into the prepared pan. Smooth the top with a spatula. Place it in the center of the preheated oven. Bake for 50-60 minutes. Here’s the thing: it will look jiggly in the center when you take it out. It will look slightly puffed and definitely burnt on top. This is correct. Do not panic. The center should jiggle like Jell-O, not slosh like water. If it’s still liquidy, give it 5 more minutes.
Step 6: Cool and Chill (4+ hours)
Remove the cheesecake from the oven. It will deflate slightly as it cools. Run a thin knife or offset spatula around the edge to loosen it from the pan. Let it cool on the counter for 30 minutes. Then, transfer it to the refrigerator. It needs to chill for at least 4 hours, but overnight is best. This is when the texture sets into that perfect creamy custard consistency.
Step 7: Serve
Once chilled, remove the springform ring. Peel off the parchment paper from the sides and bottom. The burnt top is the star, so don’t cover it. Slice with a sharp knife dipped in hot water for clean cuts. Serve with fresh berries, whipped cream, or just plain.
Expert Tips & Tricks
Here’s everything I’ve learned from making this dozens of times. These tips will save you from my mistakes.
The Parchment Trick
Crumple the parchment paper before putting it in the pan. This creates wrinkles that allow the paper to expand as the cheesecake rises and contracts. If you lay it flat, it might tear or not fit snugly. The wrinkles also add to that rustic, burnt look.
Room Temperature Ingredients
This cannot be stressed enough. Cold cream cheese and cold eggs will result in a lumpy, uneven batter. Take your cream cheese and eggs out of the fridge at least an hour before baking. If you forget, you can soften the cream cheese in the microwave in 10-second bursts, but don’t melt it.
The Jiggle Test
When you take it out of the oven, the center should jiggle like gelatin, not like soup. If it’s still liquid, it needs more time. If it’s firm and doesn’t jiggle at all, you’ve overbaked it, and the center will be dense rather than creamy. It’s okay if it looks slightly underdone; it will continue to cook as it cools.
Don’t Skip the Chill
I know it’s tempting to eat it warm. But a warm Basque cheesecake is more like a soufflé. For the true creamy, custard texture, it must be chilled. The flavors deepen, and the structure sets. Plan ahead.
Common Mistakes
Mistake: The top isn’t burnt enough.
Fix: Your oven might not be hot enough. Use an oven thermometer to check. Also, ensure you’re baking at 450°F. Some ovens run cooler, so you might need to go to 475°F. The top should be dark brown, almost black in spots.
Mistake: The cheesecake cracked.
Fix: Overmixing or overbaking. Beat the eggs gently and check for doneness early. Also, ensure your cream cheese was fully softened before mixing.
Mistake: It’s too dense.
Fix: You likely used low-fat cream cheese or didn’t soften it enough. Stick to full-fat block cream cheese.
Variations & Substitutions
Once you’ve nailed the basic version, here’s how you can mix it up. I’ve tried all of these.
Fruit Toppings
Strawberry Basque — Top the batter with fresh sliced strawberries before baking. They caramelize and create a jammy layer. This pairs beautifully with the burnt flavor.
Raspberry Swirl — Dollop raspberry jam on top and swirl it with a knife before baking. It creates a marbled effect.
Flavor Twists
Lemon Basque — Add the zest of one lemon to the batter. It cuts through the richness and adds brightness.
Coffee Basque — Add 1 teaspoon of espresso powder to the dry ingredients. Enhances the chocolatey notes of the burnt top.
Chocolate Chip — Fold ½ cup of chocolate chips into the batter before baking. The chips melt into pockets of gooey chocolate.
Dietary Modifications
Gluten-Free — The base recipe is naturally gluten-free. Just ensure your flour is certified GF if you’re sensitive.
Dairy-Free — Use vegan cream cheese (like Kite Hill or Miyoko’s) and coconut cream instead of heavy cream. The texture will be slightly different but still delicious.
Lower Sugar — Reduce sugar to ½ cup, but note that the caramelization will be less intense. Use a sugar substitute like erythritol, but it won’t brown the same way.
Serving & Storage
How to Serve
I usually serve this straight from the fridge, sliced into wedges. It’s rich, so a small slice is plenty. Here are some ideas:
- Fresh Berries — Strawberries, raspberries, or blackberries add freshness and acidity.
- Whipped Cream — A dollop of lightly sweetened whipped cream balances the burnt flavor.
- Espresso — Serve with a strong cup of coffee. The bitterness complements the cheesecake perfectly.
- Shortbread Cookies — A crisp cookie on the side adds texture.
Storage Instructions
Refrigerator: Store in an airtight container or covered with plastic wrap for up to 5 days. It actually tastes better after day 2.
Freezing: Yes, it freezes well! Freeze the whole cheesecake or individual slices in plastic wrap and foil for up to 2 months. Thaw in the fridge overnight. The texture remains creamy.
Reheating: I don’t recommend reheating. It’s best served cold or at room temperature. If you must, warm it gently in a 300°F oven for 10 minutes, but it won’t be the same.
Nutrition Information
I’m not a nutritionist, but here’s the breakdown if you’re tracking. This is a rich dessert, so portion control is key.
Per Serving (based on 8 slices):
- Calories: 380
- Protein: 6g
- Carbs: 22g
- Fiber: 0g
- Sugar: 18g
- Fat: 30g
- Saturated Fat: 18g
It’s high in fat and sugar, as expected for a cheesecake. But it’s also high in protein from the cream cheese and eggs. If you’re watching carbs, the low flour content makes it relatively keto-friendly (check your specific macros). It’s a treat, not a health food, but it’s better than most store-bought options.
Final Thoughts
So that’s my Crispy Basque Burnt Cheesecake! It’s messy, it’s bold, and it’s incredibly easy. I’ve probably talked your ear off at this point, but when you make a recipe this often, you have a lot to say about it.
This has saved me from dessert disasters more times than I can count. It’s my answer to “I need to impress someone but I have no time.” My friends think I’m a baking genius, but really, I just turned my oven up too high once. Make it yours! Try different toppings, adjust the sweetness, or serve it with a glass of dessert wine. The best recipes are the ones you adapt to your tastes.
If you make this, drop a comment and let me know what you think! I love hearing how recipes turn out in your kitchen. And if something doesn’t work, tell me that too—I’m here to help troubleshoot. Happy baking!
Frequently Asked Questions
Why is it called “Burnt” Cheesecake?
It’s not actually burnt in the sense of being ruined. The high heat (450°F) caramelizes the sugar on top, creating a dark, bitter crust that contrasts with the sweet, creamy interior. It’s a intentional style originating from La Vieja Casa de Cocina in San Sebastian, Basque Country.
Can I use a regular cake pan instead of a springform pan?
You can, but it’s harder to remove. If you use a round cake pan, line it well with parchment and grease it. You’ll need to invert it to remove it, which might damage the top. A springform pan is ideal because the ring releases easily.
Why did my cheesecake crack?
Cracking is usually caused by overmixing (too much air) or overbaking (too much moisture loss). Beat the eggs gently and check for doneness early. The center should jiggle, not be firm.
Can I make this ahead of time?
Yes! It’s actually better the next day. Make it 1-2 days before serving. Store it in the fridge covered. It will keep well for up to 5 days.
Is this recipe gluten-free?
Yes, the base recipe is naturally gluten-free since it has no crust and only 1 tablespoon of flour. Just ensure your ingredients are certified GF if you have celiac disease.
Can I freeze this cheesecake?
Absolutely. Freeze the whole cheesecake or individual slices in plastic wrap and foil for up to 2 months. Thaw in the fridge overnight. The texture remains creamy.
What if I don’t have heavy cream?
You can use sour cream or crème fraîche for a tangier flavor. It will change the texture slightly but still work. Avoid using milk, as it’s too thin and won’t provide the same richness.
Pin This Recipe!
Crispy Basque Burnt Cheesecake: Easy No-Crust Recipe
- Total Time: 4 hours 10 minutes
- Yield: 8 servings 1x
Description
A rustic, no-crust cheesecake with a deeply caramelized, charred exterior and a creamy, custard-like center. This forgiving recipe requires minimal active time and no water bath.
Ingredients
- 32 oz (900g) full-fat cream cheese, softened
- ¾ cup (150g) granulated sugar
- 4 large eggs, room temperature
- ½ cup (120ml) heavy cream
- 1 tablespoon (8g) all-purpose flour
- 1 teaspoon (5ml) vanilla extract
- ½ teaspoon (3g) salt
- Parchment paper
- Butter or oil for greasing
Instructions
- Preheat oven to 450°F (230°C).
- Line an 8-inch springform pan with a large sheet of crumpled parchment paper, pressing it into the pan. Grease lightly with butter or oil.
- In a large bowl, beat the softened cream cheese and sugar on medium speed until smooth and creamy (2-3 minutes). Scrape down sides.
- Turn mixer to low. Add eggs one at a time, mixing just until combined after each addition. Do not overmix. Add vanilla extract and salt.
- Pour in heavy cream and sprinkle flour over the top. Gently fold until just incorporated. Batter should be thick but pourable.
- Pour batter into the prepared pan and smooth the top.
- Bake for 50-60 minutes. The top should be dark brown/black and the center should jiggle like Jell-O, not slosh like water.
- Remove from oven. Run a knife around the edge to loosen. Let cool on the counter for 30 minutes.
- Transfer to the refrigerator and chill for at least 4 hours, preferably overnight.
- Remove springform ring and peel off parchment paper. Slice and serve chilled.
Notes
Ensure cream cheese and eggs are at room temperature to prevent lumps. The center should jiggle when removed from the oven; it will set as it cools. Do not skip the chilling step for the proper texture. The recipe is naturally gluten-free.
- Prep Time: 10 minutes
- Cook Time: 50-60 minutes
- Category: Dessert
- Cuisine: Basque
Nutrition
- Serving Size: 1 slice (1/8 of cake
- Calories: 380
- Sugar: 18
- Fat: 30
- Saturated Fat: 18
- Carbohydrates: 22
- Protein: 6
Keywords: Basque burnt cheesecake, no crust cheesecake, easy cheesecake, gluten-free dessert, burnt cheesecake recipe, creamy cheesecake


