There’s a specific kind of chaos that happens in my kitchen when Thanksgiving approaches. It’s not the stress of roasting a turkey or timing the mashed potatoes (though there’s plenty of that). It’s the dessert panic. You know the one. You want something festive, something that feels special enough to replace the usual pumpkin pie, but you also have three kids running around with flour on their noses and sugar cravings that hit like a tidal wave at 4 PM.
That was me last year, standing in front of an empty counter, staring at a package of butter tarts I’d bought from the local bakery. They were good—sure. But they were also tiny, expensive, and involved a pastry shell so delicate it felt like handling a soap opera plot. My son, Leo, looked at them and said, “Can we make one where we don’t have to be careful?”
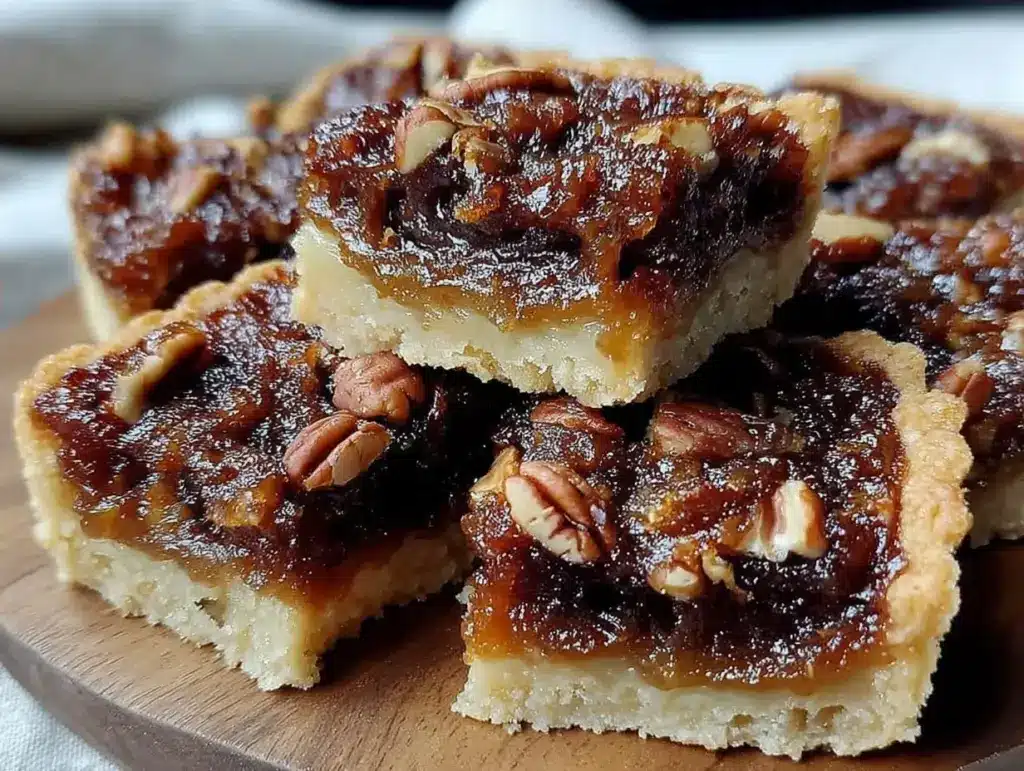
I looked at him. I looked at the butter tarts. And I realized he was right. We don’t need delicate. We need fun. We need sticky, gooey, chocolate-chip-laden squares that can be mixed in a bowl and cut into bars. So, I hacked the classic Canadian butter tart. I swapped the flaky, fiddly pastry for a sturdy, kid-friendly shortbread crust. I kept the gooey maple-pecan center but added chocolate chips because, well, it’s my kitchen, and I say so.
These Canadian Thanksgiving butter tart squares have become our new holiday tradition. They’re sweet without being cloying, chewy in the best way, and honestly? They’re easier to make than ultra-fudgy one-bowl brownies because there’s no tempering chocolate or precise temperature checks. Just mix, press, pour, and bake. It’s the kind of dessert that turns your kids into eager little chefs instead of bored bystanders.
Why You’ll Love This Recipe (And Why Your Kids Will Claim Ownership of It)
I’ve made these squares for three Thanksgivings now, and every single time, the dynamic in the kitchen shifts. Instead of me doing all the work while they watch TV, they’re pulling out the measuring cups. Here’s why this recipe has earned a permanent spot in our fall dessert rotation:
- Zero Pastry Stress — Seriously, if you can make cookie dough, you can make this crust. No rolling pins. No chilling for hours. No crying over a cracked shell. Just mix and press. I’ve taught my seven-year-old to do the pressing part, and he’s surprisingly good at it.
- The “Sticky Fingers” Factor — Let’s be real: kids love messy food. The filling is gooey, sweet, and requires licking the spoon. It’s basically candy. But it’s *your* candy, made with maple syrup and real butter. It feels indulgent but tastes like home.
- Make-Ahead Magic — These squares taste better the next day. The flavors meld, the crust sets up, and they hold their shape perfectly for potlucks or travel. I make them on Thanksgiving morning so they’re ready for dinner. Zero morning-of stress.
- Customizable Chaos — This is the best part. The base recipe is classic, but it’s a blank canvas. Add chocolate chips (my family’s favorite). Add dried cranberries for color. Add a sprinkle of sea salt on top for that fancy restaurant vibe. Your kids can help choose the mix-ins, which makes them way more likely to eat them.
- Budget-Friendly — Pecans, maple syrup, butter, flour. These are pantry staples or affordable fall ingredients. You’re not buying expensive specialty desserts. You’re making a feast for a fraction of the cost.
This recipe is my go-to when I want to create a memory, not just fill a stomach. It’s the sound of laughter, the smell of caramelizing sugar, and the pride of seeing a messy kid take a bite and say, “I made that!”
Ingredients You’ll Need (And What to Buy)
Here’s the best part: you probably have most of this already. The beauty of butter tart squares is that they rely on simple, high-quality ingredients. I’m particular about a few things here, and I’ll tell you exactly why.
For the Shortbread Crust
Unsalted butter (1 cup / 226g) — I use high-quality European-style butter if I can find it. It has a richer flavor. But honestly? Any good unsalted butter works. Soften it in the fridge for 30 minutes before you start, or microwave it for 10 seconds. You want it soft, not melted.
Granulated sugar (½ cup / 100g) — This helps crisp up the crust. Don’t skip it. It’s not about sweetness here; it’s about texture.
All-purpose flour (2 cups / 250g) — Standard flour. No need for fancy pastry flour. If you’re using whole wheat flour for other recipes, stick to white flour here for that tender, cookie-like crust.
Salt (½ teaspoon) — Just a pinch to balance the sweetness. Kosher salt is fine.
For the Gooey Filling
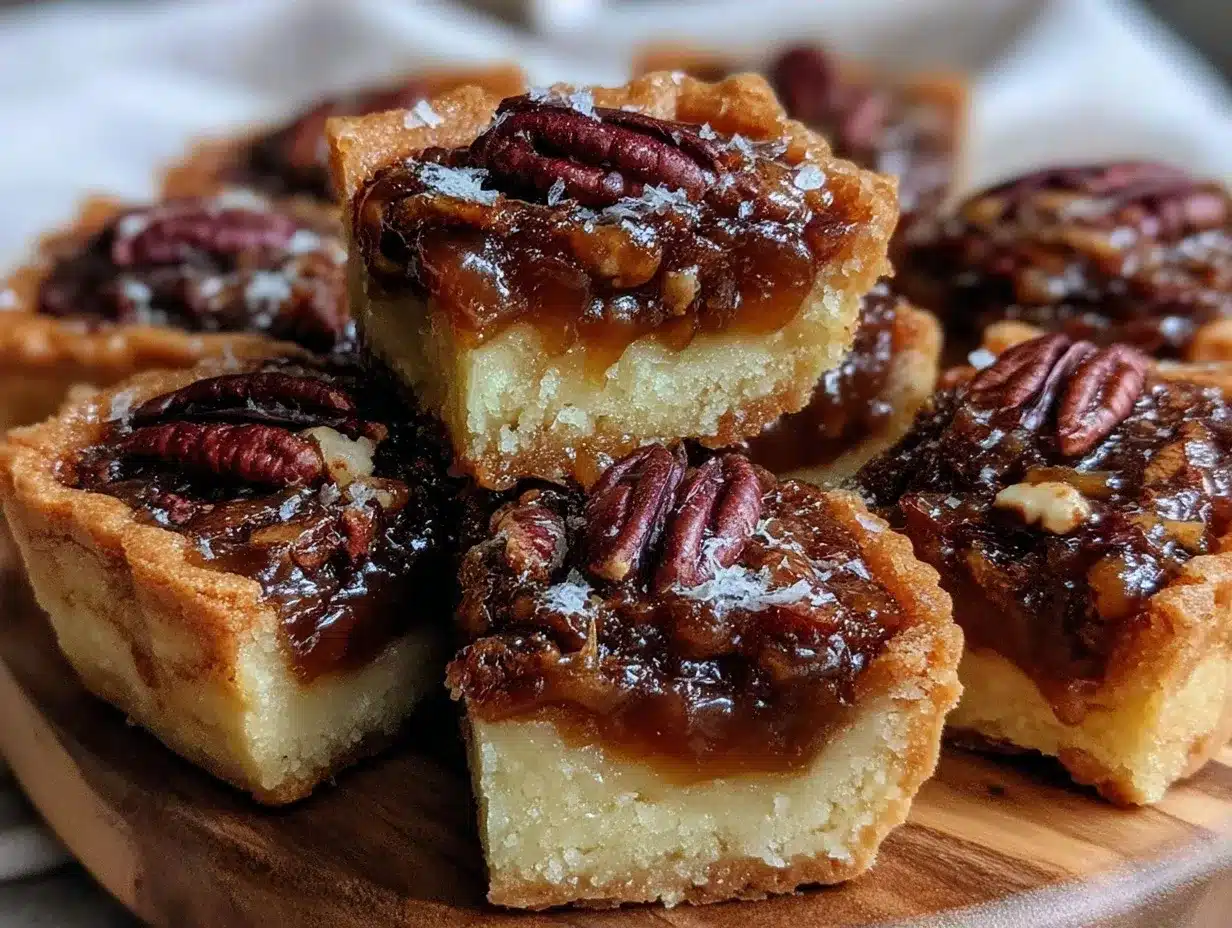
Maple syrup (1 cup / 240ml) — This is the star. Use 100% pure maple syrup. The grade doesn’t matter much here (I use Grade Amber for a medium maple flavor), but avoid “pancake syrup” or anything with corn syrup. It needs to taste like real maple.
Light brown sugar (½ cup / 100g, packed) — This adds moisture and a deeper molasses flavor. Dark brown sugar works too, but light is sweeter and more traditional for butter tarts.
Unsalted butter (½ cup / 113g, melted) — Yes, more butter. It’s a butter tart, after all. Melt it in the microwave or a saucepan.
Eggs (2 large) — Room temperature is best. They help set the filling. Don’t worry if they’re cold; just whisk them well.
Vanilla extract (1 teaspoon) — Pure vanilla, not imitation. It adds warmth.
Pecans (1 cup, chopped) — I buy whole pecans and chop them myself. Pre-chopped pecans are fine, but they’re often stale. Toasting them in the oven for 5 minutes before adding them makes them pop with flavor.
Dark chocolate chips (½ cup) — This is my twist. Semi-sweet or dark chocolate chips cut through the sweetness of the maple. If your kids are chocolate-phobic, skip this or use white chocolate chips.
Optional: Sea salt flakes — A sprinkle on top after baking. It looks fancy and balances the sweet.
Equipment Needed
You don’t need fancy equipment for this. Here’s what I actually use:
9×13 inch baking pan — I use a metal pan. Glass takes longer to bake and can result in a softer crust. If you only have glass, reduce the oven temp by 25°F.
Large mixing bowl — For the crust. A wide bowl makes it easier to mix with your hands.
Medium mixing bowl — For the filling. Whisking is key here.
Pastry brush — Optional, but nice for brushing the crust edges if you want a golden finish.
Spatula — For spreading the filling. Silicone is best because it scrapes the bowl clean.
Knife or pizza cutter — For cutting the squares. A pizza cutter is surprisingly effective for sticky desserts.
How to Make It: Step-by-Step
Alright, let’s make this! I’m walking you through exactly how I do it, including the little tricks I’ve picked up over the years. Remember, this is a kid-friendly recipe, so I’ve designed the steps to be safe and simple for little hands.
Step 1: Prep the Pan and Oven (2 minutes)
Preheat your oven to 350°F (175°C). Line your 9×13 inch baking pan with parchment paper, leaving an overhang on the long sides. This is crucial. You want to lift the squares out of the pan once they’re cool, not dig them out with a knife. Grease the parchment lightly with butter or cooking spray.
Step 2: Make the Crust (5 minutes)
In a large bowl, combine the softened butter, granulated sugar, flour, and salt. Use your hands to mix this together. It should look like coarse sand or wet sand. If it’s too dry, add a tablespoon of milk. If it’s too wet, add a sprinkle of flour. Kids can do this step! Let them squish the butter and flour together. It’s sensory play with a purpose.
Press the mixture firmly into the bottom of the prepared pan. Use the bottom of a measuring cup or your fingers to make it even. Don’t worry about perfection; it’s a rustic crust. Bake for 15 minutes until lightly golden. Let it cool while you make the filling.
Step 3: Make the Filling (5 minutes)
In a medium bowl, whisk together the maple syrup, brown sugar, melted butter, eggs, and vanilla. Whisk vigorously until the mixture is smooth and slightly frothy. This ensures the eggs don’t curdle in the oven.
Stir in the chopped pecans and chocolate chips. The mixture will be thick and sticky. This is the fun part for kids—watching the chips sink into the goo.
Step 4: Assemble and Bake (35-40 minutes)
Pour the filling over the pre-baked crust. Spread it evenly with a spatula. Make sure the filling goes all the way to the edges. If you have extra pecans or chocolate chips, sprinkle them on top for a fancy look.
Bake for 35-40 minutes. The edges should be bubbly and golden, and the center should be set but still have a little jiggle. It will firm up as it cools. Don’t overbake, or the center will become hard.
Step 5: Cool and Cut (1 hour)
Let the squares cool completely in the pan on a wire rack. This is the hardest part. If you cut them warm, they’ll be a mess. Once cool, lift them out using the parchment paper. Cut into squares or rectangles. Dust with sea salt if using.
Expert Tips & Tricks
Here’s everything I’ve learned from making these dozens of times. These tips will save you from my mistakes.
Don’t Skip the Pre-Bake — The crust needs to set before the wet filling is added. If you skip this, you’ll end up with a soggy bottom. It’s worth the extra 15 minutes.
Room Temperature Eggs — Cold eggs can cause the filling to separate. Take them out of the fridge 30 minutes before you start. If you forget, put them in a bowl of warm water for 5 minutes.
Toast Your Pecans — Raw pecans are fine, but toasted pecans have a deeper, nuttier flavor. Toast them in a dry skillet for 3-5 minutes until fragrant. Let them cool before adding to the filling.
The Jiggle Test — When you take them out of the oven, the center should jiggle like Jell-O. It’s not liquid, but it’s not solid. It will set as it cools. If it’s liquid, bake for 5 more minutes. If it’s solid, you’ve overbaked it.
Cool Completely — I know, I know. But cutting warm squares is a disaster. Use this time to clean up the kitchen or start the turkey. Patience pays off.
Variations & Substitutions
Once you’ve nailed the basic version, here’s how you can mix it up. I’ve tried all of these.
Chocolate Chip Pecan — This is my family’s favorite. Add ½ cup dark chocolate chips to the filling. The bitterness of the chocolate balances the sweet maple.
Maple Walnut — Swap pecans for walnuts. Walnuts have a slightly more bitter, earthy flavor that pairs well with maple.
Cranberry Orange — Add ½ cup dried cranberries and the zest of one orange to the filling. This is more festive and less sweet.
Gluten-Free — Use a 1:1 gluten-free flour blend for the crust. The rest of the ingredients are naturally gluten-free. The texture might be slightly denser, but it’s still delicious.
Dairy-Free — Use vegan butter in the crust and filling. Use maple syrup (which is naturally dairy-free) and vegan chocolate chips. The filling might be slightly less rich, but it’s still good.
Nut-Free — Skip the pecans. Add more chocolate chips or dried fruit. This is great for school-friendly desserts.
Serving & Storage
These squares are best served at room temperature. They hold their shape well, making them perfect for potlucks or travel.
Refrigerator: Store in an airtight container for up to 5 days. The filling will firm up in the fridge, so let them sit at room temperature for 10 minutes before eating.
Freezer: These freeze beautifully. Wrap individual squares in plastic wrap and store in a freezer bag for up to 3 months. Thaw at room temperature.
Serving Suggestion: Serve with a cup of hot coffee or tea. The contrast of the warm drink and the cool, sweet square is perfect for a fall afternoon. Or, serve with a scoop of vanilla ice cream for a decadent treat.
Nutrition Information
I’m not a nutritionist, but here’s the breakdown if you’re tracking. Keep in mind that these are rich, sweet bars, so portion control is key.
Per Serving (based on 16 squares):
Calories: 280
Fat: 16g
Carbs: 32g
Sugar: 24g
Protein: 3g
Fiber: 1g
These squares are high in sugar and fat, which is expected for a dessert. But they’re made with real ingredients, so you know what’s in them. Use them as a special treat, not a daily snack.
Final Thoughts
So, that’s my take on Canadian Thanksgiving butter tart squares. It’s a recipe that started as a hack but turned into a tradition. It’s messy, it’s sweet, and it’s perfect for making with kids. I hope your family loves them as much as mine does.
Make it yours! Add your favorite nuts, swap the chocolate, or keep it classic. The best recipes are the ones you adapt to your family’s tastes. If you make this, drop a comment and let me know what you think! I love hearing how recipes turn out in your kitchen.
Happy cooking! And I hope your kitchen smells half as good as mine does right now.
Frequently Asked Questions
Can I use maple flavoring instead of real maple syrup?
You can, but the flavor won’t be as deep or complex. Real maple syrup has notes of caramel and vanilla that artificial flavoring can’t replicate. If you’re on a budget, you can use half real maple syrup and half light corn syrup, but I recommend sticking to pure maple syrup if you can. It’s worth the extra few dollars.
Why did my squares fall apart when I cut them?
This usually happens if they weren’t cooled completely. The filling needs time to set. If you cut them warm, they’ll be gooey and fall apart. Let them cool for at least an hour, preferably two. If you’re in a hurry, you can chill them in the fridge for 30 minutes to speed up the process.
Can I make these ahead of time?
Yes! These squares actually taste better the next day. The flavors meld, and the crust firms up. You can make them 2-3 days ahead and store them in an airtight container at room temperature. If you’re traveling, they’re perfect for packing.
Can I use honey instead of maple syrup?
You can, but the flavor will be different. Honey has a stronger, floral taste that might overpower the other ingredients. If you use honey, use a mild honey like clover or orange blossom. The texture might also be slightly thinner, so you might need to bake them a few minutes longer.
My crust is too hard. What did I do wrong?
This usually means the crust was overbaked or the ratio of butter to flour was off. Make sure you’re using softened butter, not melted butter, for the crust. Also, don’t bake the crust longer than 15 minutes. It should be lightly golden, not dark brown.
Can I freeze the squares before baking?
No, I don’t recommend freezing the unbaked squares. The filling contains eggs, which can separate when frozen and thawed. It’s best to bake them fresh. However, you can freeze the baked squares for up to 3 months.
Pin This Recipe!
Canadian Thanksgiving Butter Tart Squares: Kid-Friendly Dessert
- Total Time: 1 hour 12 minutes
- Yield: 16 servings 1x
Description
A kid-friendly twist on the classic Canadian butter tart, featuring a sturdy shortbread crust and a gooey maple-pecan filling with chocolate chips. These squares are easy to make, make-ahead friendly, and perfect for holiday gatherings.
Ingredients
- 1 cup (226g) unsalted butter, softened (for crust)
- ½ cup (100g) granulated sugar (for crust)
- 2 cups (250g) all-purpose flour (for crust)
- ½ teaspoon salt (for crust)
- 1 cup (240ml) 100% pure maple syrup (for filling)
- ½ cup (100g) light brown sugar, packed (for filling)
- ½ cup (113g) unsalted butter, melted (for filling)
- 2 large eggs, room temperature (for filling)
- 1 teaspoon vanilla extract (for filling)
- 1 cup pecans, chopped (for filling)
- ½ cup dark chocolate chips (for filling)
- Sea salt flakes, optional for topping
Instructions
- Preheat oven to 350°F (175°C). Line a 9×13 inch baking pan with parchment paper, leaving an overhang on the long sides, and grease lightly.
- In a large bowl, combine softened butter, granulated sugar, flour, and salt. Mix with hands until it resembles coarse sand.
- Press the mixture firmly into the bottom of the prepared pan to form the crust.
- Bake the crust for 15 minutes until lightly golden. Remove and let cool while making the filling.
- In a medium bowl, whisk together maple syrup, brown sugar, melted butter, eggs, and vanilla until smooth and frothy.
- Stir in chopped pecans and chocolate chips.
- Pour the filling over the pre-baked crust and spread evenly.
- Bake for 35-40 minutes until edges are bubbly and golden, and the center has a slight jiggle.
- Cool completely in the pan on a wire rack (at least 1 hour) to allow the filling to set.
- Lift out using parchment paper, cut into squares, and dust with sea salt if desired.
Notes
Do not skip pre-baking the crust to avoid a soggy bottom. Ensure eggs are at room temperature to prevent the filling from separating. Toast pecans for enhanced flavor. Cool completely before cutting to ensure clean slices. Can be stored in the fridge for 5 days or frozen for 3 months.
- Prep Time: 12 minutes
- Cook Time: 50-55 minutes
- Category: Dessert
- Cuisine: Canadian
Nutrition
- Serving Size: 1 square
- Calories: 280
- Sugar: 24
- Sodium: 120
- Fat: 16
- Saturated Fat: 8
- Carbohydrates: 32
- Fiber: 1
- Protein: 3
Keywords: Canadian Thanksgiving, butter tart squares, kid-friendly dessert, maple pecan bars, shortbread crust, make-ahead dessert, holiday baking


