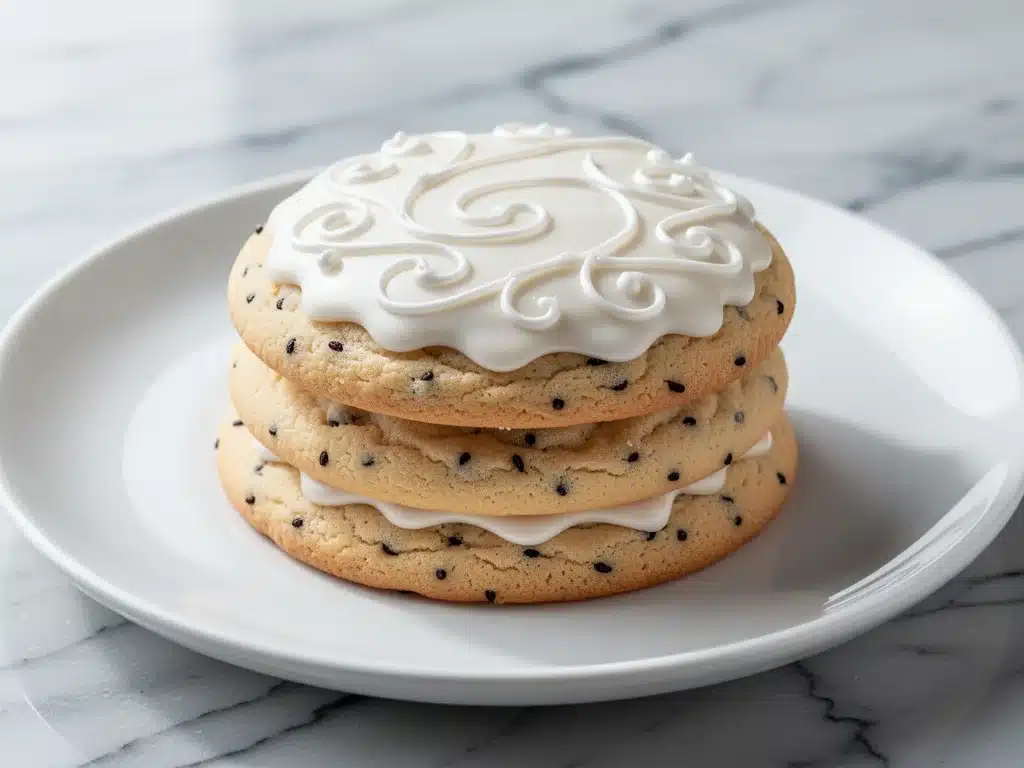
Last Saturday, I found myself staring at a box of store-bought sugar cookies, feeling a deep sense of betrayal. I had promised my kids that Saturday baking would be a special family event, something we’d look back on fondly. But when I bit into that dry, cardboard-like cookie, I realized I’d let them down. They didn’t complain—they’re too polite for that—but I saw the disappointment in their eyes. That was the moment I decided I was done with compromise. I wanted a cookie that was soft enough to melt in your mouth, fragrant with real vanilla bean, and sturdy enough to hold a beautiful layer of royal icing without cracking.
So, I went into the kitchen and started testing. And testing. And testing. I tried cutting back on the butter for a “healthier” version (huge mistake). I tried using extract instead of beans (another mistake). I tried baking them for too long because I got distracted by laundry (the third mistake). But after about eight iterations, I finally nailed it. These ultra soft vanilla bean sugar cookies are the result of that frustration. They’re chewy on the inside, crisp at the edges just enough to hold their shape, and they have that incredible, nostalgic vanilla flavor that reminds me of my grandma’s kitchen, but better. And the best part? The royal icing is actually smooth, glossy, and easy to pipe, even if you’ve never decorated a cake in your life.
I’ve made this batch at least fifteen times since last Saturday. I’ve sent them to school bake sales, brought them to church potlucks, and eaten them straight from the jar (don’t judge me). Every single time, people ask for the recipe. They always say, “These taste homemade but professional.” That’s the goal, right? To make something that looks like you spent hours in a bakery but actually took less than an hour to make. This recipe is my answer to every dry cookie disaster I’ve ever had, and I’m so excited to share it with you.
Why You’ll Love This Recipe
There are a lot of sugar cookie recipes out there. I’ve clicked on them. I’ve tried them. Some are too cakey, some are too hard, and some require chilling the dough for six hours (who has time for that?). This vanilla bean sugar cookie recipe is different because it solves the three biggest problems home bakers face: dryness, blandness, and cracking icing. Here’s why this one is going to become your new favorite:
Incredibly Soft Texture — Seriously, these cookies stay soft for days. I’ve kept leftovers in an airtight container for a week, and they’re still pillowy soft. Most sugar cookies turn into coasters by Tuesday. These don’t. The secret? A combination of cornstarch and brown sugar that keeps the crumb tender.
Real Vanilla Flavor — No fake, chemical aftertaste here. We’re using real vanilla bean paste or scraped seeds. It gives you those beautiful little black specks and that deep, complex flavor that extract just can’t match. It’s worth the extra few dollars.
Easy Royal Icing — Royal icing has a reputation for being finicky. It cracks. It bubbles. It dries too fast. I’ve perfected a simple 3-ingredient royal icing that stays glossy, doesn’t crack when you bite the cookie, and is forgiving enough for beginners. You can pipe it, flood it, or just drizzle it. Your call.
Quick and Forgiving — You don’t need to chill the dough for hours. You don’t need a stand mixer (though it helps). You can mix this by hand in about 15 minutes. It’s perfect for last-minute requests or spontaneous baking sessions. I’ve made these on weeknights after dinner, and they come together faster than ordering pizza.
Family-Approved — My picky 8-year-old says these are “the best cookies ever,” and my husband, who claims he doesn’t like sweet things, has eaten three in a row. That’s the ultimate seal of approval. These cookies are mild enough for kids but sophisticated enough for guests.
This isn’t just a cookie recipe; it’s a confidence booster. Once you make these, you’ll realize that decorating cookies isn’t magic—it’s just technique. And now you have the technique.
Ingredients You’ll Need
Before we get into the mixing, let’s talk about what you’ll need. I’m particular about a few of these, and I’ll explain why. You can substitute some things, but for the best results, stick to the basics.
Unsalted Butter (1 cup / 226g, softened) — This is the foundation. You want it softened to room temperature, but not melted. If it’s melted, your cookies will spread too much. If it’s too cold, you won’t get that tender crumb. I usually take it out of the fridge about an hour before I start. If you’re in a hurry, you can microwave it on low power for 10-second bursts, but watch it closely.
Granulated Sugar (1 cup / 200g) — This provides structure and crisp edges. Don’t try to cut this back; it helps the cookies spread correctly.
Brown Sugar (1 cup / 220g, packed) — This is the moisture keeper. It’s what makes the cookies chewy and soft. Use light or dark brown sugar; I prefer dark for a deeper caramel note, but light works fine too.
Eggs (2 large, room temperature) — Room temperature eggs blend into the batter more easily, creating a smoother dough. Cold eggs can cause the butter to seize up. Crack them into a small bowl first to check for freshness.
Vanilla Bean Paste (2 teaspoons) — Or 2 tablespoons of high-quality extract. Vanilla bean paste has seeds in it, which look beautiful and taste incredible. If you can’t find paste, scrape one vanilla bean yourself. It takes 5 minutes and is worth it. Avoid cheap imitation vanilla extract; it tastes like chemicals.
All-Purpose Flour (3 cups / 375g) — Don’t over-measure! Spoon the flour into your measuring cup and level it off. If you scoop directly from the bag, you’ll pack too much flour, and your cookies will be dry. I use Gold Medal all-purpose flour because it’s consistent.
Cornstarch (1 tablespoon) — This is the secret weapon. It interferes with gluten formation, keeping the cookies soft and tender. Don’t skip it.
Baking Powder (1 teaspoon) — And Baking Soda (½ teaspoon). These leavening agents help the cookies rise slightly. Make sure they’re not expired. Old baking powder is the silent killer of baked goods.
Salt (½ teaspoon) — Salt balances the sweetness. Don’t skip it, even if you’re watching sodium. It makes the vanilla flavor pop.
For the Royal Icing:
Confectioners’ Sugar (3 cups / 360g, sifted) — Sifting is non-negotiable. It removes lumps and ensures a smooth icing. If you don’t sift, you’ll get lumpy cookies.
Egg Whites (2 large, room temperature) — Or ¼ cup pasteurized liquid egg whites from a carton. I prefer fresh egg whites for the best flavor, but carton ones are safer if you’re worried about raw eggs.
Cream of Tartar (¼ teaspoon) — This stabilizes the egg whites and helps the icing hold its shape. It’s cheap and keeps forever.
Vanilla Extract (1 teaspoon) — For flavoring the icing.
Optional: Food coloring gel. Gel colors are better than liquid because they don’t thin out the icing. I love using red, blue, and yellow to make custom colors.
Equipment Needed
You don’t need fancy gadgets for this. Here’s what I actually use in my home kitchen:
Large Mixing Bowl — I use a 5-quart stainless steel bowl. It’s big enough to mix the dough without splattering. Glass works too, but stainless steel is lighter.
Electric Mixer — A hand mixer or stand mixer with a paddle attachment. I prefer a stand mixer because it frees up my hands, but a hand mixer works fine if you’re strong. You can mix by hand, but it’ll take some elbow grease.
Rubber Spatula — For scraping down the sides of the bowl. You want every bit of butter and sugar incorporated.
Measuring Cups and Spoons — Dry measuring cups for flour and sugar. Liquid measuring cup for eggs and vanilla. Be precise with the flour.
Baking Sheets — Two large sheets. I use half-sheet pans. Make sure they’re flat; warped pans cause uneven baking.
Parchment Paper or Silicone Mat — I always use parchment paper. It prevents sticking and makes cleanup easy. Silicone mats work too, but I like the reliability of parchment.
Piping Bags and Tips — For the royal icing, I use reusable piping bags and a round tip (like a Wilton #2 or #3) for outlining, and a larger tip or a ziplock bag with the corner cut off for flooding. You don’t need fancy tips to start.
Sifter or Fine Mesh Strainer — For sifting the confectioners’ sugar. This is crucial for smooth icing.
Cooling Rack — To cool the cookies completely before icing. Never ice warm cookies; the icing will melt and slide off.
How to Make It: Step-by-Step
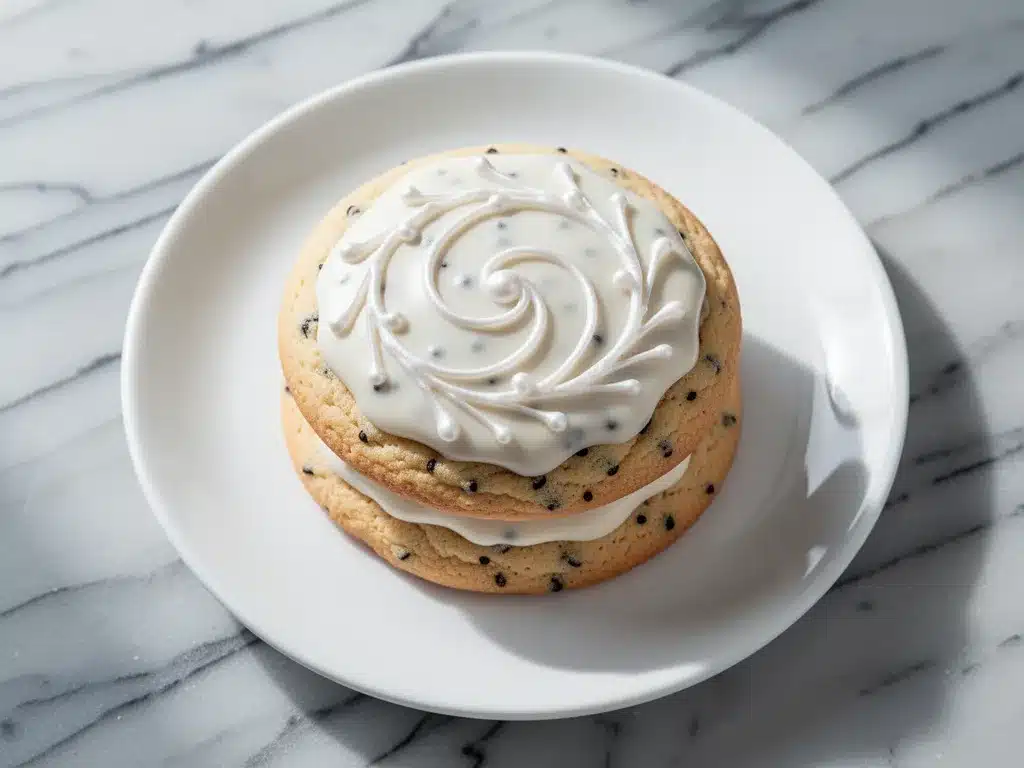
Alright, let’s make these cookies! I’m walking you through exactly how I do it, including the little tricks I’ve picked up over the years.
Step 1: Cream the Butter and Sugars (3-4 minutes)
In your large mixing bowl, combine the softened butter, granulated sugar, and brown sugar. Using your electric mixer on medium-high speed, beat them together until the mixture is light, fluffy, and pale in color. This usually takes about 3-4 minutes. Don’t rush this step. Proper creaming incorporates air, which helps the cookies rise and stay tender. Scrape down the sides of the bowl with your spatula to ensure everything is mixed evenly.
Step 2: Add Wet Ingredients (1 minute)
Add the eggs one at a time, beating well after each addition. Then add the vanilla bean paste (or extract) and beat until combined. The mixture might look slightly curdled at first—don’t panic. That’s normal. Just keep mixing for another 30 seconds, and it will come together.
Step 3: Mix Dry Ingredients (2 minutes)
In a separate medium bowl, whisk together the flour, cornstarch, baking powder, baking soda, and salt. Then, gradually add the dry ingredients to the wet mixture, mixing on low speed. Stop as soon as the flour disappears. Overmixing at this stage develops gluten, which makes cookies tough. We want tender, not tough. The dough will be thick and slightly sticky.
Step 4: Chill the Dough (30 minutes)
Cover the bowl with plastic wrap and refrigerate the dough for at least 30 minutes. This step is important because it firms up the butter, preventing the cookies from spreading too thin in the oven. If you’re in a huge rush, you can skip this, but the cookies will be flatter. I usually chill the dough while I preheat the oven.
Step 5: Scoop and Bake (12-14 minutes)
Preheat your oven to 350°F (175°C). Line two baking sheets with parchment paper. Scoop the dough into balls, about 1.5 tablespoons each. Roll them gently in your hands to smooth out cracks. Place them on the baking sheet, about 2 inches apart. Bake for 12-14 minutes. The edges should be set and lightly golden, but the centers should still look soft and slightly underbaked. They will firm up as they cool. Do not overbake!
Step 6: Cool Completely
Let the cookies cool on the baking sheet for 5 minutes, then transfer them to a wire rack to cool completely. This is crucial. If you try to ice warm cookies, the icing will melt and slide off. It’s tempting, but wait.
Step 7: Make the Royal Icing
In a clean, grease-free bowl, beat the egg whites and cream of tartar on high speed until soft peaks form. Add the vanilla and half the confectioners’ sugar. Beat until combined, then add the rest. Beat on high for 2-3 minutes until the icing is thick, glossy, and holds stiff peaks. If it’s too thick, add a few drops of water. If it’s too thin, add a little more sugar.
Step 8: Pipe and Decorate
Transfer the icing to a piping bag fitted with your desired tip. Pipe outlines first, then fill in the center with more icing (this is called flooding). Use a toothpick to pop any air bubbles. Let the icing dry for 4-6 hours until it’s hard to the touch.
Expert Tips & Tricks
Here’s everything I’ve learned from making these dozens of times. These tips will save you from my mistakes.
Don’t Overmix the Dough
Once you add the flour, mix just until combined. Overmixing leads to tough cookies. I know it’s hard to stop, but trust me. The dough should look shaggy and uneven before it comes together. That’s a sign you’re doing it right.
Chill Your Dough
I cannot stress this enough. Chilling the dough prevents spreading. If you bake the dough warm, your cookies will be flat and crisp all the way through. Chilled dough keeps them soft and thick. If you’re decorating for a party, you can make the dough a day ahead and keep it in the fridge.
Underbake Slightly
The cookies should look soft in the center when you take them out. They will continue to cook on the hot baking sheet. If you wait until they look fully set in the oven, they’ll be dry. Aim for pale centers with just a hint of gold on the edges.
Sift Your Sugar
For royal icing, sifting is non-negotiable. Lumps in the sugar mean lumps in the icing. If you’re impatient, you can press the sugar through a fine mesh strainer with a spoon, but a sifter is faster.
Use Gel Food Coloring
Liquid food coloring adds water to your icing, which can break the emulsion and make it runny. Gel colors are concentrated and don’t add moisture. A little goes a long way. I use a toothpick to dip into the gel and swirl it into the icing.
Store Properly
Uniced cookies store well in an airtight container at room temperature for up to a week. Iced cookies should be stored in a single layer in an airtight container, with parchment paper between layers if you need to stack them. They’ll keep for up to two weeks.
Variations & Substitutions
Once you’ve nailed the basic version, here’s how you can mix it up. I’ve tried all of these.
Lemon Vanilla Cookies
Add 1 tablespoon of lemon zest to the dough and replace the vanilla in the icing with lemon extract. Bright and refreshing.
Chocolate Dipped
Instead of royal icing, dip the bottoms of the cookies in melted chocolate. Sprinkle with crushed peppermint or sprinkles while the chocolate is wet. Simple and elegant.
Gluten-Free
Use a 1-to-1 gluten-free flour blend. The cornstarch in the recipe already helps with texture, so GF cookies turn out surprisingly good. Make sure your baking powder is GF.
Dairy-Free
Use a dairy-free butter alternative. Note that some DF butters have higher water content, which might affect spread. You may need to chill the dough longer.
Vegan
Replace butter with vegan butter (like Miyoko’s or Earth Balance). Replace egg whites in the icing with aquafaba (chickpea water) and add a bit more cream of tartar. The texture will be slightly different, but still delicious.
Flavor Twists
Add ½ teaspoon of almond extract for a French macaron vibe. Or mix in ¼ cup of crushed red velvet cake mix for colorful specks. The possibilities are endless.
Serving & Storage
How to Serve:
I usually serve these cookies on a tiered stand for parties, but they’re also great packed in a tin for gifts. They pair beautifully with coffee or tea. If you’re making them for a holiday, use festive colors like red and green for Christmas, or pastels for Easter.
Storage Instructions:
Room Temperature: Store uniced cookies in an airtight container for up to 1 week. Iced cookies last up to 2 weeks. Keep them in a cool, dry place away from direct sunlight.
Refrigerator: You can refrigerate iced cookies, but let them come to room temperature before serving. Condensation can make the icing sticky.
Freezing: You can freeze uniced cookies for up to 3 months. Thaw them at room temperature before icing. Iced cookies don’t freeze well because the icing can crack or become sticky. If you must freeze iced cookies, store them in a single layer in an airtight container, but eat them within 2 weeks.
Pro Tip: If your icing gets too thick while you’re decorating, add a few drops of warm water and stir. If it gets too thin, add a tiny bit more sifted confectioners’ sugar. Keep a small bowl of water nearby to dip your finger in to adjust consistency.
Nutrition Information
I’m not a nutritionist, but here’s the breakdown if you’re tracking. Note that this is an estimate based on one cookie with a small amount of icing.
Per Serving (1 medium cookie with icing):
- Calories: 180
- Protein: 2g
- Carbs: 32g
- Fiber: 0g
- Sugar: 22g
- Fat: 6g
- Saturated Fat: 4g
- Cholesterol: 25mg
- Sodium: 80mg
What’s Good: It’s a classic treat, so don’t expect it to be a health food. But it’s made with real ingredients, no artificial preservatives. The vanilla bean adds antioxidants, though in small amounts.
What to Know: High in sugar and carbs. If you’re watching your intake, enjoy a smaller portion or share with friends. The royal icing is mostly sugar, so use it sparingly if you’re concerned.
My Take: Look, these are cookies. They’re meant to be enjoyed. Life is too short to stress over 180 calories. Make them, share them, and savor them. That’s the point.
Final Thoughts
So that’s my go-to ultra soft vanilla bean sugar cookie recipe! I’ve probably talked your ear off at this point, but when you make a recipe this often, you have a lot to say about it. These cookies have saved my baking reputation more times than I can count. They’re my answer to “what dessert should I bring?” when I’m tired, don’t want to make a complicated cake, and still want something that looks impressive.
My kids love them, my friends request them, and I love making them because they’re forgiving and fun. The royal icing might seem intimidating at first, but once you try it, you’ll realize it’s just sugar and egg whites. It’s magic in a bowl. And if you mess up? Scrape it off and try again. No one will know.
Make it yours! Try different colors, different shapes, or different flavors. The best recipes are the ones you adapt to your family’s tastes. If you make this, drop a comment and let me know what you think! I love hearing how recipes turn out in your kitchen. And if something doesn’t work, tell me that too—I’m here to help troubleshoot.
Happy baking! And I hope your kitchen smells half as good as mine does right now.
Frequently Asked Questions
Can I use vanilla extract instead of vanilla bean paste?
Yes, you can! Use 2 tablespoons of extract for every 2 teaspoons of paste. The cookies will still taste great, but you won’t get those beautiful black specks. If you want the specks, scrape one vanilla bean yourself. It’s easier than you think.
Why did my cookies spread too much?
This usually happens if the butter was too warm or if the dough wasn’t chilled enough. Make sure your butter is softened, not melted. And don’t skip the 30-minute chill in the fridge. If your kitchen is very hot, you might need to chill the dough longer or even freeze it for 10 minutes before baking.
Why did my royal icing crack?
Cracking usually means the icing was too thick when you piped it, or the cookies weren’t completely cool. Make sure the icing is smooth and glossy, not stiff and dry. Also, ensure the cookies are 100% cool before icing. Warm cookies release steam, which can cause the icing to crack as it dries.
Can I make the dough ahead of time?
Absolutely! You can make the dough up to 3 days ahead and keep it in the fridge. Let it come to room temperature for 15 minutes before scooping. You can also freeze the dough balls for up to 3 months. Just thaw them in the fridge overnight before baking.
How do I fix runny royal icing?
If your icing is too thin, add more sifted confectioners’ sugar, one tablespoon at a time, until it reaches the right consistency. It should flow off the spoon in a ribbon that holds its shape for a few seconds. If it’s too thick, add a few drops of water.
Can I use meringue powder instead of egg whites?
Yes! Meringue powder is a great alternative if you’re concerned about raw eggs. Use 3 tablespoons of meringue powder mixed with ¼ cup of warm water, instead of 2 egg whites. The icing will be slightly less glossy but still works beautifully. It’s also safer for kids and pregnant women.
How long does royal icing take to dry?
It takes about 4-6 hours to dry completely at room temperature. If you’re in a hurry, you can speed it up by placing the cookies in a low oven (150°F) with the door slightly ajar, but watch them closely so they don’t melt. The icing should be hard to the touch before you stack them.
Pin This Recipe!


Ultra Soft Vanilla Bean Sugar Cookies: 5-Step Easy Royal Icing
- Total Time: 45 minutes
- Yield: Approximately 24 cookies 1x
Description
These ultra-soft vanilla bean sugar cookies are chewy on the inside, crisp at the edges, and paired with a smooth, glossy royal icing that is easy to pipe even for beginners.
Ingredients
- 1 cup (226g) unsalted butter, softened
- 1 cup (200g) granulated sugar
- 1 cup (220g) packed brown sugar
- 2 large eggs, room temperature
- 2 teaspoons vanilla bean paste (or 2 tablespoons high-quality extract)
- 3 cups (375g) all-purpose flour
- 1 tablespoon cornstarch
- 1 teaspoon baking powder
- 1/2 teaspoon baking soda
- 1/2 teaspoon salt
- 3 cups (360g) confectioners’ sugar, sifted
- 2 large egg whites, room temperature
- 1/4 teaspoon cream of tartar
- 1 teaspoon vanilla extract
- Food coloring gel (optional)
Instructions
- In a large mixing bowl, combine softened butter, granulated sugar, and brown sugar. Beat on medium-high speed for 3-4 minutes until light, fluffy, and pale. Scrape down sides.
- Add eggs one at a time, beating well after each addition. Add vanilla bean paste and beat until combined.
- In a separate bowl, whisk together flour, cornstarch, baking powder, baking soda, and salt. Gradually add dry ingredients to wet mixture on low speed, mixing just until flour disappears.
- Cover dough with plastic wrap and refrigerate for at least 30 minutes to firm up the butter.
- Preheat oven to 350°F (175°C). Line baking sheets with parchment paper. Scoop dough into 1.5 tablespoon balls and place 2 inches apart.
- Bake for 12-14 minutes until edges are set and lightly golden, but centers still look soft. Do not overbake.
- Let cookies cool on baking sheet for 5 minutes, then transfer to a wire rack to cool completely.
- In a clean bowl, beat egg whites and cream of tartar on high speed until soft peaks form. Add vanilla and half the confectioners’ sugar, beat until combined. Add remaining sugar and beat on high for 2-3 minutes until thick, glossy, and holding stiff peaks.
- Transfer icing to a piping bag. Pipe outlines and flood centers. Let dry for 4-6 hours until hard to the touch.
Notes
Do not overmix the dough once flour is added to prevent tough cookies. Chill the dough for at least 30 minutes to prevent spreading. Underbake slightly for soft centers. Sift confectioners’ sugar for smooth icing. Store uniced cookies in an airtight container for up to a week.
- Prep Time: 15 minutes
- Cook Time: 12-14 minutes
- Category: Dessert
- Cuisine: American
Nutrition
- Serving Size: 1 medium cookie with
- Calories: 180
- Sugar: 22
- Sodium: 80
- Fat: 6
- Saturated Fat: 4
- Carbohydrates: 32
- Protein: 2
Keywords: sugar cookies, vanilla bean cookies, royal icing, soft cookies, easy cookie recipe, holiday baking, family friendly


