It was a rainy Tuesday in late October, the kind of day where the sky looks like wet concrete and the only thing warmer than your coffee mug is the thought of staying in bed. I had just moved into a new apartment with a kitchen that felt too big and too quiet. My oven was temperamental, my utensil drawer was a chaotic mess of mismatched spoons, and I was craving something that felt like a hug but didn’t require a five-ingredient shopping trip.
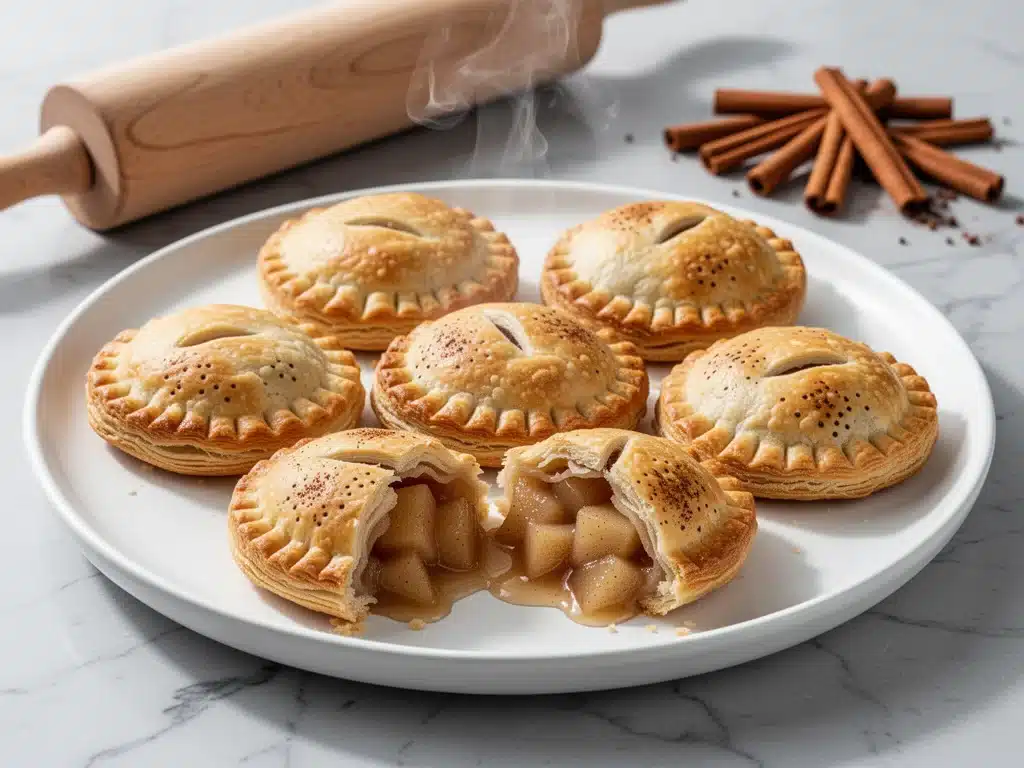
That’s when I decided to make these small-batch apple cinnamon hand pies. I wasn’t trying to be a pastry chef. I was trying to make myself feel less lonely in a strange new place. I grabbed a couple of store-bought pie crusts (don’t judge, we all have those nights), some bruised apples that needed to be used up, and a generous shake of cinnamon. I folded them into little pockets, brushed them with egg wash, and threw them in the oven.
Twenty minutes later, my tiny kitchen smelled like an apple orchard in autumn. I pulled one out, blew on the hot filling, and took a bite. The crust was flaky, the apples were tender and spiced, and it was the perfect amount of sweetness to cut through the gray weather outside. I made them again the next day. And the day after that.
There is something deeply satisfying about small-batch apple cinnamon hand pies. Unlike a whole pie, which is a commitment—a massive dish that requires a plate, a server, and the potential guilt of eating half before dinner—hand pies are personal. They’re portable. They’re forgiving. You can make four, you can make eight, you can make just one for yourself if you’re feeling indulgent. I’ve tested this recipe more times than I care to admit, tweaking the apple-to-cinnamon ratio and figuring out the perfect bake time so you don’t end up with soggy bottoms or raw dough. This is the version that works. It’s the version I make on repeat, especially when the weather turns crisp and I need a little warmth in my life.
Why You’ll Love This Recipe
Look, I love a classic lattice-top apple pie as much as the next person. But let’s be real: rolling out two crusts, weaving a lattice, and dealing with a leaking bottom crust is a lot of work for a Tuesday night. These small-batch apple cinnamon hand pies are the smarter, easier, and honestly tastier alternative. Here’s why they’ve permanently replaced my whole pies:
- Zero Waste, Zero Stress — I call these “small-batch” because you only make what you need. No freezing half a pie. No leftovers getting soggy in the fridge. You make four or six, eat them hot, and you’re done. It’s perfect for a date night, a quiet evening in, or bringing to a small gathering.
- Store-Bought Crust Friendly — I’m not going to lie to you and say homemade pie crust is always necessary. For these? It’s not. High-quality refrigerated pie dough works beautifully. It saves you forty minutes of elbow grease and still gives you that flaky, buttery texture. If you want to go the homemade route, that’s great too, but the hand pies are forgiving enough that they taste amazing regardless.
- Portability is King — These are the ultimate handheld dessert. You can eat them in the car, at your desk, or on the couch. They don’t drip everywhere (usually, if you seal them right). They’re sturdy enough to hold but tender enough to melt in your mouth.
- Customizable Filling — While I’m obsessed with the classic apple cinnamon combo, this format is a blank canvas. Swap the apples for pears, add a pinch of nutmeg, or mix in some chopped walnuts. I even tried them with cinnamon spiced canned pears once, and they were surprisingly good, though the fresh apples have a better texture.
- Quick Bake Time — Because they’re small, they cook fast. About 20-25 minutes in the oven. You’re not waiting an hour for a large pie to bake through. You’re getting that warm, gooey filling in a fraction of the time.
This is my go-to when I want to feel fancy but have zero energy. It’s my answer to “I want dessert but I don’t want to do dishes.” And honestly? It’s the best way to use up those apples that are starting to look a little wrinkly in the back of your fridge.
Ingredients You’ll Need
Here’s the thing about small-batch apple cinnamon hand pies: the ingredient list is short, sweet, and mostly stuff you already have. I’m particular about a few things, though. Quality matters, especially with the crust and the apples. Here’s exactly what you need and why.
For the Filling
Apples (3 medium, about 1.5 lbs / 680g) — This is the star. You need apples that hold their shape but get tender. I recommend a mix of Granny Smith (for tartness) and Honeycrisp or Fuji (for sweetness and texture). Avoid Red Delicious—they turn to mush. Peel them, yes, it’s extra work, but the skin can get chewy in these little pies. Core them and dice into ½-inch cubes. Uniform size ensures even cooking.
Granulated Sugar (3 tablespoons / 35g) — Apples vary in sweetness, so taste them first. If they’re tart, you might need ¼ cup. If they’re super sweet, 2 tablespoons might suffice. I like 3 tablespoons as a baseline.
Ground Cinnamon (1 teaspoon) — The classic flavor. Don’t skip it. If you like it spicy, add a pinch of nutmeg or allspice, but keep it simple. You want the apple flavor to shine.
Ground Ginger (¼ teaspoon) — Optional, but it adds a nice warmth that pairs with cinnamon. If you don’t have it, leave it out.
Lemon Juice (1 tablespoon) — This prevents the apples from browning and adds a bright acidity that cuts through the sugar. It’s a game-changer for flavor balance.
Butter (1 tablespoon, cubed) — I toss the apple mixture with a little butter before filling. It adds richness and helps create a light syrup in the pocket.
Cornstarch (1 teaspoon) — This thickens the juices so you don’t end up with a soup inside your pie. It’s crucial for keeping the crust crisp.
For the Assembly
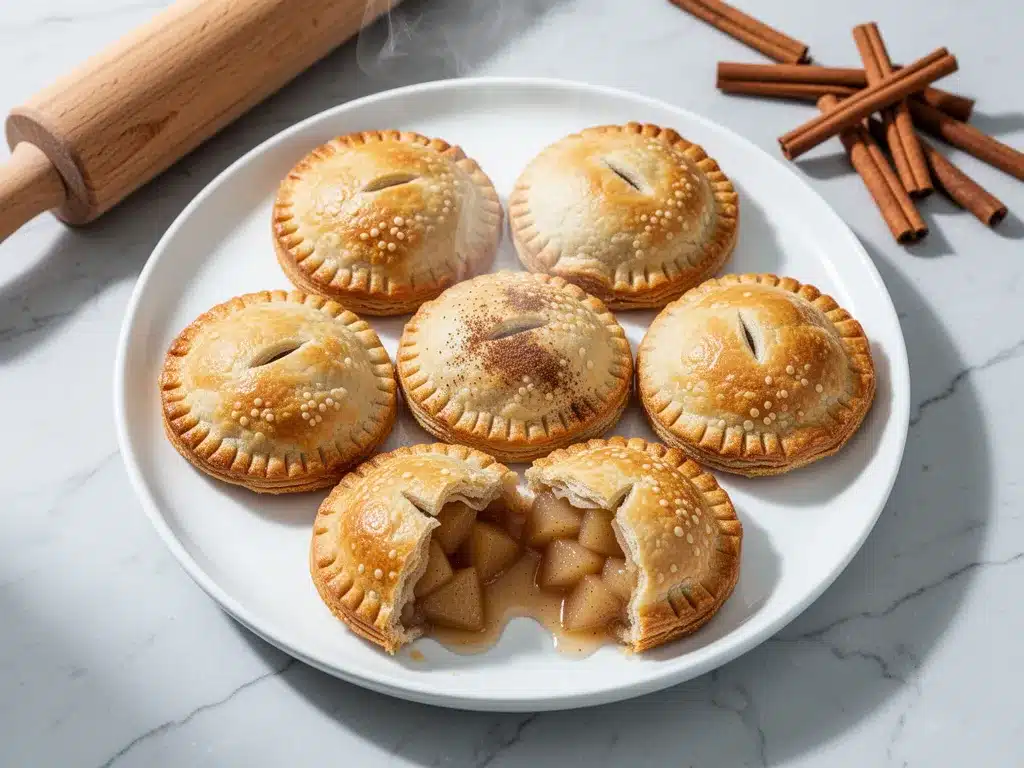
Pie Crusts (1 package / 2 crusts) — I use refrigerated dough like Pillsbury or a local bakery brand. Let them sit at room temperature for 15 minutes before rolling so they don’t crack. You can make your own if you’re feeling ambitious, but for small-batch, store-bought is totally fine.
Egg Wash (1 egg beaten with 1 tablespoon water or milk) — This gives the pies that golden, bakery-style shine. It also helps seal the edges if you press them well. Don’t skip this step.
Coarse Sugar (for sprinkling) — Turbinado or sanding sugar adds that professional crunch and sparkle. Regular granulated sugar works too, but it melts into the crust. Coarse sugar stays crunchy.
Vanilla Extract (½ teaspoon) — I add this to the egg wash for a subtle floral note that smells incredible while baking.
Equipment Needed
You don’t need a fancy kitchen for this. Here’s what I actually use. If you’re missing something, there’s usually a hack.
Large Mixing Bowl — For tossing the apples with sugar and spices. Any bowl works.
Rolling Pin — Essential for flattening the dough. If you don’t have one, a clean wine bottle works in a pinch, though it’s less even.
Baking Sheet — Line it with parchment paper. Trust me. Cleanup is so much easier, and it prevents sticking. I’ve burned pies on bare sheets before. Never again.
Pastry Brush — For the egg wash. A silicone one is easy to clean. If you don’t have one, your finger works, but it’s messier.
Fork or Pie Crimping Tool — To seal the edges. A fork is classic and rustic. A crimping tool looks fancy. I use a fork because it’s faster.
Small Sharp Knife — For cutting vents. A paring knife is perfect. You can also use a toothpick, but a knife gives cleaner slits.
Cooling Rack — Optional but recommended. Letting them cool slightly on a rack keeps the bottoms from getting soggy.
How to Make It: Step-by-Step
Alright, let’s make these small-batch apple cinnamon hand pies! I’m walking you through exactly how I do it, including the little tricks I’ve picked up so you don’t have to figure it out yourself.
Step 1: Prep the Apples (10 minutes)
Peel, core, and dice your apples into ½-inch cubes. Toss them in a large bowl with the sugar, cinnamon, ginger, lemon juice, cornstarch, and cubed butter. Mix well until every piece is coated. Let this sit for 10-15 minutes while you prep the dough. This allows the sugar to draw out some juices, which helps create that syrupy filling. If you skip this, the filling might be drier.
Step 2: Prep the Dough (5 minutes)
Take your refrigerated pie crusts out of the package. If they’re stiff, let them sit on the counter for 10-15 minutes. They should be pliable but still cold. If they’re too warm, they’ll stick. If they’re too cold, they’ll crack. Find that happy medium. Preheat your oven to 375°F (190°C) and line a baking sheet with parchment paper.
Step 3: Cut the Circles (5 minutes)
Roll out each crust on a lightly floured surface until it’s about ⅛-inch thick. Use a round cutter (4-5 inches is ideal) or a drinking glass to cut out circles. I like to cut 8 circles from each crust, giving me 16 hand pies total. If you’re making a smaller batch, just cut fewer. Save the scraps—they can be baked as little crisp cookies with cinnamon sugar.
Step 4: Fill and Seal (10 minutes)
Place a circle of dough on your palm or a small plate. Spoon 2-3 tablespoons of the apple mixture into the center. Don’t overfill! This is the #1 mistake. If you put too much, it will burst. Leave a ½-inch border around the edges. Fold the dough over the filling to create a half-moon shape. Press the edges firmly with your fingers to seal. Then, use a fork to crimp the edges. This creates a tight seal so the juices don’t leak.
Step 5: Vent and Brush (5 minutes)
Use a small knife or toothpick to cut 2-3 small slits in the top of each pie. This lets steam escape. If you don’t do this, the pies might puff up and burst. Brush the tops with the egg wash (egg + water/milk + vanilla). Sprinkle generously with coarse sugar. This is what makes them look bakery-worthy.
Step 6: Bake (20-25 minutes)
Place the pies on the prepared baking sheet, leaving a little space between them. Bake for 20-25 minutes, or until the crust is deep golden brown and the filling is bubbling through the vents. If the edges start browning too fast, tent them with foil. Let them cool on the baking sheet for 5 minutes, then transfer to a wire rack to cool for another 10 minutes. The filling will be extremely hot—be careful!
Expert Tips & Tricks
Here’s everything I’ve learned from making these dozens of times. These tips will save you from my mistakes.
Keep the Dough Cold — Warm dough is sticky dough. If your kitchen is hot, put the dough back in the fridge for 10 minutes before rolling. Cold butter in the crust is what creates those flaky layers. If the butter melts before baking, you lose the flakiness.
Don’t Skimp on the Seal — If the edges aren’t sealed tight, the juices will leak out and burn on the pan. Press firmly with your fingers, then crimp with a fork. Double-check every pie before it goes in the oven. I’ve lost pies to leaks, and it’s heartbreaking.
Use a Mix of Apples — I can’t stress this enough. Using only tart apples makes them too sour. Using only sweet apples makes them too soft. The mix of Granny Smith and Honeycrisp gives the perfect balance of texture and flavor.
Let Them Cool — I know it’s hard to wait. But the filling is like lava when it comes out of the oven. If you bite into it hot, it will burn your tongue and the filling might run out. Letting them cool for 10-15 minutes allows the filling to set slightly, making it easier to eat.
Freeze the Raw Pies — Want to make them ahead? Yes! Assemble the pies, place them on a baking sheet, and freeze for 1 hour. Then transfer to a freezer bag. You can bake them straight from frozen, adding 5-7 minutes to the bake time. This is great for meal prepping desserts.
Variations & Substitutions
Once you’ve nailed the basic version, here’s how you can mix it up. I’ve tried all of these, and they’re all delicious.
Pear Cinnamon Hand Pies — Swap the apples for ripe pears. They’re softer, so use less cornstarch (½ teaspoon). Add a pinch of cardamom for a sophisticated twist. These are great for fall gatherings.
Apple Pie à la Mode — Top the baked pies with a scoop of vanilla ice cream. The hot pie and cold ice cream combo is heavenly. Drizzle with caramel sauce if you’re feeling fancy.
Chocolate Apple Hand Pies — Add a square of dark chocolate to the center along with the apples. The chocolate melts into the apples, creating a rich, decadent filling. Great for chocolate lovers.
Gluten-Free Option — Use gluten-free pie crust dough. Most brands work well, but check the ingredients. You might need to handle the dough more gently as it can be more fragile.
Vegan Version — Use vegan pie crusts (many refrigerated brands are now vegan). Use a flax egg (1 tablespoon ground flaxseed mixed with 3 tablespoons water) instead of the egg wash. Sprinkle with sugar as usual.
Spiced Variations — Add a pinch of nutmeg, allspice, or pumpkin pie spice to the filling. For a kick, add a tiny pinch of cayenne pepper. It sounds weird, but it enhances the cinnamon flavor.
Serving & Storage
How to Serve: I usually serve these warm, straight from the cooling rack. They’re perfect with a cup of coffee or tea. I also like them with a dollop of whipped cream or a scoop of ice cream. They pair beautifully with a glass of cider or a warm latte.
Storage: Store leftovers in an airtight container at room temperature for up to 2 days. They’re best eaten within 24 hours, as the crust can get soft. If you need to keep them longer, freeze them. Do not refrigerate, as the cold will make the crust tough and soggy.
Reheating: To reheat, place them in a 350°F oven for 5-7 minutes. This restores the crispness of the crust. You can also microwave them for 20-30 seconds, but the crust will be soft. I prefer the oven method.
Freezing: As mentioned, you can freeze the raw pies for up to 3 months. Bake from frozen. You can also freeze baked pies, but the texture might suffer slightly. I recommend freezing raw for best results.
Nutrition Information
I’m not a nutritionist, but here’s the breakdown if you’re tracking. Keep in mind that this is an estimate based on standard ingredients.
Per Hand Pie (makes 16 total):
- Calories: 180
- Protein: 2g
- Carbs: 26g
- Fiber: 2g
- Sugar: 12g
- Fat: 8g
- Sodium: 150mg
What’s Good: The apples provide fiber and vitamins. It’s a relatively small portion, so it’s easy to control calories. It’s a better option than a slice of pie from a restaurant.
What to Know: It contains sugar and butter, so it’s not a health food. It’s a treat. Enjoy it in moderation. If you’re watching sugar, reduce the granulated sugar to 2 tablespoons.
Final Thoughts
So that’s my go-to small-batch apple cinnamon hand pies! I’ve probably talked your ear off at this point, but when you make a recipe this often, you have a lot to say about it. These pies have saved my dessert game more times than I can count. They’re my answer to “I want something sweet but I don’t want to commit to a whole pie.” My kids are happy, my husband’s happy, and I’m happy because I’m not stressed about cooking.
Make it yours! Try different apples, add different spices, or experiment with the filling. The best recipes are the ones you adapt to your family’s tastes. And if you make these, drop a comment and let me know what you think! I love hearing how recipes turn out in your kitchen.
Happy baking! And I hope your kitchen smells half as good as mine does right now.
Frequently Asked Questions
Can I use frozen pie crust?
Yes, but you need to thaw it completely. Let it sit at room temperature until it’s pliable. If it’s still frozen, it will crack when you try to roll it out. Thawing in the fridge overnight is best, but if you’re in a rush, room temperature works if you watch it closely.
Why did my hand pies leak?
Usually, this means the edges weren’t sealed tightly enough, or you overfilled them. Make sure to leave a ½-inch border and press the edges firmly. Also, don’t overload the filling. 2-3 tablespoons is plenty. If you put too much, the steam has nowhere to go and bursts the seal.
Can I make these ahead of time?
Absolutely. You can assemble the raw pies and freeze them on a baking sheet for 1 hour, then transfer to a bag. Bake them straight from frozen, adding 5-7 minutes to the bake time. You can also bake them ahead and reheat them in the oven for 5-7 minutes.
What’s the best apple for hand pies?
I recommend a mix of Granny Smith and Honeycrisp. Granny Smith holds its shape and adds tartness, while Honeycrisp adds sweetness and a tender texture. Avoid Red Delicious or McIntosh, as they turn to mush.
Can I use apple pie filling from a can?
You can, but it’s much sweeter and softer than fresh apples. If you use canned filling, reduce the added sugar and add a bit more cornstarch to thicken it. Fresh apples give a better texture and flavor, but canned is a good shortcut.
How do I store leftovers?
Store in an airtight container at room temperature for up to 2 days. Do not refrigerate, as it will make the crust soggy. Reheat in the oven at 350°F for 5-7 minutes to crisp up the crust.
Pin This Recipe!


Small-Batch Apple Cinnamon Hand Pies: Easy Homemade Dessert
- Total Time: 55 minutes
- Yield: 16 servings 1x
Description
These small-batch apple cinnamon hand pies are a perfect, portable dessert that uses store-bought crusts for ease. They offer a flaky, buttery texture with a tender, spiced apple filling, making them ideal for quick baking and minimal cleanup.
Ingredients
- 3 medium apples (about 1.5 lbs / 680g), peeled, cored, and diced into ½-inch cubes (mix of Granny Smith and Honeycrisp recommended)
- 3 tablespoons granulated sugar
- 1 teaspoon ground cinnamon
- ¼ teaspoon ground ginger (optional)
- 1 tablespoon lemon juice
- 1 tablespoon butter, cubed
- 1 teaspoon cornstarch
- 1 package refrigerated pie crusts (2 crusts)
- 1 egg beaten with 1 tablespoon water or milk
- ½ teaspoon vanilla extract
- Coarse sugar (for sprinkling)
Instructions
- Preheat oven to 375°F (190°C) and line a baking sheet with parchment paper.
- In a large mixing bowl, toss diced apples with granulated sugar, cinnamon, ginger, lemon juice, cornstarch, and cubed butter. Mix well to coat and let sit for 10-15 minutes to draw out juices.
- Roll out refrigerated pie crusts on a lightly floured surface until about ⅛-inch thick. Cut out 8 circles from each crust (16 total) using a 4-5 inch round cutter or glass.
- Place a circle of dough on a plate or palm. Spoon 2-3 tablespoons of the apple mixture into the center, leaving a ½-inch border.
- Fold the dough over the filling to create a half-moon shape. Press edges firmly with fingers, then crimp with a fork to seal tightly.
- Cut 2-3 small slits in the top of each pie with a small knife to vent steam.
- Brush tops with egg wash mixed with vanilla extract and sprinkle generously with coarse sugar.
- Bake for 20-25 minutes until crust is deep golden brown and filling is bubbling. Tent with foil if edges brown too quickly.
- Cool on baking sheet for 5 minutes, then transfer to a wire rack to cool for another 10 minutes before serving.
Notes
Keep dough cold to ensure flaky crust. Do not overfill to prevent bursting. Let pies cool completely to allow filling to set. Can be frozen raw for up to 3 months. Store leftovers at room temperature for up to 2 days; do not refrigerate as it makes crust soggy.
- Prep Time: 30 minutes
- Cook Time: 25 minutes
- Category: Dessert
- Cuisine: American
Nutrition
- Serving Size: 1 hand pie
- Calories: 180
- Sugar: 12
- Sodium: 150
- Fat: 8
- Saturated Fat: 3
- Carbohydrates: 26
- Fiber: 2
- Protein: 2
Keywords: apple hand pies, small batch dessert, easy apple pie, homemade hand pies, fall dessert, portable dessert, apple cinnamon


