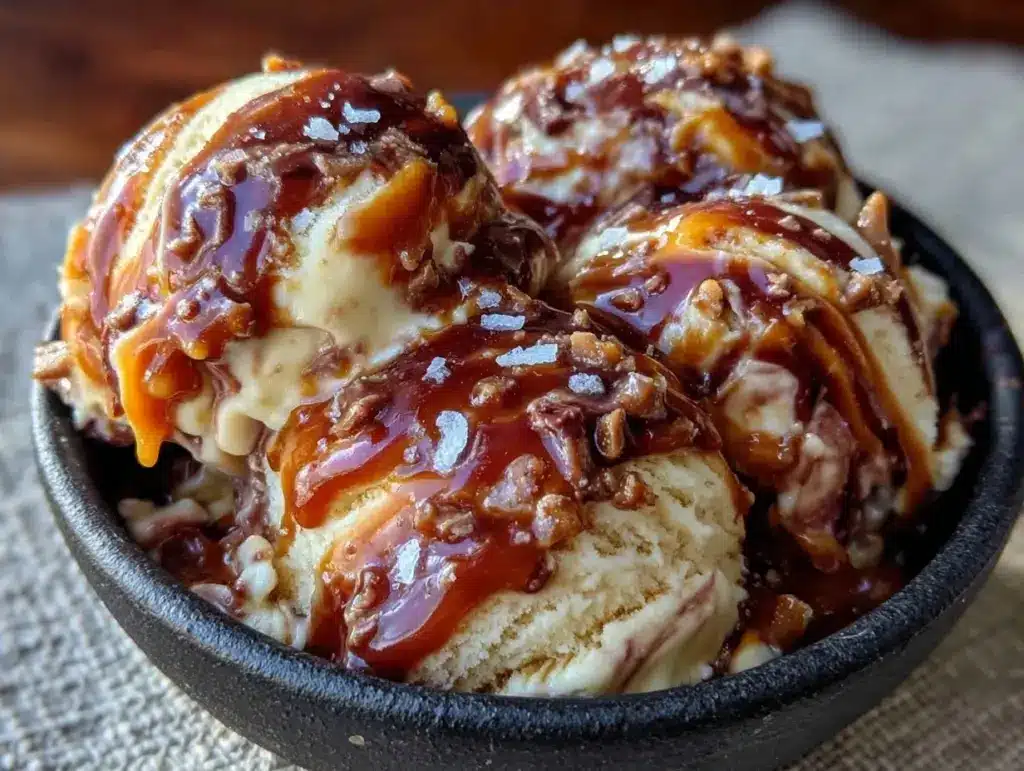
Last Tuesday, I was standing in my kitchen at 10 PM, staring into the open freezer door like it held the answers to life’s biggest mysteries. My kids were asleep. The house was finally quiet. And I had this sudden, overwhelming craving for something cold, sweet, and impossibly creamy. But here’s the problem: I didn’t want to wait six hours for ice cream to churn. I didn’t want to babysit a machine. I just wanted dessert, and I wanted it now.
So I did what any desperate home cook would do. I grabbed a can of sweetened condensed milk, a carton of heavy cream, and that jar of caramel sauce I’d been meaning to use for months. I whisked it all together, poured it into a loaf pan, and shoved it in the freezer. By 10:15 PM, I had a spoon in my hand and a piece of heaven on my tongue. It was rich, salty, sweet, and perfectly creamy. No ice crystals. No weird texture. Just pure, unadulterated joy.
That was the birth of my no-churn salted caramel ice cream. It’s become my secret weapon for those late-night cravings, my go-to dessert when I have guests over but zero energy, and honestly, my favorite way to celebrate the end of a long week. There’s something so satisfying about making a gourmet-style dessert with three ingredients and ten minutes of actual work. It’s the ultimate “make while it’s at its best” moment because you’re not waiting for a machine or a complex process—you’re just creating something delicious, right now.
I’ve tested this recipe probably fifty times over the last year. I’ve tried different brands of caramel sauce, experimented with sea salt vs. kosher salt, and even added a pinch of espresso powder (which sounds weird but tastes incredible). Each time, I’ve learned a little more about how to get that perfect, spoonable texture without an ice cream maker. And let me tell you, once you taste this, you’ll never buy store-bought ice cream again. Not even the fancy stuff from the grocery store freezer aisle.
Why You’ll Love This Recipe
Look, I know what you’re thinking. “Ice cream? In a loaf pan? Really?” Yes. Really. This no-churn salted caramel ice cream isn’t just a hack; it’s a legitimate, restaurant-quality dessert that happens to be easier to make than a batch of cookies. Here’s why it’s earned a permanent spot in my recipe rotation:
- Zero Equipment Needed — Seriously, if you have a mixing bowl and a whisk (or an electric mixer), you’re good to go. No ice cream machine, no special molds, no fancy gadgets gathering dust in your cupboard. I’ve made this in a basic Pyrex loaf pan and a plastic storage container. It works every time.
- Five Minutes of Active Time — You’re not standing over a stove stirring caramel for an hour. You’re opening cans, whisking cream, and pouring. That’s it. I can whip this up while my partner is still finishing dinner. It’s the perfect lazy-night indulgence.
- Texture That Actually Works — People assume no-churn ice cream is icy or grainy. It’s not. The secret is in the whipping and the fat content. When you do it right, this ice cream is velvety, smooth, and holds its shape beautifully. I’ve served this to friends who are “ice cream snobs,” and they couldn’t believe it wasn’t churned.
- Customizable to the Max — Love bourbon? Add a splash. Like chocolate? Swirl in some Nutella. Want it lighter? Use a lighter caramel. This recipe is a blank canvas for your sweet tooth. It’s like the lemon blueberry loaf of the dessert world—versatile, reliable, and always a crowd-pleaser.
- Perfect for Gifting — Wrap the loaf pan in foil and plastic wrap, tie a ribbon around it, and you have the best homemade gift ever. I’ve given this to neighbors, teachers, and coworkers, and it always gets better reviews than anything I’ve baked in the oven.
This is my answer to “what’s for dessert?” when I want something special but don’t want to spend my evening cooking. It’s indulgent without being complicated, and it tastes like you spent hours in the kitchen (even though you didn’t).
Ingredients You’ll Need
This is the beauty of no-churn ice cream: the ingredient list is shorter than most pancake recipes. But because there are only three main components, quality matters. You want the best you can afford, because you’ll taste every bit of it.
The Sweet Base
Sweetened Condensed Milk (1 can, 14 oz / 397g) — This is the backbone of your ice cream. It provides sweetness and, crucially, the lactose that prevents ice crystals from forming. I use Nestlé or Eagle Brand, but any good quality brand works. Do not use evaporated milk; they are completely different products. Condensed milk is thick and sugary; evaporated milk is just cooked down milk. Don’t mix them up.
Vanilla Extract (1 tablespoon) — Use pure vanilla extract, not imitation. I know imitation is cheaper, but in a recipe with no other strong flavors, you’ll taste the chemical aftertaste. A good vanilla bean paste is even better if you want those pretty speckles, but liquid extract works perfectly fine.
The Cream Factor
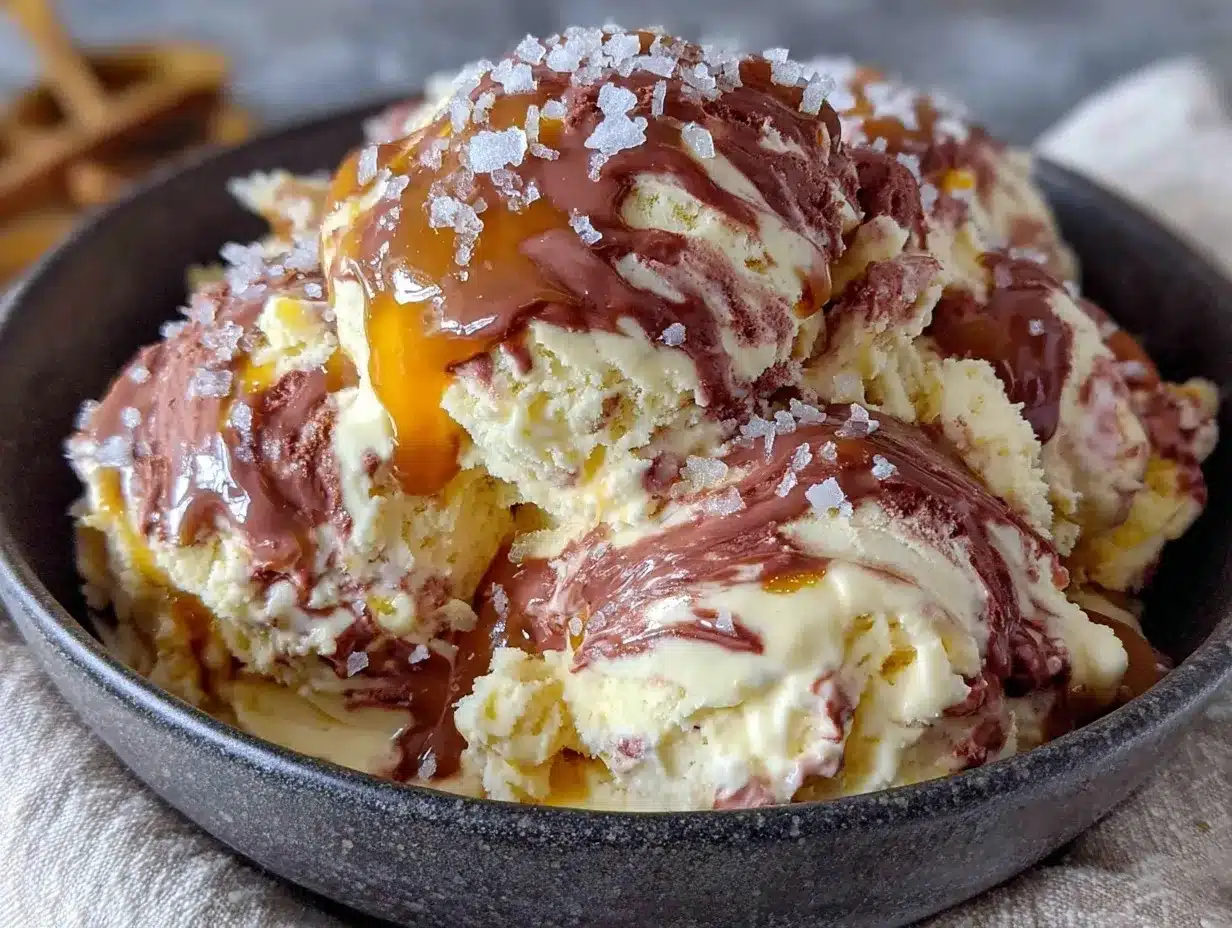
Heavy Whipping Cream (2 cups / 480ml) — This is non-negotiable. You need high fat content (at least 36%) to get that airy, fluffy texture. If you use half-and-half or light cream, your ice cream will be dense and icy. Cold heavy cream whips up faster and holds peaks better. Keep it in the fridge until the very last second before you start.
Salt (½ teaspoon fine sea salt) — This is what makes it “salted” caramel. I use Maldon or similar fine sea salt because it dissolves easily into the cream. If you only have kosher salt, you might need a tiny bit more, but start with half a teaspoon and adjust to taste. The salt cuts through the sweetness of the condensed milk and caramel, balancing everything out.
The Star: Caramel Sauce
Caramel Sauce (1 cup / 240ml) — Here’s where you can get creative. I usually use a high-quality jarred caramel sauce like Ghirardelli or Toffuti for convenience. But if you want to go gourmet, make your own. Homemade caramel sauce adds a depth of flavor that jarred stuff just can’t match. It’s worth the extra ten minutes if you have the time. Just make sure it’s cooled to room temperature before you add it, or it’ll melt the whipped cream.
Optional: Sea Salt Flakes — For the top layer. A sprinkle of flaky salt on top before freezing adds that professional finish and a nice crunch.
Equipment Needed
You don’t need fancy gear for this. Here’s what I actually use:
Large Mixing Bowl — Glass or metal works best. Avoid plastic if possible, as it can retain odors from previous cooking sessions. I use a 4-quart bowl because it gives the cream plenty of room to expand as it whips.
Electric Hand Mixer or Stand Mixer — You can whip cream by hand, but it takes about 15 minutes of arm workout. I use my hand mixer because it’s faster and gives more consistent results. If you’re strong and patient, a whisk works, but you’ll need to be diligent.
Spatula — A silicone spatula is essential for folding the ingredients together without deflating the whipped cream. I love my flexible spatulas because they scrape the bowl clean, which means no wasted cream.
Loaf Pan (9×5 inches) — This is the standard shape for no-churn ice cream. It fits in most freezers and makes for easy slicing. Line it with parchment paper or plastic wrap, leaving an overhang on the sides. This makes it super easy to lift the ice cream out later if you want to slice it neatly.
Whisk — For mixing the condensed milk, vanilla, and caramel sauce together before folding in the cream.
How to Make It: Step-by-Step
Alright, let’s make this! I’m walking you through exactly how I do it, including the little tricks I’ve picked up to ensure your ice cream is perfect every time.
Step 1: Prep Your Pan (2 minutes)
Line your 9×5 loaf pan with parchment paper or plastic wrap. I prefer parchment paper because it’s less sticky and creates a nicer surface for the ice cream. Leave a few inches of overhang on the long sides—this is your handle for lifting the ice cream out later. Set it aside in the freezer. Chilling the pan helps the ice cream set faster once you pour it in.
Step 2: Mix the Sweet Base (3 minutes)
In a medium bowl, combine the sweetened condensed milk, vanilla extract, and the ½ teaspoon of salt. Whisk them together until smooth. Now, stir in the 1 cup of caramel sauce. You want to swirl it in, not fully incorporate it yet. If you mix it too much, you’ll lose those beautiful caramel ribbons later. Just get it mostly blended. Taste it—if you want it saltier, add a pinch more salt now.
Step 3: Whip the Cream (5 minutes)
This is the most important step. Pour the cold heavy whipping cream into your large mixing bowl. Using an electric mixer on medium-high speed, whip the cream until it forms stiff peaks. This means when you lift the beaters, the cream stands up straight and doesn’t droop. It should look thick and glossy, like soft peaks but firmer. Be careful not to over-whip it into butter! If it starts to look grainy or separate, you’ve gone too far. Stop as soon as it holds its shape.
Step 4: Fold It Together (3 minutes)
Add one-third of the whipped cream to the caramel-condensed milk mixture. Gently fold it in with your spatula to lighten the dense mixture. Then, pour that mixture back into the bowl with the remaining whipped cream. Now, gently fold everything together. Use a gentle lifting motion from the bottom up, turning the bowl as you go. You want to keep as much air in the cream as possible. If you stir too vigorously, you’ll deflate the cream, and your ice cream will be dense. It should look uniform and fluffy. This is where the magic happens.
Step 5: Layer and Freeze (6 hours+)
Pour the mixture into your prepared loaf pan. Use the spatula to smooth the top. Now, for the fun part: take the remaining caramel sauce (if you have any extra) and drizzle it over the top. Use a knife or skewer to swirl it into the ice cream, creating those pretty marble patterns. Sprinkle with flaky sea salt if you’re using it. Cover the pan tightly with plastic wrap or a lid. Freeze for at least 6 hours, but ideally overnight. The longer it freezes, the firmer it gets.
Total Time: About 10 minutes active, plus 6+ hours freezing.
Expert Tips & Tricks
Here’s everything I’ve learned from making this dozens of times. These tips will save you from my mistakes.
Keep Everything Cold — Your cream must be ice cold. If your kitchen is warm, put your mixing bowl and beaters in the freezer for 15 minutes before whipping. Cold cream whips faster and holds more air. Warm cream = soup.
Don’t Skip the Stiff Peaks — I know it’s tempting to stop at soft peaks to save time, but you need stiff peaks for that light, airy texture. Soft peaks will result in dense, icy ice cream. Take the extra two minutes to get it right.
Fold, Don’t Stir — I cannot stress this enough. Folding is a gentle motion. Imagine you’re painting a wall, not scrambling eggs. You want to keep the air bubbles intact. If your ice cream turns out heavy, you likely over-mixed it.
Use High-Quality Caramel — If you’re using jarred caramel, pick a brand with a short ingredient list. Avoid ones with lots of corn syrup or artificial flavors. If you make your own, let it cool completely. Hot caramel will melt the whipped cream and ruin the texture.
Serving Tip — Ice cream straight from the freezer is hard. Let it sit on the counter for 5-10 minutes before scooping. It softens just enough to be spoonable but stays creamy.
Variations & Substitutions
Once you’ve nailed the basic version, here’s how you can mix it up. I’ve tried all of these, and they’re all delicious.
Bourbon Salted Caramel — Add 2 tablespoons of bourbon to the condensed milk mixture. The alcohol doesn’t freeze solid, so it keeps the ice cream soft and adds a warm, adult flavor. Perfect for autumn evenings.
Chocolate Swirl — Replace half the caramel sauce with chocolate hazelnut spread (Nutella). Swirl it in the same way. It’s like a gourmet version of a candy bar.
Coconut Salted Caramel — Use coconut cream instead of heavy cream for a dairy-free option (though you’ll need to adjust the sweetened condensed milk to a dairy-free version). Add a teaspoon of coconut extract. It’s tropical and rich.
Espresso Salted Caramel — Add 1 teaspoon of instant espresso powder to the condensed milk mixture. The coffee enhances the caramel flavor without making it taste like coffee. It’s a subtle, sophisticated twist.
Gluten-Free — This recipe is naturally gluten-free, but check your caramel sauce label. Some brands use thickeners that contain gluten. Most pure caramel sauces are safe.
Serving & Storage
How to Serve: I usually serve this straight from the loaf pan, slicing it with a hot knife for clean cuts. It’s rustic and beautiful. But here are other ways I’ve enjoyed it:
- On Top of Pie — I put a scoop of this on top of my fall honeycrisp apple crisp for the ultimate dessert combo. The warm fruit and cold ice cream are a match made in heaven.
- With Brownies — Serve alongside warm brownies. It’s like a sundae but better because you control the ingredients.
- As a Gift — Wrap the loaf pan beautifully and give it away. It’s the best homemade gift.
Storage Instructions: Store in an airtight container or covered loaf pan in the freezer for up to 2 weeks. It may harden after a few days, but let it sit on the counter for 10 minutes before serving. It will soften back up.
Reheating: No reheating needed, but if it’s too hard, let it sit out. Do not microwave it, or it will melt into soup.
Nutrition Information
I’m not a nutritionist, but here’s the breakdown if you’re tracking. Keep in mind, this is a rich dessert, so portion control is key.
Per Serving (based on 8 servings):
- Calories: 380
- Protein: 4g
- Carbs: 32g
- Fiber: 0g
- Sugar: 30g
- Fat: 26g
- Saturated Fat: 16g
- Cholesterol: 75mg
- Sodium: 120mg
What’s Good: High in calcium from the dairy. It’s a treat, so enjoy it mindfully.
What to Know: High in sugar and saturated fat. Use this as an occasional indulgence, not a daily snack.
Final Thoughts
So that’s my go-to no-churn salted caramel ice cream! I’ve probably talked your ear off at this point, but when you make a recipe this often, you have a lot to say about it.
This has saved dessert time more times than I can count. It’s my answer to “what’s for dessert?” when I’m tired, don’t want to bake, and still want something that tastes really good. My kids are happy, my husband’s happy, and I’m happy because I’m not stressed about cooking.
Make it yours! Try different add-ins, swap in your favorite flavors, adjust the salt. The best recipes are the ones you adapt to your family’s tastes. And remember, the key is to make while it’s at its best—when you have the energy to enjoy it, and when the ingredients are fresh and high quality.
If you make this, drop a comment and let me know what you think! I love hearing how recipes turn out in your kitchen. And if something doesn’t work, tell me that too—I’m here to help troubleshoot.
Happy cooking! And I hope your kitchen smells half as good as mine does right now.
Frequently Asked Questions
Q: Can I use light cream instead of heavy cream?
A: You can, but the texture will be different. Light cream doesn’t have enough fat to whip into stiff peaks, so your ice cream will be denser and icier. If you must use light cream, you’ll need to add a stabilizer like gelatin, but it’s not worth the hassle. Stick with heavy cream for the best results.
Q: Why did my ice cream turn out icy?
A: This usually happens if the cream wasn’t whipped to stiff peaks, or if the mixture wasn’t frozen quickly enough. Make sure your cream is very cold, whip it until it holds stiff peaks, and freeze the pan immediately. Also, ensure your freezer is at 0°F (-18°C) or lower.
Q: Can I make this ahead for a party?
A: Absolutely! You can make this up to 2 weeks ahead. Just keep it covered tightly to prevent freezer burn. Let it sit on the counter for 10 minutes before serving for the best texture.
Q: Can I use homemade caramel sauce?
A: Yes! Just make sure it’s cooled to room temperature before adding it. Hot caramel will melt the whipped cream and ruin the texture. Homemade caramel adds a deeper, richer flavor that’s worth the effort.
Q: How do I store leftovers?
A: Store in an airtight container or the original loaf pan, covered tightly with plastic wrap. It will keep for up to 2 weeks in the freezer. If it hardens, let it sit on the counter for 10 minutes before scooping.
Q: Can I double this recipe?
A: Yes, but you’ll need a larger bowl and a larger pan (like a 9×13 pan). The folding process is the same, just with more volume. Be careful not to overfill your bowl when whipping the cream.
Pin This Recipe!

No-Churn Salted Caramel Ice Cream
- Total Time: 6 hours 10 minutes
- Yield: 8 servings 1x
Description
A rich, creamy, and salty-sweet dessert made with just three main ingredients and no ice cream machine. This easy no-churn recipe yields a velvety texture perfect for late-night cravings or gifting.
Ingredients
- 1 can (14 oz / 397g) sweetened condensed milk
- 1 tablespoon pure vanilla extract
- 2 cups (480ml) heavy whipping cream, cold
- 1 cup (240ml) caramel sauce, cooled to room temperature
- 1/2 teaspoon fine sea salt
- Sea salt flakes (optional, for topping)
Instructions
- Line a 9×5 inch loaf pan with parchment paper or plastic wrap, leaving an overhang on the sides for easy removal. Place in the freezer to chill.
- In a medium bowl, whisk together the sweetened condensed milk, vanilla extract, and 1/2 teaspoon fine sea salt until smooth.
- Stir in the 1 cup of caramel sauce, swirling it in rather than fully incorporating it to create ribbons later.
- Pour the cold heavy whipping cream into a large mixing bowl. Using an electric mixer on medium-high speed, whip until stiff peaks form (about 5 minutes). Be careful not to over-whip into butter.
- Add one-third of the whipped cream to the caramel mixture and gently fold in with a spatula to lighten the mixture.
- Pour the caramel mixture back into the bowl with the remaining whipped cream. Gently fold everything together until uniform and fluffy, taking care not to deflate the cream.
- Pour the mixture into the prepared loaf pan and smooth the top.
- Drizzle with additional caramel sauce if desired and swirl with a knife to create a marble pattern. Sprinkle with flaky sea salt if using.
- Cover tightly with plastic wrap or a lid and freeze for at least 6 hours, or ideally overnight, until firm.
Notes
Keep all ingredients and equipment cold for best whipping results. Do not use light cream or half-and-half as they lack the fat content needed for stiff peaks. If using homemade caramel, ensure it is completely cooled to room temperature before adding to prevent melting the whipped cream. For serving, let the ice cream sit on the counter for 5-10 minutes to soften slightly.
- Prep Time: 10 minutes
- Cook Time: 0 minutes
- Category: Dessert
- Cuisine: American
Nutrition
- Serving Size: 1 slice (approx. 1/8
- Calories: 380
- Sugar: 30
- Sodium: 120
- Fat: 26
- Saturated Fat: 16
- Carbohydrates: 32
- Protein: 4
Keywords: no-churn ice cream, salted caramel ice cream, easy dessert, homemade ice cream, no ice cream maker, summer dessert, gifting ideas


