Last year, I was standing in the grocery store aisle at 9 PM on a Tuesday, holding a package of store-bought Halloween cookies, when I had a moment of pure panic. My kids had asked for a “spooky treat” for their class party the next day. I looked at the price tag on those little plastic-wrapped bags—$6.50 for twelve cookies—and I nearly cried. Not because they were expensive, but because I knew exactly what was in them: high-fructose corn syrup, artificial red dye #40, and enough preservatives to outlive us all.
I went home empty-handed, staring at my pantry like it owed me money. What did I have? Chocolate chips. Powdered sugar. Cream cheese. Red food coloring. And a whole lot of leftover graham crackers from a s’mores night that didn’t happen.
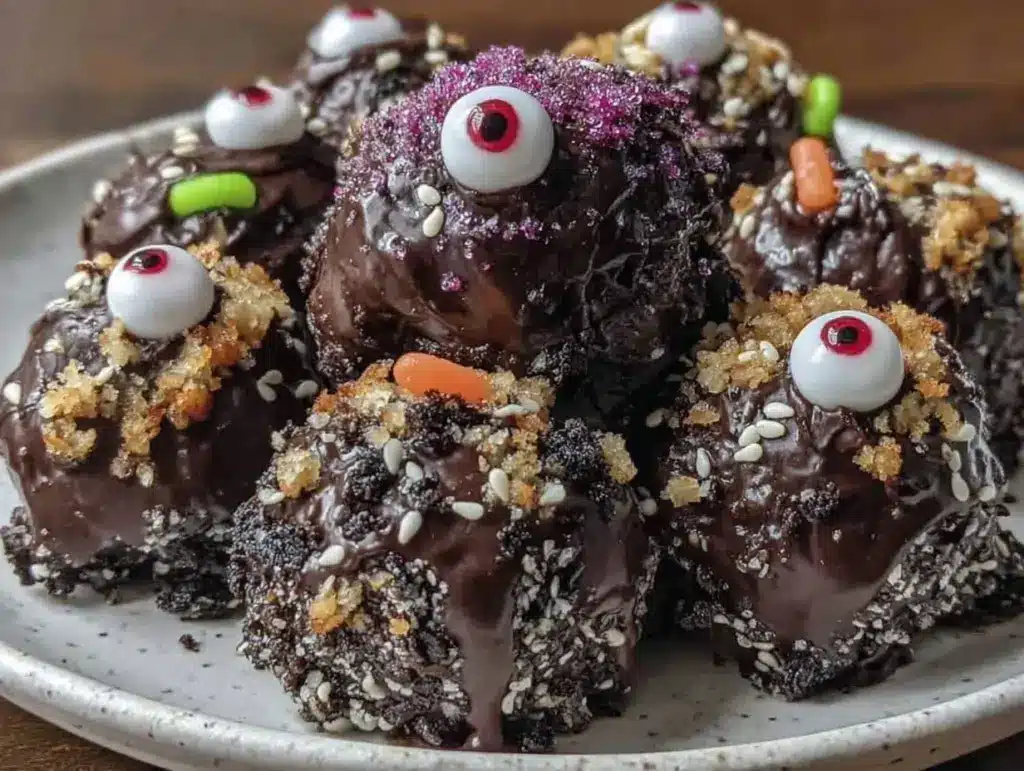
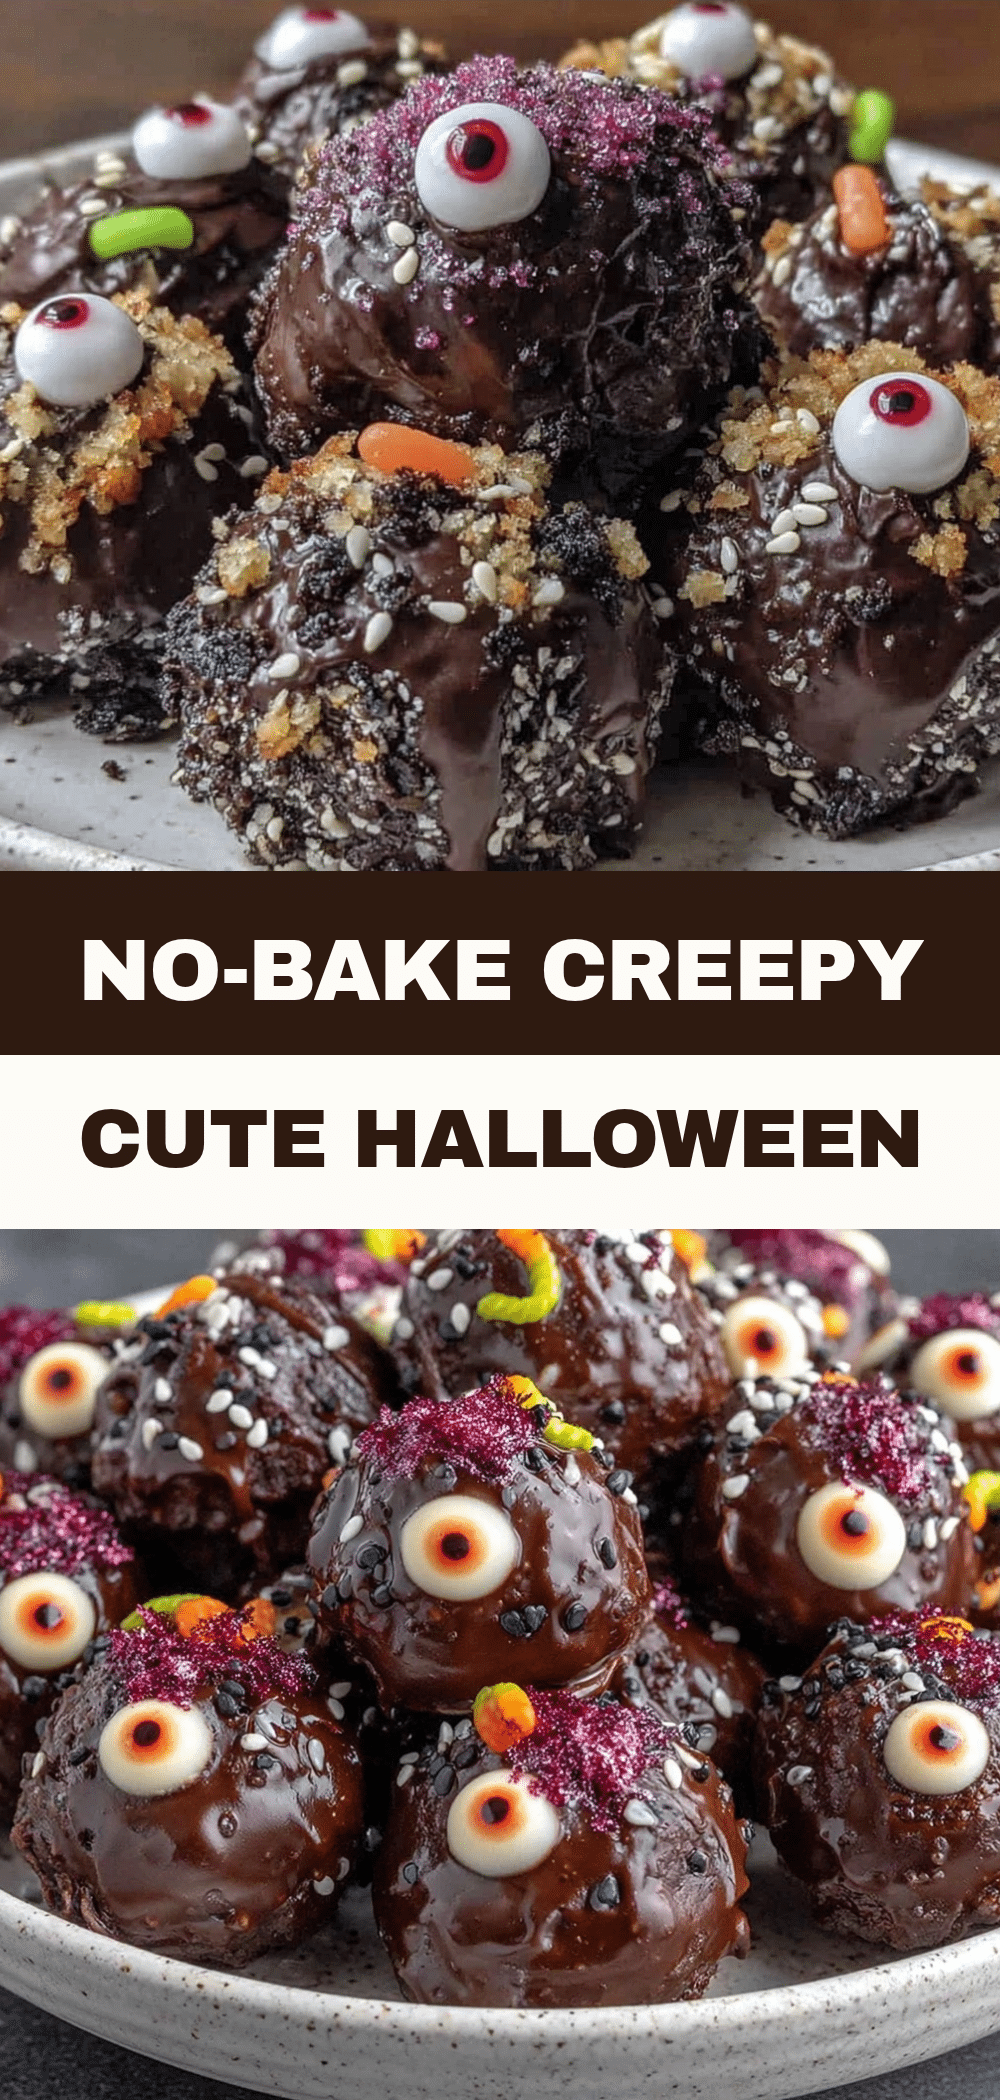
That night, I threw together a batch of Halloween Monster Eyeball Truffles. I called them “eyeballs” because, well, let’s be honest, kids love gross things. I rolled them in crushed white chocolate, made a little red dot in the center with gel food coloring, and watched my seven-year-old scream with delight. He ate three before I could even plate them.
Here’s the thing about these truffles: they cost about $8 to make a batch that feeds 20 people. That’s less than $0.50 per truffle. Compared to the $6.50 store-bought garbage, this is a win for your wallet and your kids’ teeth. I’ve made these for every Halloween party since, and they’re always the first thing to disappear. No fancy equipment needed, no trip to a specialty store. Just pantry staples and a little bit of spooky creativity.
Why You’ll Love These Monster Eyeball Truffles
Look, I get it. Halloween is expensive. Between costumes, candy corn, and decorations, the budget gets tight fast. I need desserts that look impressive enough to scare the neighbors but are cheap enough to make without checking my bank account.
Here’s why this Halloween Monster Eyeball Truffles recipe has earned a permanent spot in my fall rotation:
- Pantry Staples Only — Seriously, you probably have 90% of this in your kitchen right now. Chocolate, cream cheese, powdered sugar, and graham crackers. If you have those, you have dinner and dessert covered.
- Stupid Simple — If you can mash a banana, you can make this. No baking required. No oven, no stove, no mess. Just mix, chill, roll, and decorate. I’ve made these while helping my kids with homework.
- Kid-Approved Goo — These are rich, creamy, and sweet. My picky eater who usually turns his nose up at “fancy” desserts asks for these by name. The “eyeball” presentation makes them feel like a treat, not a vegetable.
- Budget-Friendly — As I mentioned, this costs pennies per serving. I can make a double batch for under $15 and have enough for the school party, the office, and still have leftovers for breakfast (don’t judge me).
- Make-Ahead Friendly — These actually taste better after sitting in the fridge for a day. The flavors meld, and they hold their shape perfectly. I make them three days in advance and keep them in an airtight container.
This is my go-to when I need a dessert that screams “Halloween” but whispers “I’m a busy parent on a budget.” No stress, no fancy ingredients, just reliable, delicious food that makes everyone happy.
Ingredients You’ll Need
Here’s the best part: you probably have most of this already. I’m not asking you to buy anything exotic. Just grab the basics.
- Cream Cheese (8 ounces / 225g) — Full-fat is non-negotiable here. It provides the structure and the rich texture. I use the block kind, not the spreadable tub stuff. The tub stuff has too much air and water, and your truffles will be too soft.
- Granulated Sugar (½ cup / 100g) — This cuts the richness of the cream cheese. Don’t skip it, even if you’re trying to be low-sugar. It helps with the texture too.
- Vanilla Extract (1 teaspoon) — Just a splash to round out the flavor. Pure vanilla is best, but imitation works in a pinch for baking.
- Graham Crackers (1 sleeve / about 30 crackers) — These form the “white sclera” of the eyeball. I use the standard honey graham crackers. If you’re making these for a diabetic-friendly option, you can use crushed almond flour or keto-friendly crackers, but the texture will be slightly different.
- White Chocolate Chips (1 cup / 170g) — I use standard white chocolate chips, not the premium baking chips. Why? Because they’re cheaper and they melt easier for the coating. For the “veins,” I use red gel food coloring.
- Red Gel Food Coloring (1 tube) — Gel coloring is crucial here. Liquid food coloring will make the chocolate seize and become grainy. Gel keeps the texture smooth and the color vibrant. I keep a tube of red gel just for Halloween.
- Crushed White Chocolate or White Candy Melts (for rolling) — Optional, but it gives that nice “cracked” look. You can also use crushed vanilla wafers or just plain white chocolate chips melted and drizzled.
Pro Tip: I always buy the store-brand cream cheese and chocolate chips. There is zero difference in taste for this recipe, and I save about $3 every time. My kids can’t tell the difference between Ghirardelli and the generic brand when it’s melted into a truffle.
Equipment Needed
You don’t need fancy equipment for this. Here’s what I actually use.
- Mixing Bowl — A medium-sized bowl is fine. Glass or plastic works best because it’s easy to scrape clean.
- Hand Mixer or Fork — I use a hand mixer for the cream cheese and sugar to get it smooth. If you’re lazy, a fork works, but it takes more elbow grease.
- Measuring Cups and Spoons — Standard stuff. Dollar store versions work fine.
- Baking Sheet — Line it with parchment paper. This is crucial for easy cleanup and preventing sticking.
- Small Microwave-Safe Bowl — For melting the white chocolate. If you don’t have a microwave, use a double boiler on the stove.
- Toothpicks — For adding the red “veins” and dots. Essential for the eyeball look.
- Ziploc Bags — For storing the finished truffles. I usually freeze them in bags so they don’t stick together.
Tool Tip: Don’t have a hand mixer? No problem. Just let the cream cheese sit out at room temperature for 30 minutes before mixing. It’ll be soft enough to mash with a fork. I learned this the hard way when my mixer died mid-Halloween prep.
How to Make It: Step-by-Step

Alright, let’s make this! I’m walking you through exactly how I do it, including the little tricks I’ve picked up.
Step 1: Prep Your Cream Cheese (5 minutes)
Take your cream cheese out of the fridge. Let it sit at room temperature for at least 30 minutes. This is the most important step. If the cream cheese is cold, it won’t mix smoothly with the sugar, and you’ll end up with lumpy truffles. I usually take it out when I start dinner prep so it’s ready by dessert time.
Step 2: Mix the Base (5 minutes)
In your mixing bowl, combine the softened cream cheese, granulated sugar, and vanilla extract. Mix until smooth and creamy. If using a hand mixer, beat on medium speed for 2-3 minutes. If using a fork, mix vigorously until no sugar grains remain. The mixture should look like thick frosting. Taste it—it should be sweet but not overwhelmingly so, as the graham crackers will add more sweetness.
Step 3: Prepare the Graham Cracker Crumbs (5 minutes)
Place your graham crackers in a Ziploc bag. Use a rolling pin or a heavy pan to crush them into fine crumbs. You want them to be almost like sand, not big chunks. This ensures the truffles hold together and have a smooth texture. If you have a food processor, pulse them for 10 seconds. I usually just crush them by hand because it’s quieter and doesn’t wake up the baby.
Step 4: Combine and Chill (15 minutes active, 1 hour chilling)
Gradually stir the graham cracker crumbs into the cream cheese mixture. Mix until fully combined. The dough should be thick and hold together when pressed. If it’s too dry, add a teaspoon of milk. If it’s too sticky, add a little more crumbs.
Now, the chill. Scoop out small portions (about 1 teaspoon each) and roll them into balls. Place them on a parchment-lined baking sheet. Put the tray in the freezer for 30 minutes, or the fridge for 1 hour. This firms them up so they don’t fall apart when you coat them. I usually freeze them because it’s faster.
Step 5: Melt the White Chocolate (5 minutes)
Melt your white chocolate chips in a microwave-safe bowl. Heat in 30-second intervals, stirring between each. Stop when there are still a few unmelted chips—stir them in, and the residual heat will melt them. Do not overheat, or the chocolate will seize and become grainy. If it gets too thick, add a teaspoon of vegetable oil to thin it out.
Step 6: Coat and Decorate (10 minutes)
Take a chilled truffle ball and dip it into the melted white chocolate. Use a fork to cover it completely, then lift it out and tap off the excess chocolate. Place it back on the parchment paper. Repeat with all truffles.
While the chocolate is still wet, use a toothpick to dip into red gel food coloring (mixed with a tiny bit of the melted white chocolate to make it paintable) and draw veins and a pupil on the truffle. Don’t overdo it—just a few lines and a dot. The more abstract, the scarier it looks.
Step 7: Set and Serve
Let the truffles sit at room temperature for 10 minutes to set, or put them in the fridge for 15 minutes. Once set, store them in an airtight container. They’re ready to eat immediately!
Total Time: About 1 hour 30 minutes (mostly chilling time).
Expert Tips & Tricks
Here’s everything I’ve learned from making this dozens of times. These tips will save you from my mistakes.
The Cream Cheese Rule
Room temperature cream cheese is non-negotiable. I’ve tried rushing it in the microwave, and it ends up curdled. Just plan ahead. If you forget, cut the block into small cubes and let them sit for 15 minutes. It works almost as well.
Graham Cracker Texture
Don’t use big chunks of graham cracker. Fine crumbs are key for a smooth truffle. If you like a bit of crunch, you can reserve 2 tablespoons of slightly larger crumbs to sprinkle on top after decorating. My kids love the extra texture.
Food Coloring Safety
Use gel food coloring. Liquid coloring adds too much water, which can cause the chocolate to seize. If you don’t have gel, mix a tiny drop of liquid coloring with a teaspoon of vegetable oil to thin it out before adding to the chocolate.
Double Batch Strategy
I always make two batches. One for the immediate party, and one to freeze. These freeze beautifully for up to 3 months. I keep a bag in the freezer for last-minute guests or when I need a quick dessert. Just thaw in the fridge overnight before serving.
Common Mistakes
Truffles falling apart: Your cream cheese was too cold, or you didn’t chill them long enough before dipping. Make sure they’re firm.
Chocolate too thick: You overheated it. Add a teaspoon of oil or shortening to thin it out.
Too sweet: Add a pinch of salt to the cream cheese mixture. It balances the sweetness perfectly.
Variations & Substitutions
Once you’ve nailed the basic version, here’s how you can mix it up. I’ve tried all of these.
Chocolate Chip Monster
Stir ½ cup of mini chocolate chips into the cream cheese mixture before rolling. Adds a fun surprise inside. This is my favorite version for my husband, who loves chocolate.
Cookie Dough Eyeballs
Replace half the graham cracker crumbs with edible cookie dough. It’s richer and more like a dessert bar. I make this when I want something extra indulgent.
Keto-Friendly
Use almond flour instead of graham crackers, and sugar-free white chocolate chips. I’ve tested this with my keto friend, and she loved it. Just note the texture is slightly denser.
Vegan Version
Use vegan cream cheese (like Kite Hill) and vegan white chocolate chips. The taste is surprisingly close to the original. My vegan neighbor requested this version for her kid’s party.
Gluten-Free
Use gluten-free graham crackers or crushed gluten-free cookies. Everything else is naturally gluten-free. I’ve used Gluten Free Watchers crackers, and they work great.
Serving & Storage
I usually serve these straight from the fridge on a platter with a few fake spiderwebs for effect. But here are other ways I’ve enjoyed them:
Serving Suggestions
- Spooky Platter: Arrange them on a black plate with orange and purple sprinkles around the edges.
- Party Cups: Put one in a mini cupcake liner for individual servings. Easy for kids to grab.
- Drink Garnish: Skewer one onto a cocktail stick and float it in a punch bowl. (Adults only, please.)
Storage Instructions
- Refrigerator: Store in an airtight container for up to 5 days. They get firmer in the fridge, which I like.
- Freezer: Freeze in a single layer on a baking sheet, then transfer to a freezer bag. They last up to 3 months. Thaw in the fridge overnight.
- Do Not Freeze in Chocolate: If you freeze them before dipping in chocolate, the coating might crack when thawed. I recommend freezing the plain truffle balls, then dipping them fresh before serving.
Pro Tip: If leftovers are drying out, stir in a teaspoon of cream cheese when reheating. Brings back that creamy texture.
Nutrition Information
I’m not a nutritionist, but here’s the breakdown if you’re tracking. Keep in mind, these are rich, so portion control is key.
Per Truffle (based on 24 truffles):
- Calories: 85
- Protein: 1g
- Carbs: 10g
- Fat: 5g
- Sugar: 7g
Look, these are a treat. They’re not a health food. But they’re way better than store-bought candy, and you know exactly what’s in them. When I want to make them lighter, I use the keto version or reduce the sugar by half. But usually? I just eat one and enjoy it.
Final Thoughts
So that’s my Halloween Monster Eyeball Truffles! I’ve probably talked your ear off at this point, but when you make a recipe this often, you have a lot to say about it.
This has saved Halloween parties more times than I can count. It’s my answer to “what’s for dessert” when I’m tired, don’t want to bake, and still want something that looks impressive. My kids are happy, my wallet is happy, and I’m happy because I’m not stressed about cooking.
Make it yours! Try different food coloring, add sprinkles, or swap the graham crackers for Oreos. The best recipes are the ones you adapt to your family’s tastes.
If you make this, drop a comment and let me know what you think! I love hearing how recipes turn out in your kitchen. And if something doesn’t work, tell me that too—I’m here to help troubleshoot.
Happy cooking! And I hope your kitchen smells half as good as mine does right now.
Frequently Asked Questions
Can I use liquid food coloring?
You can, but it’s risky. Liquid coloring adds water, which can cause the white chocolate to seize and become grainy. If you must use it, mix a tiny drop with a teaspoon of vegetable oil to thin it out before adding to the chocolate. Gel coloring is always safer and gives a more vibrant color.
Why did my truffles fall apart?
Usually, this means the cream cheese was too cold, or you didn’t chill them long enough before dipping. Make sure the cream cheese is completely softened, and chill the truffle balls in the freezer for at least 30 minutes before dipping. Also, check that your graham cracker crumbs are fine, not chunky.
Can I make these ahead for a party?
Absolutely. In fact, they taste better after sitting in the fridge for a day. I make them three days in advance and keep them in an airtight container. Just take them out 15 minutes before serving to let them soften slightly.
Why did my chocolate get grainy?
The heat was too high when you melted it, or water got into the bowl. White chocolate is sensitive. Melt it slowly in short intervals, and make sure your bowl is completely dry. If it’s already grainy, you can sometimes save it by adding a teaspoon of warm cream and whisking vigorously.
Can I use dark chocolate instead of white?
You can, but it won’t look like an eyeball. If you want a dark “bruised” look, you can melt dark chocolate and mix it with a tiny bit of white chocolate to make a grayish tone. But for the classic eyeball look, white chocolate is best.
How do I store leftovers?
Store in an airtight container in the fridge for up to 5 days. They can also be frozen for up to 3 months. Just thaw in the fridge overnight before serving.
Can I double this recipe?
Yes! Double everything and use a larger mixing bowl. The cooking times stay the same. I do this when I’m feeding a crowd or meal-prepping for the week. Just make sure you have enough parchment paper for the baking sheet.
Pin This Recipe!
Halloween Monster Eyeball Truffles: Budget-Friendly Spooky Party Treat
- Total Time: 1 hour 30 minutes
- Yield: 24 servings 1x
Description
These no-bake Halloween Monster Eyeball Truffles are a budget-friendly, kid-approved dessert made with pantry staples like cream cheese, graham crackers, and white chocolate. They require no oven or stove, making them perfect for busy parents looking for a spooky yet simple treat.
Ingredients
- 8 ounces (225g) full-fat cream cheese, softened to room temperature
- ½ cup (100g) granulated sugar
- 1 teaspoon vanilla extract
- 1 sleeve (about 30 crackers) honey graham crackers, crushed into fine crumbs
- 1 cup (170g) white chocolate chips
- 1 tube red gel food coloring
- Crushed white chocolate or white candy melts (for rolling/coating, optional)
Instructions
- Let the cream cheese sit at room temperature for at least 30 minutes to ensure it is soft.
- In a mixing bowl, combine the softened cream cheese, granulated sugar, and vanilla extract. Mix until smooth and creamy, resembling thick frosting.
- Place graham crackers in a Ziploc bag and crush them into fine crumbs using a rolling pin or heavy pan.
- Gradually stir the graham cracker crumbs into the cream cheese mixture until fully combined. The dough should be thick and hold together.
- Scoop out small portions (about 1 teaspoon each) and roll them into balls. Place them on a parchment-lined baking sheet.
- Freeze the truffle balls for 30 minutes or refrigerate for 1 hour to firm them up.
- Melt the white chocolate chips in a microwave-safe bowl in 30-second intervals, stirring between each, until mostly melted. Stir in residual heat to melt remaining chips. If too thick, add a teaspoon of vegetable oil.
- Dip a chilled truffle ball into the melted white chocolate, covering it completely. Lift out and tap off excess chocolate.
- Place the coated truffle back on the parchment paper. While the chocolate is wet, use a toothpick dipped in red gel food coloring (mixed with a tiny bit of melted white chocolate) to draw veins and a pupil.
- Let the truffles set at room temperature for 10 minutes or in the fridge for 15 minutes before serving.
Notes
Ensure cream cheese is fully softened to avoid lumps. Use gel food coloring instead of liquid to prevent the chocolate from seizing. For best results, chill truffles thoroughly before dipping. These can be frozen for up to 3 months if frozen before coating.
- Prep Time: 30 minutes
- Cook Time: 0 minutes
- Category: Dessert
- Cuisine: American
Nutrition
- Serving Size: 1 truffle
- Calories: 85
- Sugar: 7
- Sodium: 35
- Fat: 5
- Saturated Fat: 3
- Carbohydrates: 10
- Protein: 1
Keywords: Halloween, truffles, no-bake, budget-friendly, kid-friendly, spooky treats, cream cheese truffles, white chocolate


