Last Tuesday, I was staring into my oven like it owed me money. I had promised my book club I’d bring dessert. A real dessert. Not those sad store-bought cookies that taste like cardboard and regret. I had zero time to bake from scratch because I had just walked in the door, my feet hurt, and my brain was completely fried. I didn’t want to wait an hour for brownies to cool. I didn’t want to wrestle with a cake batter that refuses to stay in the pan. I just wanted something sweet, salty, and chocolatey that I could make in the time it takes to boil water.
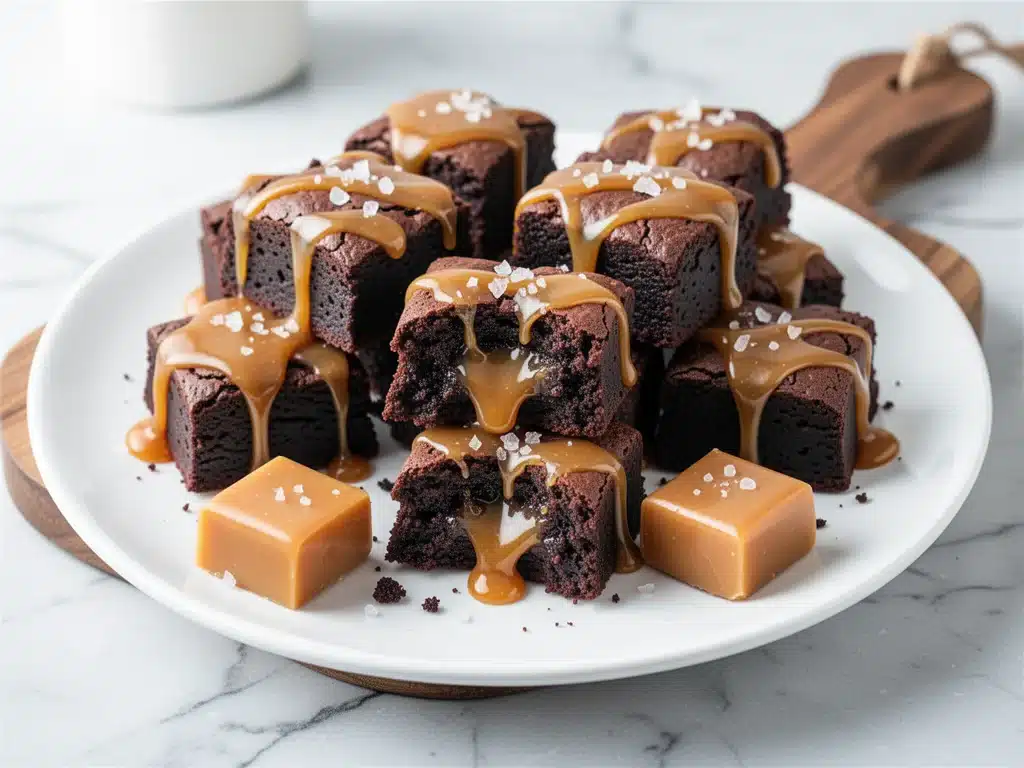
So, I threw together a few ingredients I had lying around: melted chocolate, butter, sugar, eggs, and a jar of caramel sauce I’d been hoarding for “special occasions.” I didn’t measure anything. I just mixed it in a bowl, dropped spoonfuls onto a tray, and shoved them in the oven. Ten minutes later, I pulled out these little chocolate gems. They were gooey in the middle, crisp on the edges, and swirled with sticky, salty caramel. My husband took one bite, stopped mid-chew, and said, “What is in these? They’re dangerous.” He ate three. Then he asked for more.
That night, I realized I had stumbled onto something special. These Fudgy Salted Caramel Brownie Bites are not just a quick fix for last-minute cravings—they are a legitimate dessert that rivals anything you’d buy at a high-end bakery. The texture is insane. The first bite is that deep, rich chocolate flavor, followed immediately by the warm, buttery pull of the caramel, finished with a crunch of sea salt that makes your taste buds dance.
I’ve made these at least fifteen times since that Tuesday. I’ve tweaked the ratio of chocolate to caramel. I’ve tried different types of salt. I’ve tested them with dark chocolate, milk chocolate, and even white chocolate chips (don’t judge me). And every single time, the result is the same: empty plate, satisfied friends, and me wondering how I ever lived without this recipe. If you’re looking for a dessert that feels fancy but takes less time than ordering takeout, this is it. These brownie bites are the kind of thing you’ll make on repeat, just like my husband does every weekend.
Why You’ll Love These Brownie Bites
Look, I know there are a million brownie recipes out there. Why this one? Why these bites? Here’s the thing: most brownie recipes require you to wait for them to cool, cut them into squares, and then deal with the mess of crumbs everywhere. These brownie bites are different. They’re portable, they’re intense, and they’re incredibly forgiving. Here’s why they’ve taken over my kitchen:
- Stupid Simple — Seriously, if you can melt chocolate and stir, you can make these. There’s no creaming butter and sugar. No folding in flour with delicate touches. Just dump, mix, drop, bake. I’ve made these while on the phone with my mom. It’s that easy.
- Lightning Fast — From start to finish, it’s about 25 minutes. But the active time? Maybe 10 minutes. The rest is just the oven doing the work. I make these when I need a sugar fix at 8 PM and don’t want to feel guilty about taking an hour out of my night.
- Texture Heaven — The secret is the caramel swirl. It creates pockets of gooey goodness in every bite. The edges get slightly crisp, the center stays fudgy, and the salt adds that savory kick that keeps you eating. It’s a flavor and texture combo that’s hard to beat.
- Portion Controlled (Sort Of) — Because they’re small bites, it’s easier to have just one or two. Unless you’re me, in which case I eat them straight from the pan. But hey, they’re smaller than a whole brownie, so it feels slightly less like a dessert crisis.
- Crowd-Pleaser — I’ve served these to picky eaters, chocolate snobs, and people who claim they “don’t have much of a sweet tooth.” Everyone loves them. The salt caramel flavor is universally appealing. It’s the dessert equivalent of a warm hug.
This is my go-to when I need to impress without stressing. No fancy equipment, no weird ingredients you can’t find at a regular grocery store, just reliable, delicious chocolate magic that makes everyone happy.
Ingredients You’ll Need
Here’s the best part: you probably have most of this already. I’m particular about a few things here, and I’ll tell you exactly why, but this list is short enough that you won’t need a special trip to the store.
For the Fudgy Base
Dark chocolate chips (1 cup / 170g) — I use semi-sweet or bittersweet chocolate chips. They melt evenly and give that deep chocolate flavor. Avoid the baking bar unless you really know how to temper it; chips are easier and more forgiving for this recipe. I always keep a bag of Ghirardelli or Ghirardelli-style chips in my pantry.
Unsalted butter (½ cup / 115g) — This adds richness and helps create that fudgy texture. Use real butter, not margarine. If your butter is cold, chop it up to help it melt faster in the microwave.
Granulated sugar (½ cup / 100g) — This provides the sweetness and helps create the crisp edges. Don’t reduce this too much, or you’ll lose that texture. Brown sugar can be used for a chewier bite, but white sugar gives the classic crisp edge I love.
Large eggs (2) — Room temperature eggs mix better into the chocolate. If you forgot to take them out, just run them under warm water for a minute. They bind everything together and give the brownies structure.
All-purpose flour (⅓ cup / 40g) — Just enough to hold it together. We’re not making a cake here; we want dense and fudgy. Don’t over-measure, or they’ll be dry. Scoop and level, don’t pack.
Cocoa powder (2 tablespoons / 10g) — This boosts the chocolate flavor. Use unsweetened cocoa powder, not hot chocolate mix. Dutch-process cocoa gives a deeper color and flavor, but regular works fine too.
For the Caramel Swirl
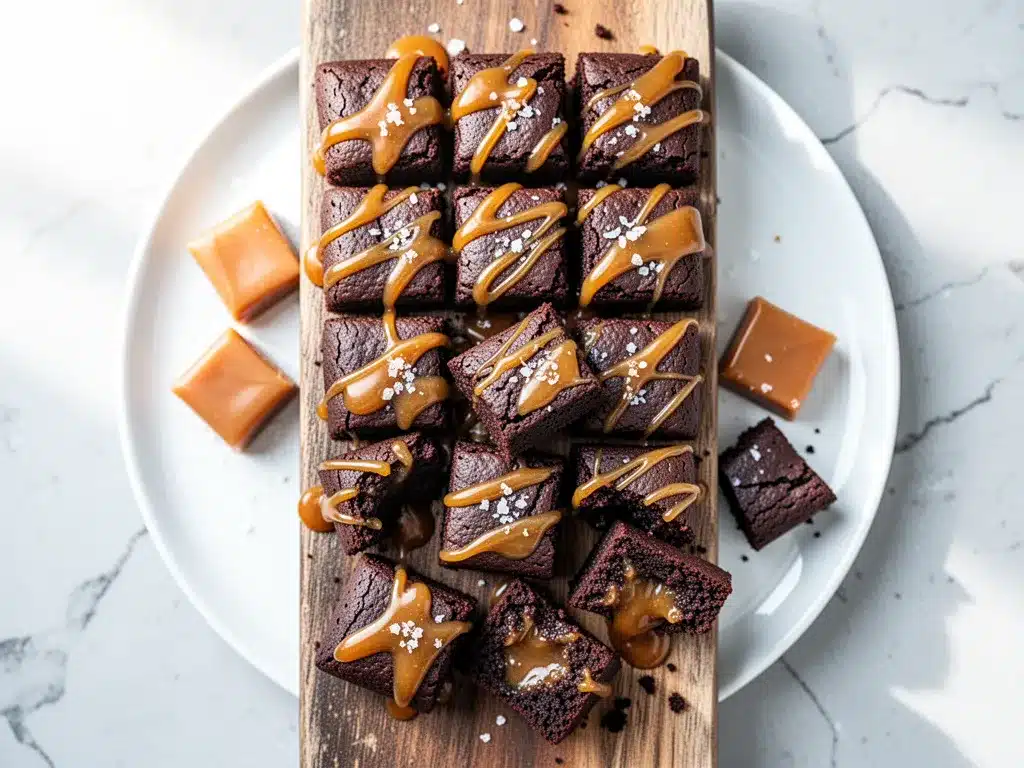
Caramel sauce (½ cup / 120ml) — I use store-bought caramel sauce because it’s convenient and consistent. Look for a thick, creamy sauce, not the thin drizzle stuff. Brands like Smucker’s or Ghirardelli work well. You can make your own, but that’s a whole other project.
Sea salt flakes (1 teaspoon) — This is non-negotiable. The salt cuts through the sweetness and enhances the chocolate flavor. Maldon sea salt is my favorite because the flakes are pretty and dissolve slowly. Regular table salt works, but it’s more intense and can get salty fast.
Optional Add-ins
Vanilla extract (1 teaspoon) — Adds depth. I always add this, even though it’s optional. It makes the chocolate taste more complex.
Chocolate chips (¼ cup / 40g) — For extra gooeyness. I like to mix these into the batter before baking. If you’re a chocolate monster, add more.
Walnuts or pecans (¼ cup / 30g) — If you like crunch, chop up some nuts and fold them in. I skip them usually, but my brother loves them. It’s personal preference.
Equipment Needed
You don’t need fancy equipment for this. Here’s what I actually use.
Microwave-safe bowl — For melting the chocolate and butter. I use a large glass bowl because it doesn’t get too hot to touch. You can also use a double boiler on the stove, but the microwave is faster.
Mixing bowls — One medium bowl for the wet ingredients, one small bowl for the dry. I like to have everything ready before I start mixing.
Silicone spatula — Essential for scraping the bowl clean. You want every bit of that chocolate mixture. A rubber spatula works too, but silicone is easier to clean.
Baking sheet — A standard 13×9 inch or half-sheet pan. Line it with parchment paper for easy cleanup. Or use a silicone baking mat if you have one.
Parchment paper — I never skip this. It makes lifting the brownies out of the pan so much easier. Just grease the pan lightly if you’re not using parchment.
Tiny spoon or piping bag — For dropping the batter and swirling the caramel. I use a teaspoon for the batter and a small spoon for the caramel. A piping bag gives more control, but it’s not necessary.
Measuring cups and spoons — Pretty standard stuff. I use metal measuring spoons because they’re durable. Plastic ones warp over time.
How to Make It: Step-by-Step
Alright, let’s make this! I’m walking you through exactly how I do it, including the little tricks I’ve picked up.
Step 1: Prep Your Oven and Pan (2 minutes)
Preheat your oven to 350°F (175°C). Line your baking sheet with parchment paper. I leave a little overhang on the sides so I can lift the brownies out later if I want to cut them into squares. Or just leave them in the pan—they’re easier to eat that way. Set your caramel sauce out so it’s at room temperature.
Step 2: Melt the Chocolate and Butter (2-3 minutes)
Combine the chocolate chips and butter in a microwave-safe bowl. Microwave in 30-second intervals, stirring well between each interval. Don’t let it get too hot, or the chocolate will seize. You want it smooth and glossy. If you’re using a double boiler, melt over low heat, stirring constantly. This should take about 2-3 minutes total.
Step 3: Mix the Wet Ingredients (2 minutes)
Once the chocolate is melted, stir in the sugar and eggs. Whisk vigorously until the mixture is smooth and slightly thickened. This incorporates air and helps create that fudgy texture. Add the vanilla extract and mix again. The mixture should look shiny and rich.
Step 4: Add the Dry Ingredients (1 minute)
Sift in the flour and cocoa powder. Gently fold them in with your spatula. Don’t overmix! You just want to incorporate the flour. Overmixing develops gluten, which makes the brownies cakey instead of fudgy. Stop as soon as you don’t see any streaks of flour. If you’re adding nuts or extra chocolate chips, fold them in now.
Step 5: Drop the Batter (3 minutes)
Using a tablespoon or cookie scoop, drop mounds of batter onto the prepared baking sheet. Space them about 2 inches apart. They’ll spread a little, but not too much. You want them to stay as distinct bites. If you’re making a lot, do two batches. Don’t overcrowd the pan.
Step 6: Add the Caramel Swirl (2 minutes)
This is the fun part. Take a small spoon or a piping bag and dollop a tiny amount of caramel sauce on top of each brownie bite. Use the tip of a knife or a toothpick to swirl the caramel into the batter. Don’t mix it completely—you want visible ribbons of caramel. Be gentle; you don’t want to break the batter.
Step 7: Bake (10-12 minutes)
Place the baking sheet in the oven and bake for 10-12 minutes. You want the edges to be set and slightly crisp, but the centers to still be soft. If you insert a toothpick, it should come out with a few moist crumbs, not wet batter. Overbaking is the enemy here. These brownies continue to cook a bit after you take them out, so err on the side of underbaking.
Step 8: Cool and Serve (5 minutes)
Let the brownies cool on the pan for 5 minutes. They’ll firm up a bit. Sprinkle with sea salt flakes immediately after taking them out of the oven, so the salt sticks to the warm surface. Serve warm or at room temperature. They’re best eaten the day they’re made, but they’ll keep for a couple of days.
Expert Tips & Tricks
Here’s everything I’ve learned from making this dozens of times. These tips will save you from my mistakes.
Don’t Overbake — This is the #1 mistake. These brownie bites should be gooey in the middle. If you bake them until they’re firm, they’ll be dry. Pull them out when the edges are set but the centers jiggle slightly. They’ll firm up as they cool.
Use Good Chocolate — Since chocolate is the main ingredient, use the best you can afford. Cheap chocolate chips have more wax and don’t melt as smoothly. Look for chips with a high cocoa butter content.
Room Temperature Eggs — Cold eggs can cause the melted chocolate to seize up. Take your eggs out of the fridge 15 minutes before you start. If you forget, run them under warm water for a minute.
Don’t Skip the Salt — The salt is crucial. It balances the sweetness and enhances the chocolate flavor. Don’t use too much, but don’t omit it either. A little goes a long way.
Swirl, Don’t Mix — When adding the caramel, swirl it gently. If you mix it too much, you’ll lose the pockets of caramel. You want those gooey surprises in every bite.
Cool Completely for Storage — If you’re storing them, let them cool completely first. Trapped steam will make them soggy. Store in an airtight container at room temperature for up to 3 days.
Variations & Substitutions
Once you’ve nailed the basic version, here’s how you can mix it up. I’ve tried all of these.
White Chocolate Version — Swap the dark chocolate chips for white chocolate chips. Use caramel sauce and sea salt. It’s sweeter and creamier. Great for kids who don’t like dark chocolate.
Double Chocolate — Add an extra ¼ cup of chocolate chips to the batter. If you’re a chocolate monster, this is for you. You can also use chocolate cookie crumbs instead of flour for a denser texture.
Gluten-Free — Use a gluten-free flour blend. Most 1:1 blends work well. Make sure your chocolate chips and caramel sauce are certified gluten-free if you have celiac disease.
Vegan — Use vegan chocolate chips and butter substitute. Replace the eggs with flax eggs (1 tablespoon ground flaxseed mixed with 3 tablespoons water per egg). Use a vegan caramel sauce. The texture will be slightly different, but still delicious.
Nutty — Fold in chopped walnuts, pecans, or almonds. Toast the nuts first for extra flavor. This adds a nice crunch and breaks up the softness.
Mint Chocolate — Add ½ teaspoon of peppermint extract to the batter. Top with crushed candy canes after baking. Perfect for the holidays.
Serving & Storage
How to Serve: I usually serve these warm, straight from the oven. They’re best enjoyed with a cold glass of milk or a cup of coffee. The contrast of hot, gooey brownie and cold milk is perfection. You can also serve them with a dollop of whipped cream or a scoop of vanilla ice cream if you’re feeling fancy.
Side Dishes: These are dessert on their own, but if you’re having a dinner party, serve them with fresh berries. The acidity of the berries cuts through the richness. Or serve with a simple arugula salad to balance the meal.
Refrigerator: Store in an airtight container for up to 4 days. They’ll firm up in the fridge, so let them come to room temperature before eating. Or microwave for 10 seconds to soften them up.
Freezing: These freeze well! Let them cool completely, then place them in a single layer on a baking sheet. Once frozen, transfer to a freezer bag. They’ll keep for up to 3 months. Thaw at room temperature or microwave for 15 seconds.
Pro Tip: If you’re making these ahead for a party, bake them the night before. Reheat them in the oven at 350°F for 5 minutes before serving. They’ll taste fresh out of the oven.
Nutrition Information
I’m not a nutritionist, but here’s the breakdown if you’re tracking. Keep in mind, these are estimates based on standard ingredients.
Per Bite (approx. 12 bites per batch):
- Calories: 180
- Protein: 2g
- Carbs: 22g
- Fiber: 1g
- Sugar: 16g
- Fat: 10g
- Saturated Fat: 6g
- Cholesterol: 25mg
- Sodium: 45mg
What’s Good: They’re a decent source of iron from the cocoa powder. And they’re small, so portion control is easier. What to Know: They’re high in sugar and fat because, well, they’re brownies. Enjoy them in moderation. If you want to lighten them up, use dark chocolate with higher cocoa content and reduce the sugar slightly.
Final Thoughts
So that’s my go-to Fudgy Salted Caramel Brownie Bites! I’ve probably talked your ear off at this point, but when you make a recipe this often, you have a lot to say about it. These have saved my dessert game more times than I can count. They’re my answer to “what’s for dessert” when I’m tired, don’t want to bake a whole cake, and still want something that tastes really good. My kids are happy, my husband’s happy, and I’m happy because I’m not stressed about cooking.
Make it yours! Try different add-ins, swap in your favorite chocolate, adjust the salt to your taste. The best recipes are the ones you adapt to your family’s tastes. If you make this, drop a comment and let me know what you think! I love hearing how recipes turn out in your kitchen. And if something doesn’t work, tell me that too—I’m here to help troubleshoot.
Happy baking! And I hope your kitchen smells half as good as mine does right now.
Frequently Asked Questions
Can I use milk chocolate instead of dark chocolate?
Yes, you can. Milk chocolate will make the brownies sweeter and less intense. If you use milk chocolate, you might want to reduce the sugar slightly. I prefer dark chocolate for that rich, fudgy flavor, but milk chocolate is great for kids or those who prefer a milder taste.
Why did my brownies turn out cakey?
This usually happens if you overmix the batter or use too much flour. Remember, brownies should be fudgy, not cakey. Mix the dry ingredients just until combined. Also, make sure you’re measuring the flour correctly—scoop and level, don’t pack it down.
Can I make these ahead of time?
Absolutely. Bake them, let them cool completely, and store them in an airtight container at room temperature for up to 3 days. Or freeze them for up to 3 months. Reheat in the microwave for 10-15 seconds before serving for that fresh-out-of-the-oven texture.
How do I store the caramel sauce?
Store leftover caramel sauce in an airtight container in the fridge for up to 2 weeks. Reheat gently in the microwave or on the stove to make it pourable again. You can also freeze it for up to 3 months.
Can I use homemade caramel sauce?
Yes! Homemade caramel sauce works great. Just make sure it’s cooled to room temperature so it doesn’t melt the batter too quickly. Store-bought is convenient, but homemade has a deeper flavor. I sometimes make a big batch of caramel sauce to use in other recipes too.
Why did my brownies spread too much?
This can happen if the butter was too warm or if you didn’t space the batter enough on the pan. Make sure your butter is melted but not hot when you mix it with the chocolate. Also, leave enough space between the mounds so they have room to spread without merging.
Can I double this recipe?
Yes, you can double it. Just use a larger mixing bowl and a bigger baking sheet. You might need to bake them in two batches if your oven doesn’t fit two sheets. The baking time should be the same.
Pin This Recipe!
Fudgy Salted Caramel Brownie Bites
- Total Time: 25 minutes
- Yield: 12 servings 1x
Description
Quick, fudgy brownie bites swirled with salted caramel sauce, ready in just 25 minutes. Perfect for last-minute cravings or impressing guests without the stress.
Ingredients
- 1 cup (170g) dark chocolate chips (semi-sweet or bittersweet)
- ½ cup (115g) unsalted butter
- ½ cup (100g) granulated sugar
- 2 large eggs, room temperature
- ⅓ cup (40g) all-purpose flour
- 2 tablespoons (10g) unsweetened cocoa powder
- 1 teaspoon vanilla extract
- ½ cup (120ml) caramel sauce
- 1 teaspoon sea salt flakes
- Optional: ¼ cup (40g) extra chocolate chips
- Optional: ¼ cup (30g) chopped walnuts or pecans
Instructions
- Preheat oven to 350°F (175°C). Line a baking sheet with parchment paper.
- Combine chocolate chips and butter in a microwave-safe bowl. Microwave in 30-second intervals, stirring between each, until smooth and glossy.
- Whisk in sugar and eggs until the mixture is smooth and slightly thickened. Stir in vanilla extract.
- Sift in flour and cocoa powder. Gently fold in with a spatula until just combined. Do not overmix. Fold in optional nuts or extra chocolate chips if using.
- Drop tablespoon-sized mounds of batter onto the prepared baking sheet, spacing them 2 inches apart.
- Dollop a small amount of caramel sauce on top of each bite. Use a knife or toothpick to gently swirl the caramel into the batter.
- Bake for 10-12 minutes until edges are set but centers are still soft. Centers should jiggle slightly.
- Remove from oven and immediately sprinkle with sea salt flakes.
- Let cool on the pan for 5 minutes before serving.
Notes
Do not overbake; the centers should remain gooey. Use room temperature eggs to prevent the chocolate from seizing. For storage, keep in an airtight container at room temperature for up to 3 days or freeze for up to 3 months. Reheat in the microwave for 10-15 seconds to restore texture.
- Prep Time: 10 minutes
- Cook Time: 12 minutes
- Category: Dessert
- Cuisine: American
Nutrition
- Serving Size: 1 brownie bite
- Calories: 180
- Sugar: 16
- Sodium: 45
- Fat: 10
- Saturated Fat: 6
- Carbohydrates: 22
- Fiber: 1
- Protein: 2
Keywords: brownie bites, salted caramel, quick dessert, chocolate dessert, easy baking, fudgy brownies, caramel swirl


