Last Tuesday, I stared into my open refrigerator, the cold light hitting my face, and realized I was about to make the same mistake I always make on busy weeknights. I was hungry, it was getting dark, and the idea of cooking a massive batch of something just so I had dinner for four more days felt exhausting. I didn’t want leftovers. I wanted a good meal. Right now. For me. Or maybe for my partner if he happened to be home.
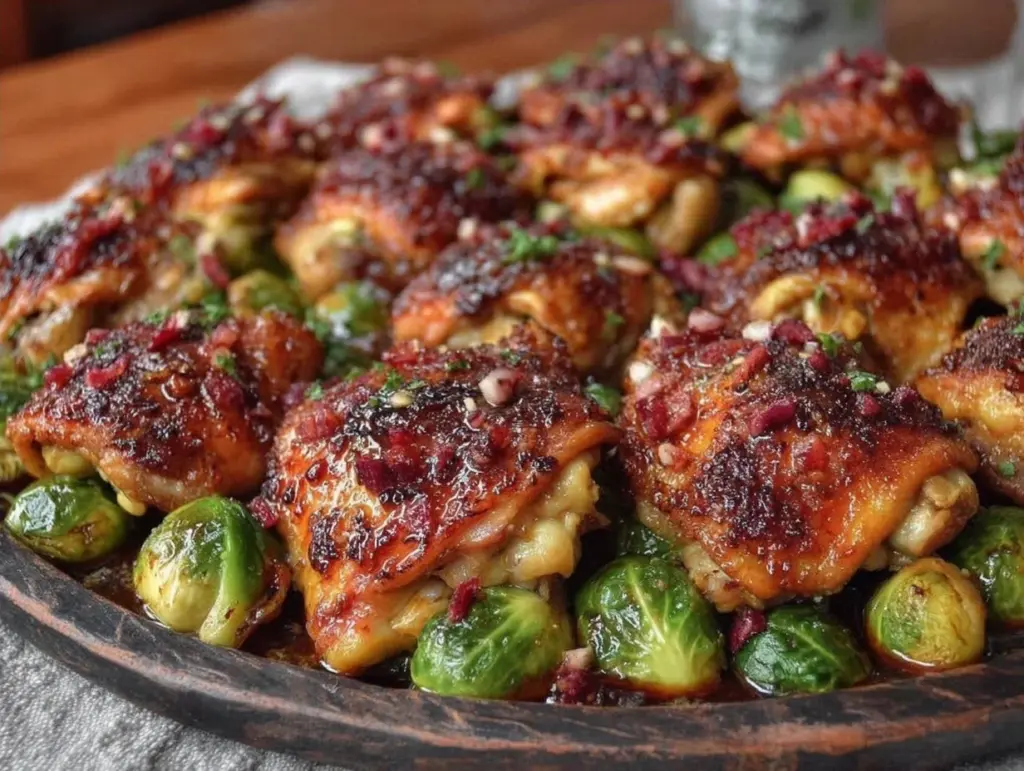
So I pulled out my smallest sheet pan, grabbed two chicken thighs, and decided to make fall sheet pan maple dijon chicken thighs specifically sized for one or two people. I’ve spent years trying to scale down recipes that are clearly written for a family of six, only to end up with a tiny, sad pile of food that burns easily or doesn’t cook evenly. It’s frustrating. It’s wasteful. And honestly? It’s the reason I ordered takeout twice that week instead.
But this time, I tweaked the ratios. I adjusted the pan size. I played with the timing so the small-batch chicken actually got crispy instead of steaming in its own juices. The result? Two perfect, golden, sticky-sweet chicken thighs that tasted like autumn, with zero guilt about wasting food. This fall sheet pan maple dijon chicken thighs recipe is my new secret weapon for those “I just need dinner, not a meal plan” nights. It’s small-batch perfection, and I’m so glad I finally figured it out.
Why You’ll Love This Small-Batch Dinner
There are a few reasons this has become my go-to when I’m cooking for just myself or one other person, but let’s be real—it’s mostly because it solves the leftover problem once and for all.
- Right-Sized Portions — Seriously, this recipe makes exactly two servings. No more, no less. I’ve stopped trying to halve family recipes because the math never works out, and the seasoning gets weird. This is designed from the start for a small crew.
- One Pan, Zero Stress — You dump everything on a single sheet pan. No chopping onions for a sauce that requires a separate pot. No washing a colander. Just a pan, the oven, and about 10 minutes of prep. I make this after work when my brain is completely fried.
- Small-Batch Flavor Boost — When you cook small amounts of chicken, the seasoning hits harder because there’s less meat to dilute it. The maple and dijon glaze coats every inch of these thighs, and because the pan isn’t overcrowded, the skin actually crisps up. It’s not soggy. It’s not dry. It’s just good.
- Perfect for Meal Prep (If You Want) — Look, I know some people hate leftovers, but I’m a realist. If I make this on Sunday, I can easily eat it for lunch on Monday if I portion it out. But the beauty is, if I don’t want to, I don’t have to. I cook what I’ll eat. That’s the win.
- Uses Pantry Staples — You probably have maple syrup, dijon mustard, olive oil, and chicken thighs in your fridge right now. You don’t need to go to the store. You don’t need to buy a whole jar of something you’ll use once. This is efficient cooking.
This is my answer to “what’s for dinner?” when I’m tired, don’t want to think, and definitely don’t want to clean up a kitchen full of dishes. It’s reliable, it’s delicious, and it respects my time and my appetite.
Ingredients You’ll Need
Here’s the best part: the ingredient list is short. Like, seriously short. I’m not asking you to buy anything fancy. Here’s what you need for two perfect chicken thighs.
For the Chicken and Glaze
Chicken thighs (2 bone-in, skin-on thighs / about 12-14 oz) — Bone-in, skin-on is non-negotiable for flavor and texture. Boneless thighs work, but they cook faster and don’t get that crispy skin. I buy them fresh, but frozen works if you thaw them completely first.
Maple syrup (2 tablespoons) — Use real maple syrup, not the pancake syrup stuff. The grade doesn’t matter much for cooking, but darker maple has a richer flavor. This is the sweet backbone of the glaze.
Dijon mustard (1 tablespoon) — I use Grey Poupon or any good store-brand Dijon. It adds that tangy, sharp bite that cuts through the sweetness. Don’t use yellow mustard. Please.
Garlic (2 cloves, minced / about 1 teaspoon) — Fresh garlic only. No jarred stuff. Two cloves is the perfect amount for two pieces of chicken. If you’re a garlic lover, go for three, but don’t skimp.
Olive oil (1 tablespoon) — Just enough to help the glaze stick and promote browning. You can use melted butter if you want, but olive oil keeps it a bit lighter and prevents burning.
Smoked paprika (½ teaspoon) — This adds a subtle smokiness that screams “fall.” If you don’t have smoked paprika, regular paprika works, but you’ll miss that depth. I keep a jar in my cabinet specifically for these kinds of dishes.
Salt and black pepper (to taste) — I use about ½ teaspoon kosher salt and a generous crack of black pepper. Adjust to your preference, but don’t be shy with the salt.
Thyme (1 teaspoon fresh, or ½ teaspoon dried) — Fresh thyme is better, but dried works fine. I usually just pinch it off the stem. It adds that herbal, earthy note that pairs perfectly with maple.
Optional Add-ins (Keep Them Small)
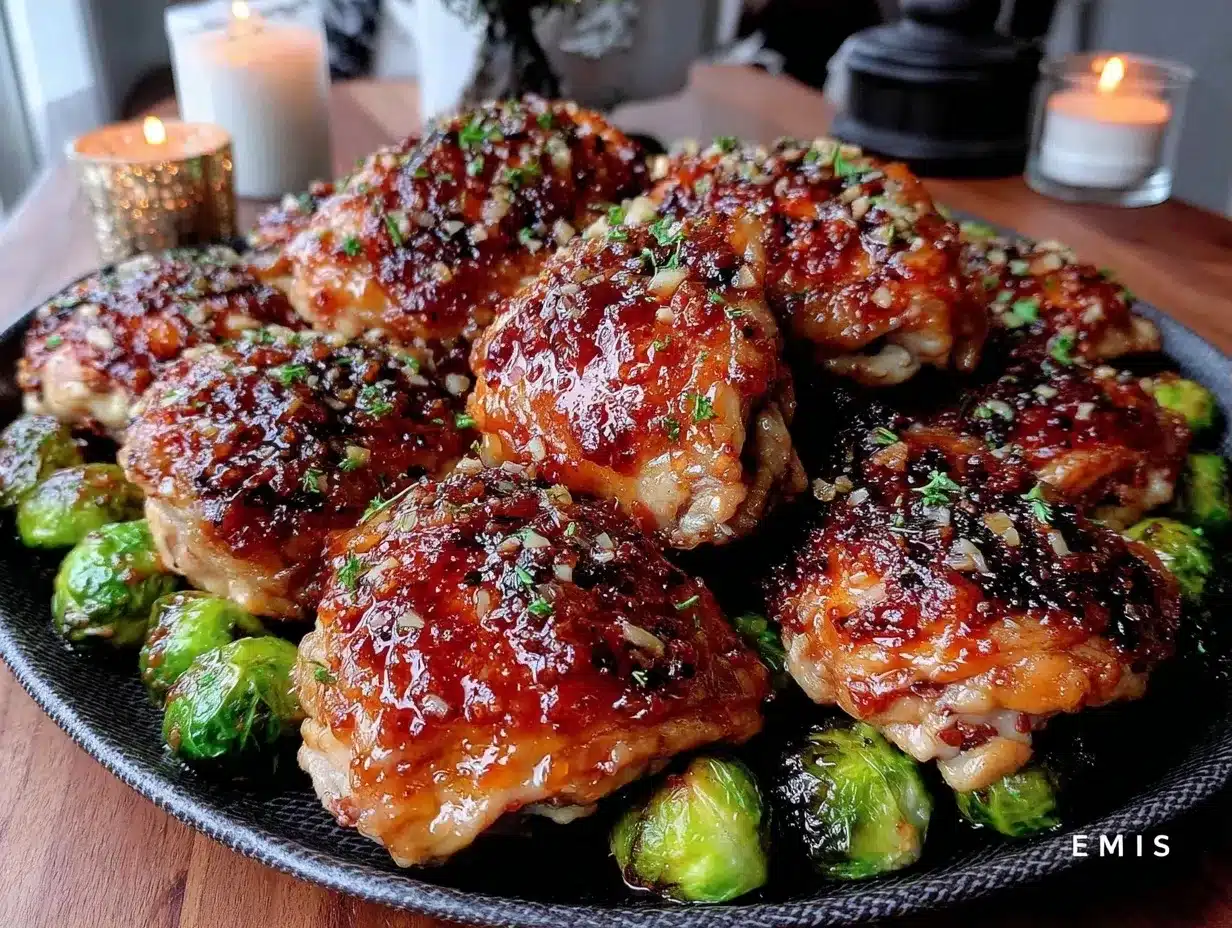
Since we’re cooking for two, I don’t want to overload the pan. But if you want veggies, keep them small.
- Small potatoes (2 small red potatoes, halved) — These roast quickly and absorb the glaze. Don’t use big russets; they take too long.
- Brussels sprouts (½ cup, halved) — Tiny sprouts cook evenly. Big ones can get bitter.
- Butternut squash cubes (½ cup) — Cut them small so they roast in the same time as the chicken.
Pro Tip: If you’re adding veggies, make sure they’re cut into small, uniform pieces. Big chunks will either burn or stay raw while the chicken cooks. Small batches mean small veggies.
Equipment Needed
You don’t need fancy gadgets for this. Here’s what I actually use in my kitchen.
Small sheet pan (10×13 or 9×13) — I use a half-sheet pan, but for two servings, a smaller pan is better. It prevents the chicken from being too spread out, which helps the glaze concentrate. If you only have a full-size sheet pan, you’ll need to reduce the cooking time slightly.
Small mixing bowl — For whisking the glaze. A ramekin works too. I use a small glass bowl because I can see how much glaze I have.
Pastry brush — For applying the glaze. I have a cheap silicone one from the dollar store that works perfectly. Or just use a spoon if you’re being lazy.
Cutting board and knife — For mincing garlic and prepping any veggies. Keep it simple.
Aluminum foil or parchment paper — I line my pan with parchment for easy cleanup. It’s worth it. I hate scrubbing baked-on glaze.
How to Make It: Step-by-Step
Alright, let’s make this! I’m walking you through exactly how I do it, including the little tricks I’ve picked up for small-batch roasting.
Step 1: Prep Your Oven and Pan (5 minutes)
Preheat your oven to 400°F (200°C). This is hot enough to crisp the skin without drying out the meat. Line your small sheet pan with parchment paper or aluminum foil. I prefer parchment because the glaze doesn’t stick to it at all.
Why this matters: A hot oven is crucial. If your oven is too low, the chicken will steam instead of roast, and you’ll get soggy skin. Trust me on this.
Step 2: Prep the Chicken
Pat your chicken thighs dry with paper towels. This is the most important step for crispy skin. If they’re wet, they’ll steam. Once they’re dry, place them on the sheet pan, skin-side up. Season both sides generously with salt, pepper, and smoked paprika.
Sensory cue: The paprika should turn the chicken a deep, rusty orange color. It looks beautiful before it even hits the oven.
Step 3: Make the Glaze
In a small bowl, whisk together the maple syrup, Dijon mustard, minced garlic, olive oil, and fresh thyme (if using). It should look like a thick, glossy sauce. If it’s too thick, add a teaspoon of water.
Why this matters: Whisking the garlic into the liquid ensures it distributes evenly, so you don’t get a giant chunk of raw garlic in one bite.
Step 4: Coat and Roast
Brush the glaze generously over the chicken thighs, making sure to coat the skin well. If you’re adding small veggies, toss them in a little olive oil and salt, then arrange them around the chicken on the pan.
Place the pan in the oven and roast for 25-30 minutes. Halfway through (around 15 minutes), flip the chicken and brush on more glaze. This builds up layers of flavor and keeps it sticky.
Sensory cue: You’ll smell the maple and garlic hitting the hot oven. It smells like a cozy autumn evening. If you see the glaze bubbling and darkening, that’s a good sign.
Step 5: Check for Doneness
The chicken is done when the internal temperature reaches 165°F (74°C) and the skin is crispy and caramelized. Since these are small batches, they might cook a bit faster than large ones, so check around the 25-minute mark. If the skin isn’t crispy enough, broil for 1-2 minutes, but watch it closely—sugar burns fast.
Why this matters: Overcooked chicken is dry chicken. Since we’re using thighs, they’re forgiving, but you still don’t want them leather-like.
Step 6: Rest and Serve
Remove the pan from the oven and let the chicken rest for 5 minutes. This lets the juices redistribute. Sprinkle with extra thyme or a crack of pepper if you want. Serve immediately.
Total Time: About 35 minutes (10 minutes prep, 25 minutes cooking)
Expert Tips & Tricks
Here’s everything I’ve learned from making this dozens of times. These tips will save you from my mistakes.
Pat the Chicken Dry
I cannot stress this enough. Wet chicken = soggy skin. Use paper towels and really press the moisture out. It takes 30 seconds, but it makes all the difference.
Don’t Overcrowd the Pan
Even for two servings, don’t pile the chicken on top of each other. They need space for air to circulate. If you’re adding veggies, give them room too. Crowding leads to steaming, not roasting.
Brush, Don’t Pour
Brush the glaze on. Pouring it creates a puddle that burns. You want a thin, even coat that caramelizes.
Watch the Broiler
If you broil to crisp the skin, watch it like a hawk. Maple syrup burns in seconds. Set a timer for 1 minute and check every 30 seconds.
Save the Pan Juices
The bits left on the pan are liquid gold. Scrape them up with a little water or broth and pour over the chicken. It’s instant sauce.
Variations & Substitutions
Once you’ve nailed the basic version, here’s how you can mix it up. I’ve tried all of these.
Spicy Maple Dijon
Add ½ teaspoon red pepper flakes to the glaze. It adds a nice kick that balances the sweetness. Great if you like a little heat.
Honey Mustard Twist
Swap half the maple syrup for honey. It’s slightly less sweet and has a different floral note. Also delicious.
Herb-Forward
Add rosemary or sage to the glaze. These herbs pair beautifully with fall flavors. I love sage with maple.
Gluten-Free
Just make sure your Dijon mustard and maple syrup are labeled gluten-free (most are, but check). Everything else is naturally gluten-free.
Dairy-Free
This recipe is already dairy-free. Just ensure your olive oil is the fat you use. No butter needed.
Protein Swap
Can use chicken breasts, but reduce cooking time to 20-25 minutes. They dry out faster, so keep an eye on them.
Serving & Storage
How to serve and store this small-batch dinner.
How to Serve
I usually serve this with simple roasted vegetables or a green salad. It’s light enough for a weeknight but feels special. It pairs well with cozy fall pumpkin sage pasta if you want to double down on autumn flavors, or with keto fall loaded cauliflower soup for a low-carb meal.
Storage
Store leftovers in an airtight container in the fridge for up to 3 days. The chicken stays moist if stored with the pan juices.
Reheating
Reheat in the oven at 350°F for 10 minutes to crisp the skin again. Microwave works but makes the skin soft. If you microwave, do it in 30-second bursts.
Freezing
You can freeze cooked chicken for up to 3 months. Thaw in the fridge overnight. The glaze might separate slightly, but it’s still tasty.
Nutrition Information
I’m not a nutritionist, but here’s the breakdown if you’re tracking. Based on two servings.
- Calories: 380 per serving
- Protein: 28g
- Carbs: 12g
- Fat: 24g
- Fiber: 1g
- Sugar: 10g (from maple syrup)
It’s rich in protein and healthy fats, with some natural sugar from the maple. Not a diet food, but a balanced dinner.
Final Thoughts
So that’s my go-to fall sheet pan maple dijon chicken thighs! I’ve talked your ear off, but when you find a recipe that actually works for small-batch cooking, you want to share it. This has saved me from so many takeout nights. It’s quick, it’s flavorful, and it respects the fact that I’m just one person (or two) trying to eat well without the stress.
Make it yours! Try different herbs, add veggies, or change the glaze. The best recipes are the ones you adapt. If you make this, drop a comment and let me know what you think! I love hearing how recipes turn out in your kitchen.
Happy cooking! And I hope your kitchen smells half as good as mine does right now.
Frequently Asked Questions
Can I use boneless chicken thighs?
Yes, but reduce the cooking time by 5-7 minutes. They cook faster and can dry out. Check temperature early.
Why did my chicken steam instead of roast?
Probably overcrowded the pan or didn’t pat the chicken dry. Make sure there’s space between pieces and the skin is dry before seasoning.
Can I make this in an air fryer?
Yes! Cook at 375°F for 15-18 minutes, flipping halfway. Smaller batches work great in air fryers.
Is the maple syrup too sweet?
It’s balanced by the Dijon mustard. If you prefer less sweet, reduce to 1 tablespoon. But the sweetness helps caramelize the skin.
Can I prep this ahead?
You can season the chicken and make the glaze ahead, but wait to brush it on until right before roasting. The sugar in the glaze can make the skin soggy if it sits too long.
What sides go best with this?
Roasted Brussels sprouts, mashed potatoes, or a simple green salad. Keep sides simple to let the chicken shine.
Pin This Recipe!
Fall Sheet Pan Maple Dijon Chicken Thighs: Small-Batch Perfection
- Total Time: 35 minutes
- Yield: 2 servings 1x
Description
A small-batch sheet pan dinner designed for one or two people, featuring crispy, golden chicken thighs coated in a sticky-sweet maple and Dijon glaze with minimal prep and cleanup.
Ingredients
- 2 bone-in, skin-on chicken thighs (about 12–14 oz)
- 2 tablespoons real maple syrup
- 1 tablespoon Dijon mustard
- 2 cloves garlic, minced
- 1 tablespoon olive oil
- 1/2 teaspoon smoked paprika
- 1/2 teaspoon kosher salt
- Generous crack of black pepper
- 1 teaspoon fresh thyme (or 1/2 teaspoon dried)
- Optional: 2 small red potatoes, halved
- Optional: 1/2 cup Brussels sprouts, halved
- Optional: 1/2 cup butternut squash cubes
Instructions
- Preheat oven to 400°F (200°C). Line a small sheet pan (10×13 or 9×13) with parchment paper or aluminum foil.
- Pat chicken thighs dry with paper towels to ensure crispy skin. Place skin-side up on the prepared pan.
- Season both sides of the chicken generously with salt, pepper, and smoked paprika.
- In a small bowl, whisk together maple syrup, Dijon mustard, minced garlic, olive oil, and thyme until combined.
- Brush the glaze generously over the chicken thighs. If adding vegetables, toss them with a little olive oil and salt and arrange them around the chicken.
- Roast for 25-30 minutes. Halfway through (around 15 minutes), flip the chicken and brush on more glaze.
- Chicken is done when internal temperature reaches 165°F (74°C) and skin is crispy. If needed, broil for 1-2 minutes to crisp skin further, watching closely to prevent burning.
- Remove from oven and let rest for 5 minutes before serving.
Notes
Patting the chicken dry is crucial for crispy skin. Do not overcrowd the pan. If adding vegetables, cut them into small, uniform pieces so they cook evenly with the chicken. The glaze contains sugar, so watch closely if broiling to prevent burning. Pan juices can be scraped up with water or broth to create a sauce.
- Prep Time: 10 minutes
- Cook Time: 25 minutes
- Category: Main Course
- Cuisine: American
Nutrition
- Serving Size: 1 chicken thigh with
- Calories: 380
- Sugar: 10
- Fat: 24
- Carbohydrates: 12
- Fiber: 1
- Protein: 28
Keywords: small batch dinner, sheet pan chicken, maple dijon chicken, weeknight dinner, easy chicken recipe, fall recipes, gluten-free dinner, dairy-free dinner


