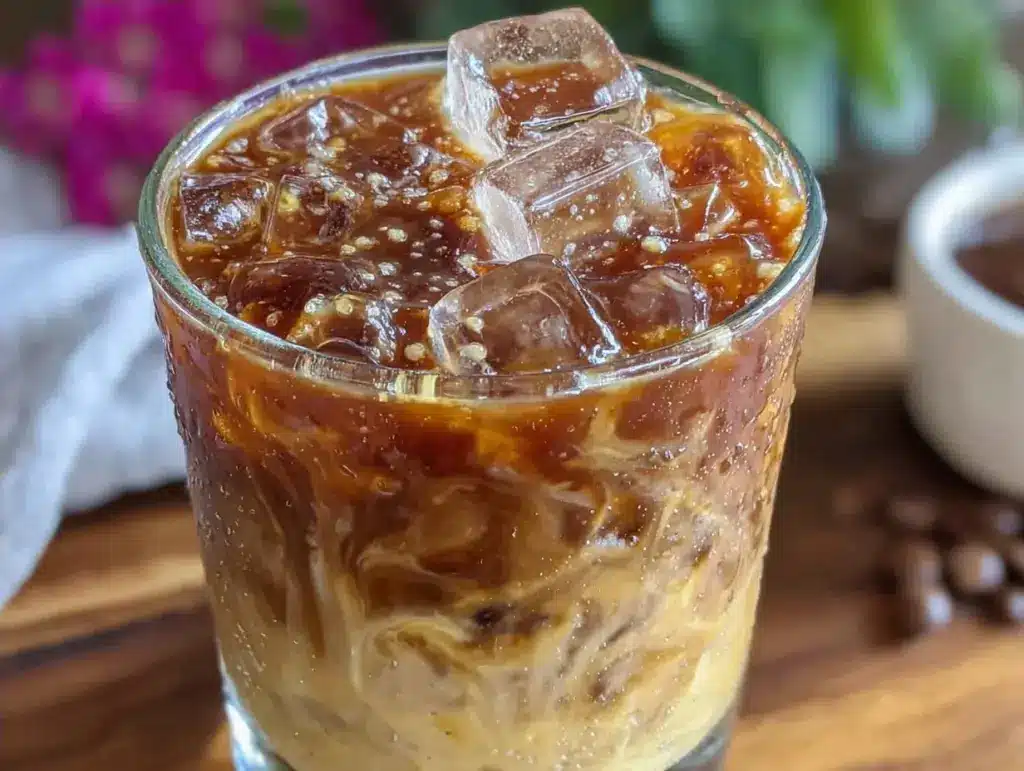
I have a confession to make. For years, I was the person who bought a fancy latte every single morning. You know the type: the one with the perfect foam art, the exact right amount of sweetness, and the price tag that made my wallet cry. I thought I needed a barista to make my day bearable. I thought “good coffee” was something you bought, not something you made.
Then came last summer. It was one of those brutally hot July days where the heat hits you the second you step outside, and I was running late for a brunch with friends. I was stressed, sweating, and desperate for a caffeine fix that wouldn’t leave me jittery for three hours. I skipped the drive-thru and threw together what I thought would be a mediocre iced coffee using leftover cold brew and some vanilla syrup from the back of my pantry.
I took one sip, and I literally stopped in my tracks. It was creamy, it was sweet, it had this incredible depth of flavor that hit you with those tiny black specks of real vanilla bean, and it tasted like something from a high-end indie coffee shop. My friends couldn’t believe I made it at home. They demanded the recipe before the pancakes were even done.
That was the moment I realized I didn’t need a coffee machine. I needed three ingredients and a little bit of patience. This creamy vanilla bean iced coffee has become my absolute obsession. It’s the drink I make when I want to treat myself, when I’m hosting a lazy Sunday brunch, or just when I need to feel a little bit fancy on a Tuesday afternoon. And the best part? It’s stupidly simple. You don’t need expensive equipment. You don’t need a trip to the store. You just need to know how to mix things right.
I’ve made this drink probably fifty times in the last six months. I’ve tweaked the ratios, I’ve tried different milks, and I’ve even experimented with different beans. But the core remains the same: rich coffee, creamy texture, and that warm, comforting hug of vanilla. If you’ve been looking for a way to upgrade your morning routine without spending a fortune or buying a dozen gadgets, this is it. Let me show you how to make it.
Why You’ll Love This Simple Iced Coffee Recipe
There are a hundred reasons to make this, but let’s be real—you’re here because you want something delicious, easy, and Instagram-worthy. Here’s why this creamy vanilla bean iced coffee keeps me coming back:
- It’s Actually Homemade — Most “vanilla” syrups are full of corn syrup and artificial flavoring. This uses real vanilla bean paste or a scraped pod. The difference? You get those beautiful specks, and the flavor is floral and complex, not just sugary. It tastes like you spent hours making it.
- Three Ingredients, Zero Fuss — Seriously. Coffee, cream (or milk), and vanilla. That’s it. No complex brewing schedules, no special filters. If you can pour water and stir, you can master this. I make it in about two minutes, even when I’m half-asleep.
- Customizable to Your Heart’s Content — Want it dairy-free? No problem. Want it extra sweet? Add more vanilla. Want it bold? Use a dark roast. I love how this recipe adapts to my mood. Some days I want a light, airy coffee; other days I want something thick and rich like a dessert. This creamy vanilla bean iced coffee does both.
- It’s a Conversation Starter — When I serve this to guests, it’s always the star of the show. It looks elegant in a tall glass with condensation dripping down the sides. It’s perfect for a summer party, a cozy morning, or just when you want to impress your partner without doing actual work.
- Better Than Takeout — Think about what you’re paying for those 12-ounce vanilla iced coffees. Now think about the cost of this. It’s pennies. You’re saving money and getting a better product. My wallet is happy, and so is my taste bud.
This isn’t just a drink; it’s a little moment of joy in your day. It’s the reason I look forward to mornings again. And once you try it, you’ll probably never go back to store-bought syrup again. Trust me on this one.
Ingredients You’ll Need for the Perfect Vanilla Coffee
Here’s the beauty of this recipe: you probably have most of this already. It’s not a shopping list that requires a trip to three different stores. Here’s what you need to make this creamy vanilla bean iced coffee shine:
The Coffee Base
Strong Brewed Coffee (2 cups / 480ml) — You need coffee that’s strong enough to stand up to the milk. I usually use a dark roast or a medium-dark blend. If you’re using drip coffee, brew it double strength. If you’re using a French press, use a bit more grounds than usual. Cold brew is amazing for this too—if you have the patience to wait 12 hours, it’s the smoothest option. I keep a jar of cold brew in the fridge during summer, so I’m always ready.
Ice Cubes (1 large handful) — Obviously, you need ice. But here’s a tip: if you’re worried about your drink getting watery, make your ice cubes out of leftover coffee. Freeze your brewed coffee in an ice tray. Then you’re just chilling your drink, not diluting it. Genius, right? I do this all the time.
The Creamy Element
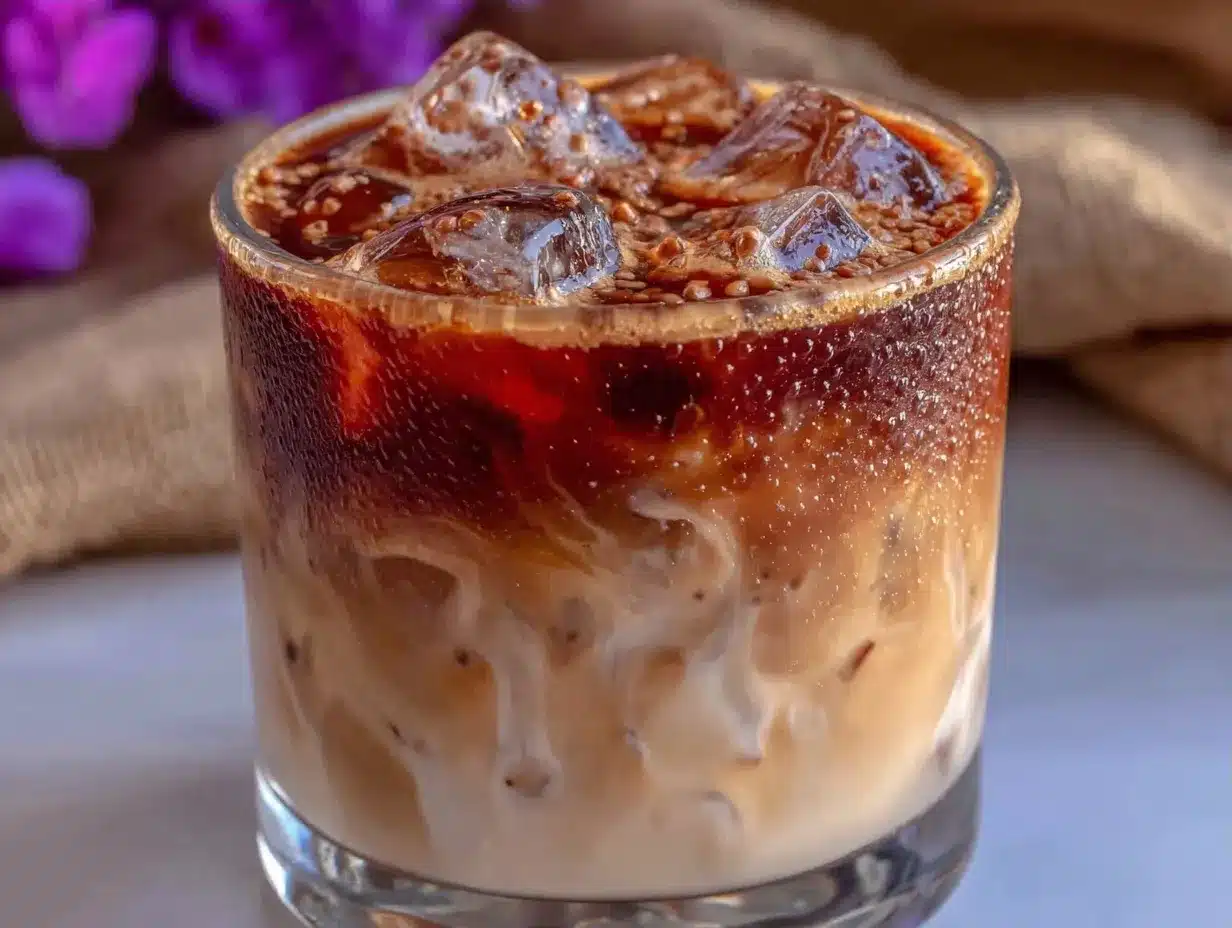
Heavy Cream or Half-and-Half (½ cup / 120ml) — This is what gives it that luxurious, silky texture. I prefer heavy cream for the ultimate indulgence, but half-and-half works if you want it a bit lighter. For a dairy-free version, oat milk is my absolute favorite because it’s naturally sweet and creamy. Almond milk works too, but it’s thinner, so you might want to add a splash of coconut cream if you want that richness. I’ve tried them all, and oat milk is the winner for dairy-free.
Milk of Choice (1 cup / 240ml) — This is the main liquid to fill your glass. Whole milk adds more body, but skim milk will make it lighter. I usually use a mix: half heavy cream, half regular milk. It’s the sweet spot for me. If you’re watching calories, skip the heavy cream and just use your favorite milk, but you’ll lose that “indulgent” feel.
The Vanilla Magic
Vanilla Bean Paste (2 tablespoons / 30ml) — This is the secret weapon. Vanilla bean paste contains real vanilla seeds suspended in a thick syrup. It gives you the flavor AND the visual appeal of those tiny black specks. It’s worth the extra few dollars. If you can’t find it, you can use pure vanilla extract, but you’ll miss out on the pretty specks. And honestly? The specks make it feel so fancy.
OR: A Whole Vanilla Pod — If you’re feeling really fancy, you can split a vanilla bean pod lengthwise, scrape out the seeds, and stir both the seeds and the pod into your warm coffee. Let it steep for 10 minutes, then remove the pod. This is the most authentic method, but it takes a bit more time. I usually stick to the paste for weeknights and use the pod when I’m having guests.
Simple Syrup (Optional) (1-2 tablespoons) — If your coffee isn’t sweet enough, or if you’re using a very bitter dark roast, add a touch of simple syrup. I keep a jar of this in the fridge (just equal parts sugar and water, heated until dissolved). It mixes in instantly, unlike granulated sugar which sits at the bottom. But honestly? The vanilla paste is usually sweet enough on its own.
Pro Tip: Don’t skimp on the quality of your coffee. If you’re using instant coffee, this won’t taste good. You need real brewed coffee. And for the vanilla? Avoid “imitation vanilla.” It tastes chemical. Stick to pure vanilla extract or paste.
Equipment Needed
You don’t need anything fancy for this. Here’s what I actually use:
Tall Glasses — I love serving this in tall, clear glasses so you can see the layers and the vanilla specks. A mason jar works great too if you want a rustic vibe.
Measuring Spoons — For the vanilla paste. Accuracy helps, but you can eyeball it if you’re feeling adventurous.
Spoon or Stirrer — Just a simple long spoon to stir everything together. A whisk isn’t necessary unless you’re making a frothy version.
Coffee Maker or French Press — Whatever you normally use to brew coffee. If you’re making cold brew, you’ll need a jar and a filter.
Ice Cube Tray — Preferably one that makes small cubes, which chill faster. But any ice works.
Optional: Milk Frother — If you want to make the cream part frothy and velvety, a handheld frother adds a nice texture. It’s not required, but it’s fun for special occasions.
How to Make It: Step-by-Step
Alright, let’s make this! It’s going to take you less than five minutes. I’m walking you through exactly how I do it, so you get it right the first time.
Step 1: Brew Your Coffee Strong
Start by brewing your coffee. If you’re using hot coffee, brew it stronger than you normally would—about twice the amount of grounds you’d use for a regular cup. You want the flavor to punch through the ice and milk. If you’re using cold brew, just grab a cup from the fridge. Pour your brewed coffee into a pitcher or jug and let it cool to room temperature. If you’re in a hurry, you can put it in the fridge for 20 minutes, or just pour it over ice to chill it fast. I usually brew the night before, so it’s ready to go in the morning.
Step 2: Prepare Your Glasses
Take your tall glasses and fill them to the top with ice cubes. If you’re using coffee ice cubes, now is the time. Pack them in tightly. The more ice, the colder your drink stays. I like to fill the glass almost to the rim because I like my drinks cold.
Step 3: Mix the Vanilla Cream
In a separate small bowl or measuring cup, combine your heavy cream (or oat milk), your regular milk, and the vanilla bean paste. Stir it well until the vanilla is fully incorporated. You should see those little black specks distributed evenly. If you’re using a vanilla pod, add the seeds and the pod now. Taste it—it should smell amazing. If it’s not sweet enough, add a teaspoon of simple syrup here.
Step 4: Pour the Coffee
Pour your cooled coffee over the ice in the glasses. Fill them about halfway. You’ll see the coffee swirl around the ice, chilling instantly. If you’re using hot coffee, pour it slowly over the ice to avoid splashing. Take a moment to appreciate the color—it should be a rich, deep brown.
Step 5: Add the Vanilla Cream
Slowly pour the vanilla cream mixture over the coffee. If you’re doing it right, you’ll see a nice layer of cream sitting on top before it starts to mix. This looks beautiful, especially if you’re serving guests. Pour it gently so you keep that layered look. If you want it fully mixed, stir it now. If you want to drink it as it mixes, just leave it.
Step 6: Garnish and Serve
If you have a little extra vanilla paste, dot the top with a tiny bit for extra specks. You can also add a sprinkle of cocoa powder or a cinnamon stick for a fancy touch. But honestly? It’s beautiful on its own. Serve immediately while it’s cold and creamy.
Total Time: About 5 minutes (plus brewing time if you’re making coffee from scratch).
Expert Tips & Tricks
Here’s everything I’ve learned from making this dozens of times. These tips will save you from my mistakes.
The Coffee Matters Most
If your coffee is weak, your drink will taste watery. Use a dark roast or a medium-dark roast. Avoid light roasts unless you like acidic, tea-like coffee. And please, don’t use instant coffee. It just doesn’t have the depth. If you’re buying beans, look for ones labeled “espresso blend” or “dark roast”—they have that rich, chocolatey flavor that pairs perfectly with vanilla.
Cold vs. Hot Coffee
You can make this with hot coffee or cold coffee. With hot coffee, you’re essentially making a quick iced latte. With cold coffee (or cold brew), you’re getting a smoother, less acidic drink. I prefer cold brew for summer because it’s less bitter. But hot coffee works fine if you’re in a rush. Just make sure you chill it quickly!
The Cream Ratio
I like a 1:2 ratio of cream to milk. So for every 1 cup of milk, I use ½ cup of cream. This gives me that rich mouthfeel without it being too heavy. If you want it lighter, use more milk. If you want it like a dessert, use more cream. Adjust to your taste.
Don’t Skip the Vanilla
This is where the magic happens. Vanilla bean paste is thick and syrupy, so it mixes well. If you use extract, add it to the coffee, not the cream, so it disperses better. And use good vanilla. Bad vanilla tastes like alcohol and chemicals. Good vanilla smells like comfort.
Make It Ahead
You can prep the vanilla cream mixture in advance. Mix the cream, milk, and vanilla, and store it in the fridge in a jar. When you’re ready to drink, just pour over ice and coffee. It saves time in the morning. I do this on weekends when I’m hosting brunch.
Variations & Substitutions
Once you’ve nailed the basic version, here’s how you can mix it up. I’ve tried all of these, and they’re all delicious.
Mocha Version
Add a tablespoon of chocolate syrup or cocoa powder to the vanilla cream. It’s like a vanilla mocha iced coffee. My kids love this version. It’s sweet, rich, and feels like a treat.
Caramel Swirl
Drizzle caramel sauce on the inside of the glass before adding ice. Then pour in the coffee and cream. The caramel sticks to the sides, creating a beautiful swirl. It’s gorgeous and tastes amazing. I serve this when I want to impress.
Coconut Vanilla
Use full-fat coconut milk instead of dairy cream. It’s dairy-free and adds a tropical twist. It pairs surprisingly well with vanilla. I make this when I’m feeling adventurous or when I have dairy-free friends over.
Espresso Shot Boost
Add a shot of espresso to the coffee base. This makes it stronger and more caffeinated. Perfect for those days when you need an extra kick. I do this before big meetings or early morning events.
Dairy-Free Option
Use oat milk or almond milk instead of cream. Oat milk is creamier and works best. You might want to add a splash of maple syrup for sweetness since oat milk is naturally sweet. It’s lighter but still delicious.
Serving & Storage
How to Serve
I usually serve this straight from the pitcher. It’s perfect for a summer party or a lazy morning. I put out a few different milks and syrups so guests can customize their drinks. It’s interactive and fun. Garnish with a cinnamon stick or a few coffee beans for a fancy touch.
Storage Instructions
Refrigerator: Store leftover coffee in an airtight container for up to 3 days. The vanilla cream mixture can also be stored in the fridge for 3 days. Keep them separate until you’re ready to drink.
Freezing: You can freeze the coffee in ice cube trays. Then just use those cubes in your drink. It’s a great way to prevent dilution. I freeze coffee in small portions for quick iced coffees.
Reheating: This is an iced coffee, so don’t reheat it. But if you have leftover cold brew, you can use it to make hot coffee later. Just heat it gently.
Pro Tip
If your drink gets watery as the ice melts, just add a splash of the vanilla cream mixture to bring back the richness. It’s easy to fix.
Nutrition Information
I’m not a nutritionist, but here’s the breakdown if you’re tracking. This is a treat, so enjoy it guilt-free!
Per Serving (based on 2 servings):
- Calories: 250
- Protein: 4g
- Carbs: 18g
- Fat: 18g
- Sugar: 15g
What’s Good: It’s a good source of calcium from the milk. The vanilla adds flavor without too many calories if you skip extra sugar.
What to Know: It’s higher in fat and sugar because of the cream and vanilla. If you’re watching calories, use skim milk and less cream. But honestly? It’s worth the indulgence.
Final Thoughts
So that’s my go-to creamy vanilla bean iced coffee! I’ve probably talked your ear off at this point, but when you make a recipe this often, you have a lot to say about it.
This has saved my mornings more times than I can count. It’s my answer to “I need coffee” when I’m tired, don’t want to leave the house, and still want something that tastes really good. My family loves it, my friends ask for it, and I love making it because it’s so easy.
Make it yours! Try different coffees, swap the milk, adjust the vanilla. The best recipes are the ones you adapt to your taste. And if you make this, drop a comment and let me know what you think! I love hearing how recipes turn out in your kitchen.
Happy brewing! And I hope your kitchen smells half as good as mine does right now.
Frequently Asked Questions
Can I use instant coffee?
You can, but it won’t taste as good. Instant coffee lacks the depth and richness of brewed coffee. If you must use it, use a strong brew and add a bit more vanilla to compensate. But I really recommend using real coffee for the best flavor.
Why is my coffee watery?
This usually happens if the coffee is too weak or if too much ice melts. Use strong coffee, and consider making coffee ice cubes. This way, as the ice melts, it just adds more coffee, not water.
Can I make this with hot coffee?
Yes! Just brew your coffee strong, let it cool slightly, and pour it over ice. It’s essentially an iced latte. The process is the same, just the starting point is different.
What kind of vanilla should I use?
Vanilla bean paste is best because it has real seeds. Pure vanilla extract works too, but you won’t get the specks. Avoid imitation vanilla, as it tastes chemical. Look for “pure vanilla extract” on the label.
Can I make this ahead for a party?
Yes! Brew the coffee and chill it. Mix the vanilla cream and store it in the fridge. When guests arrive, fill glasses with ice, pour coffee, then add the cream. It’s quick and easy for entertaining. I do this for all my summer brunches.
Is this dairy-free?
Not with cream, but you can easily make it dairy-free by using oat milk or coconut cream. Oat milk is the creamiest option and works beautifully in this recipe. It’s my go-to for dairy-free friends.
Pin This Recipe!

Creamy Vanilla Bean Iced Coffee: 3-Ingredient Indie Coffee
- Total Time: 5 minutes
- Yield: 2 servings 1x
Description
A simple, homemade iced coffee made with just three core ingredients: strong brewed coffee, cream, and real vanilla bean paste. This recipe delivers a rich, creamy texture and complex vanilla flavor without the need for expensive equipment or syrups.
Ingredients
- 2 cups (480ml) strong brewed coffee (dark roast or medium-dark recommended)
- 1 large handful ice cubes (or coffee ice cubes)
- ½ cup (120ml) heavy cream or half-and-half
- 1 cup (240ml) milk of choice (whole milk, oat milk, or almond milk)
- 2 tablespoons (30ml) vanilla bean paste
- 1–2 tablespoons simple syrup (optional, for extra sweetness)
Instructions
- Brew coffee strong (double strength if using drip) and let it cool to room temperature or chill in the fridge. Alternatively, use cold brew.
- Fill tall glasses to the top with ice cubes.
- In a separate bowl or measuring cup, combine the heavy cream (or dairy-free alternative), milk, and vanilla bean paste. Stir well until the vanilla is fully incorporated and specks are distributed.
- Pour the cooled coffee over the ice in the glasses, filling them about halfway.
- Slowly pour the vanilla cream mixture over the coffee to create a layered effect, or stir to combine.
- Garnish with a dot of vanilla paste, cocoa powder, or a cinnamon stick if desired. Serve immediately.
Notes
For best results, use real brewed coffee rather than instant coffee. To prevent dilution, freeze leftover coffee in ice cube trays. If using vanilla extract instead of paste, add it to the coffee rather than the cream for better dispersion. The recipe is easily customizable: use oat milk for a dairy-free version or add espresso shots for extra caffeine.
- Prep Time: 5 minutes
- Cook Time: 0 minutes
- Category: Beverage
- Cuisine: American
Nutrition
- Serving Size: 1 glass (approx. 12-
- Calories: 250
- Sugar: 15
- Sodium: 50
- Fat: 18
- Saturated Fat: 11
- Carbohydrates: 18
- Protein: 4
Keywords: iced coffee, vanilla bean coffee, homemade iced coffee, 3 ingredient recipe, dairy-free coffee, cold brew, indie coffee shop style, creamy coffee


