It’s 7:15 AM on a Tuesday. The sun is streaming through the kitchen window, birds are chirping outside, and I am standing in front of an open refrigerator, staring into the void. My husband is already dressed. My kids are arguing over whose turn it is to pick out their shoes. The clock on the stove is ticking louder than it has any right to be.
Last week, I tried to be “perfect.” I spent twenty minutes arranging a kale salad with fancy croutons and artisanal vinaigrette. Result? My son pushed it to the side of his plate, untouched. My daughter ate the croutons and left the rest. I ended up throwing away half a salad and rushing out the door with a granola bar that was mostly sugar and regret.
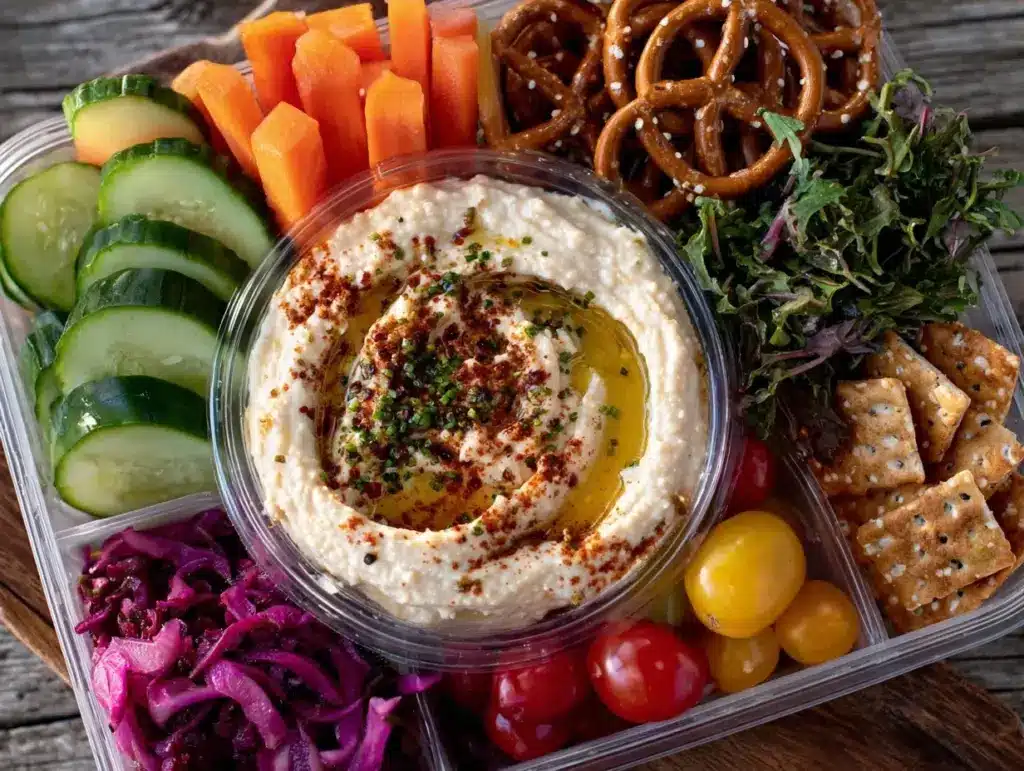
This week, I decided to stop overthinking. I wanted something that looked beautiful, felt special, and actually got eaten. So, I grabbed the colorful veggies hiding in my crisper drawer, a tub of store-bought hummus (don’t judge me, I’m tired), and some pita triangles. Ten minutes later, I had these Back to School Rainbow Veggie Snack Boxes. They looked like tiny, edible rainbows. They were crunchy, creamy, and satisfying. And the best part? Both kids ate every single bite. Even my husband stopped for a second to steal a carrot stick from one of the boxes before he left for work.
Here’s the thing about busy mornings: we don’t have time for culinary masterpieces. But we do have time for five minutes of intentional assembly. This rainbow veggie and hummus snack box isn’t just about nutrition (though it’s packed with it). It’s about creating a moment of calm and joy in the chaos. It’s the difference between a sad, sad desk lunch and a meal that feels like a treat.
I’ve made these boxes for three weeks straight now. They’ve become my secret weapon for back-to-school survival. They’re portable, they’re colorful, and they require zero cooking during the actual rush. If you’re dreading the morning scramble, you need this in your life. Let me show you how to make it easy, pretty, and delicious.
Why You’ll Love This Rainbow Veggie Snack Box
There are about ten reasons I keep making these snack boxes, but here are the big ones that have convinced me to stick with this routine:
Zero Cooking Required — Seriously. This is a cold assembly recipe. I’m not turning on the stove. I’m not preheating the oven. If you can wash a vegetable and scoop hummus, you can make this. I’ve even made these while helping my youngest with his homework at the kitchen table.
Colorful and Appetizing — We eat with our eyes first, right? The contrast of bright orange carrots, green cucumbers, red peppers, and purple cabbage against the creamy beige hummus is just satisfying to look at. It makes healthy food feel festive, not like a chore.
Perfectly Portable — These boxes fit perfectly in standard lunch bags. They don’t spill (if you pack them right), they don’t get soggy immediately, and they hold up well until lunchtime. No messy drips on textbooks.
Customizable for Picky Eaters — My son hates bell peppers. My daughter loves them. With this rainbow veggie platter concept, I can make one box with peppers for her and leave them out of his, replacing them with extra snap peas. Everyone gets what they like, and no food goes to waste.
Meal Prep Friendly — I wash and chop all the veggies on Sunday night. By Monday morning, the hardest part is already done. I just assemble and go. It saves me so much stress during the week.
Budget-Smart — Veggies are cheap, especially when you buy what’s in season or on sale. A bag of carrots, a cucumber, a bell pepper, and a tub of hummus cost less than a single takeout sandwich. This is honest-to-goodness affordable food.
Makes Kids Feel Special — When I pack these colorful boxes, my kids feel like they’re getting a treat. It’s not just “lunch.” It’s a “rainbow box.” That little bit of excitement makes them actually want to eat their veggies.
This is my go-to when I need lunch to just work. No complicated techniques, no weird ingredients, just reliable, delicious food that makes everyone happy and keeps everyone full until dinner.
Ingredients You’ll Need
Here’s the best part: you probably have most of this already in your fridge or pantry. This rainbow veggie and hummus snack box relies on simple, fresh ingredients. I’m particular about a few things, and I’ll tell you exactly why.
For the Rainbow Veggies
Carrots (1 large bunch, peeled and cut into sticks / about 200g) — The backbone of the box. I use baby carrots for ease, but peeling and cutting your own large carrots gives better texture. They’re sweet and crunchy. Look for ones that are bright orange and firm, not slimy.
Cucumbers (2 medium, sliced into half-moons or sticks / about 300g) — I prefer English cucumbers because they have fewer seeds and thinner skin. They add a cool, refreshing crunch. If you use regular cucumbers, peel them first to avoid tough skins.
Red Bell Peppers (2 medium, seeded and cut into strips / about 250g) — The red adds that pop of color and a sweet, crisp bite. Make sure to remove all the seeds and white membrane, or it’ll be bitter. I like the red ones because they’re sweeter than green.
Cherry Tomatoes (1 pint, halved / about 250g) — For juiciness and a bit of acidity. I halve them so they’re easy to eat in one bite. If you’re worried about mess, you can leave them whole, but halves are easier for little hands.
Red Cabbage (1 small head, thinly sliced or shredded / about 150g) — The purple element! It adds a nice crunch and holds up well in the fridge. I shred it by hand or use a mandoline for thin strips. It keeps for days without wilting.
Snap Peas or Sugar Snap Peas (1 cup, trimmed / about 100g) — For extra green and a sweet crunch. I leave them whole if they’re small, or cut them in half diagonally. They’re like nature’s candy.
Cherry Tomatoes (1 pint, halved / about 250g) — For juiciness and a bit of acidity. I halve them so they’re easy to eat in one bite. If you’re worried about mess, you can leave them whole, but halves are easier for little hands.
For the Hummus and Dippers
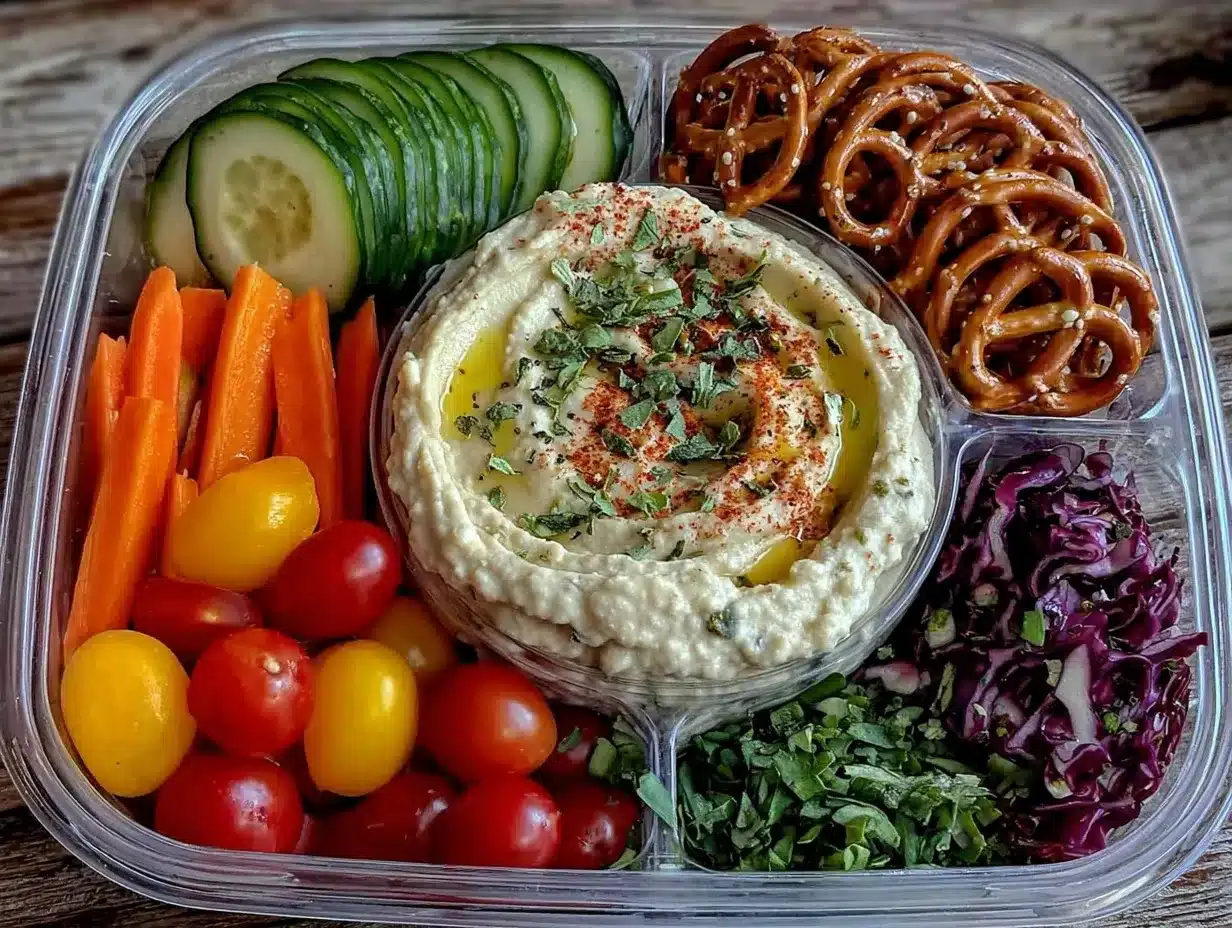
Hummus (1 container, about 15-20 oz / 425-565g) — This is the star. I buy store-bought for convenience, but I’m picky about the brand. I like the classic plain or roasted garlic flavor. I’ve tried making my own, but for busy mornings, store-bought is a lifesaver. Look for smooth, creamy varieties.
Pita Bread (2 large pitas, cut into triangles / about 150g) — For dipping. I toast them lightly for a few minutes in the oven or toaster oven to make them crispier. Toasted pita holds up better in a lunch bag than soft pita. It stays crunchy for hours.
Olives (½ cup, kalamata or green, pitted / about 75g) — For a salty, briny contrast. I like kalamata olives because they’re meaty and flavorful. They add a savory element that balances the sweet veggies.
Feta Cheese (½ cup, crumbled / about 75g) — Optional, but I love the tangy, salty kick it adds. I sprinkle it over the veggies or put it in a small compartment. It pairs perfectly with the hummus and olives.
Fresh Herbs (2 tablespoons, chopped parsley or mint / about 10g) — For garnish and freshness. I sprinkle chopped parsley over the veggies before packing. It makes the box look vibrant and adds a subtle flavor boost.
Olive Oil (1 tablespoon) — For drizzling over the veggies if you want them to look shiny and fresh. I use a light drizzle, not a soak. Just enough to make them glisten.
Lemon Juice (1 tablespoon) — For brightness. I squeeze a little over the veggies before packing. It keeps them from browning and adds a fresh, zesty note.
Personal Tips for Ingredient Selection
- Brand Recommendations: I always buy hummus from brands like Sabra or Cedar’s for consistent texture. For pita, I like flatbread brands that hold up well.
- Shopping Shortcuts: I buy pre-cut baby carrots and pre-shredded cabbage to save time. It’s worth the extra dollar for the convenience during the week.
- Substitutions: No hummus? Use tzatziki or baba ganoush. No pita? Use pretzel crisps or rice cakes. The concept is flexible.
- Storage: Veggies keep for 3-4 days in the fridge if stored properly. Keep them dry until you’re ready to pack.
Equipment Needed
You don’t need fancy equipment for this. Here’s what I actually use.
Sharp Knife — For chopping veggies. A good chef’s knife makes quick work of peppers and cucumbers. I learned to love my knife from whole30 grilled chicken shawarma bowls prep, where sharp knives are essential.
Cutting Board — Any size works. I use a large plastic board for veggies so I don’t cross-contaminate with raw meat. Easy to sanitize.
Mandoline Slicer — Optional but nice for shredding cabbage and slicing cucumbers evenly. It’s safer than I thought, and it makes uniform slices that look pretty.
Lunch Boxes or Containers — Compartmentalized bento-style boxes work best. I have a set from Rubbermaid that has three compartments. You can also use small mason jars or even regular Tupperware.
Toaster Oven — For toasting pita triangles. It’s faster than the big oven and gives a nice crisp. If you don’t have one, a regular oven works fine.
Measuring Spoons — For the olive oil and lemon juice. Not strictly necessary, but helps with consistency.
Small Bowls or Containers — For holding hummus and olives separately. I use small silicone cups that fit inside the lunch box.
Ziplock Bags — For storing prepped veggies in the fridge. I label them with the date so I know when to use them.
How to Make It: Step-by-Step
Alright, let’s make this! I’m walking you through exactly how I do it, including the little tricks I’ve picked up.
Step 1: Prep Your Veggies (10 minutes)
Wash all your vegetables thoroughly. Peel the carrots if you’re using large ones, or use baby carrots for speed. Cut the carrots into sticks about the thickness of your finger. Slice the cucumbers into half-moons or sticks. Remove seeds from the bell peppers and cut them into strips. Halve the cherry tomatoes. Shred the red cabbage. Trim the snap peas. This seems like a lot, but it’s fast if you have a sharp knife. I do this on Sunday night so it’s ready for the week.
Step 2: Toast the Pita (5 minutes)
Preheat your toaster oven or regular oven to 350°F (175°C). Cut the pitas into triangles. Arrange them on a baking sheet in a single layer. Toast for 3-5 minutes until golden and crisp. Watch them closely—they burn quickly! Let them cool completely before packing. Warm pita will get soggy in the lunch box.
Step 3: Assemble the Hummus Base
Take your lunch box. Scoop about ¼ cup of hummus into a small container or compartment. If your lunch box doesn’t have a small compartment, you can use a small silicone cup or even a small ziplock bag (sealed tightly) to hold the hummus. This keeps it separate from the veggies until you’re ready to eat.
Step 4: Pack the Rainbow Veggies
Arrange the veggies in the remaining compartments. Try to group similar colors together for a visually pleasing effect. Put carrots in one section, cucumbers in another, peppers in another, etc. If you have a large box, you can mix them, but separate compartments keep them crisp. Sprinkle the shredded cabbage and snap peas on top for height and texture.
Step 5: Add the Extras and Close
Add the olives and feta cheese to small separate sections or sprinkle them over the veggies. Drizzle with a little olive oil and lemon juice if desired. Add the toasted pita triangles to the largest compartment or a separate bag. Close the lid tightly. Shake gently to make sure everything stays in place. Your rainbow veggie and hummus snack box is ready to go!
Visual/Sensory Cues: The veggies should look vibrant and crisp. The hummus should be smooth and creamy. The pita should be golden and crunchy. Everything should fit snugly without being crushed.
Built-in Troubleshooting:
– Veggies getting soggy? Make sure they’re completely dry before packing. Use a salad spinner or paper towels.
– Pita getting soft? Toast them well and let them cool completely. Store in an airtight container or bag.
– Hummus leaking? Use a sealed container or silicone cup. Don’t overfill.
Expert Tips & Tricks
Here’s everything I’ve learned from making these boxes dozens of times. These tips will save you from my mistakes.
Keep Veggies Dry
This is the #1 tip. Moisture is the enemy of crisp veggies. Wash them the night before, dry them thoroughly, and store them in a towel-lined container. If they’re wet when you pack them, they’ll get soggy by lunchtime.
Toast Pita Thoroughly
Under-toasted pita turns to mush in a lunch bag. Toast it until it’s crisp all the way through. Let it cool completely before packing. I’ve learned this the hard way with a soggy, sad pita triangle.
Use a Hummus Barrier
If your lunch box doesn’t have a small compartment for hummus, use a small silicone cup or a sealed ziplock bag. This prevents the hummus from leaking and mixing with the veggies. It also makes it easier to scoop.
Prep in Batches
I wash and chop all veggies on Sunday night. I store them in separate containers in the fridge. This way, Monday-Friday assembly takes less than 5 minutes. It’s a game-changer for busy mornings.
Add a Splash of Acid
A little lemon juice or vinegar keeps veggies fresh and bright. I add a few drops to the container before packing. It prevents browning and adds flavor.
Common Mistakes (and how to avoid them):
Mistake: Veggies are wilted
Fix: Dry them thoroughly. Use a salad spinner. Store in a container with a paper towel to absorb excess moisture.
Mistake: Pita is soggy
Fix: Toast it well. Cool it completely. Pack it in a separate bag or container.
Mistake: Hummus is messy
Fix: Use a sealed container or silicone cup. Don’t overfill.
Pro Tricks I’ve Learned:
For Extra Flavor
Add a pinch of za’atar or sumac to the veggies. It adds a Middle Eastern flair that pairs perfectly with hummus. I learned this from making whole30 grilled chicken shawarma bowls, where spices make all the difference.
For Better Texture
Toss the veggies with a tiny bit of olive oil before packing. Prevents drying out and adds richness.
Make-Ahead Strategy
Prep all veggies on Sunday. Assemble boxes Monday-Friday. Takes 5 minutes and tastes fresh every day.
Variations & Substitutions
Once you’ve nailed the basic version, here’s how you can mix it up. I’ve tried all of these.
Mediterranean Version
Add kalamata olives, feta cheese, and tzatziki instead of hummus. This is my favorite variation. It tastes like a mini Greek salad.
Asian-Inspired Version
Use edamame, shredded carrots, cucumber, and snap peas. Dip in a soy-sesame sauce or peanut sauce. It’s a totally different vibe but still crunchy and fresh.
Southwestern Version
Add black beans, corn, diced avocado, and salsa. Use tortilla chips instead of pita. It’s like a mini nacho box.
Protein-Packed Version
Add hard-boiled eggs, grilled chicken strips, or chickpeas. Makes it more filling. I add this for my husband’s lunch.
Dietary Modifications:
Gluten-Free
Use gluten-free pita or rice cakes. Everything else is naturally gluten-free.
Dairy-Free
Skip the feta cheese. Use dairy-free hummus. Most hummus is naturally dairy-free.
Vegan
Skip the feta. Use vegan hummus. Everything else is vegan.
Different Proteins:
– Hard-boiled eggs (slice in half)
– Grilled chicken strips (leftover from sheet pan greek chicken)
– Chickpeas (rinsed and drained)
– Turkey slices (rolled up)
Serving & Storage
How to Serve:
I pack these boxes the night before and put them in the fridge overnight. In the morning, I grab them and go. They’re ready to eat cold. No reheating needed.
Side Dishes:
These boxes are complete on their own. But if you want to add something, pair them with a piece of fruit or a small dessert. I sometimes add a few dark chocolate chips for a treat.
Storage Instructions:
Refrigerator:
Store prepped veggies in airtight containers for up to 4 days. Keep them dry. Hummus lasts 3-5 days after opening. Pita stays crisp for 2-3 days if stored properly.
Freezing:
Honestly, this doesn’t freeze well. Veggies get mushy, and hummus separates. Make it fresh or store in the fridge for up to 4 days.
Meal Prep:
Prep veggies on Sunday. Assemble boxes Monday-Friday. Takes 5 minutes and tastes fresh every day.
Pro tip: If veggies are drying out, add a few drops of water or lemon juice before packing. Brings back that fresh crunch.
Nutrition Information
I’m not a nutritionist, but here’s the breakdown if you’re tracking. This is per box (based on 4 boxes).
Per Serving (1 box):
– Calories: 250
– Protein: 8g
– Carbs: 30g
– Fiber: 6g
– Sugar: 8g
– Fat: 12g
– Saturated Fat: 2g
– Cholesterol: 0mg
– Sodium: 300mg
– Calcium: 100mg
What’s Good:
– High in fiber from veggies and hummus
– Low in saturated fat
– Good source of vitamins A and C from veggies
– Plant-based protein from hummus and chickpeas
What to Know:
– Moderate sodium from hummus and olives
– Contains gluten (if using regular pita)
– Can be made gluten-free and dairy-free
My Take:
Look, this is fresh, crunchy, and satisfying. It’s not a diet recipe, but it’s nutrient-dense and filling. It’s way better than processed snacks, and I know exactly what’s in it. When I want to make it lighter, I use less hummus and more veggies. But usually? I just enjoy it as a healthy, delicious lunch.
Final Thoughts
So that’s my go-to Back to School Rainbow Veggie and Hummus Snack Box! I’ve probably talked your ear off at this point, but when you make a recipe this often, you have a lot to say about it.
This has saved my sanity during back-to-school mornings. It’s my answer to “what’s for lunch?” when I’m tired, don’t want to cook, and still want something that tastes really good. My kids are happy, my husband’s happy, and I’m happy because I’m not stressed about packing lunch.
Make it yours! Try different veggies, swap in your favorite dips, adjust the spices. The best recipes are the ones you adapt to your family’s tastes. And if you need more inspiration, check out my budget college sheet pan chicken with veggies for a warm meal option.
If you make this, drop a comment and let me know what you think! I love hearing how recipes turn out in your kitchen. And if something doesn’t work, tell me that too—I’m here to help troubleshoot.
Happy packing! And I hope your lunchboxes look as good as mine do.
Frequently Asked Questions
Q: Can I use store-bought hummus?
A: Absolutely! I use store-bought for convenience. Just pick a brand you like. Sabra, Cedar’s, and Amy’s are good options. Homemade hummus is great, but for busy mornings, store-bought is a lifesaver.
Q: How long do these boxes last in the fridge?
A: Up to 4 days if prepped properly. Keep veggies dry and store in airtight containers. Hummus lasts 3-5 days after opening. Pita stays crisp for 2-3 days.
Q: Can I freeze these boxes?
A: No, they don’t freeze well. Veggies get mushy, and hummus separates. Make them fresh or store in the fridge for up to 4 days.
Q: What if my kids don’t like hummus?
A: Try tzatziki, baba ganoush, or a yogurt-based dip. Or make a simple olive oil and herb dip. The key is to find a dip they like.
Q: Can I add protein?
A: Yes! Add grilled chicken, hard-boiled eggs, chickpeas, or turkey slices. It makes the box more filling and balanced.
Q: How do I keep veggies crisp?
A: Dry them thoroughly after washing. Store in a container with a paper towel. Add a splash of lemon juice to keep them fresh.
Q: Can I make these for adults?
A: Definitely! Just add more protein, use artisanal hummus, and include fancy crackers or bread. It’s a great light lunch or snack for adults too.
Pin This Recipe!
Back to School Rainbow Veggie Snack Boxes: 5-Step Hummus Platter
- Total Time: 20 minutes
- Yield: 4 servings 1x
Description
A quick, no-cook lunch solution featuring colorful raw vegetables, creamy hummus, and toasted pita triangles, designed for busy school mornings.
Ingredients
- 1 large bunch carrots (peeled and cut into sticks, approx. 200g)
- 2 medium cucumbers (sliced into half-moons or sticks, approx. 300g)
- 2 medium red bell peppers (seeded and cut into strips, approx. 250g)
- 1 pint cherry tomatoes (halved, approx. 250g)
- 1 small head red cabbage (thinly sliced or shredded, approx. 150g)
- 1 cup snap peas or sugar snap peas (trimmed, approx. 100g)
- 1 container hummus (15–20 oz / 425-565g)
- 2 large pita breads (cut into triangles, approx. 150g)
- 1/2 cup kalamata or green olives (pitted, approx. 75g)
- 1/2 cup feta cheese (crumbled, approx. 75g, optional)
- 2 tablespoons fresh parsley or mint (chopped, approx. 10g)
- 1 tablespoon olive oil
- 1 tablespoon lemon juice
Instructions
- Wash all vegetables thoroughly. Peel carrots if using large ones, then cut into sticks. Slice cucumbers into half-moons or sticks. Remove seeds from bell peppers and cut into strips. Halve cherry tomatoes. Shred red cabbage. Trim snap peas.
- Preheat toaster oven or regular oven to 350°F (175°C). Cut pitas into triangles and arrange on a baking sheet. Toast for 3-5 minutes until golden and crisp. Let cool completely.
- Scoop about 1/4 cup of hummus into a small container or compartment within the lunch box to prevent leaking.
- Arrange the prepared vegetables in the remaining compartments of the lunch box, grouping by color for visual appeal.
- Add olives and feta cheese to small separate sections or sprinkle over veggies. Drizzle with olive oil and lemon juice if desired. Add toasted pita triangles to the largest compartment or a separate bag. Close lid tightly.
Notes
Ensure vegetables are completely dry before packing to maintain crispness. Toast pita thoroughly and let cool to prevent sogginess. Use a sealed container for hummus to avoid leaks. Veggies can be prepped up to 4 days in advance if stored dry.
- Prep Time: 15 minutes
- Cook Time: 5 minutes
- Category: Lunch
- Cuisine: Mediterranean
Nutrition
- Serving Size: 1 box
- Calories: 250
- Sugar: 8
- Sodium: 300
- Fat: 12
- Saturated Fat: 2
- Carbohydrates: 30
- Fiber: 6
- Protein: 8
Keywords: rainbow veggie snack box, hummus platter, back to school lunch, healthy lunch ideas, no cook lunch, meal prep, vegetarian lunch


