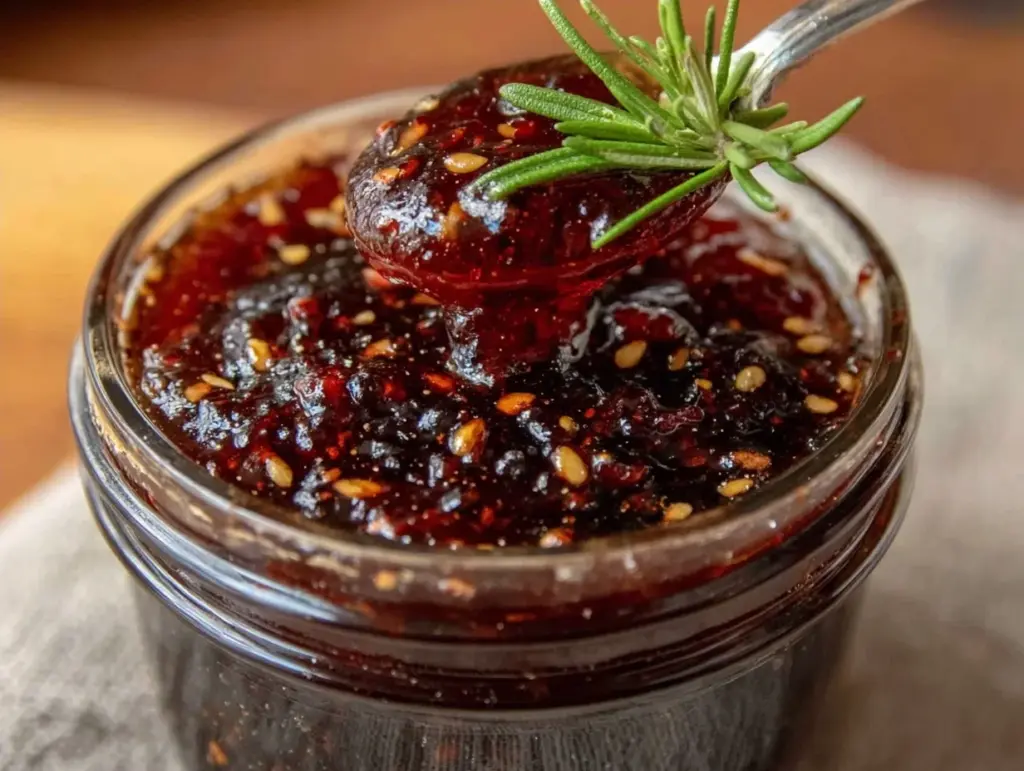
It started with a jar of deep purple berries that looked like they’d been dipped in midnight ink. I was standing in my kitchen last November, staring at a massive bag of elderberries I’d picked up at a local farmers market, wondering what on earth I was going to do with them. I’d seen the jars before—those beautiful, glossy bottles of dark syrup that everyone claims will save you from every cold, flu, and sniffle that comes through town. But I always assumed they were just marketing hype wrapped in cute labels.
Then I made a batch. And then another. And another.
There’s something almost magical about the way this syrup smells. It’s not just “berry.” It’s rich, earthy, and deeply comforting, with hints of cinnamon and clove that fill your entire house and make it feel like a hug from the inside out. I’ve spent the last three winters perfecting this homemade elderberry immune syrup, tweaking the spice ratios and testing how long it keeps. I’ve handed bottles to neighbors, gifted them to friends, and stocked our pantry shelves with it. It’s become our family’s secret weapon against the winter chill, and honestly? It tastes so good that my kids actually ask for it. Yes, kids. Asking for medicine.
This isn’t just about health (though it definitely helps). It’s about the ritual of making it. There’s something deeply satisfying about simmering dark berries on the stove, watching the colors deepen, and bottling it up for later. It’s a tiny act of care for your family during the hardest time of year. And if you’re looking for other ways to boost wellness naturally, you might also enjoy checking out our warm garlic honey tonic for a quick daily boost.
Why You’ll Love This Syrup
I know what you’re thinking. “Do I really need to make my own syrup when I can just buy a bottle at the health food store?” Here’s the thing: store-bought versions are often loaded with preservatives, artificial colors, and sometimes way too much sugar. Plus, they cost a fortune. Making this elderberry immune syrup at home is cheaper, cleaner, and honestly, kind of therapeutic.
Here’s why this recipe has earned a permanent spot in my winter routine:
- Actually Tastes Good — Seriously. It’s sweet, tangy, and spiced perfectly. I’ve had friends who hate “health foods” finish their spoonfuls and ask for seconds. It’s basically a treat that’s good for you.
- Super Simple to Make — You don’t need fancy equipment or culinary skills. Just a pot, a strainer, and a jar. The simmering does all the work while you go read a book or help with homework.
- Long Shelf Life — Once bottled, this syrup keeps in the fridge for up to a month. That’s a lot of immune support for just one hour of effort.
- Perfect Gift Idea — I’ve made dozens of these for holiday gifts. They look stunning in small glass bottles with twine and a label. It’s a gift that says, “I care about your health,” without being preachy.
- Customizable — Want it spicier? Add more ginger. Want it less sweet? Use less honey. You’re in control of every ingredient.
It’s one of those recipes that feels like a cheat code for winter wellness. You get the cozy vibes of baking without the oven heat, and you end up with something that makes your home smell amazing. Plus, if you’re into homemade wellness drinks, this pairs beautifully with our spiced apple cider mule for a festive holiday party punch.
Ingredients You’ll Need
One of the best things about this homemade elderberry immune syrup is how few ingredients it uses. Most of them are pantry staples or easy-to-find health food items. Here’s exactly what you need, and why each one matters.
The Base
Dried elderberries (1 cup / 85g) — This is the star. Make sure you buy dried elderberries. Fresh elderberries can be toxic if not cooked properly, and dried ones are concentrated and shelf-stable. I usually buy mine from bulk bins or online. If you can’t find dried, look for frozen wild elderberries, but adjust the liquid amounts slightly.
Water (2 cups / 480ml) — Just plain, filtered water. If your tap water tastes like chlorine, it’ll show up in the syrup. Filtered makes a noticeable difference.
Raw honey (½ cup / 170g) — Honey isn’t just a sweetener here; it’s a natural preservative and immune booster. Use raw, unfiltered honey if you can. It has more enzymes and flavor. If you’re keeping this vegan, substitute with agave nectar, though the preservation power is slightly less.
The Spice Blend
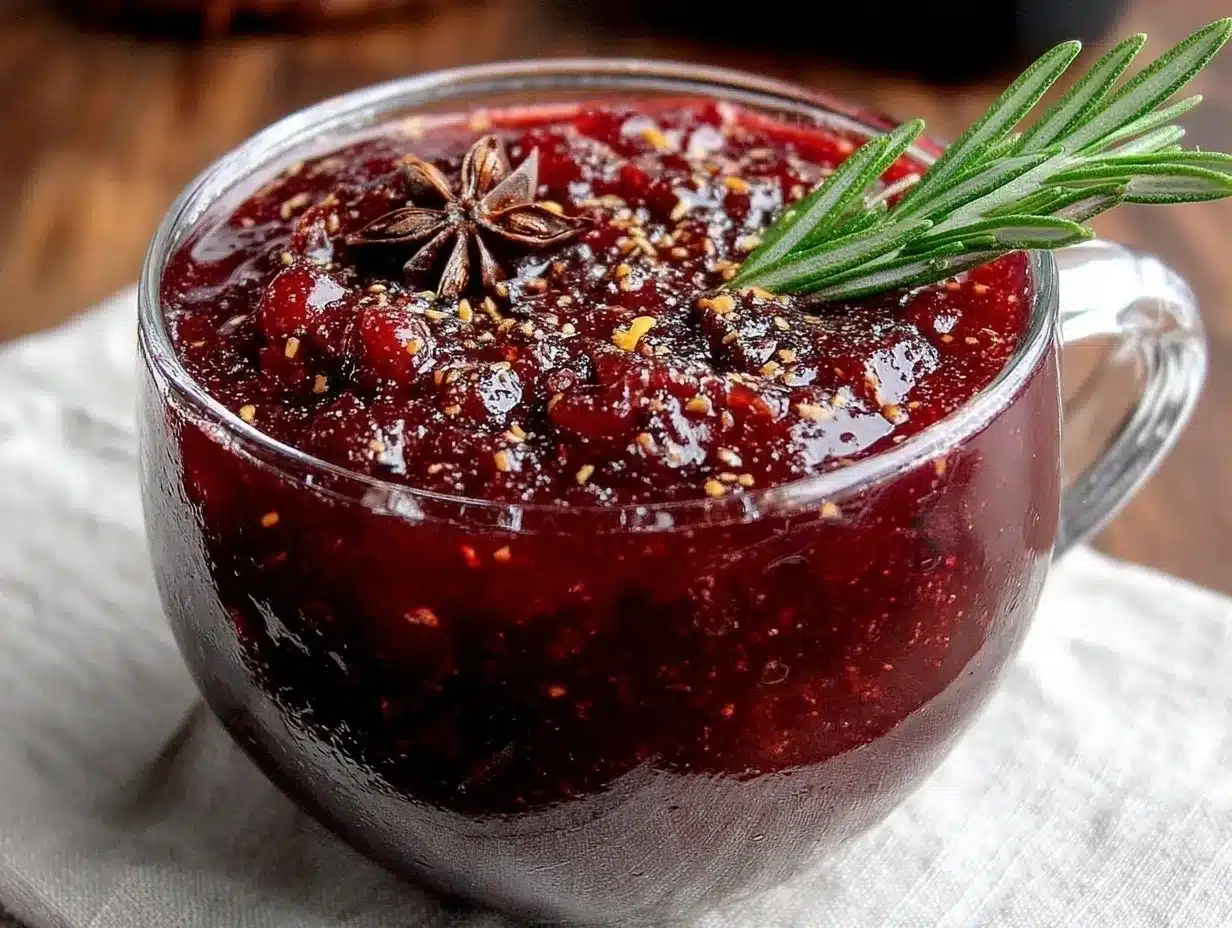
Cinnamon stick (1 large / about 3 inches) — I use Ceylon cinnamon if I can find it, as it’s milder and sweeter. It adds warmth and helps with digestion. Don’t use ground cinnamon unless you’re in a pinch—it gets gritty and hard to strain.
Whole cloves (5-6 cloves) — These are potent. Don’t add more, or the syrup will taste like a toothache. They add that deep, festive spice note.
Fresh ginger (1-inch piece, sliced) — This adds a nice kick and anti-inflammatory properties. Peel it first, then slice it into rounds. If you’re a ginger lover, use two inches. I prefer a moderate heat, so one inch is perfect for me.
Star anise (1 pod) — Optional, but I highly recommend it. It adds a subtle licorice note that makes the syrup smell incredible. It’s also part of traditional Chinese medicine for colds.
The Finishers
Lemon juice (2 tablespoons / 30ml) — Freshly squeezed. This brightens the flavor and adds vitamin C. It also helps balance the sweetness. Don’t skip this; it makes the syrup taste less like syrup and more like a complex drink.
Apple cider vinegar (1 tablespoon / 15ml) — This is the secret ingredient. It helps preserve the syrup and adds a tangy depth. It won’t taste like vinegar in the final product, I promise. If you’re worried about the taste, you can skip it, but it helps the syrup last longer.
Equipment
You don’t need much. Just a medium saucepan, a fine-mesh strainer or nut milk bag (for the easiest straining), a wooden spoon, and glass jars for storage. I use old pasta sauce jars that I’ve washed and sterilized. They’re free and look rustic.
How to Make It: Step-by-Step
Making this homemade elderberry immune syrup is surprisingly easy. There’s no complicated technique, just simmering and straining. Here’s exactly how I do it, so you don’t make the same mistakes I did the first time.
Step 1: Combine the Ingredients
In a medium saucepan, combine the dried elderberries, water, cinnamon stick, cloves, ginger, and star anise. Stir it all together. You don’t need to measure the spices precisely—just eyeball it. If you like it spicy, add more ginger. If you prefer it mild, stick to one cinnamon stick and six cloves.
Step 2: Simmer the Berries
Place the pot over medium-high heat and bring it to a boil. Once it boils, reduce the heat to low. Cover the pot and let it simmer gently for 45 minutes to 1 hour. You’ll notice the water turning a deep, dark purple. The elderberries will burst and soften. This is the extraction phase—the flavors and nutrients are moving from the berries into the water.
Pro tip: Don’t rush this step. If you simmer for only 20 minutes, the syrup will be weak and watery. The long simmer is what makes it rich and potent.
Step 3: Cool and Strain
Remove the pot from the heat and let it cool for about 15-20 minutes. This makes it safer to handle and easier to strain. Once it’s cool enough to touch, it’s time to strain. Pour the mixture through a fine-mesh strainer into a large bowl or measuring cup. If you want a crystal-clear syrup, use a nut milk bag or cheesecloth. I usually just use the strainer and press the berries with the back of a spoon to get all the liquid out. Discard the solids (or compost them).
Note: You’ll be left with a dark, concentrated liquid. It might look like black tea. That’s exactly what you want.
Step 4: Add Honey and Lemon
Here’s the important part: wait until the liquid is warm, not hot, before adding the honey. High heat can destroy the beneficial enzymes in raw honey. Once the liquid is warm to the touch, stir in the raw honey until it’s completely dissolved. Then, stir in the fresh lemon juice and apple cider vinegar.
The syrup will thin out slightly as the honey melts. It should have the consistency of light maple syrup. If it’s too thick, add a splash of hot water. If it’s too thin, you can simmer it a bit longer next time.
Step 5: Bottle and Store
Let the syrup cool completely to room temperature. Then, pour it into clean glass jars or bottles. I use small 4-ounce glass bottles with cork stoppers for gifts, and a larger mason jar for our daily use. Seal them tightly and store them in the refrigerator.
Timing: The whole process takes about 1.5 hours, but most of that is hands-off simmering. Active time is only about 15 minutes.
Expert Tips & Tricks
I’ve made this syrup probably twenty times now, and I’ve learned a few things that make a huge difference. Here’s how to get the best results.
Don’t Skimp on the Simmer — I know it’s tempting to rush, but the 45-minute simmer is non-negotiable. It’s what extracts the anthocyanins (the purple pigment) and the medicinal properties. If you boil it too hard, you might evaporate too much liquid and make it too concentrated. Low and slow is the way.
Strain Twice if You Want Clarity — If you’re giving this as a gift, presentation matters. I strain it through a fine-mesh strainer, then through a coffee filter or nut milk bag. It takes extra time, but the result is a beautiful, clear syrup that looks professional.
Honey Quality Matters — Since you’re using honey as a preservative and sweetener, use the best quality you can afford. Local raw honey is ideal because it’s already acclimated to your local environment, which some people believe helps with seasonal allergies. Plus, it tastes better.
Label Everything — When you’re making gifts, label the bottles with the date and ingredients. This syrup keeps for about a month in the fridge, so writing the date helps you keep track of freshness. I use small tags tied with twine—it looks so charming.
Adjust Sweetness to Taste — Elderberries can be quite tart. After you strain the liquid, taste it before adding honey. If it’s very tart, you might need more honey. If it’s already sweet, you can use less. Start with ½ cup and adjust from there.
Variations & Substitutions
Once you’ve mastered the basic recipe, you can get creative. Here are some variations I’ve tried that work well.
Elderberry + Echinacea — Add 1 teaspoon of dried echinacea root during the simmer. It’s another immune-boosting herb that pairs beautifully with elderberry. Strain it out along with the spices.
Elderberry + Ginger Kick — Double the ginger to 2 inches. This version is spicier and great for when you feel a scratchy throat coming on. It’s warming and soothing.
Vegan Version — Simply swap the honey for agave nectar or maple syrup. Agave is slightly sweeter and thinner, so you might need less. Maple syrup adds a deeper flavor that some people love.
Elderberry Gummies — If you prefer a chewable form, you can use this syrup base to make gummies. Just mix the syrup with gelatin or agar-agar and pour into molds. I have a separate recipe for elderberry gummies if you want to try that instead.
Spiced Apple Cider Syrup — Replace half the water with apple cider. This adds a fruity sweetness that’s perfect for holiday drinks. It’s delicious stirred into hot water with lemon for a winter tea.
Serving & Storage
Now that you’ve made this beautiful syrup, how do you use it? There are a few ways I enjoy it.
Daily Immune Support — Take 1 tablespoon daily as a preventive measure. It’s a quick way to get some immune support without thinking about it. Mix it with a little warm water if you want a drink, or just take it straight from the spoon.
Winter Wellness Tea — When you feel a cold coming on, mix 2-3 tablespoons of syrup with 8 ounces of hot water. Add a slice of lemon and stir. It’s soothing, sweet, and helps calm a sore throat. I keep a bottle right next to my kettle for easy access.
Breakfast Boost — Drizzle a tablespoon over oatmeal or yogurt in the morning. It adds a nice berry flavor and a health kick to your breakfast. It’s surprisingly good on pancakes too.
Storage — Keep the syrup in the refrigerator in airtight glass containers. It will keep for up to 1 month. If you notice any mold or off-smells, discard it. The high sugar content and acidity usually prevent spoilage, but always trust your nose.
Freezing — You can freeze the syrup in ice cube trays for easy portioning. Once frozen, transfer the cubes to a freezer bag. They’ll keep for up to 6 months. Just pop a cube into hot water when you need a quick dose.
Nutrition Information
I’m not a nutritionist, but here’s a rough breakdown. This syrup is concentrated, so a little goes a long way.
Per Serving (1 tablespoon):
- Calories: 45
- Carbohydrates: 11g
- Sugar: 10g (from honey)
- Protein: 0g
- Fat: 0g
It’s relatively low in calories but high in natural sugars from the honey. If you’re watching your sugar intake, use less honey or substitute with a low-calorie sweetener, though the preservation properties will be reduced. The elderberries themselves add antioxidants and vitamin C, but the exact amounts depend on the quality of the berries.
Remember, this is a supplement, not a meal replacement. It’s a small, potent dose of wellness. Enjoy it as part of a balanced diet and healthy lifestyle.
Final Thoughts
Making this homemade elderberry immune syrup has become one of my favorite winter rituals. There’s something deeply comforting about the smell of simmering berries and spices, and even more comforting knowing that you’ve created something that helps your family stay healthy. It’s a simple recipe, but it feels special. It feels like care.
I hope you try it. I hope you love the taste, and I hope it helps you through the cold months. And if you do make it, I’d love to hear how you use it. Do you take it straight? Mix it into tea? Drizzle it on yogurt? Drop a comment below and let me know.
Happy simmering! And here’s to a healthy, cozy winter.
Frequently Asked Questions
Can I use fresh elderberries instead of dried?
It’s not recommended. Fresh elderberries contain cyanogenic glycosides, which can be toxic if not cooked properly. Dried elderberries are safer and more concentrated. If you forage your own, make sure they are fully cooked and processed correctly. For simplicity and safety, stick with dried.
How long does this syrup last?
Stored in the refrigerator in an airtight glass jar, this syrup will last for about 1 month. If you freeze it in ice cube trays, it can last up to 6 months. Always check for signs of spoilage, like mold or an off smell, before using.
Can I give this to children?
Yes, but with a caveat. Do not give honey to children under 1 year old due to the risk of botulism. For older children, this syrup is generally safe. Use a smaller dose (1 teaspoon) and adjust the sweetness to their taste. Always consult your pediatrician if you’re unsure.
Why is my syrup cloudy?
Cloudiness usually means there are fine particles from the berries in the syrup. If you want a clear syrup, strain it twice using a fine-mesh strainer and then a coffee filter or nut milk bag. Cloudy syrup is still perfectly good to drink, it just looks less polished.
Can I make this without honey?
Yes, you can use agave nectar or maple syrup. However, honey acts as a natural preservative, so the syrup might not last as long without it. If you use agave, store the syrup in the fridge and use it within 2-3 weeks. Also, agave is sweeter, so use less.
Is this syrup safe for diabetics?
This syrup contains honey, which is high in sugar. People with diabetes should consult their doctor before consuming. You can reduce the honey amount or use a sugar substitute, but the taste and preservation properties will change. Monitor your blood sugar if you choose to try it.
Can I add other spices?
Absolutely! This is a great base for experimentation. Try adding star anise, cardamom pods, or a strip of orange peel. Just remember that strong spices can overpower the elderberry flavor, so start with small amounts and taste as you go.
Pin This Recipe!
Homemade Elderberry Immune Syrup: Easy Winter Wellness Gift
- Total Time: 1 hour 15 minutes
- Yield: Approximately 2 cups (32 servings) 1x
Description
A rich, earthy, and spiced homemade elderberry syrup that serves as a natural immune booster and a comforting winter wellness ritual. It is easy to make, customizable, and makes a perfect gift.
Ingredients
- 1 cup (85g) dried elderberries
- 2 cups (480ml) filtered water
- 1 large cinnamon stick (about 3 inches)
- 5–6 whole cloves
- 1-inch piece fresh ginger, sliced
- 1 pod star anise (optional)
- ½ cup (170g) raw honey
- 2 tablespoons (30ml) fresh lemon juice
- 1 tablespoon (15ml) apple cider vinegar
Instructions
- In a medium saucepan, combine the dried elderberries, water, cinnamon stick, cloves, ginger, and star anise. Stir to combine.
- Place the pot over medium-high heat and bring to a boil. Once boiling, reduce heat to low, cover, and simmer gently for 45 minutes to 1 hour until the liquid is deep purple and berries have burst.
- Remove from heat and let cool for 15-20 minutes until safe to handle.
- Strain the mixture through a fine-mesh strainer or nut milk bag into a bowl, pressing the berries to extract all liquid. Discard solids.
- Ensure the liquid is warm, not hot, then stir in the raw honey until completely dissolved.
- Stir in the fresh lemon juice and apple cider vinegar.
- Let the syrup cool completely to room temperature.
- Pour into clean glass jars or bottles, seal tightly, and store in the refrigerator.
Notes
Do not use fresh elderberries as they can be toxic if not cooked properly; use dried or frozen wild elderberries. Do not give honey to children under 1 year old. For a clearer syrup, strain twice using a coffee filter or nut milk bag. The syrup keeps in the fridge for up to 1 month or can be frozen in ice cube trays for up to 6 months.
- Prep Time: 15 minutes
- Cook Time: 1 hour
- Category: Condiments
- Cuisine: American
Nutrition
- Serving Size: 1 tablespoon
- Calories: 45
- Sugar: 10
- Carbohydrates: 11
Keywords: elderberry syrup, immune booster, winter wellness, homemade syrup, natural cold remedy, elderberry recipe, immune support, winter gift idea


