It was 7:30 PM on a Tuesday, and I was staring at my fridge like it owed me money. You know that look. The one where you’re exhausted from work, the kids are asking for snacks, and your brain has completely short-circuited when it comes to cooking. I had a bag of mozzarella balls, some stale basil leaves that were wilting in the crisper drawer, and a bottle of balsamic glaze I’d bought for a salad three months ago and never used.
Normally, I’d just throw together some toast or order takeout. But last week, I decided to try something ridiculous: I threw those ingredients on skewers, popped them under the broiler for two minutes, and drizzled the glaze over them. I expected mediocrity. Maybe a warm, sad salad bite.
Instead, I got magic.
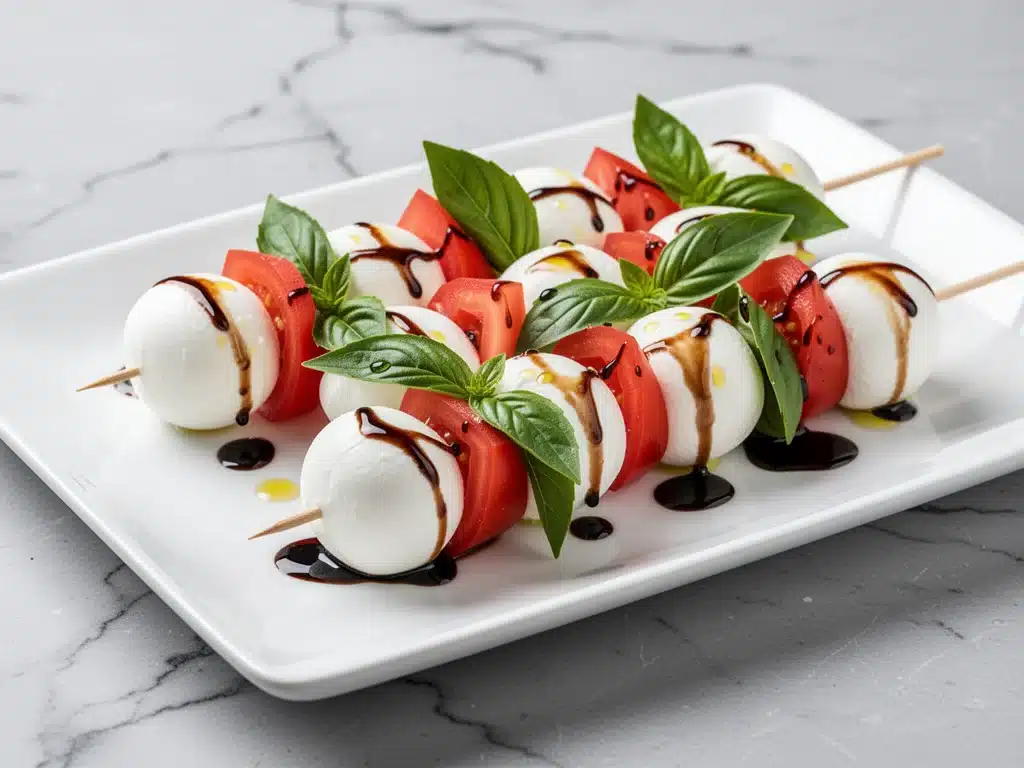
The mozzarella turned golden and gooey. The basil got fragrant and slightly crispy at the edges. The balsamic glaze caramelized into a sticky, sweet-tangy coating that made my husband stop mid-sentence and ask, “Wait, where did this come from?” It was my warm caprese skewers with balsamic glaze, and it had never been this good.
I’ve made these skewers probably fifteen times since that random Tuesday. They’ve become my secret weapon for busy weeknights when I need to feed people something that feels special but requires zero effort. They’re perfect for easy weeknight dinners when you’re serving a main course that needs a side, or just as a standalone snack while you wait for dinner to cook. The best part? You can prep them in five minutes. Five. Minutes.
Before I got the timing right, I burned the cheese twice and overcooked the tomatoes. But now? I’ve got it down to a science. And I’m sharing that science with you. These aren’t just “caprese salad on a stick.” They’re a warm, savory, sweet, and salty bite that will convince even the most skeptical eater that you’ve been hiding your cooking skills. Let’s get into how to make them perfectly every single time.
Why You’ll Love These Warm Caprese Skewers
Look, I love a good caprese salad. But let’s be real: caprese salad is a pain to eat at a party. It’s messy, the ingredients slide off the plate, and it gets soggy if you don’t eat it immediately. These skewers solve all of that while adding a whole new layer of flavor and texture.
Here’s why these have taken over our house:
Stupid Simple Prep — Seriously, if you can thread a cherry tomato onto a stick, you can make this. I’ve assembled these while holding a toddler on one hip. It’s that easy. No chopping, no sautéing, no complex techniques.
Five-Minute Active Time — From fridge to oven to plate, you’re looking at about five minutes of hands-on time. The rest is just waiting for the broiler to do its work. This is crucial for busy weeknights when you don’t have the mental bandwidth for a complicated recipe.
Flavor Explosion — Warm cheese tastes different than cold cheese. When you heat mozzarella, it gets incredibly creamy and milky. The balsamic glaze reduces slightly in the heat, concentrating its sweetness. The basil gets aromatic. It’s a flavor profile that’s way more interesting than a standard cold salad.
Party-Proof — These are finger food perfection. No plates needed. No forks required. They hold their shape, they don’t drip, and they look elegant enough for a dinner party but casual enough for a Tuesday night snack. I’ve served these to wine-snob friends and picky kids, and everyone goes back for seconds.
Budget-Friendly — You probably have most of these ingredients already. Mozzarella balls, cherry tomatoes, basil, and balsamic glaze are pantry staples for me. It’s a cheap way to make something feel fancy.
So basically, these skewers are my answer to “what’s for appetizers?” when I have no time but still want to impress. They’re reliable, delicious, and ridiculously easy.
Ingredients You’ll Need
Here’s the best part: you probably have most of this already in your kitchen. This recipe relies on high-quality, simple ingredients because there’s nowhere to hide. If the cheese is bad, you’ll taste it. If the balsamic is watery, it won’t glaze properly.
Mozzarella Balls (1 pint / 250g) — Look for “bocconcini” or fresh mozzarella balls. They’re small, pre-sized, and perfect for skewering. Avoid large mozzarella balls that you’d have to cut yourself; they’re too big and won’t heat evenly. Fresh is best, but frozen mozzarella balls (thawed) work in a pinch.
Cherry Tomatoes (2 cups / 300g) — Use sweet, ripe cherry tomatoes. I prefer red ones for the classic look, but yellow or grape tomatoes work too. Make sure they’re firm enough to stay on the skewer. Overripe tomatoes will burst and make a mess.
Fresh Basil Leaves (1 cup / loosely packed) — This is the non-negotiable ingredient. Fresh basil is what makes this taste like summer. Dried basil just won’t cut it here. Look for vibrant green leaves without brown spots. If your basil is starting to wilt, it’s still usable, but the fresher the better.
Balsamic Glaze (½ cup / 120ml) — This is the star of the show. Don’t use regular balsamic vinegar; it’s too thin and won’t stick to the skewers. You need a thick, syrupy balsamic glaze (also called balsamic reduction). I like the brand Aldi’s, but any brand works. If you can’t find it, you can make your own by simmering balsamic vinegar until it reduces by half, but that takes time.
Wooden Skewers (8-10 sticks) — Soak them in water for 10 minutes before using to prevent burning. This is a crucial step I learned the hard way. I once threw dry skewers under the broiler and watched them catch fire. Not fun. Soak them first, always.
Optional: Olive Oil (1 teaspoon) — A light drizzle helps the basil stick and adds a bit of richness. I usually skip this if I’m using a generous amount of glaze, but it’s nice for extra flavor.
Optional: Sea Salt (pinch) — A tiny pinch of flaky sea salt after broiling elevates the sweetness of the balsamic. I add this when I want to feel fancy.
Pro Tip: I buy pre-portioned mozzarella balls from the store. It saves time and ensures uniform size. If you’re buying block mozzarella, cut it into 1-inch cubes. Just make sure they’re not too small, or they’ll fall off.
Equipment Needed
You don’t need fancy equipment for this. Here’s what I actually use:
Broiler — This is essential. You need high, direct heat to melt the cheese and crisp the basil quickly. If your oven doesn’t have a broiler, you can use an air fryer, but the results are slightly different. I prefer the broiler for that authentic char.
Baking Sheet — Line it with parchment paper or foil for easy cleanup. I use parchment because it prevents sticking and makes cleanup a breeze.
Skewers — Wooden or bamboo skewers work best. Metal skewers get too hot and can burn your fingers. Soak wooden skewers in water for 10 minutes before using.
Tongs — For flipping the skewers if needed. I usually don’t flip them, but if your broiler runs hot, you might want to rotate them halfway through.
Pastry Brush — Optional, but helpful for drizzling the glaze evenly. I just pour it directly from the bottle, but a brush gives more control.
Small Bowl — For soaking the skewers. Any bowl works.
Knife — For trimming basil if needed. Not strictly necessary, but helpful for keeping things tidy.
Tip: If you don’t have a broiler, you can bake these at 400°F (200°C) for 8-10 minutes. The cheese will melt, but you won’t get that nice charred edge. It’s still good, but the broiler is better.
How to Make It: Step-by-Step
Alright, let’s make this! I’m walking you through exactly how I do it, including the little tricks I’ve picked up over the last few months.
Step 1: Prep Your Skewers (2 minutes)
First, soak your wooden skewers in a bowl of water for at least 10 minutes. This prevents them from burning under the broiler. While they’re soaking, preheat your oven’s broiler on high. If your oven has a convection setting, use it for more even heating. Line a baking sheet with parchment paper or foil. I use foil because I’m lazy, but parchment is easier to clean up.
Step 2: Assemble the Skewers (3 minutes)
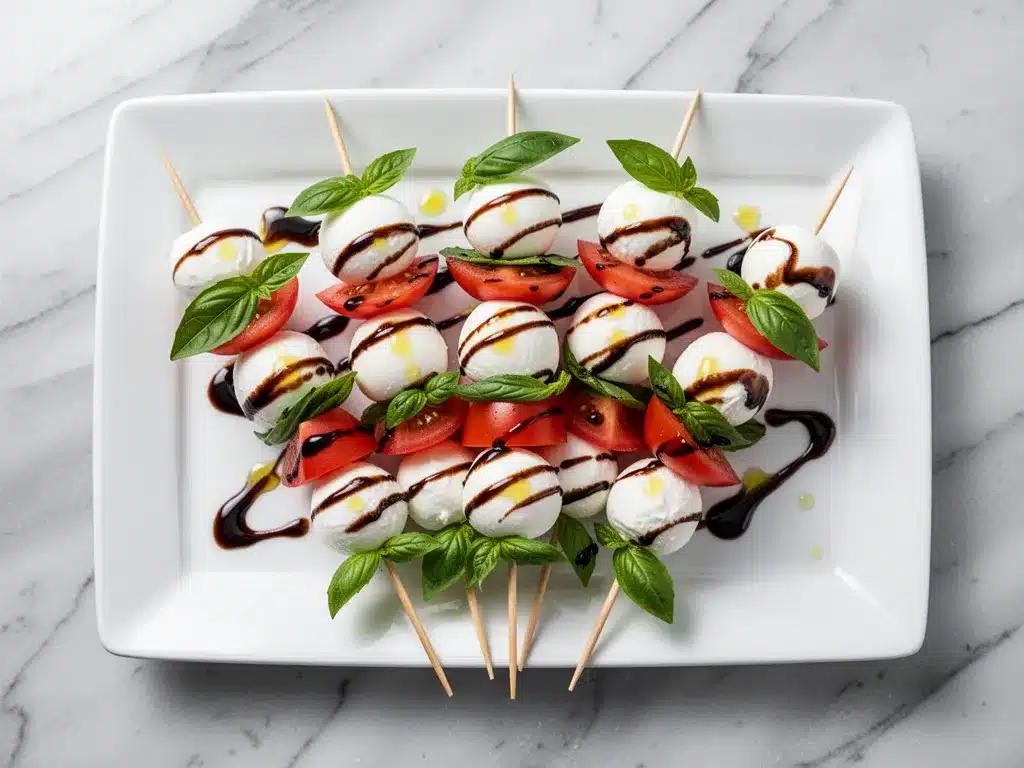
Take a skewer and thread a cherry tomato onto it. Then, add a mozzarella ball. Then, fold a basil leaf in half and thread it onto the skewer. Repeat this pattern until the skewer is full. You want a nice distribution of ingredients so every bite has a bit of everything. Don’t pack them too tightly; you want some air circulation for even heating.
Pro Tip: If your basil leaves are large, fold them in half or tear them slightly. This makes them easier to thread and ensures they don’t fall off. If they’re small, you can thread a whole leaf.
Step 3: Broil the Skewers (2-3 minutes)
Place the assembled skewers on the prepared baking sheet. Slide them under the broiler. Watch them closely! Broilers vary in intensity. You want the mozzarella to melt and turn golden brown on the edges, and the basil to get fragrant and slightly crispy. This usually takes 2-3 minutes. Do not walk away. I burned my first batch because I got distracted by a text message. Lesson learned.
Visual Cue: You’ll know they’re done when the cheese is bubbling and has a light golden spot, and the basil edges are slightly curled and crispy.
Step 4: Glaze and Serve (1 minute)
Remove the skewers from the oven. Immediately drizzle the balsamic glaze over them while they’re still hot. The heat will help the glaze stick and caramelize slightly. If you’re using sea salt, sprinkle it on now. Serve immediately. These are best eaten hot, right out of the oven. The cheese is gooey, the tomatoes are warm, and the basil is aromatic.
Total Time: About 5 minutes active, plus 10 minutes soaking time for skewers.
Troubleshooting:
Skewers burning: Make sure they’re soaked for at least 10 minutes. If they’re still burning, use metal skewers or bamboo skewers labeled “broiler-safe.”
Cheese not melting: Your broiler might not be hot enough. Try broiling for an extra minute, or use the convection setting.
Basil falling off: Fold the basil leaf in half before threading. This creates a tighter fit on the skewer.
Expert Tips & Tricks
Here’s everything I’ve learned from making these dozens of times. These tips will save you from my mistakes.
Soak Your Skewers
I can’t stress this enough. Dry wooden skewers will catch fire under the broiler. Soak them in water for at least 10 minutes. I usually soak them when I’m prepping other ingredients so I don’t forget. If you’re in a hurry, soak them in hot water for 5 minutes—it works too.
Don’t Overcrowd the Pan
Give each skewer some space. If they’re touching, the cheese won’t brown evenly. I usually fit 6-8 skewers on a standard baking sheet. If you’re making a lot, use two sheets.
Use Thick Balsamic Glaze
Regular balsamic vinegar is too thin. It will drip off the skewers and make a mess. You need a thick, syrupy glaze. Look for “balsamic reduction” or “balsamic glaze” in the store. If you can’t find it, simmer 1 cup of balsamic vinegar in a saucepan over medium heat for 15-20 minutes until it reduces by half and coats the back of a spoon. It’s worth the effort.
Watch the Broiler
Ovens vary. Some broilers are hotter than others. Watch your skewers closely. You want golden brown, not black. If your broiler runs hot, pull the pan out after 2 minutes and check.
Season with Salt
A tiny pinch of flaky sea salt after broiling enhances the sweetness of the balsamic and the savoriness of the cheese. It’s a small step that makes a big difference.
Common Mistakes:
Mistake: Skewers are dry
Fix: Make sure you’re using fresh mozzarella balls, not aged mozzarella. Fresh mozzarella has more moisture and melts better.
Mistake: Basil is burnt
Fix: Broil for less time. Basil burns quickly. You want it fragrant, not charred.
Mistake: Glaze is too runny
Fix: Use a thicker glaze, or simmer your own. Or, drizzle less glaze.
Variations & Substitutions
Once you’ve nailed the basic version, here’s how you can mix it up. I’ve tried all of these.
Strawberry-Basil Skewers
Swap the cherry tomatoes for fresh strawberries. It’s sweet, tangy, and perfect for dessert. I serve these with a drizzle of chocolate sauce instead of balsamic glaze. My kids love this version.
Avocado-Lime Skewers
Swap the mozzarella for cubes of avocado and the balsamic glaze for a lime-cilantro dressing. It’s fresh and zesty. Great for summer parties.
Prosciutto-Wrapped
Add a small strip of prosciutto to each skewer. It adds a salty, savory element that pairs beautifully with the sweet balsamic. This is my go-to for dinner parties.
Vegan Version
Use vegan mozzarella balls (like Violife or Daiya) and make sure the balsamic glaze is vegan (most are, but check the label). The result is similar, though the cheese doesn’t melt quite the same way.
Gluten-Free
This recipe is naturally gluten-free, as long as your balsamic glaze doesn’t contain added thickeners with gluten. Most are safe, but always check.
Different Cheeses:
You can use string cheese (cut into chunks) or small balls of goat cheese. String cheese melts beautifully, but it’s less elegant. Goat cheese adds a tangy flavor that pairs well with the balsamic.
Serving & Storage
How to Serve:
I usually serve these straight from the baking sheet at the dinner table. They look rustic and stay warm. But here are other ways I’ve enjoyed them:
Side Dishes:
- Grilled Chicken — These skewers pair perfectly with cast iron ribeye steak or grilled chicken. The lightness of the skewers balances the richness of the meat.
- Pasta — Serve with a simple aglio e olio pasta. The caprese flavors complement the garlic and olive oil.
- Salad — Add a side of mixed greens with a light vinaigrette. The warm skewers contrast nicely with the cold salad.
Toppings Bar:
When I have guests, I put out: extra balsamic glaze, flaky sea salt, fresh basil leaves, and cracked black pepper. Everyone customizes their skewer.
Storage Instructions:
Refrigerator: These are best eaten fresh. If you have leftovers, store them in an airtight container for up to 2 days. The cheese will firm up, and the basil will wilt. Reheat in the oven at 350°F for 5 minutes to soften the cheese.
Freezing: I don’t recommend freezing these. The cheese becomes grainy, and the basil loses its texture. Make them fresh whenever you can.
Meal Prep: You can assemble the skewers ahead of time and store them in the fridge for up to 4 hours. Just don’t add the glaze until you’re ready to broil. This saves time on busy weeknights.
Pro Tip: If you’re serving these at a party, assemble them on a platter and keep them in the fridge until guests arrive. Then broil them in batches. They’ll be hot and fresh for everyone.
Nutrition Information
I’m not a nutritionist, but here’s the breakdown if you’re tracking. This is per skewer, based on 8 skewers total.
| Nutrient | Per Skewer |
|---|---|
| Calories | 85 |
| Protein | 5g |
| Carbs | 6g |
| Fiber | 1g |
| Sugar | 4g |
| Fat | 4g |
| Sodium | 120mg |
What’s Good:
- Low in calories
- Good source of protein from mozzarella
- Contains vitamins from tomatoes and basil
What to Know:
- Higher in sodium from the mozzarella
- Contains dairy
- Balsamic glaze adds sugar
My Take:
Look, these are appetizers. They’re meant to be indulgent. But they’re not loaded with calories like fried foods. They’re a lighter option that still feels special. When I want to make them lighter, I use low-fat mozzarella and less glaze. But usually? I just enjoy them as is.
Final Thoughts
So that’s my go-to warm caprese skewers with balsamic glaze! I’ve probably talked your ear off at this point, but when you make a recipe this often, you have a lot to say about it.
This has saved weeknight appetizers more times than I can count. It’s my answer to “what’s for snacks?” when I’m tired, don’t want takeout, and still want something that tastes really good. My kids are happy, my husband’s happy, and I’m happy because I’m not stressed about cooking.
Make it yours! Try different add-ins, swap in your favorite vegetables, adjust the glaze. The best recipes are the ones you adapt to your family’s tastes.
If you make this, drop a comment and let me know what you think! I love hearing how recipes turn out in your kitchen. And if something doesn’t work, tell me that too—I’m here to help troubleshoot.
Happy cooking! And I hope your kitchen smells half as good as mine does right now.
Frequently Asked Questions
Can I use frozen mozzarella balls?
You can, but thaw them completely before assembling. Frozen mozzarella has more moisture, so it might not melt as evenly. Pat them dry with a paper towel before threading. Fresh mozzarella is best for the creamiest texture.
Why did my skewers burn?
Most likely, your skewers weren’t soaked long enough, or your broiler ran hot. Always soak wooden skewers for at least 10 minutes. Watch the skewers closely under the broiler—they can go from perfect to burnt in seconds.
Can I make these in an air fryer?
Yes! Preheat your air fryer to 400°F (200°C). Cook the skewers for 4-5 minutes, flipping halfway through. The cheese will melt, but you won’t get the same charred edges as the broiler. It’s still delicious, just slightly different.
Can I use regular balsamic vinegar instead of glaze?
You can, but it will be much thinner and won’t stick to the skewers. It will drip off and make a mess. If you must use vinegar, simmer it down first to reduce it to a syrup. Or, drizzle it lightly just before serving.
How do I reheat leftovers?
Reheat in the oven at 350°F for 5-7 minutes until the cheese is soft again. The microwave works too, but it can make the basil soggy. Avoid the microwave if you want the best texture.
Can I assemble these ahead of time?
Yes! Assemble the skewers and store them in the fridge for up to 4 hours. Just don’t add the glaze until you’re ready to broil. This is great for meal prep or party planning.
What kind of basil works best?
Fresh basil is essential. Sweet basil is the classic choice, but Thai basil or lemon basil can add interesting twists. Avoid dried basil; it doesn’t have the same flavor or texture when cooked.
Can I add other ingredients?
Absolutely! Try adding prosciutto, avocado, or strawberries. Get creative! The basic combination is classic, but there’s room for experimentation.
Pin This Recipe!
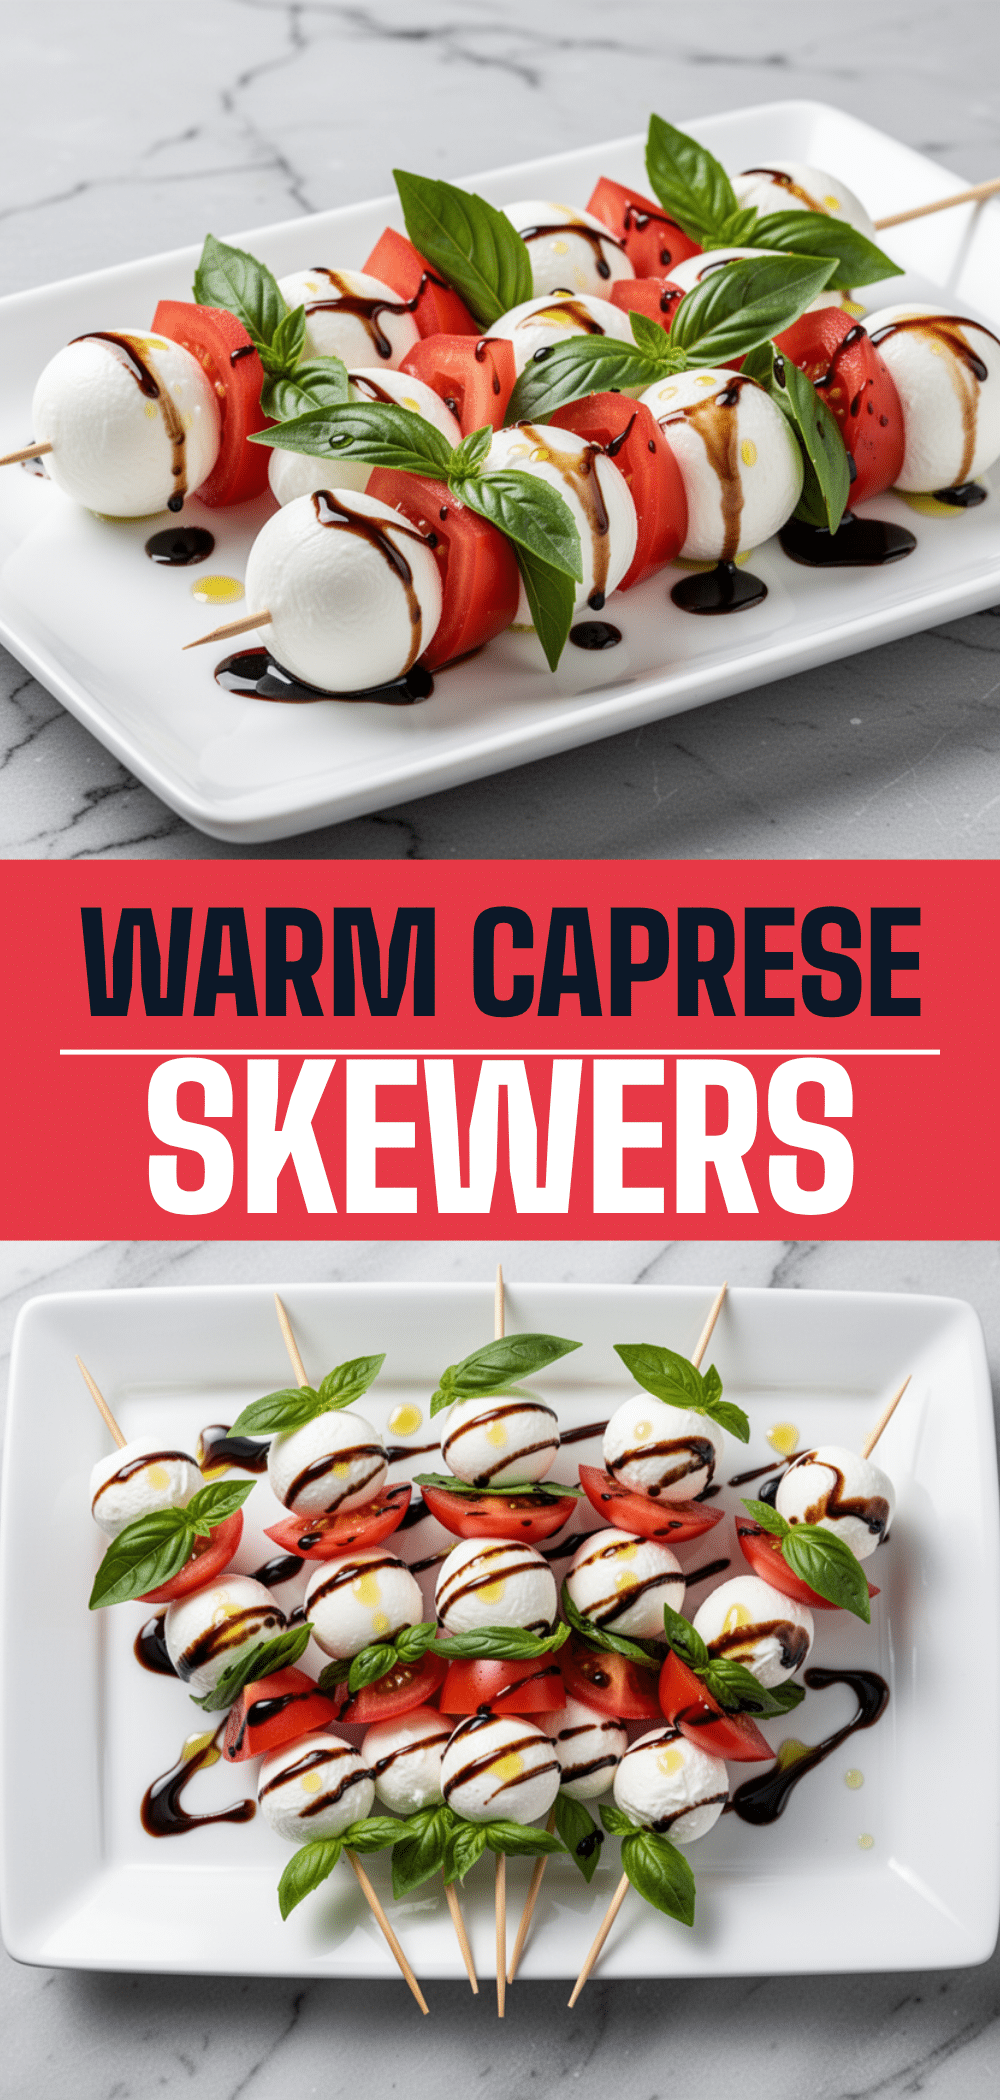
Warm Caprese Skewers: Easy 5-Minute Weeknight Appetizer
- Total Time: 15 minutes
- Yield: 8 servings 1x
Description
A quick and elegant appetizer featuring golden, gooey mozzarella, sweet cherry tomatoes, and fragrant basil, finished with a sticky balsamic glaze. Ready in just five minutes of active time.
Ingredients
- 1 pint (250g) fresh mozzarella balls (bocconcini)
- 2 cups (300g) cherry tomatoes
- 1 cup fresh basil leaves (loosely packed)
- 1/2 cup (120ml) thick balsamic glaze
- 8–10 wooden skewers
- 1 teaspoon olive oil (optional)
- Pinch of flaky sea salt (optional)
Instructions
- Soak wooden skewers in a bowl of water for at least 10 minutes to prevent burning.
- Preheat the oven broiler to high. Line a baking sheet with parchment paper or foil.
- Thread ingredients onto skewers in an alternating pattern: cherry tomato, mozzarella ball, and folded basil leaf. Do not pack too tightly.
- Place skewers on the prepared baking sheet.
- Broil skewers for 2-3 minutes, watching closely, until the mozzarella is melted and golden and the basil is fragrant and slightly crispy.
- Remove from oven and immediately drizzle with balsamic glaze while hot.
- Sprinkle with a pinch of sea salt if desired and serve immediately.
Notes
Soak wooden skewers for at least 10 minutes to prevent them from catching fire under the broiler. Use thick balsamic glaze rather than regular vinegar to ensure it sticks. If your broiler runs hot, check skewers after 2 minutes. These are best served immediately but can be stored in the fridge for up to 2 days.
- Prep Time: 5 minutes
- Cook Time: 2-3 minutes
- Category: Appetizer
- Cuisine: Italian
Nutrition
- Serving Size: 1 skewer
- Calories: 85
- Sugar: 4
- Sodium: 120
- Fat: 4
- Saturated Fat: 2
- Carbohydrates: 6
- Fiber: 1
- Protein: 5
Keywords: caprese skewers, warm appetizer, balsamic glaze, mozzarella, cherry tomatoes, easy weeknight dinner, Italian appetizer, 5 minute recipe


