Last November, I was the designated dessert provider for my in-laws’ house. You know the pressure. My mother-in-law is a professional baker who makes sourdough from scratch and knows the exact humidity level required for macarons. I, on the other hand, am a “throw it in a bowl” kind of cook who usually survives on takeout and hope.
I had planned to make a simple apple crisp. But three days before the dinner, my oven started acting up, and I panicked. I needed something that looked impressive, tasted like it came from a high-end London café, and wouldn’t require me to stand over a stove for hours. That’s when I decided to make this sticky toffee pudding cake. I’d seen recipes for it on Pinterest, but most looked like dense, brick-heavy nightmares. I wanted something that was actually moist, with a sauce that pooled in the bottom of the dish like liquid gold.
I spent two weeks testing different versions. I burned one batch because I didn’t watch the sugar closely enough. I made another that was too sweet because I underestimated how sweet the dates naturally are. But on the third try? It was perfect. The cake was tender, the sauce was silky and salty, and my mother-in-law actually asked for the recipe. She didn’t even know I’d almost ordered a pie from a bakery instead.
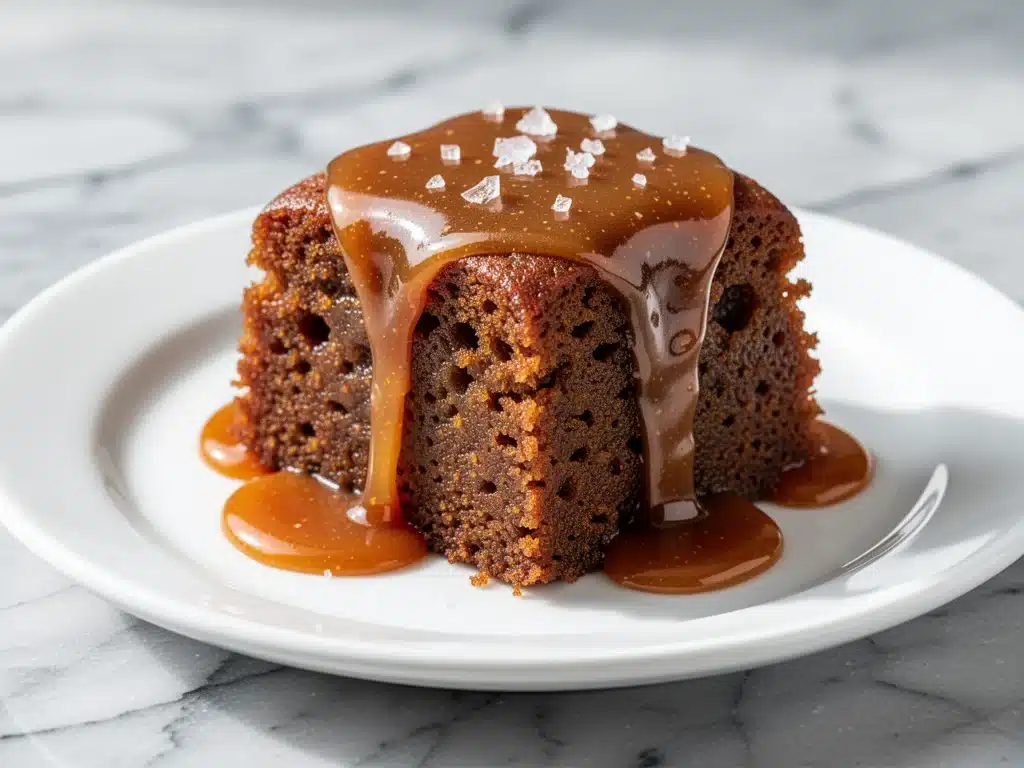
This sticky toffee pudding cake with warm salted butterscotch sauce has become my go-to “I need to impress people” dessert. It’s essentially a dessert that bakes itself, requires minimal effort, and delivers maximum flavor. If you’ve never made it before, you’re in for a treat. It’s rich, it’s comforting, and it tastes like a hug from the inside out. Plus, it’s surprisingly similar in texture and sweetness profile to the fall maple pecan sticky buns I make for brunch, but in cake form.
Why You’ll Love This Sticky Toffee Pudding Cake
There are about ten reasons I keep making this dessert, but here are the big ones. This isn’t just another sweet treat; it’s a reliable, crowd-pleasing masterpiece that works for holidays, dinner parties, or just because it’s Tuesday.
It’s Actually Moist — I’ve made dense, dry cakes that crumble into dust before I even get a fork into them. This cake stays moist for days. The dates and brown sugar create a tender crumb that doesn’t dry out. I’ve kept leftovers in the fridge for four days, and they were still soft on day four. That’s rare for date-based desserts.
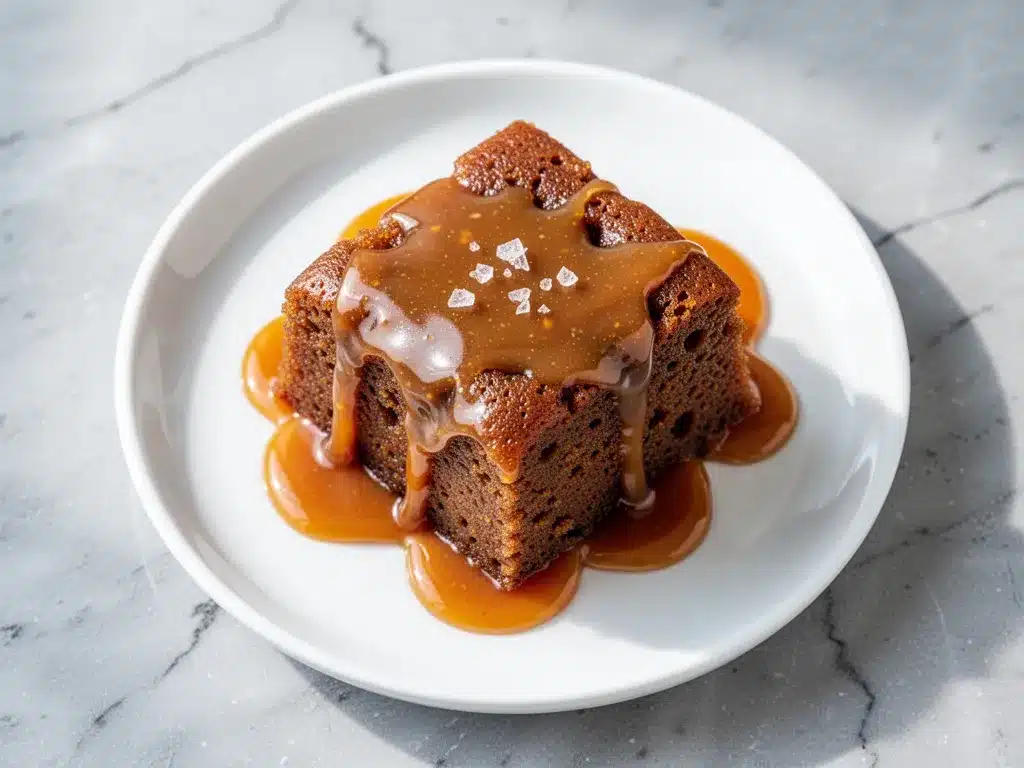
The Sauce is Liquid Gold — The warm salted butterscotch sauce is the star. It’s not just sugar and butter; it’s rich, creamy, and has that perfect salty-sweet balance that makes you close your eyes when you take a bite. It’s similar to the sauce on my brown butter salted caramel blondies, but thinner and pourable. It pools in the dish, so every bite has that extra hit of sauce.
Minimal Cleanup — Seriously, if you can boil water and mix batter, you can make this. I use one mixing bowl, one saucepan for the sauce, and one baking dish. No fancy equipment, no complicated techniques. I made this while watching a movie and stirring the sauce with one hand. It’s that easy.
Make-Ahead Friendly — This is my secret weapon for hosting. I can bake the cake the day before, store it in the fridge, and just reheat it (or serve it room temperature) when guests arrive. The sauce takes 5 minutes to whip up. I don’t have to stress about dessert on the day of the event. I learned this trick after a disastrous dinner party where I tried to bake everything fresh and ended up sweating in the kitchen.
It Feels Fancy (But Isn’t) — When you pull this out of the oven, it looks like something you’d order at a British pub. The glossy sauce, the deep brown color, the aroma of caramel and vanilla—it’s impressive. But the ingredients are simple: dates, butter, brown sugar, flour, eggs. You probably have most of these already. It’s the kind of dessert that makes people think you spent hours in the kitchen, when really, you spent 20 minutes.
This is my go-to when I need dessert to just work. No complicated techniques, no weird ingredients, just reliable, delicious food that makes everyone happy. And if you like this, you’ll probably also enjoy the fall caramel apple crisp cheesecake bars—they have that same caramel-date vibe but in a bar format.
Ingredients You’ll Need
Here’s the best part: you probably have most of this already. I’m particular about three ingredients here, and I’ll tell you exactly why.
For the Cake
Dates (1 ½ cups / 200g, pitted) — This is the main flavor. I use Medjool dates because they’re soft, sweet, and easy to blend. If you only have Deglet Noor dates, soak them in hot water for 10 minutes first. Don’t skip pitting them! I learned this the hard way with a cracked tooth. You want them soft and chewy, not hard and stony.
Boiling Water (¾ cup / 180ml) — This goes into the food processor with the dates. It helps blend them into a smooth paste. If you don’t have a food processor, you can chop the dates finely and soak them in the boiling water for 15 minutes, then mash them with a fork. It takes longer, but it works.
Unsalted Butter (½ cup / 115g, melted) — I use unsalted so I can control the salt in the sauce. Melt it gently—don’t burn it. If you use salted butter, reduce the salt in the sauce by half.
Brown Sugar (1 cup / 200g, packed) — I use light brown sugar for a milder molasses flavor, but dark brown sugar works too if you want a deeper, more robust taste. Pack it tightly into the cup for accuracy.
Dark Brown Sugar (½ cup / 100g, packed) — I add a little extra dark brown sugar for that deep, caramel-like color and flavor. It’s not strictly necessary, but it makes a difference. If you don’t have dark brown sugar, just use 1 ½ cups of light brown sugar.
Eggs (2 large) — Room temperature eggs blend better into the batter. I take them out of the fridge 30 minutes before I start. If you’re in a hurry, you can soften them in warm water for 5 minutes.
All-Purpose Flour (1 ½ cups / 190g) — I sift it to remove lumps. This ensures a smooth, even cake. If you don’t have a sifter, just whisk it well in a bowl.
Baking Soda (1 teaspoon) — This reacts with the acidic dates to help the cake rise. Don’t skip it, or you’ll end up with a dense brick.
Salt (½ teaspoon) — Just a pinch to balance the sweetness. I use kosher salt.
Vanilla Extract (1 teaspoon) — Pure vanilla only. I don’t use imitation. It adds warmth and depth to the date flavor.
For the Warm Salted Butterscotch Sauce
Heavy Cream (1 cup / 240ml) — Full-fat only. Half-and-half will make the sauce too thin. I let it come to room temperature before heating—cold cream can seize when you add hot butter.
Unsalted Butter (½ cup / 115g) — Again, unsalted so you control the salt. Cut it into cubes so it melts evenly.
Brown Sugar (1 cup / 200g, packed) — Light or dark works here. I use light for a smoother sauce.
Salt (1 teaspoon kosher salt) — This is what makes it “salted butterscotch.” Don’t skimp. The salt cuts through the sweetness and makes the butter flavor pop. If you’re sensitive to salt, start with ½ teaspoon and adjust.
Vanilla Extract (1 teaspoon) — Add this after you remove the sauce from heat. If you add it while it’s boiling, the flavor evaporates.
Optional: Sea Salt Flakes — For garnish. I sprinkle a little on top of each serving. It looks pretty and adds a nice crunch.
Equipment Needed
You don’t need fancy equipment for this. Here’s what I actually use.
Food Processor — This is the key to getting the dates smooth. If you don’t have one, a blender works, but it might take longer. I’ve also done it with a fork and a lot of patience, but don’t recommend it unless you’re in a pinch.
9×9 Inch Baking Dish — I use a glass dish because it heats evenly. You can also use a metal pan or a ceramic dish. Just make sure it’s 9×9 inches. If you use a larger dish, the cake will be thinner and cook faster. If you use a smaller dish, it might overflow.
Saucepan — For the sauce. I use a small saucepan, about 2-quart size. It needs to be wide enough to stir the sauce easily.
Mixing Bowls — One large bowl for the dry ingredients, one medium for the wet. I usually just use the food processor bowl for the dates and butter, then pour it into a mixing bowl for the flour.
Whisk — For mixing the batter. A silicone whisk is great because it doesn’t scratch the bowl.
Spatula — For scraping the bowl and smoothing the batter. I use a rubber spatula because it gets every bit of batter out.
Measuring Cups and Spoons — Standard stuff. I use the metal measuring spoons because they’re more accurate.
Oven — Obviously. Preheat it to 350°F (175°C). I use an oven thermometer to make sure it’s actually at 350°F, because my oven runs hot.
How to Make It: Step-by-Step
Alright, let’s make this! I’m walking you through exactly how I do it, including the little tricks I’ve picked up.
Step 1: Prep the Dates (5 minutes)
Pit your dates and put them in the food processor. Pour in the boiling water. Pulse a few times to chop them up, then let them sit for 5 minutes. This softens them further. Then, blend until you have a smooth, thick paste. If it’s too thick and the processor is struggling, add a tablespoon of water at a time. You want it to look like date butter. This is the base of your cake, so get it smooth.
Step 2: Mix the Wet Ingredients (3 minutes)
Add the melted butter, light brown sugar, dark brown sugar, eggs, and vanilla extract to the date paste. Blend again until everything is well combined. The mixture should look like thick, glossy caramel. Taste it—it should be sweet and rich. If it tastes too sweet, add a pinch of salt. Pour this mixture into a large mixing bowl.
Step 3: Combine Dry Ingredients (2 minutes)
In a separate bowl, whisk together the flour, baking soda, and salt. I usually do this in the same bowl I used for the brown sugar to save dishes, but it’s not critical. Just make sure there are no lumps of baking soda.
Step 4: Make the Batter (2 minutes)
Pour the dry ingredients into the wet ingredients. Use a spatula to fold them together. Mix until just combined. Don’t overmix! Overmixing makes the cake tough. You’ll see streaks of flour at first, but keep folding until they disappear. The batter will be thick and sticky. That’s normal.
Step 5: Bake the Cake (35-40 minutes)
Preheat your oven to 350°F (175°C). Grease your 9×9 inch baking dish with butter or non-stick spray. Pour the batter into the dish and smooth the top with a spatula. Bake for 35-40 minutes. The cake is done when the top is set and a toothpick inserted in the center comes out with a few moist crumbs (not wet batter). It will look slightly firm on top but soft underneath. Don’t overbake it, or it’ll dry out.
While the cake bakes, make the sauce.
Step 6: Make the Warm Salted Butterscotch Sauce (10 minutes)
In a small saucepan, combine the heavy cream, butter, brown sugar, and salt. Heat over medium heat, stirring constantly. The butter will melt, and the sugar will dissolve. Bring it to a gentle simmer. Once it simmers, let it cook for 2-3 minutes, stirring occasionally. It will thicken slightly. Remove from heat and stir in the vanilla extract. The sauce will continue to thicken as it cools. If it gets too thick, you can warm it up again with a little extra cream.
Step 7: Assemble and Serve (5 minutes)
Remove the cake from the oven. Let it cool for 5 minutes. Then, spoon half of the warm butterscotch sauce over the top of the cake. Use a knife to gently swirl it into the top layer. Let it sit for another 10 minutes so the sauce absorbs a bit. Serve warm with the remaining sauce on the side. I usually drizzle it over each serving. Add a sprinkle of sea salt flakes if you have them.
Total Time: About 60 minutes (15 minutes prep, 40 minutes bake, 5 minutes cool)
Expert Tips & Tricks
Here’s everything I’ve learned from making this dozens of times. These tips will save you from my mistakes.
Use Soft Dates
If your dates are hard or dry, soak them in hot water for 10 minutes before blending. This ensures a smooth paste. I’ve made this with hard dates before, and the result was gritty. Don’t do that.
Don’t Overmix the Batter
Once you add the flour, mix until just combined. Overmixing develops gluten, which makes the cake dense. I used to mix too much and ended up with a rubbery cake. Now I mix until I see no more streaks of flour and stop.
Keep the Sauce Warm
The sauce thickens as it cools. If you’re serving it later, warm it gently on the stove or in the microwave. Add a splash of cream if it’s too thick. Cold sauce on warm cake is good, but warm sauce on warm cake is *amazing*.
Test for Doneness
Ovens vary. Start checking at 35 minutes. The cake should be set but still slightly jiggly in the center. It will firm up as it cools. If the top is browning too fast, cover it with foil for the last 10 minutes.
Make It Ahead
I bake the cake the day before and store it in the fridge. Reheat it in the microwave for 30 seconds before serving. The sauce can be made ahead and stored in a jar in the fridge. Warm it up before serving. This is my favorite way to make it for dinner parties.
Adjust Sweetness
Dates vary in sweetness. If your dates are very sweet, reduce the brown sugar by 2 tablespoons. If they’re tart, add 2 tablespoons more. Taste the date paste before mixing the batter.
Variations & Substitutions
Once you’ve nailed the basic version, here’s how you can mix it up. I’ve tried all of these.
Gluten-Free Version
Use a 1:1 gluten-free flour blend. I’ve used Bob’s Red Mill and King Arthur, and both work great. The texture is slightly denser, but still delicious.
Dairy-Free Version
Replace the butter with coconut oil or vegan butter. Use coconut cream instead of heavy cream for the sauce. It adds a slight coconut flavor, which pairs well with the dates. My vegan friend loved this version.
Chai Spice Twist
Add 1 teaspoon of chai spice blend to the dry ingredients. It adds warmth and complexity. I love this for fall and winter.
Maple Syrup Swap
Replace the brown sugar with pure maple syrup. Reduce the other liquid slightly. It adds a different depth of flavor. I tried this with maple streusel flavors in mind, and it worked well.
Extra Rich
Add ½ cup of chocolate chips to the batter. The chocolate and date combination is incredible. It’s like a date brownie.
Nutty Version
Stir in ½ cup of chopped pecans or walnuts. Toast them first for extra flavor. This adds crunch and richness.
Serving & Storage
How to Serve:
I usually serve this straight from the baking dish at the dinner table—it looks rustic and stays warm. But here are other ways I’ve enjoyed it:
Side Dishes:
- Vanilla ice cream (obviously)
- Whipped cream
- Custard (for a British pub vibe)
- Crushed pistachios for garnish
Wine Pairing:
Not a wine expert, but my wine-snob friend says a tawny port or a sweet Riesling works great with this. The sweetness of the wine matches the cake.
Storage Instructions:
Refrigerator:
Store in an airtight container for up to 5 days. The cake gets denser in the fridge, so warm it before serving.
Reheating:
Best method: Microwave for 30-60 seconds. The sauce will melt and become pourable again.
Microwave method: Heat in 30-second intervals, stirring between. Add a splash of milk if it’s too thick.
Never works: Trying to reheat in the oven. It dries out the edges. Ask me how I know.
Freezing:
Yes, this freezes well! Wrap the cake tightly in plastic wrap and foil. Freeze for up to 3 months. Thaw in the fridge overnight and reheat. The sauce doesn’t freeze well because it separates. Make the sauce fresh.
Meal Prep:
Make the cake on Sunday, store in the fridge. Reheat individual portions during the week. Takes 30 seconds and tastes way better than store-bought dessert.
Pro tip: If leftovers are drying out, microwave with a damp paper towel over them. It steams the cake slightly and keeps it moist.
Nutrition Information
I’m not a nutritionist, but here’s the breakdown if you’re tracking.
Per Serving (based on 9 servings):
- Calories: 480
- Protein: 5g
- Carbs: 72g
- Fiber: 3g
- Sugar: 58g
- Fat: 20g
- Saturated Fat: 12g
- Cholesterol: 65mg
- Sodium: 280mg
What’s Good:
- Dates provide natural fiber and potassium
- Whole grain flour if you use it
- More filling than it looks
What to Know:
- Higher in calories from sugar and butter
- Contains dairy and gluten
- Moderate sodium (use low-sodium broth to reduce)
My Take:
Look, this is dessert with butter and sugar. It’s not a diet recipe. But it’s way better than takeout, costs less, and I know exactly what’s in it. When I want to make it lighter, I reduce the sugar and use half-and-half. But usually? I just eat a reasonable portion and enjoy it.
Final Thoughts
So that’s my sticky toffee pudding cake! I’ve probably talked your ear off at this point, but when you make a recipe this often, you have a lot to say about it.
This has saved holiday dinners more times than I can count. It’s my answer to “what’s for dessert” when I’m tired, don’t want to order out, and still want something that tastes really good. My family is happy, my in-laws are happy, and I’m happy because I’m not stressed about cooking.
Make it yours! Try different add-ins, swap in your favorite nuts, adjust the sauce. The best recipes are the ones you adapt to your family’s tastes. And if you like this, you might also enjoy the fall apple cider donut cake—it has that same cozy, spiced vibe.
If you make this, drop a comment and let me know what you think! I love hearing how recipes turn out in your kitchen. And if something doesn’t work, tell me that too—I’m here to help troubleshoot.
Happy cooking! And I hope your kitchen smells half as good as mine does right now.
Frequently Asked Questions
Can I use dried apricots instead of dates?
You can, but the flavor will be different. Apricots are tart and chewy, while dates are sweet and sticky. If you use apricots, soak them longer and add a little more sugar. I haven’t tried it extensively, but it should work. Dates are the traditional choice for a reason.
Why did my cake turn out dense?
Usually means you overmixed the batter or used old baking soda. Make sure your baking soda is fresh. Also, don’t overmix once you add the flour. Fold gently until just combined. If the dates weren’t smooth, that can also make it dense. Blend them well.
Can I make this ahead for a dinner party?
Yes! Bake the cake the day before and store it in the fridge. Reheat it in the microwave for 30-60 seconds before serving. Make the sauce fresh on the day of. It’s my favorite way to host because I don’t have to stress about dessert.
Why did my sauce split?
The heat was too high when you added the cream, or you didn’t stir enough. Keep the heat medium-low and stir constantly. If it splits, remove from heat and whisk in a splash of cold cream. It should come back together. If not, blend it with an immersion blender.
Can I use maple syrup instead of brown sugar?
You can, but reduce the other liquids slightly. Maple syrup is thinner than brown sugar. Use ¾ cup of maple syrup instead of 1 cup of brown sugar. It adds a different flavor, but it’s still delicious.
How do I reheat leftovers without it getting dry?
Add a splash of milk or cream to a microwave-safe bowl, add your leftover cake, and heat gently for 30 seconds. The extra liquid brings back the moist texture. Microwave sort of works but tends to dry it out. If you do microwave, definitely add a splash of milk first and heat in short bursts, stirring between.
Can I double this recipe?
Absolutely! Double everything and use a 9×13 inch baking dish. The cooking time might increase by 5-10 minutes. Check for doneness with a toothpick. I do this when I’m feeding a crowd. Just make sure your oven can handle the larger dish.
Pin This Recipe!
Sticky Toffee Pudding Cake: Easy Best Recipe
- Total Time: 60 minutes
- Yield: 9 servings 1x
Description
A moist, tender date cake topped with a warm, silky salted butterscotch sauce. This easy-to-make dessert is perfect for impressing guests and can be prepared ahead of time.
Ingredients
- 1 ½ cups (200g) Medjool dates, pitted
- ¾ cup (180ml) boiling water
- ½ cup (115g) unsalted butter, melted
- 1 cup (200g) light brown sugar, packed
- ½ cup (100g) dark brown sugar, packed
- 2 large eggs, room temperature
- 1 teaspoon vanilla extract
- 1 ½ cups (190g) all-purpose flour
- 1 teaspoon baking soda
- ½ teaspoon salt
- 1 cup (240ml) heavy cream
- ½ cup (115g) unsalted butter, cubed
- 1 cup (200g) brown sugar, packed
- 1 teaspoon kosher salt
- 1 teaspoon vanilla extract
- Sea salt flakes, optional for garnish
Instructions
- Preheat oven to 350°F (175°C). Grease a 9×9 inch baking dish.
- Place pitted dates and boiling water in a food processor. Pulse to chop, let sit for 5 minutes, then blend until a smooth, thick paste forms.
- Add melted butter, light brown sugar, dark brown sugar, eggs, and 1 teaspoon vanilla to the date paste. Blend until well combined and glossy. Pour into a large mixing bowl.
- In a separate bowl, whisk together flour, baking soda, and ½ teaspoon salt.
- Fold dry ingredients into the wet mixture until just combined. Do not overmix.
- Pour batter into the prepared baking dish and smooth the top.
- Bake for 35-40 minutes until the top is set and a toothpick inserted comes out with moist crumbs.
- While the cake bakes, make the sauce: In a saucepan over medium heat, combine heavy cream, cubed butter, brown sugar, and 1 teaspoon salt. Stir constantly until butter melts and sugar dissolves.
- Bring sauce to a gentle simmer and cook for 2-3 minutes until slightly thickened. Remove from heat and stir in 1 teaspoon vanilla.
- Remove cake from oven and let cool for 5 minutes. Spoon half the sauce over the cake and swirl gently. Let sit for 10 minutes to absorb.
- Serve warm with remaining sauce drizzled on top and optional sea salt flakes.
Notes
Ensure dates are soft; soak hard dates in hot water if necessary. Do not overmix the batter to avoid a dense texture. The sauce thickens as it cools; warm it gently before serving if needed. Cake can be made ahead and refrigerated for up to 5 days.
- Prep Time: 15 minutes
- Cook Time: 40 minutes
- Category: Dessert
- Cuisine: British
Nutrition
- Serving Size: 1 slice of cake with
- Calories: 480
- Sugar: 58
- Sodium: 280
- Fat: 20
- Saturated Fat: 12
- Carbohydrates: 72
- Fiber: 3
- Protein: 5
Keywords: sticky toffee pudding, date cake, butterscotch sauce, British dessert, easy dessert, make-ahead dessert, holiday dessert


