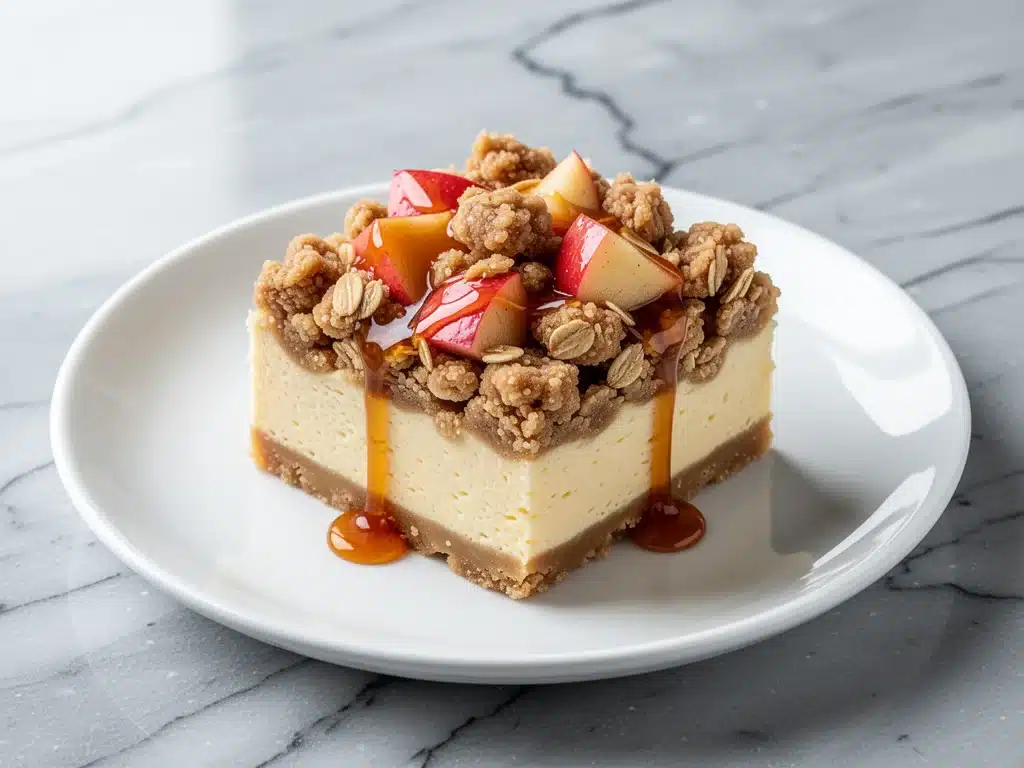
Last October, I was sitting on my couch in pajamas at 8:30 PM, staring at my phone. The rain was hammering against the window, the air had that crisp, damp chill that screams “pumpkin spice everything,” and I had a serious sugar craving. My options were limited: order delivery from the expensive local bakery down the street (which would arrive cold and soggy) or attempt something from scratch. I chose delivery. It arrived in a flimsy plastic container, lukewarm, with a sad slice of apple pie that tasted more like cinnamon syrup than actual fruit.
I took one bite and knew I needed to do better. I needed something warm, something gooey, something that tasted like a cozy autumn evening but was actually worth the effort. That night, I pulled out my favorite classic New York cheesecake recipe and decided to marry it with the best part of fall: caramel apple crisp. The result? These Fall Caramel Apple Crisp Cheesecake Bars.
They are, hands-down, better than takeout. Better than the bakery. Better than anything you can buy in a store. I’ve made this recipe at least twelve times in the last three years, tweaking the ratio of apples to cheesecake filling until it was absolutely perfect. The first few times, I burned the caramel (oops), and the last time, I used too many apples and the bars collapsed. But now? Now I have it down to a science. It’s creamy, it’s crunchy, it’s spiced just right, and it smells like heaven while it bakes.
If you’ve been looking for a dessert that feels fancy enough for a dinner party but is actually easy enough to throw together on a random Tuesday, this is it. You won’t regret it. I promise.
Why You’ll Love These Cheesecake Bars
There are a dozen reasons I keep making these bars, but here are the big ones that have converted my skeptical husband and my picky-eater kids into loyal fans.
It’s the Ultimate Texture Combo — Crisp, creamy, chewy, and crunchy. You get the buttery graham cracker crust, the dense and smooth cheesecake layer, the tender spiced apples, and that crunchy oat streusel topping. It’s like eating five desserts in one bite. I love how the contrast works. It’s not just soft; it has substance.
Smells Like Autumn — Seriously, the smell of cinnamon, brown sugar, and baking apples filling your house is worth the calories alone. I made these last week, and my neighbors actually knocked on my door to ask what I was baking. It’s that good. It’s cozy, nostalgic, and instantly comforting.
Actually Better Than Takeout — I know I said this before, but it bears repeating. Store-bought fall desserts are often dry or overly sweet. These bars are balanced. The tartness of the apples cuts through the richness of the cream cheese, and the caramel adds that deep, buttery flavor without being cloying. It’s restaurant-quality, but homemade.
Great for Meal Prep — These bars keep well in the fridge for up to five days. I make a batch on Sunday, and I have my dessert ready for the rest of the week. They’re also great for potlucks because they’re easy to cut into squares and serve. No fancy plating required.
Uses Seasonal Ingredients — Apples are cheap and abundant in the fall. I use Honeycrisp and Granny Smith because they hold their shape well. It’s a great way to use up your local apple haul before it’s gone. Plus, it feels more sustainable than buying out-of-season fruit.
Easy to Customize — Not a fan of oats? Skip them. Want more caramel? Drizzle extra on top. These bars are a canvas for your creativity. I’ve tried adding chopped pecans to the topping, and they’re amazing. Feel free to make it your own.
This is my go-to dessert when I want to impress without stressing. No complicated techniques, no weird ingredients, just reliable, delicious food that makes everyone happy.
Ingredients You’ll Need
Here’s the best part: you probably have most of these ingredients already. I’m particular about three things here—the apples, the cream cheese, and the caramel—but everything else is pantry staples.
For the Graham Cracker Crust
Graham cracker crumbs (1 ½ cups / 150g) — I use store-bought crumbs for convenience, but you can crush whole graham crackers in a food processor. It’s easier than it sounds. Don’t use honey graham crumbs; the plain ones let the other flavors shine.
Unsalted butter (6 tablespoons / 85g, melted) — This binds the crust. Make sure it’s melted but not hot. If it’s too hot, it’ll melt the cream cheese later. I use Kerrygold, but any good European-style butter works.
Granulated sugar (2 tablespoons / 25g) — Just a little to sweeten the crust. Don’t skip it; it helps the crust crisp up.
Cinnamon (½ teaspoon) — A hint of warmth in the base. It ties everything together.
For the Cheesecake Layer
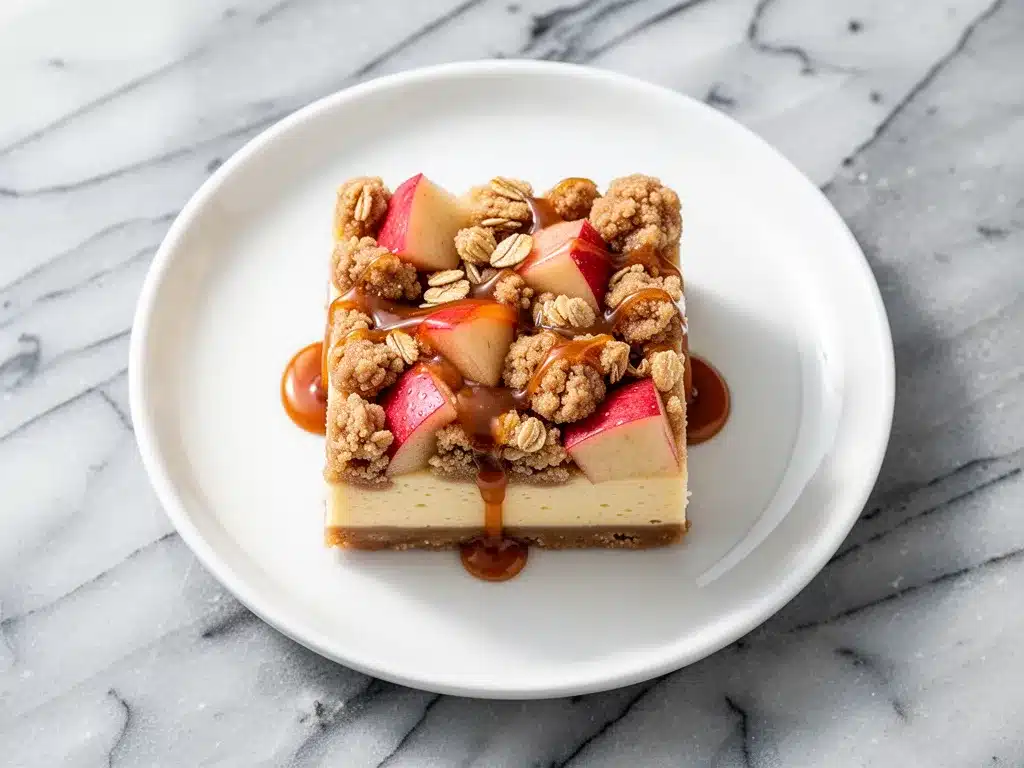
Full-fat cream cheese (24 ounces / 680g, softened) — This is non-negotiable. Low-fat cream cheese won’t set properly and will be grainy. Let it sit on the counter for 30 minutes before you start. Room temperature cream cheese mixes smoothly; cold cream cheese creates lumps that you can’t beat out.
Granulated sugar (1 cup / 200g) — The standard amount for sweetness. If you prefer less sweet, reduce to ¾ cup, but the caramel and apples are tart, so you need the sugar balance.
Vanilla extract (2 teaspoons) — Use real vanilla, not imitation. It makes a noticeable difference in flavor. I use Nielsen-Massey.
Eggs (3 large) — Room temperature eggs incorporate better into the batter. Crack them into a small bowl first to check for bad eggs—better safe than sorry.
All-purpose flour (2 tablespoons / 15g) — Just a little bit to stabilize the cheesecake. It prevents cracking and helps it hold its shape when sliced.
Sour cream (½ cup / 120g) — This adds tang and richness. It makes the cheesecake extra creamy. Full-fat only.
For the Caramel Apple Topping
Granny Smith apples (2 medium, peeled and diced) — Tart apples are crucial. If you use sweet apples like Red Delicious, the bars will be too sugary. Granny Smith holds its shape when baked, so you get nice chunks of apple in every bite.
Honeycrisp apples (2 medium, peeled and diced) — I use a mix. Honeycrisp adds sweetness and juiciness. You can use all Granny Smith if you prefer, but the mix is better.
Unsalted butter (3 tablespoons / 45g)
Brown sugar (½ cup / 100g, packed) — Dark brown sugar has more molasses, so it’s deeper and richer. I prefer dark, but light works too.
Cinnamon (1 teaspoon)
Ground nutmeg (¼ teaspoon) — Just a pinch. It adds that classic fall spice profile. Don’t overdo it.
Maple syrup (2 tablespoons) — This enhances the caramel flavor without making it too sweet. Real maple syrup only, not pancake syrup.
For the Crunchy Oat Topping
Old-fashioned oats (½ cup / 40g) — Do not use quick oats. Quick oats will turn mushy. Old-fashioned oats stay crunchy. If you only have quick oats, pulse them in a food processor for a few seconds to break them up a bit.
All-purpose flour (¼ cup / 30g)
Brown sugar (¼ cup / 50g, packed)
Unsalted butter (3 tablespoons / 45g, cold and cubed)
Cinnamon (½ teaspoon)
Salt (¼ teaspoon) — A pinch of salt balances the sweetness. Don’t skip it.
Optional Garnish
Caramel sauce (for drizzling) — I buy store-bought caramel sauce for convenience, but homemade is great if you have time. It’s not essential, but it looks pretty and adds extra flavor.
Chopped pecans (optional) — If you like nuts, add them to the oat topping. They add a nice crunch and flavor.
Equipment Needed
You don’t need fancy equipment for this. Here’s what I actually use.
9×13-inch baking dish — Glass or metal works fine. I use a Pyrex dish because I can see the bottom crust browning. Make sure it’s deep enough so the apples don’t spill over.
Stand mixer or hand mixer — For the cheesecake layer. A stand mixer is faster, but a hand mixer works perfectly. You just need to beat the cream cheese until it’s smooth.
Medium saucepan — For cooking the apples. A non-stick pan is easiest to clean.
Small bowl — For mixing the oat topping. A fork is all you need.
Pastry brush or spoon — To grease the pan. I use butter for the crust, but cooking spray works for the rest.
Wire cooling rack — Essential for cooling the bars properly. If you cut them hot, they’ll fall apart.
Sharp knife — For slicing. Wipe the knife between cuts for clean squares. I use a chef’s knife.
Measuring cups and spoons — Standard stuff. Dollar store versions work fine.
Parchment paper — Optional but recommended. Line the pan with parchment for easy removal. It makes cleanup so much easier.
How to Make It: Step-by-Step
Alright, let’s make this! I’m walking you through exactly how I do it, including the little tricks I’ve picked up.
Step 1: Prep Your Pan and Oven (5 minutes)
Preheat your oven to 350°F (175°C). Line your 9×13-inch baking dish with parchment paper, leaving an overhang on the long sides. This acts as a sling to lift the bars out later. Grease the parchment with butter or cooking spray. This ensures nothing sticks.
Step 2: Make the Crust (5 minutes)
In a medium bowl, combine the graham cracker crumbs, melted butter, sugar, and cinnamon. Mix until it looks like wet sand. Press this mixture firmly into the bottom of your prepared pan. Use the bottom of a measuring cup to pack it down evenly. A dense crust is key; if it’s loose, the bars will crumble. Bake for 8 minutes until lightly golden. Remove and let cool while you make the filling.
Step 3: Make the Cheesecake Filling (10 minutes)
In a large bowl, beat the softened cream cheese and sugar until smooth and creamy, about 2-3 minutes. Scrape down the sides of the bowl. Add the vanilla and sour cream, and mix until combined. Add the eggs one at a time, mixing on low speed just until incorporated. Do not overmix! Overmixing adds air, which causes cracks. Fold in the flour gently. Pour this mixture over the cooled crust and spread it evenly.
Step 4: Cook the Apple Caramel Layer (10 minutes)
In a medium saucepan over medium heat, melt the 3 tablespoons of butter. Add the diced apples, brown sugar, cinnamon, nutmeg, and maple syrup. Stir to coat the apples. Cook for 8-10 minutes, stirring occasionally, until the apples are tender and the mixture has thickened into a syrup. The apples should be fork-tender but not mushy. Remove from heat.
Step 5: Assemble the Bars (5 minutes)
Spoon the warm apple mixture over the cheesecake layer. Use a spatula to spread it evenly, but don’t worry if it’s not perfect. It should look rustic. In a small bowl, combine the oats, flour, brown sugar, cinnamon, salt, and cold cubed butter. Use your fingers or a fork to mix until it resembles coarse crumbs. Sprinkle this topping evenly over the apples.
Step 6: Bake (45-50 minutes)
Bake at 350°F for 45-50 minutes. The edges should be golden brown, and the center should be set but still have a slight jiggle. It shouldn’t look liquidy. If the top is browning too quickly, cover it loosely with foil after 30 minutes.
Step 7: Cool Completely (2 hours)
This is the hardest part. Let the bars cool in the pan on a wire rack for at least 2 hours. They need to set completely. If you cut them warm, they’ll be a mess. For best results, refrigerate them for 4 hours or overnight. This makes slicing much easier.
Step 8: Slice and Serve
Use the parchment sling to lift the bars out of the pan. Place on a cutting board. Use a sharp knife to cut into squares. Wipe the knife clean between cuts. Drizzle with caramel sauce if desired. Serve at room temperature or slightly chilled.
Expert Tips & Tricks
Here’s everything I’ve learned from making these bars dozens of times. These tips will save you from my mistakes.
Room Temperature Ingredients Are Key
Cold cream cheese and eggs will create lumps in your cheesecake. Let them sit on the counter for 30-60 minutes before you start. If you forget, you can microwave the cream cheese in 10-second bursts until it’s soft. But don’t melt it!
Don’t Overmix the Batter
Once you add the eggs, mix on low speed and stop as soon as they’re incorporated. Overmixing incorporates air bubbles, which expand in the oven and then collapse, causing cracks. I learned this the hard way with my first batch. Now I mix gently and quickly.
Cook the Apples First
Don’t skip cooking the apples before adding them to the bars. Raw apples release a lot of water during baking, which can make the cheesecake soggy. Cooking them first concentrates the flavor and removes excess moisture. It’s worth the extra step.
Cool Completely Before Slicing
I know it’s tempting to dig in early, but these bars need time to set. If you cut them warm, they’ll fall apart. I usually make them the night before I want to serve them. They taste even better the next day as the flavors meld together.
Use a Sharp Knife
A dull knife will squish the bars. Use a sharp chef’s knife or a serrated knife. Dip the knife in hot water and wipe it dry between cuts for clean, sharp edges. It’s a small trick that makes a big difference in presentation.
Storage Tips
Store leftovers in an airtight container in the fridge for up to 5 days. They can also be frozen for up to 3 months. Wrap individual squares in plastic wrap and place them in a freezer bag. Thaw in the fridge overnight before serving.
Variations & Substitutions
Once you’ve nailed the basic version, here’s how you can mix it up. I’ve tried all of these.
Pecan Crumble Version
Add ½ cup of chopped pecans to the oat topping. Toast them first for extra flavor. My husband loves this version—it adds a nice nutty crunch.
Maple Bourbon Apples
Add 1 tablespoon of bourbon to the apple mixture while cooking. It adds a sophisticated depth of flavor. Skip the maple syrup if you use bourbon. It’s a great twist for adult gatherings.
White Chocolate Cheesecake
Replace half the cream cheese with white chocolate chips (melted and cooled). It makes the cheesecake layer sweeter and richer. I’ve tried this, and it’s delicious, but it’s very sweet. Balance it with tart apples.
Gluten-Free Option
Use gluten-free graham crackers and gluten-free oats. Everything else is naturally gluten-free. I’ve used Bob’s Red Mill gluten-free graham crackers, and they work great. Just make sure the oats are certified gluten-free.
Dairy-Free Option
Use dairy-free cream cheese (like Kite Hill) and dairy-free butter. The texture might be slightly different, but it’s still tasty. I’ve made this for a lactose-intolerant friend, and she loved it.
Mini Bars
Use a 9-inch square pan for thicker bars, or use a muffin tin to make mini cheesecake bars. Reduce baking time by 10-15 minutes. They’re perfect for parties and easier to serve.
Serving & Storage
How to Serve:
I usually serve these bars straight from the fridge, sliced into squares. They’re great for potlucks because they’re easy to transport. I also like to serve them with a dollop of whipped cream or a scoop of vanilla ice cream. It’s indulgent and delicious.
Side Dishes:
These bars are rich, so I don’t usually serve them with heavy sides. A simple green salad or some roasted vegetables balance the meal. If you’re serving them as a snack, pair them with a cup of hot tea or coffee.
Wine Pairing:
I’m not a wine expert, but a glass of dessert wine like Moscato or a buttery Chardonnay pairs well with these bars. The sweetness of the wine complements the caramel and apples.
Storage Instructions:
Refrigerator: Store in an airtight container for up to 5 days. The bars will firm up in the fridge, which is good for slicing.
Freezing: Wrap individual squares in plastic wrap and place them in a freezer bag. They freeze well for up to 3 months. Thaw in the fridge overnight.
Reheating: You don’t need to reheat these bars. They’re best served at room temperature or chilled. If you want them warm, microwave a square for 10-15 seconds. Don’t overheat it, or the cheesecake will get oily.
Nutrition Information
I’m not a nutritionist, but here’s the breakdown if you’re tracking. This is per bar (makes 12 bars).
– Calories: 380
– Protein: 6g
– Carbs: 42g
– Fiber: 1g
– Sugar: 28g
– Fat: 20g
– Saturated Fat: 12g
– Cholesterol: 65mg
– Sodium: 220mg
– Calcium: 80mg
What’s Good:
– Decent protein from the cream cheese
– Calcium from the cheese and milk
– Apples add some fiber and vitamins
What to Know:
– Higher in calories and sugar due to the cream cheese, butter, and caramel
– Contains dairy and gluten
– Moderate sodium
My Take:
Look, this is a dessert. It’s meant to be indulgent. It’s not a health food. But it’s way better than store-bought bars, and you control the ingredients. When I want to make it lighter, I reduce the sugar in the crust and use less caramel drizzle. But usually? I just eat one square and enjoy it.
Final Thoughts
So that’s my Fall Caramel Apple Crisp Cheesecake Bars! I’ve probably talked your ear off at this point, but when you make a recipe this often, you have a lot to say about it.
This has saved my dessert game more times than I can count. It’s my answer to “what should I bring to the party?” or “what should I bake for the kids?” It’s reliable, delicious, and always a crowd-pleaser. My family is happy, my friends are happy, and I’m happy because I’m not stressed about cooking.
Make it yours! Try different apples, add nuts, or skip the caramel. The best recipes are the ones you adapt to your tastes.
If you make this, drop a comment and let me know what you think! I love hearing how recipes turn out in your kitchen. And if something doesn’t work, tell me that too—I’m here to help troubleshoot.
Happy baking! And I hope your kitchen smells half as good as mine does right now.
Frequently Asked Questions
Can I use different apples?
You can, but I recommend tart apples like Granny Smith or Honeycrisp. Sweet apples like Red Delicious will get too soft and sweet. You can use a mix of apples, just make sure they hold their shape when baked. I’ve tried Fuji apples, and they work okay, but they’re softer.
Why did my cheesecake crack?
Cracking usually happens because the batter was overmixed, introducing too much air. It can also happen if the oven temperature was too high. Make sure to mix the eggs gently and on low speed. Also, let the cheesecake cool slowly in the oven with the door cracked open. This prevents sudden temperature changes.
Can I make these bars ahead of time?
Yes! These bars actually taste better the next day. Make them 1-2 days ahead and store them in the fridge. They’ll hold their shape well and the flavors will meld together. Just make sure to cover them tightly to prevent them from drying out.
Can I freeze these bars?
Absolutely. Wrap individual squares in plastic wrap and place them in a freezer bag. They freeze well for up to 3 months. Thaw in the fridge overnight before serving. I do this all the time for meal prep.
Can I use low-fat cream cheese?
I don’t recommend it. Low-fat cream cheese has more water and less fat, which affects the texture and setting. It will be grainy and won’t set properly. Stick with full-fat cream cheese for the best results.
How do I store leftovers?
Store leftovers in an airtight container in the fridge for up to 5 days. They can also be frozen for up to 3 months. If you store them in the fridge, let them come to room temperature before serving for the best flavor and texture.
Can I double this recipe?
Yes, you can double the recipe and bake it in a 9×13-inch pan. Just make sure the bars aren’t too thick, or they might not cook evenly. If you double it, you might need to bake it for a few minutes longer. Keep an eye on it.
Pin This Recipe!
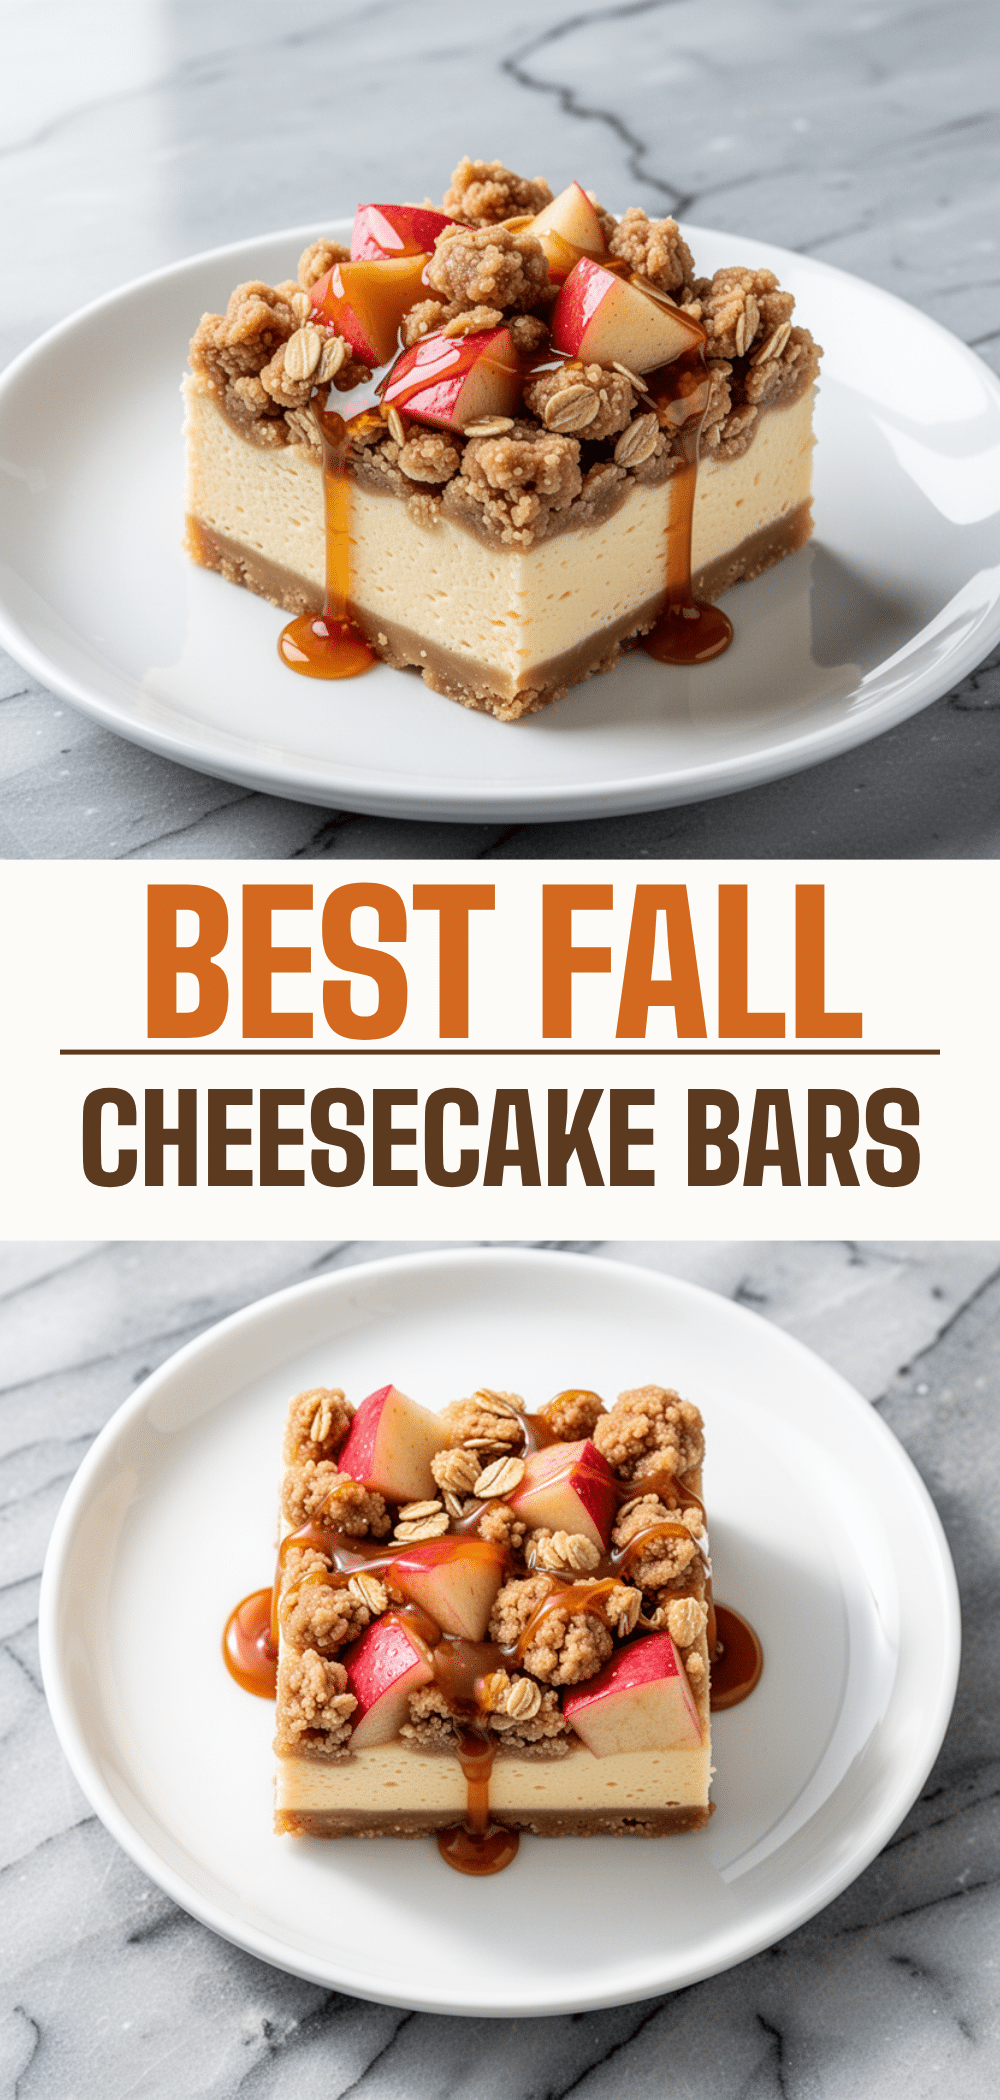
Fall Caramel Apple Crisp Cheesecake Bars
- Total Time: 2 hours 25 minutes
- Yield: 12 servings 1x
Description
A rich and creamy cheesecake bar featuring a buttery graham cracker crust, a dense cheesecake layer, warm spiced caramel apples, and a crunchy oat streusel topping. This dessert combines the best flavors of autumn into an easy-to-make, crowd-pleasing treat.
Ingredients
- 1 ½ cups (150g) graham cracker crumbs
- 6 tablespoons (85g) unsalted butter, melted
- 2 tablespoons (25g) granulated sugar
- ½ teaspoon cinnamon
- 24 ounces (680g) full-fat cream cheese, softened
- 1 cup (200g) granulated sugar
- 2 teaspoons vanilla extract
- 3 large eggs, room temperature
- 2 tablespoons (15g) all-purpose flour
- ½ cup (120g) full-fat sour cream
- 2 medium Granny Smith apples, peeled and diced
- 2 medium Honeycrisp apples, peeled and diced
- 3 tablespoons (45g) unsalted butter
- ½ cup (100g) packed brown sugar
- 1 teaspoon cinnamon
- ¼ teaspoon ground nutmeg
- 2 tablespoons maple syrup
- ½ cup (40g) old-fashioned oats
- ¼ cup (30g) all-purpose flour
- ¼ cup (50g) packed brown sugar
- 3 tablespoons (45g) unsalted butter, cold and cubed
- ½ teaspoon cinnamon
- ¼ teaspoon salt
- Caramel sauce for drizzling (optional)
- Chopped pecans (optional)
Instructions
- Preheat oven to 350°F (175°C). Line a 9×13-inch baking dish with parchment paper, leaving an overhang on the long sides, and grease with butter or cooking spray.
- In a medium bowl, combine graham cracker crumbs, melted butter, 2 tablespoons sugar, and ½ teaspoon cinnamon. Mix until it resembles wet sand.
- Press the crust mixture firmly into the bottom of the prepared pan. Bake for 8 minutes until lightly golden. Remove and let cool.
- In a large bowl, beat the softened cream cheese and 1 cup sugar until smooth and creamy (2-3 minutes). Scrape down the sides.
- Add vanilla extract and sour cream; mix until combined.
- Add eggs one at a time, mixing on low speed just until incorporated. Do not overmix.
- Fold in the 2 tablespoons flour gently. Pour the mixture over the cooled crust and spread evenly.
- In a medium saucepan over medium heat, melt 3 tablespoons butter. Add diced apples, ½ cup brown sugar, 1 teaspoon cinnamon, nutmeg, and maple syrup.
- Cook for 8-10 minutes, stirring occasionally, until apples are tender and the mixture has thickened into a syrup. Remove from heat.
- Spoon the warm apple mixture over the cheesecake layer and spread evenly.
- In a small bowl, combine oats, ¼ cup flour, ¼ cup brown sugar, ½ teaspoon cinnamon, salt, and cold cubed butter. Mix until it resembles coarse crumbs.
- Sprinkle the oat topping evenly over the apples.
- Bake at 350°F for 45-50 minutes, until edges are golden and the center is set but has a slight jiggle. If browning too quickly, cover loosely with foil after 30 minutes.
- Cool completely in the pan on a wire rack for at least 2 hours. For best results, refrigerate for 4 hours or overnight.
- Use the parchment sling to lift bars out of the pan. Slice into squares with a sharp knife. Drizzle with caramel sauce if desired and serve.
Notes
Ensure cream cheese and eggs are at room temperature to prevent lumps. Do not overmix the batter after adding eggs to avoid cracks. Cook the apples beforehand to remove excess moisture. Cool completely before slicing to ensure the bars hold their shape. Store in an airtight container in the fridge for up to 5 days or freeze for up to 3 months.
- Prep Time: 30 minutes
- Cook Time: 55 minutes
- Category: Dessert
- Cuisine: American
Nutrition
- Serving Size: 1 bar
- Calories: 380
- Sugar: 28
- Sodium: 220
- Fat: 20
- Saturated Fat: 12
- Carbohydrates: 42
- Fiber: 1
- Protein: 6
Keywords: fall dessert, caramel apple, cheesecake bars, autumn baking, graham cracker crust, oat streusel, easy dessert, meal prep dessert


