Last Thursday, I was standing in my kitchen at 7:45 PM, staring at the clock with that familiar knot of guilt in my stomach. Dinner was done, the kids were watching a movie, and my husband had just mentioned he was “craving something sweet” before collapsing on the couch. I knew what was coming. I was either going to order takeout (which I hate), dig through the freezer for a half-melted ice cream bar, or actually bake something.
Usually, I choose the ice cream bar. But this time, I wanted to do better. I wanted something that felt indulgent—like a real dessert—but didn’t require three hours of chilling, a water bath, or a mental breakdown. I wanted something that fit into the “busy weeknight” reality but still tasted like I had planned ahead.
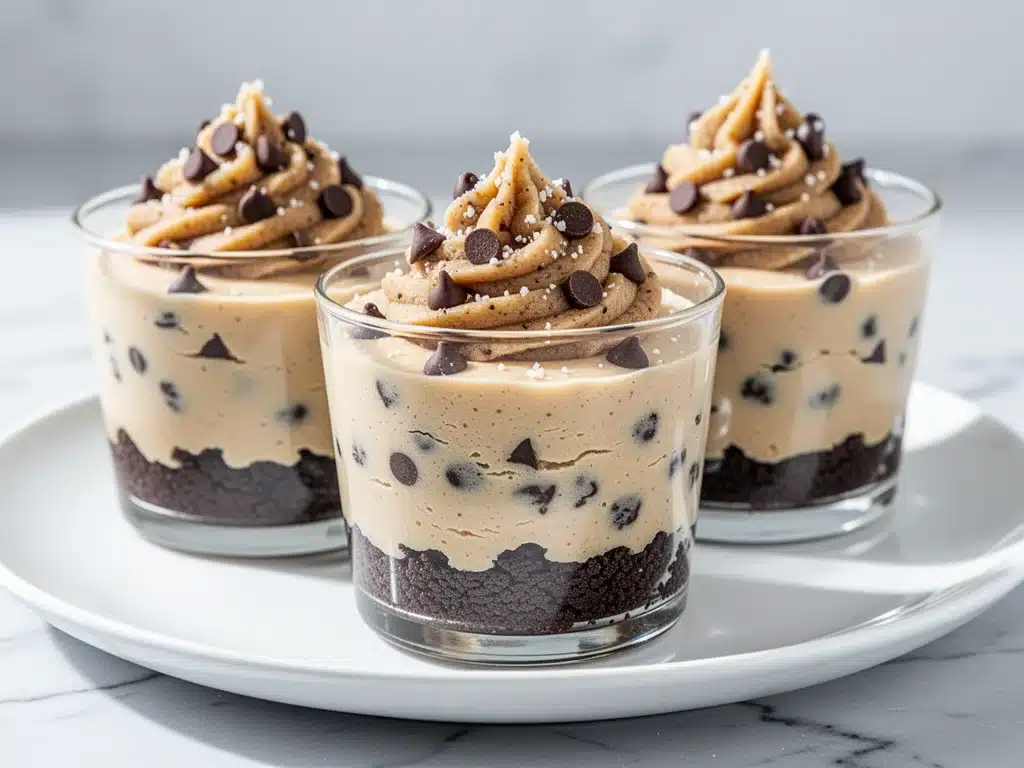
That’s when I stumbled on the idea for these High-Protein Cookie Dough Cheesecake Cups. Honestly? I was skeptical. Protein desserts usually taste like chalky protein bars disguised as cake. But this? This is different. It’s creamy, it’s rich, it has that nostalgic cookie dough crunch, and it takes about 10 minutes of active time. No baking required. No special equipment. Just five ingredients and a spoon.
I’ve made these cups at least a dozen times since that Thursday night. They’ve saved me from late-night vending machine runs, impressed my picky eater, and honestly, they’ve become my secret weapon for staying on track with my protein goals without feeling like I’m eating diet food. If you’re tired of choosing between “healthy” and “tasty,” you need to try this.
Why You’ll Love This High-Protein Cookie Dough Cheesecake Recipe
Look, I’m not going to lie to you. These aren’t going to replace a traditional, slow-chilled New York cheesecake if you’re throwing a formal dinner party. But for a weeknight snack, a post-workout treat, or a late-night craving that won’t keep you up for hours? They are unbeatable. Here’s why I keep making them:
Zero Baking Required — Seriously. If you have a spoon and a few bowls, you can make this. I’ve made these cups while my toddler was having a meltdown in the next room. You don’t need an oven, and you don’t need to clean a bunch of pans.
Actually Tastes Like Dessert — Most protein snacks taste like cardboard. These taste like cookie dough and cheesecake. The texture is creamy and dense, not gummy or icy. My husband said it tasted “like cheating” because it feels so indulgent.
High Protein, Low Sugar — I’m not a nutritionist, but I know what I see. Each cup packs a solid punch of protein (thanks to Greek yogurt and protein powder) without the sugar crash that comes with a slice of fall caramel apple crisp cheesecake bars. It’s the kind of treat that actually fuels you.
Meal Prep Friendly — I make a batch on Sunday night, and they last all week in the fridge. I grab two every evening after work. It’s my “I didn’t have time to cook dinner but I still want something nice” safety net. They’re also great for high-protein peanut butter overnight oats lovers who want a change of pace.
Customizable — Want chocolate? Swap the powder. Want nuts? Add them. Want to keep it simple? Stick to the basics. This recipe is a blank canvas that just happens to be delicious.
Ingredients You’ll Need
Here’s the best part: you probably have most of this already. I’m particular about three ingredients here, and I’ll tell you exactly why. Don’t skimp on the quality of the yogurt—it makes or breaks the texture.
Greek Yogurt (2 cups / 450g) — This is your base. I use full-fat plain Greek yogurt. Why full fat? Because low-fat yogurt can be watery and tangy, which throws off the balance. You want that thick, creamy mouthfeel. Brands like Fage or Chobani work great. If you’re dairy-free, coconut yogurt works, but it will be softer.
Protein Powder (1 scoop / 30g) — Vanilla whey or casein works best. I prefer casein or a blend because it creates a thicker, pudding-like texture. Whey can be a bit grainy if you don’t mix it well. Avoid flavored powders with added sugar—I want to control the sweetness myself. If you’re vegan, a vanilla pea protein blend works too, but you might need a tiny bit more liquid.
Cream Cheese (4 oz / 113g, softened) — This gives it that classic cheesecake tang and richness. It needs to be softened to room temperature so it blends smoothly. If you skip this, it’s just yogurt pudding. Trust me, the cream cheese is worth the extra 2 minutes of waiting.
Cookie Dough Mix (1 cup / 100g) — You can buy this pre-made (like Wholesome Sweeteners or homemade edible cookie dough), or you can make your own. I usually just use a mix of rolled oats, mini chocolate chips, and a pinch of salt. It adds the texture contrast that makes these cups addictive. If you’re avoiding gluten, use certified GF oats.
Maple Syrup or Honey (2-3 tablespoons / 30-45ml) — You don’t need much because the cookie dough and yogurt are already sweet. I start with 2 tablespoons and taste. If you want it sweeter, add more. Maple syrup adds a nice depth that honey doesn’t, but both work.
Vanilla Extract (1 teaspoon / 5ml) — Just a splash to tie everything together. Don’t skip it. It makes it taste like actual dessert, not just protein mush.
Optional: Mini Chocolate Chips — For the cookie dough layer, I always add a handful of mini chips. They melt slightly when you eat them, which is heaven.
Equipment Needed
You don’t need fancy equipment for this. Here’s what I actually use.
Mixing Bowls — Two medium bowls. One for the cheesecake base, one for the cookie dough mix. I use glass bowls because I can see what’s happening.
Mason Jars or Small Cups — I use 8-ounce mason jars. They’re perfect for portion control and look cute in the fridge. You can also use ramekins or even large ice cream cones (if you want to eat it out of the cone for fun).
Whisk or Fork — No mixer needed. A simple whisk or even a sturdy fork is enough to blend the yogurt and cream cheese until smooth.
Spoons — For layering. I use a small dessert spoon to get the layers neat.
Measuring Spoons — Standard stuff. I keep a set in my drawer. Dollar store versions work fine for this.
How to Make It: Step-by-Step
Alright, let’s make this! I’m walking you through exactly how I do it, including the little tricks I’ve picked up. It takes about 10 minutes.
Step 1: Prepare the Cookie Dough Mix (5 minutes)
In a small bowl, combine your rolled oats, mini chocolate chips, and a pinch of salt. If you’re using pre-made edible cookie dough, skip this step and just chop it into small bits. If you’re making it from scratch, you can lightly toast the oats in a dry pan for 2 minutes for extra flavor, but it’s not necessary. Set this aside.
Step 2: Blend the Cheesecake Base (3 minutes)
In a larger bowl, add the softened cream cheese. Use a whisk or fork to mash it until it’s completely smooth and lump-free. This is crucial. If you have lumps of cream cheese, they’ll stay there. Then, add the Greek yogurt, vanilla extract, and maple syrup. Whisk vigorously until everything is fully combined and creamy. The mixture should look like thick frosting.
Step 3: Add the Protein Powder (1 minute)
Sprinkle the protein powder over the yogurt mixture. Whisk again. You’ll notice it thickens up quickly. If it’s too thick to stir, add a splash of milk (dairy or plant-based) one tablespoon at a time until it reaches a spreadable consistency. Don’t add too much, or it’ll be runny.
Step 4: Layer the Cups (2 minutes)
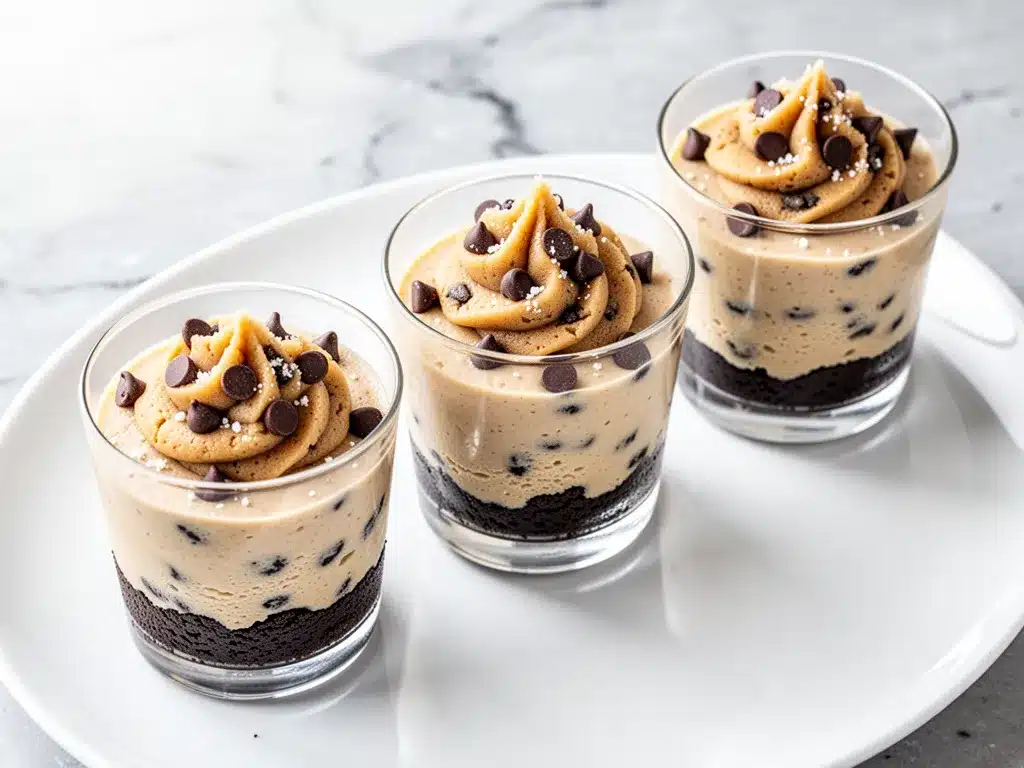
Take your mason jars or serving cups. Start with a layer of the cookie dough mix at the bottom—about 2 tablespoons. Then, add a generous layer of the cheesecake mixture—about ¼ cup. Repeat the layers: cookie dough on top. You want to end with the creamy cheesecake layer so it looks pretty, but honestly, mixing it all together is delicious too.
Step 5: Chill and Serve
These are best served chilled. I put them in the fridge for at least 30 minutes before eating. This helps the flavors meld and the texture set. If you’re in a hurry, you can eat them right away, but they’re not quite as good. Top with a few extra chocolate chips if you want to be fancy.
Pro Tip: I make four cups at a time. They last in the fridge for up to 4 days. I keep them in the front so I see them and grab them instead of reaching for the chips.
Expert Tips & Tricks
Here’s everything I’ve learned from making this dozens of times. These tips will save you from my mistakes.
Room Temperature is Key
The cream cheese MUST be softened. If it’s cold, you’ll get lumps. I take it out of the fridge 30 minutes before I start, or I microwave it for 10-second bursts until it’s soft to the touch. This makes a huge difference in the final texture.
Don’t Over-Mix the Protein Powder
Once you add the protein powder, mix just until combined. Over-mixing can make the texture gummy. You want it smooth, not elastic.
Customize Your Sweetness
Protein powders vary wildly in sweetness. Some are intensely sweet, some are bland. Taste your yogurt mixture before adding the maple syrup. If your protein powder is already sweet, you might not need any syrup at all. Adjust to your taste.
Use Casein Protein for Thicker Texture
If you find the cups too runny, switch to casein protein powder. It absorbs more liquid and creates a thicker, pudding-like consistency. Whey protein is lighter and might make the mixture looser.
Make Your Own Cookie Dough
Store-bought cookie dough mixes are convenient, but homemade is better. I use a mix of oats, chocolate chips, and a little maple syrup to bind it. It’s healthier and costs less. Just make sure it’s edible (no raw flour) if you’re using flour.
Variations & Substitutions
Once you’ve nailed the basic version, here’s how you can mix it up. I’ve tried all of these.
Chocolate Lovers
Swap the vanilla protein powder for chocolate. Add mini chocolate chips to the cookie dough mix. It’s basically a dessert in a cup. This is my favorite variation.
Strawberry Cheesecake
Add 2 tablespoons of strawberry jam to the cheesecake base. It adds a nice tang and sweetness. Top with fresh strawberries if you have them.
Peanut Butter
Add a swirl of peanut butter to the cheesecake base. It pairs perfectly with the oat cookie dough. This is great for pre-workout fuel.
Gluten-Free
Use certified gluten-free oats and make sure your protein powder is GF. Everything else is naturally gluten-free.
Dairy-Free
Use coconut yogurt and dairy-free cream cheese (like Kite Hill). Use dairy-free chocolate chips. It’s creamy and delicious, though the texture is slightly softer.
Serving & Storage
How to Serve:
I usually serve these straight from the jar. They look rustic and homemade. You can also serve them in small dessert dishes with a mint leaf on top if you’re having guests. I pair them with a cup of coffee or tea for a perfect afternoon snack.
Side Dishes:
These are self-contained, so they don’t need sides. But if you’re having a larger dessert, pair them with fresh fruit like berries or apple slices.
Storage Instructions:
Store in an airtight container in the fridge for up to 4 days. They actually get thicker and more pudding-like as they sit. Do not freeze them. The texture will change, and the cookie dough might get soggy. Make it fresh or store in the fridge.
Pro Tip:
If you’re meal prepping, make the cookie dough mix and the cheesecake base in separate containers. Assemble the cups right before you eat them to keep the texture perfect. But honestly, pre-assembled is easier for busy weeknights.
Nutrition Information
I’m not a nutritionist, but here’s the breakdown if you’re tracking. This is an estimate based on standard ingredients.
Per Serving (1 cup, based on 4 servings):
- Calories: 320
- Protein: 25g
- Carbs: 28g
- Fiber: 3g
- Sugar: 15g (natural sugars from yogurt and maple syrup)
- Fat: 12g
- Saturated Fat: 6g
- Cholesterol: 30mg
- Sodium: 150mg
What’s Good:
High protein content helps with satiety. Low added sugar compared to traditional cheesecake. Good source of calcium from yogurt and cream cheese.
What to Know:
Contains dairy and gluten (unless modified). Higher in calories than a piece of fruit, but more filling. Adjust protein powder and sweetener to fit your specific dietary needs.
My Take:
Look, this is a treat. It’s not a vegetable. But it’s way better than a candy bar, and it fits into a balanced diet. When I want to make it lighter, I use less maple syrup and more oats. But usually? I just enjoy it and move on.
Final Thoughts
So that’s my go-to High-Protein Cookie Dough Cheesecake Cups! I’ve probably talked your ear off at this point, but when you make a recipe this often, you have a lot to say about it.
This has saved me from late-night sugar crashes more times than I can count. It’s my answer to “what’s for dessert” when I’m tired, don’t want to bake, and still want something that tastes really good. My kids are happy, my husband’s happy, and I’m happy because I’m getting in my protein without feeling guilty.
Make it yours! Try different protein powders, swap the chocolate chips for nuts, or add a swirl of jam. The best recipes are the ones you adapt to your family’s tastes. And if you’re looking for more easy, healthy treats, check out my soft batch snickerdoodle cookies for a baking option, or my overnight vanilla cinnamon chia pudding for another no-cook option.
If you make this, drop a comment and let me know what you think! I love hearing how recipes turn out in your kitchen. And if something doesn’t work, tell me that too—I’m here to help troubleshoot.
Happy cooking! And I hope your kitchen smells half as good as mine does right now.
Frequently Asked Questions
Can I use whey protein instead of casein?
Yes, but the texture will be thinner. Whey protein doesn’t absorb liquid as much as casein, so your cups might be more like a smoothie consistency. If you use whey, start with less liquid or add a bit more protein powder to thicken it. Casein is better for that pudding-like texture.
Why did my cheesecake mixture get lumpy?
Usually means the cream cheese wasn’t softened enough. Make sure you let it sit at room temperature for 30 minutes before mixing. If you’re in a hurry, microwave it in 10-second bursts. Also, whisk it thoroughly before adding the yogurt.
Can I make these ahead for a party?
Absolutely. I make them up to 2 days ahead and store them in the fridge. They actually get better as they chill. Just keep them covered so they don’t absorb fridge smells. I’ve served these at potlucks and everyone asks for the recipe.
Can I freeze these cups?
I don’t recommend it. The texture of the yogurt and cream cheese can change when frozen and thawed. It might become watery or grainy. It’s best to make them fresh or store in the fridge for a few days.
Can I use honey instead of maple syrup?
Yes, honey works great. It has a stronger flavor, so use a little less if you’re sensitive to honey taste. Maple syrup adds a nice warmth that complements the cookie dough, but honey is perfectly fine.
How do I store the cookie dough mix?
Keep it in an airtight container at room temperature for up to a week. If you’re using fresh ingredients like mashed banana (for binding), store it in the fridge for 2-3 days. For the oats and chips version, room temp is fine.
Can I double this recipe?
Yes! Double everything and use a larger bowl. The process is the same. I often double it to have enough for the whole week. Just make sure your mason jars are clean and dry before filling.
Pin This Recipe!
High-Protein Cookie Dough Cheesecake Cups
- Total Time: 40 minutes
- Yield: 4 servings 1x
Description
A creamy, no-bake dessert featuring layers of protein-rich cheesecake base and edible cookie dough mix. This easy 5-ingredient snack is high in protein, low in sugar, and ready in just 10 minutes of active time.
Ingredients
- 2 cups (450g) full-fat plain Greek yogurt
- 1 scoop (30g) vanilla whey or casein protein powder
- 4 oz (113g) cream cheese, softened to room temperature
- 1 cup (100g) cookie dough mix (rolled oats, mini chocolate chips, pinch of salt)
- 2–3 tablespoons maple syrup or honey
- 1 teaspoon vanilla extract
- Optional: Mini chocolate chips for topping
Instructions
- Prepare the cookie dough mix by combining rolled oats, mini chocolate chips, and a pinch of salt in a small bowl. Set aside.
- In a larger bowl, mash the softened cream cheese with a whisk or fork until smooth and lump-free.
- Add the Greek yogurt, vanilla extract, and maple syrup to the cream cheese. Whisk vigorously until the mixture is fully combined and creamy.
- Sprinkle the protein powder over the yogurt mixture and whisk until just combined. If the mixture is too thick, add a splash of milk one tablespoon at a time until spreadable.
- In mason jars or small cups, layer 2 tablespoons of cookie dough mix at the bottom, followed by about 1/4 cup of the cheesecake mixture. Repeat layers, ending with the creamy cheesecake layer.
- Chill in the refrigerator for at least 30 minutes to allow flavors to meld and texture to set before serving.
Notes
Ensure cream cheese is softened to room temperature to avoid lumps. Casein protein powder creates a thicker texture than whey. These cups can be stored in the fridge for up to 4 days but should not be frozen as the texture may change.
- Prep Time: 10 minutes
- Cook Time: 0 minutes
- Category: Dessert
- Cuisine: American
Nutrition
- Serving Size: 1 cup
- Calories: 320
- Sugar: 15
- Sodium: 150
- Fat: 12
- Saturated Fat: 6
- Carbohydrates: 28
- Fiber: 3
- Protein: 25
Keywords: high protein, cookie dough, cheesecake, no bake, healthy dessert, meal prep, gluten free option, dairy free option


