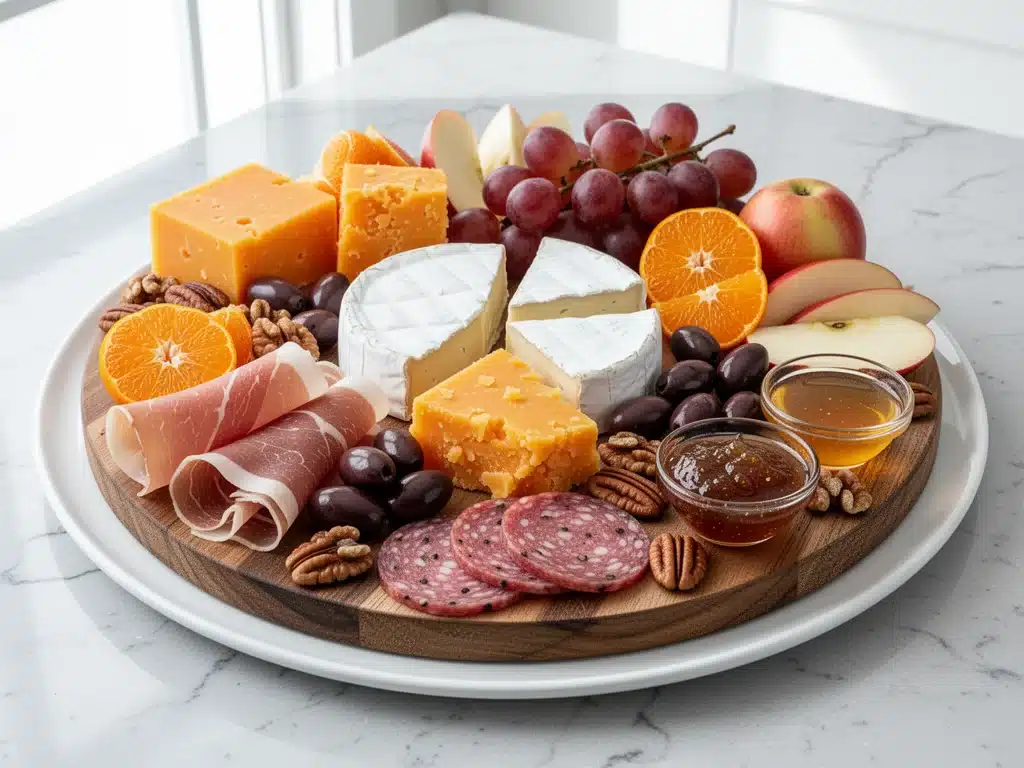
I used to think hosting game day was a full-time job that required a catering budget and three hours of prep time. I was wrong. This game day football charcuterie board is the answer to every party host’s prayer: it looks like you spent all afternoon arranging artisanal cheeses and prosciutto, but it actually takes about 15 minutes and costs less than ordering pizza for the whole team.
Here is the truth about charcuterie boards. People think they need to be professional chefs to pull one off. They don’t. They just need a little strategy and the right ingredients. I’ve tested this setup for Super Bowls, tailgates, and those random Tuesday night games where we’re too tired to cook a real meal but still want to feel festive.
Zero Stress Assembly — Seriously. You buy the components, you arrange them, you step back. I’ve assembled this board while watching the pre-game show. It’s that simple. No cooking required.
Feeds a Crowd (and Pickers) — Whether you have gluten-free friends, keto cousins, or just one person who only eats crackers, this board has something for everyone. It’s the ultimate crowd-pleaser because it lets people graze at their own pace.
Looks Expensive, Costs Little — You can get a board that looks like it came from a high-end deli for under $40, depending on your town. And if you buy the big blocks of cheese and slice them yourself, you save money and it tastes fresher.
Make-Ahead Friendly — You can prep the cheese and wash the fruit the night before. The actual assembly happens right before the kickoff. I love that because it means I’m not stuck in the kitchen when the game starts.
This is my go-to when I need to look like a hostess with the mostest without actually doing any work. It’s reliable, it’s delicious, and it disappears fast. Which is exactly what you want.
Ingredients You’ll Need
Here’s the best part: you probably have most of this already, or you can grab it on your way home from work. I’m particular about three ingredients here, and I’ll tell you exactly why. The rest is just about picking what you like.
For the Cheese (The Stars of the Show)
Sharp Cheddar Cheese (8 ounces / 225g, block) — Buy the block and grate or slice it yourself. Pre-shredded cheese has anti-caking agents that make it clumpy and sad. Sharp cheddar has the punch to stand up to the other flavors. I love aged cheddar for a nice bite.
Cream Cheese (8 ounces / 225g, block) — This is the secret weapon. You don’t serve it plain; you mix it into dips. It adds creaminess and bulk to the board without costing a fortune. It’s the glue that holds the snack vibe together.
Soft Goat Cheese or Brie (8 ounces / 225g) — You need a soft cheese to balance the hard cheddar. I prefer goat cheese because it’s tangy and easy to crumble. If you’re serving people who are picky, go with Brie. It’s milder and universally liked.
Salami or Prosciutto (8 ounces / 225g) — This is your meat element. Salami is easier to slice into rolls and looks rustic. Prosciutto is fancier but tears easily if you’re not careful. I usually buy a mix of both if I’m feeling fancy, but salami is the budget-friendly winner here.
For the Crunch and Dip
Mixed Crackers (1 large box / about 16 ounces) — Get a variety pack. Water crackers, wheat crackers, and maybe some seeded ones. I always buy the big box because you never know how many people will show up. Crispy parmesan smashed potatoes are great, but crackers are the vehicle for all this cheese.
Hot Pepper Relish or Jalapeño Slices (1 small jar) — This cuts through the richness of the cheese. It’s the little bite of acid that keeps people coming back. I use the jarred stuff because it’s consistent and saves time.
Granola or Pretzels (1 cup / 100g) — For some extra crunch that isn’t a cracker. I love using granola for a sweet-salty combo with the cheese. Pretzels are a classic football snack, so they fit the theme perfectly.
For the Freshness and Color
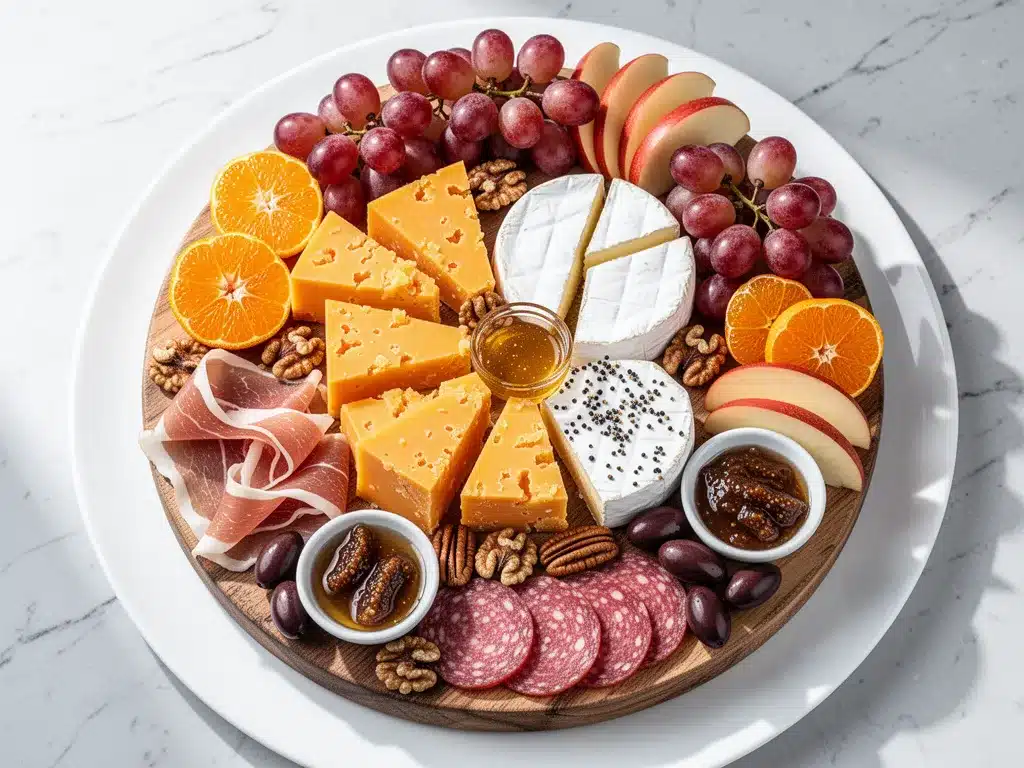
Grapes (2 cups / 300g, halved) — Red or green, doesn’t matter. They add sweetness and juiciness. Halving them makes them easier to pick up. They also look beautiful against the dark meats.
Apples or Pears (2 medium, sliced) — Crunchy fruit is essential. I like Honeycrisp apples because they don’t brown too quickly. Slicing them thin makes them elegant. Pears are softer and sweeter, which is a nice contrast.
Olives (1 cup / 150g, mixed) — Kalamata and green olives add saltiness. They’re small, so they fill in the gaps on the board. I buy them in a jar for convenience.
Chocolate Covered Pretzels or Almonds (1 cup / 150g) — This is the dessert element. You don’t need a separate dessert if you have these. They’re easy to grab and satisfy the sweet tooth.
For the Dips
Marinara Sauce (1 cup / 240ml) — Warm this up slightly for dipping meatballs or bread. It’s a classic pairing with cheese.
Mustard (½ cup / 120g, whole grain) — Adds a zesty kick. Whole grain looks better on the board than yellow mustard.
Equipment Needed
You don’t need fancy equipment for this. Here’s what I actually use.
Large Wooden Board or Platter — I use a 24-inch board. It needs to be big enough to spread things out so it doesn’t look cramped. A large baking sheet works in a pinch, but wood looks better for photos.
Knife Set — A sharp knife for slicing cheese and fruit. I use a chef’s knife for the apples and a small paring knife for the grapes. Don’t use the same knife for meat and fruit without washing it first.
Small Bowls — Four to six small ramekins or bowls for the dips. Glass or ceramic looks nice. I use what I have in my drawer.
Serving Spoons — Small spoons for the dips. You don’t want people using the same spoon for the hot relish and the cold mustard.
Cheese Board Spreader — Optional, but nice for the cream cheese. It makes it look neat when you dollop it on.
How to Make It: Step-by-Step
Alright, let’s make this! I’m walking you through exactly how I do it, including the little tricks I’ve picked up over the years.
Step 1: Prep the Ingredients (10 minutes)
Before you start arranging, get everything ready. Wash and dry the grapes and fruit. Slice the apples and pears. Grate or cube the cheddar. Slice the salami. If you’re using Brie, just leave it whole or cut it in half. The goal is to have everything in bowls or on plates so you can grab and go. I know it seems fussy, but it makes the actual assembly way less stressful.
Step 2: Place the Anchor Items (5 minutes)
Start with your largest items. Place your small bowls of dips around the board. I like to place them in a triangle pattern—top left, top right, and bottom center. This creates visual interest and leaves room for the larger cheeses in the middle. Put the bowl of olives in one of the empty spots. These bowls act as anchors for the rest of the arrangement.
Step 3: Arrange the Cheeses (5 minutes)
Place your blocks of cheese in the open spaces between the bowls. If you have a large block of cheddar, place it near the center. If you have goat cheese, crumble it loosely into a small pile. Don’t over-pack it; you want it to look natural. If you’re using Brie, place it on a small plate or directly on the board. The variety of textures—hard, soft, crumbly—makes the board look professional.
Step 4: Fold the Meats (5 minutes)
Take your salami or prosciutto and fold it into loose rolls or fans. Don’t just lay it flat; it looks boring. Roll it up loosely and place it in clusters near the cheeses. I like to place meat clusters near the cheddar and the mustard. It creates little flavor pockets. If you have prosciutto, drape it over the edge of the board for a fancy look.
Step 5: Fill in the Gaps with Fruit and Crunch (5 minutes)
This is the fun part. Tuck your grapes, apple slices, and pears into the empty spaces. I like to alternate colors—red grapes next to green apples, for example. Scatter the crackers around the edges. Don’t lay them flat; stand some of them up against the cheese blocks for height. Scatter the pretzels and granola in the gaps. This fills in the white space and makes the board look abundant.
Step 6: Final Touches
Step back and look. Is there too much white space? Add more crackers or fruit. Is it too crowded? Move a bowl. The goal is a balanced, inviting look. Add a few chocolate-covered pretzels or almonds near the sweet elements. Your game day football charcuterie board is ready to serve.
Total Time: About 30 minutes (mostly prep, 10 minutes active assembly)
Expert Tips & Tricks
Here’s everything I’ve learned from making this dozens of times. These tips will save you from my mistakes.
Room Temperature Cheese
Take your cheese out of the fridge 30 minutes before serving. Cold cheese loses its flavor and aroma. Room temperature cheese tastes so much better. I know it’s hot in the kitchen, but it’s worth it. If the cheese sweats, just pat it dry.
Don’t Overcrowd
It’s tempting to fill every inch, but leave some space. People need room to grab items without knocking everything over. A board that looks a bit sparse is better than one that looks like a food fight.
Use Height
Stack crackers against cheese blocks. Stand up fruit slices. Use small bowls for dips to add verticality. A flat board is boring. Height makes it look professional and interesting.
Color Contrast
Aim for a mix of colors. Red grapes, green apples, white cheese, brown crackers, dark meat. It’s visually appealing. If everything is beige, it looks dull. I always check for color balance before I call it done.
Keep it Fresh
If you’re serving the board for more than an hour, keep it in a cool spot. Fruit can brown, and cheese can dry out. If you’re worried, keep the fruit slices in water until the last minute, then dry them thoroughly.
Variations & Substitutions
Once you’ve nailed the basic version, here’s how you can mix it up. I’ve tried all of these.
Vegetarian Version
Skip the meat and add more cheese and fruit. I add roasted red peppers and artichoke hearts for extra flavor. It’s just as satisfying without the meat.
Gluten-Free Version
Use gluten-free crackers and pretzels. Everything else is naturally gluten-free. I love using rice crackers or almond flour crackers. They hold up well and don’t get soggy.
Keto Version
Skip the crackers and fruit. Add more nuts, cheese, and meat. I use pork rinds instead of crackers. They’re crunchy and zero carb. It’s a great option for my keto friends.
Sweet Tooth Version
Add more dessert elements. I include chocolate-covered strawberries, macarons, and honey. It’s more of a dessert board, but it works for game day if you’re having a sweet crowd.
Spicy Version
Add spicy peppers, chorizo, and hot sauce. I use pepper jack cheese instead of cheddar. It’s for people who like a kick. I always have a bottle of hot sauce on the side.
Serving & Storage
How to Serve:
I usually place the board on the coffee table or a side table near the TV. It’s easy to reach and doesn’t require a separate table. Have napkins ready—cheese and meat are messy. I use small plates for people who want to build their own bites.
Side Dishes:
This board is a complete meal, but you can add creamy southern coleslaw for a fresh, crunchy side. It’s light and balances the richness of the board. Or serve it with one pot chicken and wild rice soup if you want something warm and hearty.
Storage:
Leftover cheese can be wrapped in wax paper and stored in the fridge for up to 5 days. Fruit should be eaten within 2 days. Crackers stay good in their package. Meat can be stored in an airtight container for 3 days. I usually eat all the leftovers within a day because they’re too good to keep.
Nutrition Information
I’m not a nutritionist, but here’s the breakdown if you’re tracking. This is a grazing board, so portions vary widely. These are approximate per person if you serve 8 people.
Per Serving (based on 8 servings):
- Calories: 350
- Protein: 15g
- Carbs: 25g
- Fiber: 3g
- Sugar: 12g
- Fat: 22g
- Saturated Fat: 10g
- Cholesterol: 45mg
- Sodium: 600mg
What’s Good:
It’s high in protein and calcium from the cheese. You can control the carbs by choosing fewer crackers. It’s a balanced mix of savory and sweet.
What to Know:
It’s high in sodium and fat, which is typical for charcuterie. It’s not a diet food, but it’s a treat. When I want to make it lighter, I add more vegetables and fewer crackers.
Final Thoughts
So that’s my game day football charcuterie board! I’ve probably talked your ear off at this point, but when you make a recipe this often, you have a lot to say about it.
This has saved game day dinners more times than I can count. It’s my answer to “what’s for snacks” when I’m tired, don’t want to cook, and still want something that looks impressive. My friends are happy, my family is happy, and I’m happy because I’m not stressed about cooking.
Make it yours! Try different cheeses, swap in your favorite fruits, adjust the meats to your taste. The best boards are the ones you adapt to your crowd’s tastes.
If you make this, drop a comment and let me know what you think! I love hearing how recipes turn out in your kitchen. And if something doesn’t work, tell me that too—I’m here to help troubleshoot.
Happy hosting! And I hope your kitchen smells half as good as mine does right now.
Frequently Asked Questions
Can I make this board ahead of time?
Yes, but with some caveats. You can prep the cheese and wash the fruit the night before. Store them in airtight containers in the fridge. Assemble the board 1-2 hours before serving. This keeps the cheese at room temperature and the fruit fresh. Don’t assemble it more than 4 hours in advance, or the fruit will brown and the crackers will get soggy.
How long does the board last?
If left out, it’s best to eat it within 2 hours for food safety, especially with the meat and cheese. Leftovers can be stored in the fridge for up to 3 days. The cheese will harden, and the fruit will soften, but it’s still good. I usually finish it all by the end of the game.
Can I use pre-sliced cheese?
You can, but block cheese tastes better and looks nicer. Pre-sliced cheese often has a waxy texture. If you’re short on time, pre-sliced is okay, but I recommend buying a block and slicing it yourself. It takes 5 minutes and makes a huge difference in flavor.
What if I don’t have enough bowls for dips?
No problem. You can make dips in small ramekins or even use the lids of your jarred items. Or, you can spread the dips directly on the board in small pools. It’s a bit messier, but it works. I’ve used small cups from my kitchen drawer when I forgot to bring bowls.
Can I make this board vegetarian?
Absolutely. Just skip the meat and add more cheese, fruit, and nuts. I add roasted red peppers and artichoke hearts for extra flavor. It’s just as satisfying without the meat. My vegetarian friends love this version.
How do I keep the fruit from browning?
Toss apple and pear slices in a little lemon juice before arranging them. It prevents browning. Grapes and berries don’t brown, so they’re safe. I keep the fruit in the fridge until the last minute, then arrange them quickly.
Can I use this board for other parties?
Yes! This board is perfect for any party. Birthday parties, holiday gatherings, or just a casual get-together. It’s versatile and easy to customize. I’ve used it for birthday parties and dinner parties with great success.
Pin This Recipe!
Game Day Football Charcuterie Board: Easy Party Snack
- Total Time: 30 minutes
- Yield: 8 servings 1x
Description
A stress-free, crowd-pleasing charcuterie board that looks expensive but takes only 15 minutes to assemble. Perfect for game days, this no-cook snack features a mix of cheeses, meats, fruits, and dips.
Ingredients
- 8 ounces (225g) Sharp Cheddar Cheese (block)
- 8 ounces (225g) Cream Cheese (block)
- 8 ounces (225g) Soft Goat Cheese or Brie
- 8 ounces (225g) Salami or Prosciutto
- 1 large box (about 16 ounces) Mixed Crackers
- 1 small jar Hot Pepper Relish or Jalapeño Slices
- 1 cup (100g) Granola or Pretzels
- 2 cups (300g) Grapes, halved
- 2 medium Apples or Pears, sliced
- 1 cup (150g) Mixed Olives
- 1 cup (150g) Chocolate Covered Pretzels or Almonds
- 1 cup (240ml) Marinara Sauce
- ½ cup (120g) Whole Grain Mustard
Instructions
- Prep ingredients: Wash and dry grapes and fruit. Slice apples and pears. Grate or cube cheddar. Slice salami. Leave Brie whole or cut in half. Place everything in bowls or on plates.
- Place anchor items: Arrange small bowls of dips in a triangle pattern (top left, top right, bottom center) and place olives in an empty spot.
- Arrange cheeses: Place blocks of cheese in open spaces between bowls. Crumble goat cheese loosely. Place Brie on a small plate or directly on the board.
- Fold meats: Fold salami or prosciutto into loose rolls or fans and place in clusters near cheeses and mustard. Drape prosciutto over the edge for a fancy look.
- Fill gaps: Tuck grapes, apple slices, and pears into empty spaces. Scatter crackers around edges, standing some up against cheese for height. Scatter pretzels and granola in gaps.
- Final touches: Step back to check balance. Add more crackers or fruit if there is too much white space. Add chocolate-covered pretzels or almonds near sweet elements.
Notes
[‘Take cheese out of the fridge 30 minutes before serving for better flavor.’, “Don’t overcrowd the board; leave space for guests to grab items.”, ‘Use height by stacking crackers and standing up fruit slices.’, ‘Aim for color contrast to make the board visually appealing.’, ‘Keep the board in a cool spot if serving for more than an hour.’, ‘Toss apple and pear slices in lemon juice to prevent browning.’]
- Prep Time: 15 minutes
- Cook Time: 0 minutes
- Category: Appetizer
- Cuisine: American
Nutrition
- Serving Size: Grazing portions for
- Calories: 350
- Sugar: 12
- Sodium: 600
- Fat: 22
- Saturated Fat: 10
- Carbohydrates: 25
- Fiber: 3
- Protein: 15
Keywords: charcuterie board, game day snacks, football party, easy appetizer, no cook recipe, crowd pleaser, cheese board, party food


