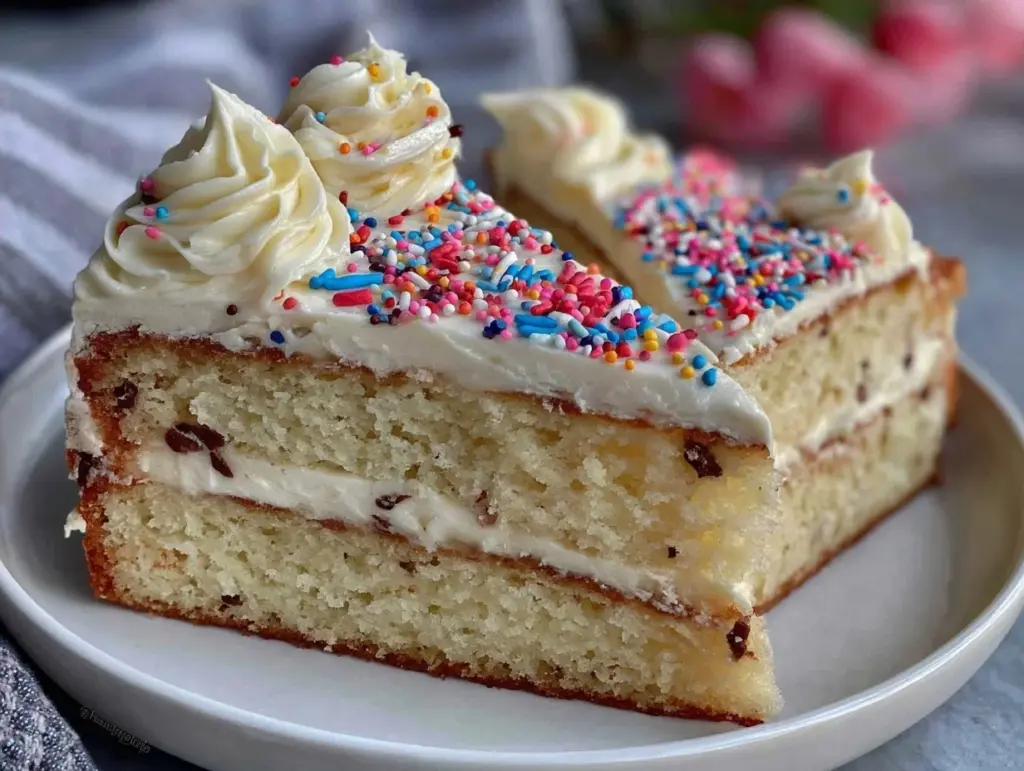
Last summer, my niece turned seven. She’s the kind of kid who wants everything to be “aesthetic” (a word I learned from her, much to my confusion). She wanted pink, she wanted sparkles, and she wanted a cake that looked like it came from a fancy boutique bakery but actually tasted like vanilla. The problem? I’m not a professional pastry chef. I’m a home cook who burns toast if I look away for too long. And I was terrified of making a giant cake that would sit in our fridge for two weeks, drying out into a brick.
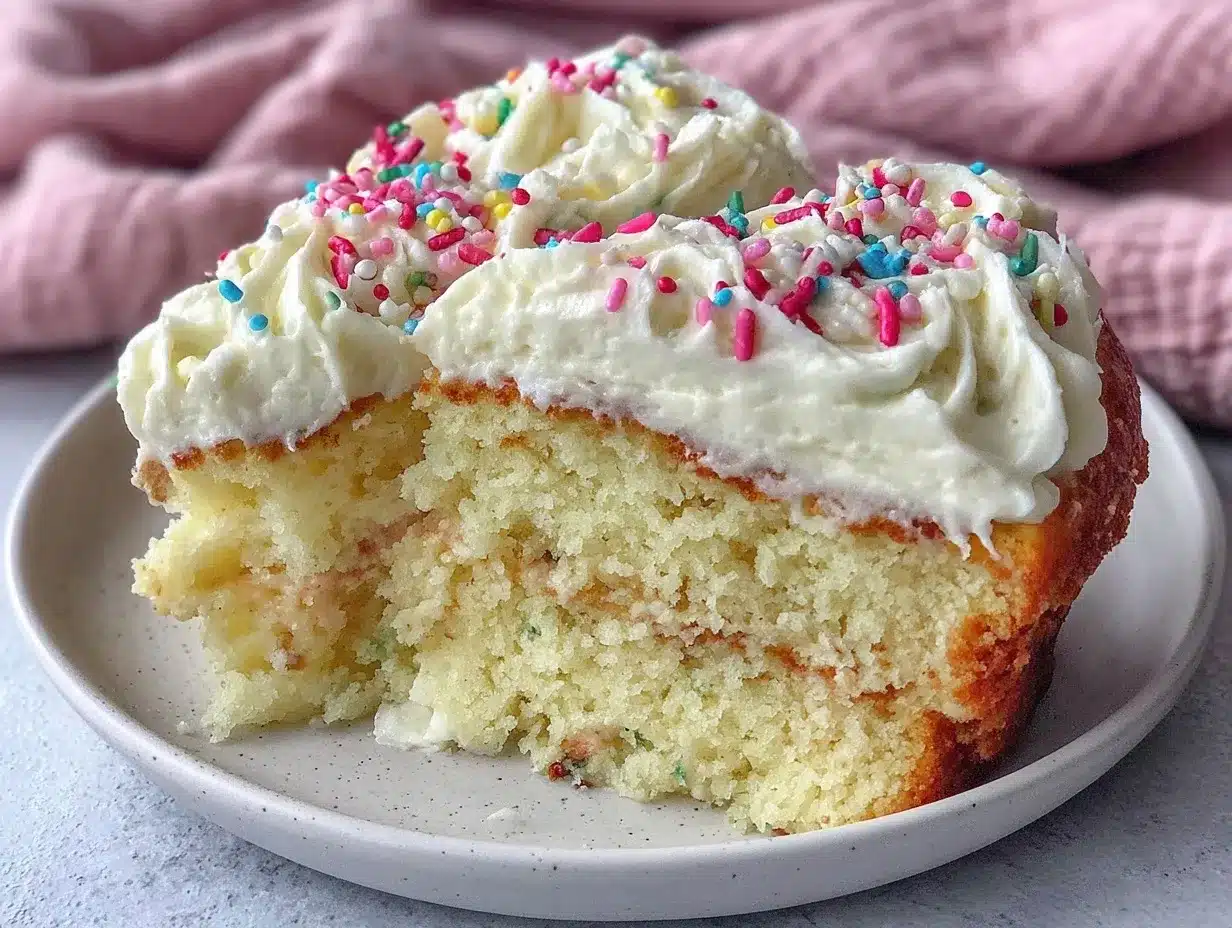
So, I decided to make a small batch vanilla bean birthday cake with sprinkles instead. Just a 6-inch cake. Enough for the party, but small enough that we could actually finish it in a few days without feeling guilty. I threw together a simple vanilla cake batter, used real vanilla beans because I wanted that speckled, luxurious look, and topped it with swirls of buttercream and every color of sprinkles I could find.
When I pulled it out of the oven, the kitchen smelled like pure nostalgia—warm sugar, toasted butter, and that deep, floral scent of real vanilla. My niece’s eyes went wide. She didn’t care that it wasn’t twenty feet tall. She cared that it was moist, that it had those tiny black vanilla seeds in every bite, and that it was the perfect size for her little table. It was hands-down the best birthday cake I’ve ever made, and honestly? It was the easiest one too.
That cake has become my secret weapon. Whenever someone mentions a birthday, a “just because” celebration, or just a Tuesday that needs cheering up, I make this small batch vanilla bean birthday cake with sprinkles. It’s impressive enough for guests but forgiving enough for beginners. I’ve tested this recipe at least a dozen times, tweaking the buttercream and the baking time, until I got it absolutely perfect. And today, I’m sharing the whole thing with you.
Why You’ll Love This Small Batch Vanilla Bean Birthday Cake with Sprinkles
There are about ten reasons I keep coming back to this recipe, but let’s be real—you’re here because you want a cake that looks amazing without the stress. Here’s why this small batch vanilla bean birthday cake with sprinkles is about to become your new favorite dessert:
- Perfectly Portioned — No more wasting half a cake. This 6-inch cake serves 6-8 people comfortably. It’s ideal for a small family, a couple’s celebration, or just when you want cake for breakfast and dinner.
- Looks Fancy, Actually Simple — The vanilla bean specks give it that high-end bakery look instantly. You don’t need piping skills or fondant. Just a spatula and some sprinkles.
- Moist Every Time — I’ve tried a lot of small batch recipes, and many end up dry. This one stays soft for days because of the buttermilk and oil blend. I’ve had leftovers four days later, and they still tasted fresh.
- Real Flavor, No Artificial Taste — Using real vanilla beans makes all the difference. It’s not just sweet; it’s aromatic and complex. Your guests will ask what the secret ingredient is (it’s vanilla, but don’t tell them how easy it is).
- Impresses Without the Effort — You can bake this while you’re watching TV or chatting with friends. It’s low-maintenance but high-reward. I even made this for a Virgo birthday cake last year, and it fit the vibe perfectly.
- Customizable — Love sprinkles? Go wild. Want it elegant? Skip the sprinkles and add edible flowers. This small batch vanilla bean birthday cake with sprinkles is your canvas.
This is my go-to when I need a dessert that feels special but doesn’t require a degree in pastry arts. It’s reliable, delicious, and makes everyone happy.
Ingredients You’ll Need
Here’s the best part: you probably have most of these ingredients already. I’m particular about three things here—vanilla, butter, and flour—and I’ll tell you exactly why.
For the Cake
All-purpose flour (1 ½ cups / 190g) — Don’t use cake flour unless you want a different texture. All-purpose gives that perfect tender crumb. Spoon it into the cup and level it off; don’t scoop, or you’ll pack it too tight.
Baking powder (1 ½ teaspoons) — Make sure it’s fresh! Old baking powder is the #1 reason cakes don’t rise. If yours is more than six months old, toss it and buy new.
Salt (½ teaspoon) — Essential for balancing the sweetness. Don’t skip it.
Unsalted butter (½ cup / 115g, softened) — Softened means room temperature. It should yield slightly when you press it. Cold butter won’t cream properly, and melted butter makes the cake dense.
Granulated sugar (1 cup / 200g) — The standard stuff. Don’t try to use brown sugar unless you want a caramel flavor.
Eggs (2 large, room temperature) — Room temp eggs emulsify better. If you forget, just drop them in warm water for 5 minutes.
Vanilla bean paste (2 teaspoons) OR 1 vanilla bean, scraped — This is the star. Paste is easier, but scraping a real bean gives you those beautiful black specks. If you use extract, you’ll miss the specks, but it’ll still taste good.
Buttermilk (¾ cup / 180ml) — Buttermilk adds tang and tenderness. Can’t find it? Mix ¾ cup milk with 1 tablespoon lemon juice and let it sit for 5 minutes.
Vegetable oil (2 tablespoons) — This is my secret trick. A little oil keeps the cake moist longer than butter alone.
For the Vanilla Buttercream
Unsalted butter (1 cup / 225g, softened) — Again, room temperature is key. If it’s too cold, you’ll get lumps.
Confectioners’ sugar (3-4 cups / 360-480g) — Sift this if it’s clumpy. You want silky smooth frosting.
Heavy cream (2-3 tablespoons) — Adjust for consistency. More cream = softer frosting.
Vanilla bean paste (1 teaspoon) — Or extract.
Salt (¼ teaspoon) — Cuts the sweetness.
For the Topping
Jimmies or Nonpareils — As much as you want! I love the contrast of bright colors against white frosting.
Equipment Needed
You don’t need fancy equipment for this. Here’s what I actually use.
6-inch round cake pans (2) — You need two 6-inch pans, or one 6-inch and one 8-inch if you want a taller cake. Line the bottoms with parchment paper for easy release.
Mixer — A hand mixer works fine, but a stand mixer is easier. I use a KitchenAid, but honestly, my old hand mixer did the job just fine.
Cooling rack — Essential. Let the cake cool completely before frosting, or your buttercream will melt.
Offset spatula — Makes frosting smoother. If you don’t have one, a butter knife works, but it takes more practice.
Measuring cups and spoons — Accuracy matters in baking. I use the standard set from my drawer.
How to Make It: Step-by-Step
Alright, let’s make this! I’m walking you through exactly how I do it, including the little tricks I’ve picked up.
Step 1: Prep Your Oven and Pans (5 minutes)
Preheat your oven to 350°F (175°C). Grease your 6-inch cake pans with butter or non-stick spray, then line the bottoms with parchment paper. This is non-negotiable—it ensures the cake doesn’t stick and you can get it out cleanly.
Step 2: Mix the Dry Ingredients (2 minutes)
In a medium bowl, whisk together the flour, baking powder, and salt. Set this aside. It’s that simple. Just make sure there are no lumps of baking powder.
Step 3: Cream the Butter and Sugar (3-4 minutes)
In a large bowl, beat the softened butter and sugar together on medium-high speed until light and fluffy. This takes about 3-4 minutes. You’ll see the color lighten and the texture become airy. This step adds air to the cake, which helps it rise.
Step 4: Add Eggs and Vanilla (2 minutes)
Add the eggs one at a time, beating well after each addition. Scrape down the sides of the bowl. Stir in the vanilla bean paste (or scraped vanilla bean). The mixture should look creamy and pale.
Step 5: Combine Wet and Dry (2 minutes)
Reduce mixer speed to low. Add the dry ingredients in three parts, alternating with the buttermilk in two parts, starting and ending with the dry ingredients. Mix just until combined. Do not overmix! Overmixing makes the cake tough. It’s okay if there are a few tiny streaks of flour.
Step 6: Bake (20-25 minutes)
Divide the batter evenly between the two pans. Bake for 20-25 minutes, or until a toothpick inserted into the center comes out clean or with just a few moist crumbs. The cakes should spring back when you lightly touch them.
Step 7: Cool Completely (1 hour)
Let the cakes cool in the pans for 10 minutes, then turn them out onto a wire rack to cool completely. If you frost a warm cake, the buttercream will slide right off. Patience is key.
Step 8: Make the Frosting (5 minutes)
Beat the softened butter until creamy. Add the confectioners’ sugar, one cup at a time, on low speed. Once incorporated, add the heavy cream, vanilla, and salt. Beat on high for 2-3 minutes until fluffy. Add more sugar if it’s too soft, or more cream if it’s too stiff.
Step 9: Assemble and Decorate (10 minutes)
Place one cake layer on a plate or stand. Spread a layer of frosting on top. Place the second layer on top. Frost the top and sides with the remaining buttercream. Press sprinkles onto the sides and top. It’s that easy.
Expert Tips & Tricks
Here’s everything I’ve learned from making this dozens of times. These tips will save you from my mistakes.
- Room Temperature Ingredients — This is the golden rule. Cold eggs and butter won’t mix properly. Take them out of the fridge 30 minutes before you start.
- Don’t Overmix the Batter — Once you add the flour, mix until *just* combined. Overmixing develops gluten, which makes the cake chewy instead of tender.
- Check Your Oven — Ovens vary. Start checking at 20 minutes. If the top is browning too fast, tent it with foil.
- Use Real Vanilla — Vanilla extract is fine, but vanilla bean paste or a real bean makes a huge difference in flavor and appearance. It’s worth the extra cost.
- Chill Before Serving — Let the frosted cake chill in the fridge for 30 minutes before slicing. It sets the frosting and makes clean cuts easier.
Common Mistakes
Mistake: Cake is dense — Fix: You probably overmixed the batter or used old baking powder. Next time, mix gently and check your leavening agents.
Mistake: Frosting is too sweet — Fix: Add a pinch more salt or a splash of lemon juice to balance it.
Mistake: Cakes are domed — Fix: Use cake strips or reduce the oven temperature by 25°F. Or just level them with a knife!
Variations & Substitutions
Once you’ve nailed the basic version, here’s how you can mix it up. I’ve tried all of these.
Flavor Twists
Lemon Vanilla — Add the zest of one lemon to the batter. Bright and refreshing.
Chocolate Swirl — Mix 2 tablespoons cocoa powder into half the batter. Swirl it into the plain batter for a marbled effect.
Strawberry — Fold in ½ cup crushed freeze-dried strawberries. Adds flavor without extra moisture.
Dietary Mods
Gluten-Free — Use a 1:1 gluten-free flour blend. It works great in this recipe. I’ve used Bob’s Red Mill and it’s perfect.
Dairy-Free — Use coconut oil instead of butter, and coconut milk instead of buttermilk. The flavor will be slightly coconutty, but still delicious.
Egg-Free — Use flax eggs (1 tbsp ground flax + 3 tbsp water per egg). The texture will be slightly denser, but it works.
Serving & Storage
How to Serve: I usually serve this straight from the fridge, but let it sit at room temperature for 15 minutes before slicing. The frosting softens, and the cake is more flavorful.
Side Dishes: This cake pairs well with watermelon mint sangria for a summer party, or a simple cup of coffee for a cozy night in.
Storage: Store in an airtight container at room temperature for up to 3 days. If it’s hot outside, refrigerate it. Bring to room temperature before serving.
Freezing: You can freeze the unfrosted cake layers for up to 2 months. Wrap tightly in plastic wrap and foil. Thaw overnight in the fridge before frosting.
Nutrition Information
I’m not a nutritionist, but here’s the breakdown if you’re tracking.
Per Serving (1/8th of cake):
- Calories: 380
- Protein: 4g
- Carbs: 45g
- Fat: 20g
- Sugar: 32g
- Sodium: 250mg
Look, this is a cake. It’s sweet, it’s rich, and it’s meant to be enjoyed. It’s better than store-bought because you control the ingredients. When I make this, I use real butter and real vanilla, which tastes so much better than the artificial stuff.
Final Thoughts
So that’s my go-to small batch vanilla bean birthday cake with sprinkles! I’ve probably talked your ear off at this point, but when you make a recipe this often, you have a lot to say about it.
This cake has saved my sanity more times than I can count. It’s my answer to “what’s for dessert?” when I want something special but don’t want to spend hours in the kitchen. My family is happy, my guests are impressed, and I’m happy because I’m not stressed about cooking.
Make it yours! Try different sprinkles, add fresh fruit on top, or swap the vanilla for almond extract. The best recipes are the ones you adapt to your tastes.
If you make this, drop a comment and let me know what you think! I love hearing how recipes turn out in your kitchen. And if something doesn’t work, tell me that too—I’m here to help troubleshoot.
Happy baking! And I hope your kitchen smells half as good as mine does right now.
Frequently Asked Questions
Can I use vanilla extract instead of vanilla beans?
Yes, you can! Use 2 teaspoons of high-quality vanilla extract. You’ll miss the beautiful black specks, but the flavor will still be delicious. If you want the specks without scraping beans, buy vanilla bean paste.
Why did my cake sink in the middle?
Usually, this means it wasn’t baked long enough, or you opened the oven door too early. Check your oven temperature with a thermometer—it might be running hot. Also, make sure you’re not overmixing the batter.
Can I make this a day ahead?
Absolutely! Bake and cool the layers the day before. Wrap them tightly in plastic wrap. Frost the cake the day of the party. This actually helps the flavors meld and makes the cake easier to frost.
How do I get smooth frosting?
Chill the cake for 15 minutes after applying a “crumb coat” (a thin layer of frosting). Then apply the final layer. Use an offset spatula and dip it in hot water, then wipe it dry. The heat helps smooth the frosting.
Can I double this recipe?
Yes, but you’ll need to bake it in 8-inch pans. Increase the baking time by 5-10 minutes. Or bake it in two 6-inch pans for 20 minutes, then let them cool before stacking.
What kind of sprinkles work best?
Jimmies (the long cylindrical ones) hold up best and don’t bleed color. Nonpareils (the tiny balls) are cute but can bleed into the frosting. I love using a mix of both for texture.
Pin This Recipe!
Small Batch Vanilla Bean Birthday Cake with Sprinkles
- Total Time: 40 minutes
- Yield: 8 servings 1x
Description
A moist, 6-inch vanilla bean birthday cake with real vanilla specks, topped with swirls of vanilla buttercream and colorful sprinkles. Perfect for small celebrations or beginners.
Ingredients
- 1 ½ cups all-purpose flour
- 1 ½ teaspoons baking powder
- ½ teaspoon salt
- ½ cup unsalted butter, softened
- 1 cup granulated sugar
- 2 large eggs, room temperature
- 2 teaspoons vanilla bean paste OR 1 vanilla bean, scraped
- ¾ cup buttermilk
- 2 tablespoons vegetable oil
- 1 cup unsalted butter, softened (for frosting)
- 3–4 cups confectioners’ sugar (for frosting)
- 2–3 tablespoons heavy cream (for frosting)
- 1 teaspoon vanilla bean paste (for frosting)
- ¼ teaspoon salt (for frosting)
- Jimmies or Nonpareils sprinkles (for topping)
Instructions
- Preheat oven to 350°F (175°C). Grease two 6-inch round cake pans and line bottoms with parchment paper.
- In a medium bowl, whisk together flour, baking powder, and salt. Set aside.
- In a large bowl, beat softened butter and sugar on medium-high speed for 3-4 minutes until light and fluffy.
- Add eggs one at a time, beating well after each addition. Scrape down bowl sides. Stir in vanilla bean paste or scraped bean.
- Reduce mixer speed to low. Add dry ingredients in three parts, alternating with buttermilk in two parts, starting and ending with dry ingredients. Mix just until combined.
- Divide batter evenly between the two pans.
- Bake for 20-25 minutes, or until a toothpick inserted into the center comes out clean.
- Let cakes cool in pans for 10 minutes, then turn out onto a wire rack to cool completely.
- Beat softened butter until creamy. Add confectioners’ sugar one cup at a time on low speed. Add heavy cream, vanilla, and salt. Beat on high for 2-3 minutes until fluffy.
- Place one cake layer on a plate. Spread a layer of frosting on top. Place second layer on top. Frost top and sides with remaining buttercream.
- Press sprinkles onto the sides and top of the cake.
Notes
Ensure ingredients are at room temperature for best results. Do not overmix the batter to avoid a tough cake. For smooth frosting, chill the cake for 15 minutes after applying a crumb coat before the final layer. Can be stored in an airtight container at room temperature for up to 3 days.
- Prep Time: 15 minutes
- Cook Time: 25 minutes
- Category: Dessert
- Cuisine: American
Nutrition
- Serving Size: 1/8th of cake
- Calories: 380
- Sugar: 32
- Sodium: 250
- Fat: 20
- Saturated Fat: 12
- Carbohydrates: 45
- Fiber: 1
- Protein: 4
Keywords: small batch cake, vanilla bean cake, birthday cake, 6 inch cake, vanilla buttercream, homemade cake, easy birthday dessert


