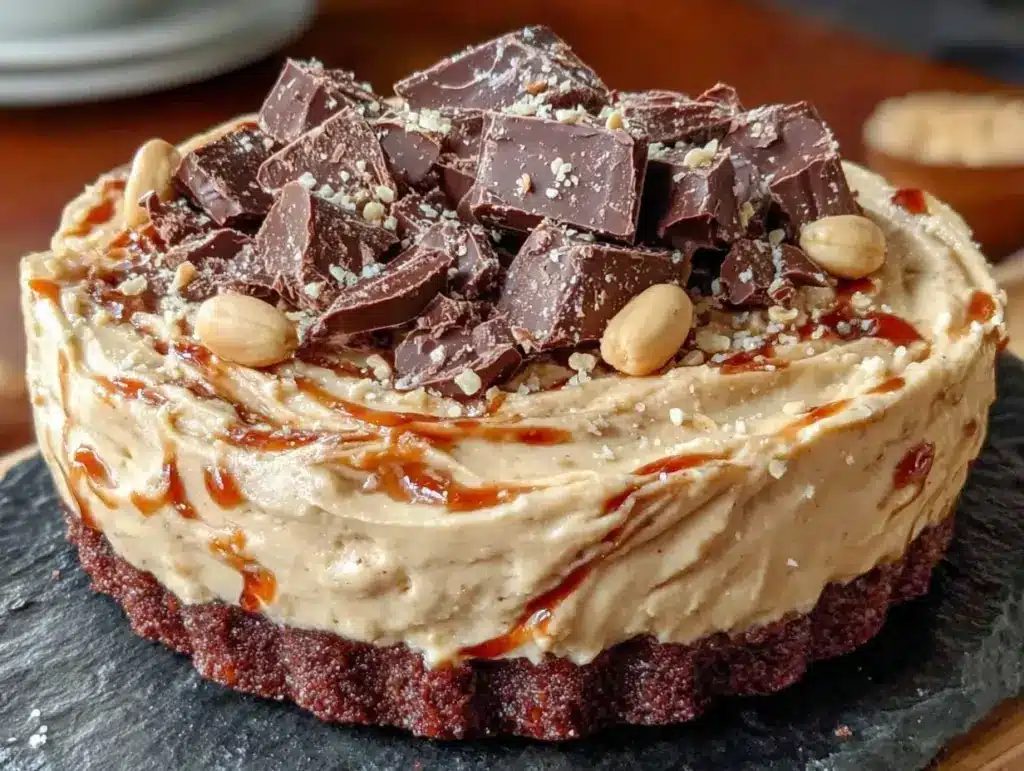
Last Labor Day, I was standing in my kitchen at 8 PM, staring at a completely empty dessert tray, while my guests were already asking if we were having cake. I had spent the afternoon grilling smoky honey garlic BBQ ribs and prepping loaded baked potato salad, so my oven was hot, my patience was thin, and my creativity was non-existent. I needed something that looked impressive, tasted indulgent, and required zero actual cooking. I didn’t have time to bake a crust or worry about a soggy bottom.
That’s when I remembered the no-bake peanut butter chocolate pie I’d made for a casual get-together the month before. I pulled out the graham crackers, whipped up the peanut butter filling, and layered it with a glossy, dark chocolate ganache. Thirty minutes later, I slid a perfect, chilled pie onto the table. The look on my guests’ faces wasn’t just surprise—it was pure delight. They thought I’d ordered it from that fancy bakery downtown. No one guessed it was made in my messy kitchen while I was still wiping down the grill grates.
This no-bake peanut butter chocolate pie has become my secret weapon for every gathering since. It’s the kind of dessert that feels luxurious and grown-up but is actually stupidly simple. You don’t need a mixer (though it helps), you don’t need an oven, and you certainly don’t need to be a pastry chef. It’s rich, it’s creamy, and it sets up perfectly in the fridge while you’re busy enjoying your actual dinner. If you’re looking for a way to end a meal on a high note without the stress, this is it.
Why You’ll Love This 5-Ingredient Indulgence
I’ve made this pie at least a dozen times in the last year, and it never fails to turn heads. Here’s why it’s become a permanent fixture in my dessert rotation:
- Zero Baking Required — Seriously. No preheating the oven, no waiting for crusts to cool, no risk of burning. It’s all about assembly and chilling. I make this on weeknights when I don’t have the energy to turn on the stove, let alone the oven.
- Five Ingredients Max — I’m not exaggerating. You need graham crackers, butter, peanut butter, chocolate chips, and heavy cream. That’s it. It’s pantry-friendly, which means I can pull this together on a whim when I realize I forgot dessert until after dinner is served.
- Texture Heaven — The contrast between the crunchy, buttery crust and the silky, rich peanut butter filling topped with a snap-worthy chocolate layer is addictive. It’s not too sweet, not too heavy, just perfectly balanced.
- Make-Ahead Magic — This pie actually tastes better the next day. The flavors meld together as it chills, and the chocolate layer firms up nicely. I love making this the night before a party so I can relax and enjoy the event instead of stressing over last-minute prep.
- Impressive Factor — It looks like something you’d buy at a high-end dessert shop. The dark chocolate drizzle and the neat layers give it a professional finish that screams “I put in effort,” even though you put in almost none.
This pie is my go-to when I want to treat myself or my family to something special without the fuss. It’s comfort food in pie form, and it’s guaranteed to disappear fast.
Ingredients You’ll Need
Here’s the best part: you probably have most of this already. The beauty of this no-bake peanut butter chocolate pie is its simplicity. You don’t need fancy or hard-to-find ingredients. Here’s exactly what you need and why:
Graham Cracker Crumbs (1 ½ cups / 150g) — These form the base. I buy pre-crushed crumbs to save time, but if you have leftover graham crackers from s’mores, pulse them in a food processor. Avoid the overly sweetened varieties; you want a neutral, buttery crunch.
Unsalted Butter (½ cup / 113g, melted) — This binds the crust together. Use real butter, not margarine. It adds that rich, savory note that balances the sweetness. I melt it in the microwave in 30-second intervals, stirring in between.
Creamy Peanut Butter (1 cup / 250g) — This is the star. I use standard Jif or Skippy because they’re smooth and consistent. Natural peanut butter can be oily and won’t set as well, so stick to the processed kind for this recipe. It gives that classic, comforting peanut butter flavor.
Heavy Cream (1 cup / 240ml) — This whips up to create the light, airy texture of the filling. It needs to be cold. If it’s warm, it won’t whip. I keep a carton in the fridge specifically for desserts like this.
Semi-Sweet Chocolate Chips (1 cup / 170g) — For the topping. I use Ghirardelli or Hershey’s. Semi-sweet is perfect because it’s not too bitter and not too sweet. You can use dark chocolate chips if you prefer a richer, less sweet topping.
Optional Garnishes — A pinch of flaky sea salt on top of the chocolate layer adds a nice contrast. Crushed peanuts or a drizzle of peanut butter also look great and add extra crunch.
Equipment Needed
You don’t need fancy equipment for this. Here’s what I actually use:
9-Inch Pie Dish — A standard glass or ceramic pie dish works best. It allows you to see the layers and slice it neatly. I use a Pyrex dish because it’s durable and easy to clean.
Mixing Bowls — You’ll need two medium bowls. One for the crust, one for the filling. I like stainless steel because they’re sturdy and easy to whisk in.
Electric Hand Mixer — While you *can* whisk by hand, it takes effort and time. A hand mixer makes whipping the cream and peanut butter quick and easy. I’ve used a whisk before, and I never go back.
Spatula — A silicone spatula is essential for folding the whipped cream into the peanut butter and for spreading the chocolate topping evenly. I keep a few around the kitchen for various tasks.
Microplane or Grater — If you’re using chocolate bars instead of chips, you’ll need a grater. But chips melt faster and easier, so I usually stick with those.
Measuring Cups and Spoons — Standard stuff. Accurate measurements matter here, especially for the chocolate topping, so don’t eyeball it too much.
How to Make It: Step-by-Step
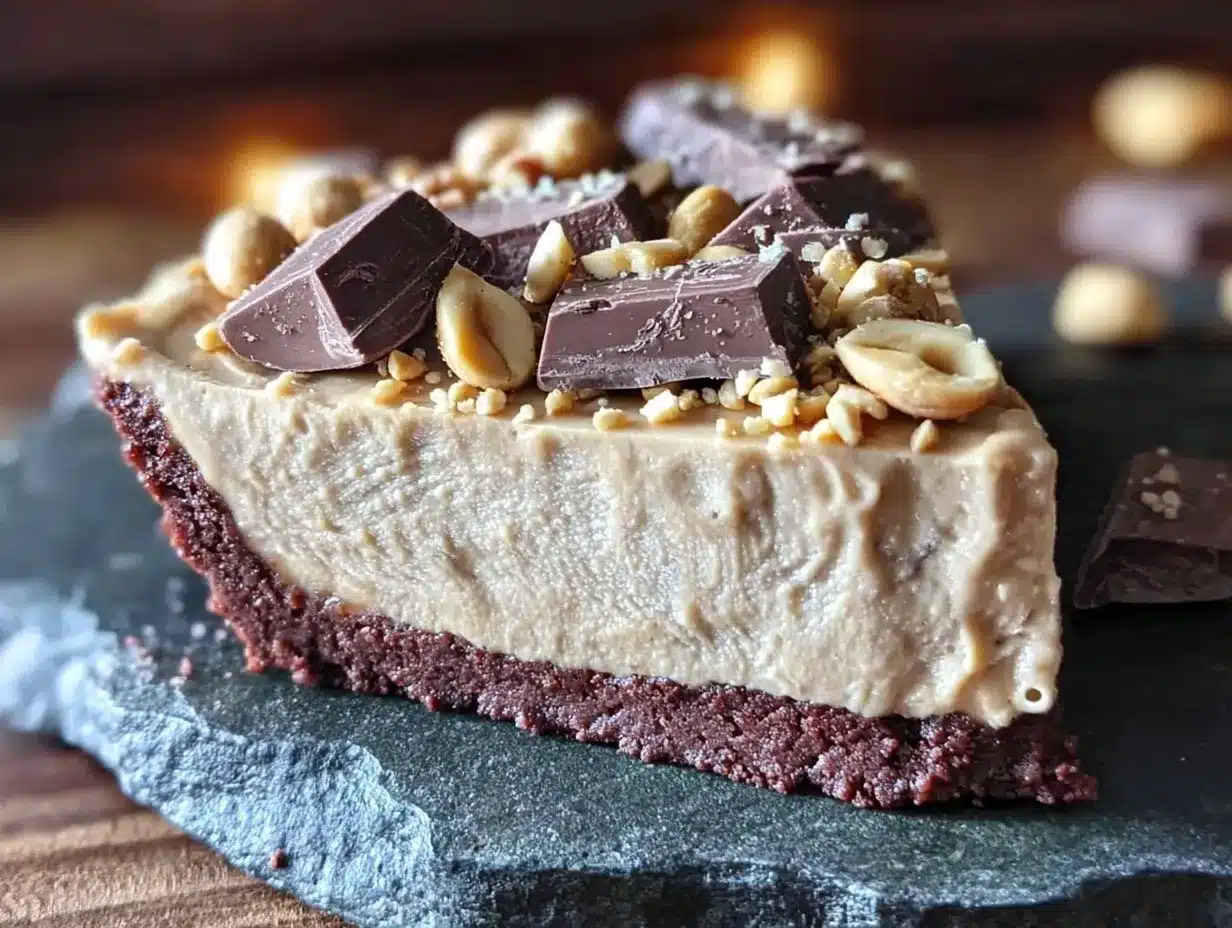
Alright, let’s make this! I’m walking you through exactly how I do it, including the little tricks I’ve picked up.
Step 1: Make the Crust (5 minutes)
In a medium bowl, mix the graham cracker crumbs and melted butter until the mixture looks like wet sand. Press this mixture firmly into the bottom and up the sides of your 9-inch pie dish. Use the bottom of a glass to pack it down evenly. I like to go a little higher up the sides than usual for that extra crunch in every bite. Chill this in the fridge while you make the filling.
Step 2: Whip the Filling (10 minutes)
In a large bowl, beat the heavy cream with the electric mixer on medium-high speed until stiff peaks form. This should take about 3-4 minutes. The cream should hold its shape when you lift the beaters. In a separate bowl, mix the peanut butter until it’s smooth and creamy. Gently fold the whipped cream into the peanut butter using a spatula. Be careful not to deflate the cream. You want a light, airy mixture. Spread this evenly over the chilled crust.
Step 3: Prepare the Chocolate Topping (5 minutes)
Melt the chocolate chips in a microwave-safe bowl in 30-second intervals, stirring in between, until smooth. Alternatively, use a double boiler on the stove. Let the chocolate cool for about 2-3 minutes so it’s still liquid but not hot. Pour it over the peanut butter layer and spread it evenly with a spatula. I like to swirl the spatula to create a marbled effect, but a smooth layer looks very professional too.
Step 4: Chill and Set (4+ hours)
Place the pie in the refrigerator for at least 4 hours, or overnight. This allows the chocolate to set and the flavors to meld. I usually make this the night before, so it’s ready to go when I need it. The longer it chills, the firmer the chocolate layer becomes, which makes slicing cleaner.
Step 5: Slice and Serve
When ready to serve, slice with a sharp knife. I dip the knife in hot water and wipe it dry between slices for clean cuts. Garnish with a pinch of sea salt or crushed peanuts if desired. Serve cold and enjoy!
Expert Tips & Tricks
Here’s everything I’ve learned from making this dozens of times. These tips will save you from my mistakes.
Keep Everything Cold — The heavier the cream, the better it whips. Make sure your bowl and beaters are cold. I sometimes put my mixing bowl in the fridge for 15 minutes before starting. Cold cream whips faster and holds its shape better.
Don’t Overmix — When folding the whipped cream into the peanut butter, be gentle. You want to keep as much air in the mixture as possible. Overmixing will deflate the cream and make the filling dense.
Let the Chocolate Cool — If you pour hot chocolate over the peanut butter, it will melt the layer underneath. Let the melted chocolate cool for a few minutes until it’s just warm to the touch. It should still be pourable but not hot.
Use a Sharp Knife — Slicing a no-bake pie can be tricky. A dull knife will squish the layers. Dip your knife in hot water and wipe it dry before each cut for clean, neat slices.
Store Properly — Cover the pie with plastic wrap or foil to prevent it from absorbing fridge odors. It keeps well in the fridge for up to 5 days.
Variations & Substitutions
Once you’ve nailed the basic version, here’s how you can mix it up. I’ve tried all of these.
Salted Caramel Version — Drizzle salted caramel sauce over the peanut butter layer before adding the chocolate. Adds a sweet and salty kick that’s amazing.
Chocolate Peanut Butter Cup — Add a layer of crushed Reese’s Peanut Butter Cups between the peanut butter filling and the chocolate topping. It’s like eating a candy bar.
Gluten-Free — Use gluten-free graham cracker crumbs. Everything else is naturally gluten-free. I’ve used Kinnikinnick crumbs and they work great.
Dairy-Free — Use dairy-free peanut butter and coconut cream instead of heavy cream. Use dairy-free chocolate chips. It’s not quite the same texture, but it’s still delicious.
Low-Sugar — Use sugar-free peanut butter and sugar-free chocolate chips. It’s a bit less sweet, but still satisfies the craving.
Serving & Storage
How to Serve: I usually serve this straight from the fridge. It’s best cold, so don’t leave it out on the counter for too long. Pair it with a glass of cold milk or a cup of coffee for a complete treat.
Side Dishes: This pie is rich, so I like to serve it with something light. A simple fruit salad or some fresh berries cut through the richness nicely.
Storage: Store in an airtight container or covered with plastic wrap in the fridge for up to 5 days. It does not freeze well because the texture of the whipped cream can change upon thawing. For best results, make it fresh or store it in the fridge.
Nutrition Information
I’m not a nutritionist, but here’s the breakdown if you’re tracking. This is a rich dessert, so enjoy in moderation.
Per Serving (based on 8 servings):
| Nutrient | Amount |
|---|---|
| Calories | 380 |
| Protein | 8g |
| Carbs | 35g |
| Fiber | 3g |
| Sugar | 22g |
| Fat | 24g |
| Saturated Fat | 12g |
| Cholesterol | 35mg |
| Sodium | 220mg |
Look, this is indulgent comfort food. It’s not a diet recipe. But it’s way better than store-bought, and I know exactly what’s in it. When I want to make it lighter, I use a smaller slice and pair it with fresh fruit. But usually? I just enjoy a square and let myself indulge.
Final Thoughts
So that’s my no-bake peanut butter chocolate pie! It’s simple, it’s delicious, and it’s guaranteed to impress. I’ve made this for potlucks, dinner parties, and just because I wanted something sweet. It’s my answer to “what’s for dessert” when I’m tired but still want to treat my family. My kids love it, my husband loves it, and I love it because it’s easy to make.
Make it yours! Try different toppings, swap in your favorite chocolate, or add a layer of fruit. The best recipes are the ones you adapt to your tastes. If you make this, drop a comment and let me know what you think! I love hearing how recipes turn out in your kitchen. And if something doesn’t work, tell me that too—I’m here to help troubleshoot.
Happy cooking! I hope your kitchen smells as good as mine does right now.
Frequently Asked Questions
Can I use crunchy peanut butter?
You can, but the filling will have a chunky texture. I prefer creamy for a smoother, more uniform bite. If you like crunch, you can add chopped peanuts to the filling.
Why did my chocolate topping crack?
This usually happens if the chocolate was too hot when poured or if the pie was moved too much while setting. Let the chocolate cool slightly before pouring, and avoid moving the pie until it’s fully set.
Can I make this ahead of time?
Absolutely! This pie is best made at least 4 hours in advance, but overnight is ideal. The flavors meld and the texture improves with time. I often make it the night before a party.
How do I store leftovers?
Store in the refrigerator, covered with plastic wrap or in an airtight container. It will keep for up to 5 days. Do not freeze, as the texture may change.
Can I use a food processor for the crust?
Yes! If you’re using whole graham crackers, pulse them in a food processor until fine. Then mix with the melted butter as usual.
What if I don’t have heavy cream?
You can use whipped topping (like Cool Whip) for a quicker version, but the texture will be different. For a lighter option, you can use Greek yogurt mixed with a little honey, but it won’t whip up the same way.
Can I add other flavors?
Yes! Try adding a teaspoon of vanilla extract to the peanut butter filling, or a pinch of cinnamon. You can also swirl in some jam or caramel for extra flavor.
Pin This Recipe!
No-Bake Peanut Butter Chocolate Pie: 5-Ingredient Indulgence
- Total Time: 4 hours 20 minutes
- Yield: 8 servings 1x
Description
A simple, luxurious no-bake dessert featuring a crunchy graham cracker crust, a creamy peanut butter filling, and a rich chocolate ganache topping. This 5-ingredient pie is perfect for make-ahead entertaining.
Ingredients
- 1 ½ cups graham cracker crumbs
- ½ cup unsalted butter, melted
- 1 cup creamy peanut butter
- 1 cup heavy cream, cold
- 1 cup semi-sweet chocolate chips
Instructions
- Mix graham cracker crumbs and melted butter in a medium bowl until resembling wet sand.
- Press the mixture firmly into the bottom and up the sides of a 9-inch pie dish. Chill in the fridge.
- In a large bowl, beat heavy cream with an electric mixer on medium-high speed until stiff peaks form (about 3-4 minutes).
- In a separate bowl, mix peanut butter until smooth.
- Gently fold the whipped cream into the peanut butter using a spatula until combined but airy.
- Spread the peanut butter filling evenly over the chilled crust.
- Melt chocolate chips in a microwave-safe bowl in 30-second intervals, stirring until smooth.
- Let chocolate cool for 2-3 minutes until warm but not hot.
- Pour chocolate over the filling and spread evenly.
- Refrigerate for at least 4 hours or overnight until set.
- Slice with a sharp knife dipped in hot water and wipe dry between cuts. Serve cold.
Notes
Keep all equipment and cream cold for best whipping results. Do not overmix the filling to maintain airiness. Let chocolate cool slightly before pouring to prevent melting the layer below. Store covered in the fridge for up to 5 days; do not freeze.
- Prep Time: 20 minutes
- Cook Time: 0 minutes
- Category: Dessert
- Cuisine: American
Nutrition
- Serving Size: 1 slice
- Calories: 380
- Sugar: 22
- Sodium: 220
- Fat: 24
- Saturated Fat: 12
- Carbohydrates: 35
- Fiber: 3
- Protein: 8
Keywords: no-bake pie, peanut butter dessert, chocolate pie, easy dessert, 5-ingredient recipe, make-ahead dessert, graham cracker crust


