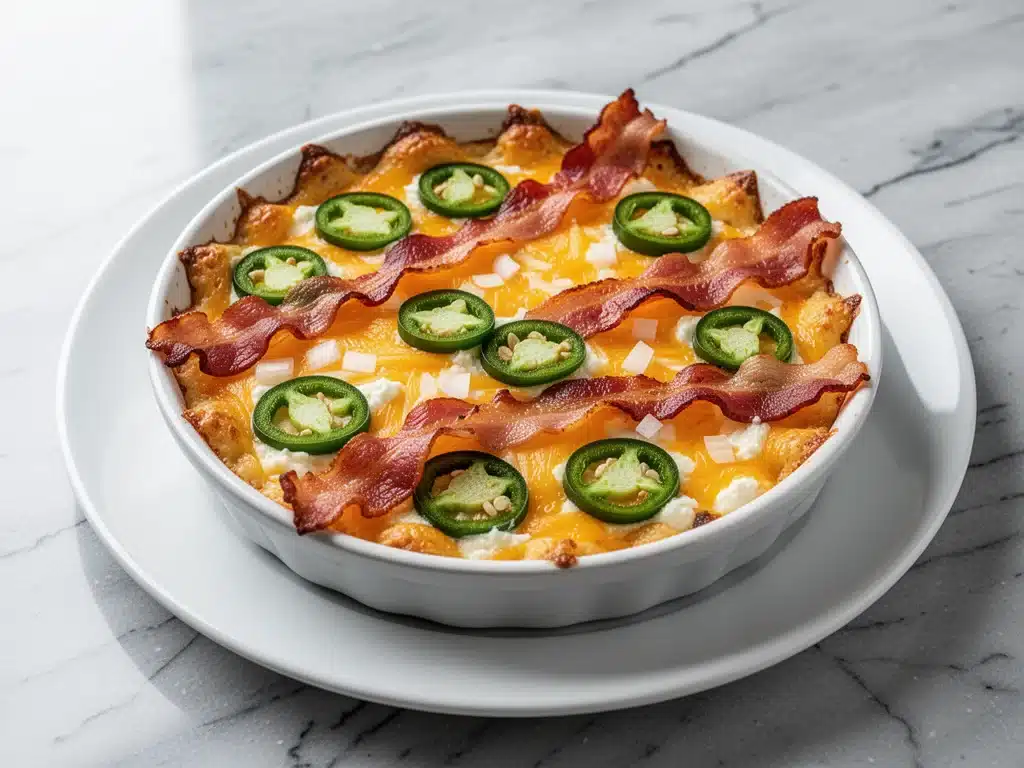
It was 11:45 PM on a Tuesday. I was staring into my open refrigerator, the light casting a harsh glow on my existential dread. We had a birthday party for my nephew’s friend’s cousin’s dog (yes, it was that kind of chaotic family gathering) in four hours, and I had absolutely nothing to bring. I wasn’t going to show up empty-handed, but I also wasn’t going to spend my last two hours chopping vegetables for a salad that would get buried under a mountain of chips.
I had a block of cream cheese sweating on the top shelf. I had a bag of shredded cheddar that was slightly past its “best by” date but definitely still good. I had a can of green chiles, a handful of crispy bacon I’d bought on a whim last week, and, crucially, three jalapeños from my garden that were begging to be used before they turned to mush.
I dumped it all into a skillet. I didn’t measure. I didn’t plan. I just threw cheese, heat, and spice into a pan and waited. When it came out of the oven twenty minutes later, the smell hit the whole house. My husband walked in, sniffed the air, and asked, “Is that… is that jalapeño popper dip?”
It was. And it was incredible. Creamy, spicy, smoky, and incredibly cheesy. It disappeared in twelve minutes. The entire bowl was gone, and people were still asking for more. That was the moment I realized that sometimes the best cheesy jalapeno popper dip recipes aren’t the ones you find in a cookbook—they’re the ones you invent when you’re desperate, hungry, and holding a block of cream cheese like a lifeline.
Since that night, I’ve made this dip at least fifty times. I’ve tweaked it. I’ve added more bacon. I’ve tried different cheeses. I’ve even made it in the air fryer for a quicker crisp. But the core remains the same: it’s stupidly easy, it uses ingredients you probably already have, and it is hands-down the best party appetizer you can make in under 30 minutes. If you’ve ever been stuck in a “what do I bring to the party?” panic, this recipe is your new best friend. It’s better than store-bought, cheaper than catering, and infinitely more delicious than a bag of pretzels.
Why You’ll Love This Cheesy Jalapeno Popper Dip
Look, I’m not here to sell you on the idea that every party needs a gourmet spread. Most of the time, people just want something salty, creamy, and slightly spicy to nibble on while they drink and gossip. This dip hits every single one of those buttons. Here’s why it’s become my go-to for every gathering, from Super Bowl Sundays to holiday potlucks.
- It’s Actually Easy — Seriously, if you can shred cheese and chop a jalapeño, you can make this. I’ve made this while helping my kids with homework. You don’t need to stand over the stove for hours. You mix it, you bake it, you eat it. It’s that simple.
- It’s a Crowd-Pleaser — I’ve served this to my vegetarian sister, my spice-phobic aunt, and my brother-in-law who claims he doesn’t like “weird” food. Everyone loves it. The cream cheese mellows out the heat, so even mild peppers work. It’s safe for beginners but exciting for heat-seekers.
- It’s Incredibly Fast — 30 minutes from start to finish. I make this on weeknights when I need a snack that feels fancy but takes zero effort. The prep time is maybe 10 minutes. The rest is just waiting for the cheese to melt.
- It’s Budget-Smart — You can feed a crowd of 6-8 people for under $10. That’s less than what I’d spend on a single appetizer plate at a restaurant. And unlike those tiny, sad canapés, this is a big, shareable bowl of goodness.
- It Tastes Better the Next Day — Okay, I know, it’s hard to believe, but the flavors meld together overnight. I deliberately make extra for lunch the next day. It’s still warm, still creamy, and honestly? It might be even better than the first night.
This is my answer to “what’s for snacks?” when I’m tired, broke, or just lazy. It’s reliable. It’s delicious. And it always, always gets compliments.
Ingredients You’ll Need
Here’s the best part: you probably have most of this already. This isn’t a recipe that requires a trip to three different specialty stores. It’s pantry-friendly, fridge-clearing goodness. I’m particular about three things here, though, so pay attention to those.
For the Base:
Block Cream Cheese (8 oz / 225g) — Do not use the whipped kind in a tub. It has too much air and won’t melt right. You need the dense, block kind. Let it sit out for 15 minutes to soften up, or microwave it for 10 seconds. Softened cream cheese blends smoothly. Lumpy dip is sad dip.
Shredded Cheddar Cheese (1.5 cups / 150g) — I use sharp cheddar for that tangy kick, but a mix of cheddar and Monterey Jack works great too. Crucial tip: Buy a block and shred it yourself. Pre-shredded cheese is coated in cellulose (wood pulp, basically) to keep it from clumping. That coating stops it from melting properly. Your dip will be grainy if you use the bag stuff. Grate your own. It takes two minutes and changes everything.
Green Chiles (1 can / 4 oz) — The small can of diced green chiles. Not the roasted ones unless you want a different flavor profile. The standard diced ones are mild and add that classic “popper” texture. Drain them lightly if they’re super watery, but don’t squeeze them dry.
For the Flavor:
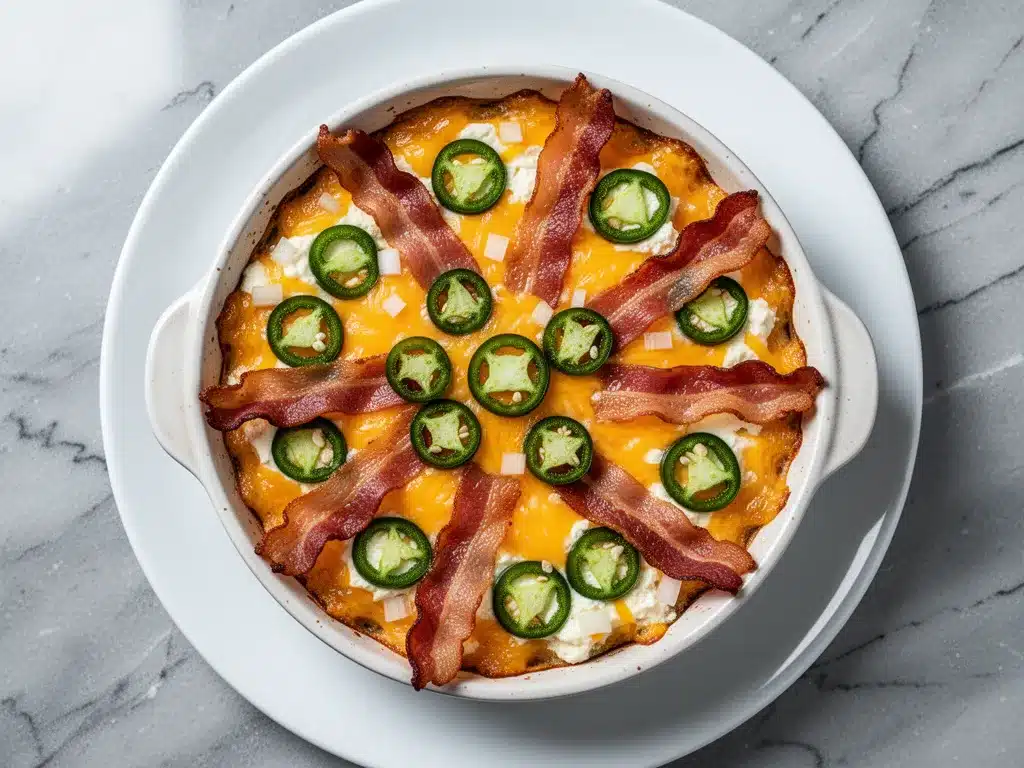
Fresh Jalapeños (2-3 medium, minced) — This is where you control the heat. If you want it mild, remove all the seeds and white ribs. If you want it spicy, leave some seeds in. I usually keep half the seeds in for a medium kick. Warning: Wear gloves if you have sensitive skin. I learned this the hard way when I got jalapeño burn on my finger for three days. Don’t rub your eyes!
Crispy Bacon (6 slices, cooked and crumbled) — This is the game-changer. The saltiness and smokiness of bacon balance the creaminess of the cheese. Use thick-cut bacon if you can. Thin bacon burns too easily. Cook it until it’s crisp, then crumble it into bite-sized pieces. Don’t use the oily grease; drain it on paper towels.
Garlic Powder (1 teaspoon) — I use powder, not fresh garlic, because fresh garlic can burn in the oven and turn bitter. Powder gives that savory depth without the risk. If you must use fresh, mince it super fine and use half the amount.
Green Onions (2 stalks, sliced) — For garnish and a little fresh onion bite. They add color and a nice crunch on top.
For Serving:
Tortilla Chips — Thick, sturdy tortilla chips. The kind that won’t break when you scoop. I buy the restaurant-style ones. They hold up best.
Optional Add-ins:
I sometimes add 1/2 cup of sour cream for extra tang and creaminess, but the cream cheese is usually enough. If you’re feeling fancy, top with a little fresh cilantro or a drizzle of hot sauce right before serving.
Equipment Needed
You don’t need fancy equipment for this. Here’s what I actually use.
Skillet or Oven-Safe Dish — I use a 10-inch cast iron skillet. It looks rustic and stays warm longer. But a standard 8×8 baking dish works fine if you don’t have cast iron. Just make sure it’s oven-safe.
Sharp Knife — For chopping jalapeños and green onions. Dull knives make you cry more—literally. A sharp knife glides through the pepper without crushing the seeds.
Box Grater — For shredding your cheese. Or a food processor if you’re feeling lazy and have a big batch to make.
Baking Sheet — If you’re using a skillet that might drip, put it on a baking sheet to catch any mess. I don’t usually bother, but it’s nice to have.
Spatula — For stirring everything together. Silicone works best so you don’t scratch your pan.
How to Make It: Step-by-Step
Alright, let’s make this! I’m walking you through exactly how I do it, including the little tricks I’ve picked up.
Step 1: Prep Your Ingredients (5 minutes)
Before you turn on the oven, get everything ready. Chop your jalapeños. Cook your bacon until crispy and crumble it. Shred your cheese. Slice your green onions. I know it seems fussy, but it makes the actual mixing way less stressful. Once you start cooking, things move fast, and you don’t want to be hunting for a spoon while your cheese is melting.
Step 2: Preheat the Oven (2 minutes)
Set your oven to 375°F (190°C). While it heats up, get your skillet or baking dish ready. If you’re using a skillet, make sure it’s clean and dry. No need to grease it; the cheese and cream cheese will provide plenty of fat.
Step 3: Mix the Base (3 minutes)
In a large bowl, combine the softened cream cheese, shredded cheddar, drained green chiles, minced jalapeños, garlic powder, and half of your crumbled bacon. Stir it all together until it’s well combined. It’ll look like a thick, chunky paste. Don’t worry if it looks messy. That’s normal. If it’s too stiff to stir, microwave it for 15 seconds to soften it up a bit more.
Step 4: Transfer to Dish (1 minute)
Spread the mixture evenly into your skillet or baking dish. Use the back of your spoon to smooth it out. You want an even layer so it bakes uniformly. If you like a little extra crunch on top, press some of the remaining bacon bits and a few jalapeño pieces into the surface.
Step 5: Bake (20 minutes)
Place the dish in the preheated oven. Bake for 20 minutes. You’ll know it’s done when the edges are bubbling and the cheese is melted and slightly golden. Visual cue: The center should be soft and jiggly, not liquid. If it’s still liquidy in the middle, give it 5 more minutes.
Step 6: Garnish and Serve (1 minute)
Remove from the oven. Sprinkle with the sliced green onions and the remaining bacon bits. Let it cool for 5 minutes before serving. This is crucial! If you serve it immediately, it’ll be molten lava and burn everyone’s tongues. Five minutes is enough to let it set slightly so it scoops nicely.
Total Time: About 30 minutes (10 minutes prep, 20 minutes bake).
Expert Tips & Tricks
Here’s everything I’ve learned from making this dozens of times. These tips will save you from my mistakes.
Don’t Skimp on the Cheese — I know it’s tempting to use less to save calories, but the cheese is the structure. If you use too little, the dip will be runny and fall apart. The ratio of cream cheese to cheddar is key for that perfect scoopable texture.
Control the Heat — Jalapeños vary wildly in spice. One jalapeño might be mild; another might be a firework. Taste your minced jalapeño before adding it. If it’s super spicy, remove more seeds. If you want it mild, use just one jalapeño and remove all seeds and ribs. You can always add hot sauce at the table, but you can’t take heat out once it’s baked in.
Use Thick Chips — This dip is heavy. Thin chips will shatter. Use sturdy tortilla chips, pita chips, or even celery sticks for a veggie option. I’ve served this with air-fryer eggplant parmesan chips before (they’re a great low-carb crunch alternative), and it worked surprisingly well.
Keep It Warm — If you’re serving this at a party, it’s nice to keep it warm. Put the skillet on a small warmer or a trivet on a hot plate. It stays creamy and scoopable for hours. If it cools down too much, the cheese will harden and become difficult to eat. Reheat gently in the microwave for 30 seconds if needed.
Make-Ahead Strategy — You can mix this dip up to 24 hours in advance. Cover it and store it in the fridge. Let it come to room temperature for 15 minutes before baking. This actually helps the flavors meld. I do this all the time for parties so I’m not stressed on the day of.
Variations & Substitutions
Once you’ve nailed the basic version, here’s how you can mix it up. I’ve tried all of these.
Smoked Gouda Version — Swap half the cheddar for smoked gouda. It adds a deep, smoky flavor that pairs perfectly with the bacon. This is my favorite variation for fall parties.
Spicy Sopapilla — Add 1 teaspoon of cinnamon and 1 tablespoon of sugar to the mix. It sounds weird, but it gives it a slight sweetness that contrasts with the spice. Great with sweet potato chips.
Vegetarian Bacon — Use vegetarian bacon bits. They’re not quite the same texture, but they add that salty crunch. I’ve used them for my vegetarian friends, and they love it.
Lighter Version — Use low-fat cream cheese and reduced-fat cheddar. It’s thinner and less rich, but still tasty. I make this when I’m trying to be “healthy,” though I usually end up eating the same amount anyway.
Gluten-Free — This recipe is naturally gluten-free (just check your bacon and cheddar labels to be sure). Serve with gluten-free tortilla chips or rice crackers. I’ve used gluten-free crackers from the local store, and they hold up well.
Dairy-Free — Use dairy-free cream cheese and vegan cheddar. It’s different—vegan cheese doesn’t melt the same way—but there are brands that work okay in baked dips. I’ve used Daiyo and Follow Your Heart, and they melt decently. Top with extra green onions for flavor.
Serving & Storage
How to Serve:
I usually serve this straight from the skillet at the dinner table—it looks rustic and stays warm. But here are other ways I’ve enjoyed it:
- Side Dishes: This goes great with smoky chipotle shredded beef barbacoa bowls if you’re making a full meal. The dip can be a side for tacos or burritos.
- Toppings Bar: When I have guests, I put out extra bacon, jalapeño slices, sour cream, and hot sauce. Everyone customizes their scoop.
- Wine Pairing: Not a wine expert, but my wine-snob friend says a crisp Sauvignon Blanc or a light Pinot Grigio works great with this. The acidity cuts through the fat.
Storage Instructions:
Refrigerator: Store in an airtight container for up to 4 days. The dip will thicken in the fridge—totally normal. Stir in a splash of milk or cream when reheating to loosen it up.
Reheating: Best method: Add to a skillet with a splash of milk or cream over low heat. Stir until heated through and creamy again. Microwave method: Heat in 30-second intervals, stirring between. Add a splash of milk if it’s too thick. Never works: Trying to reheat it in the oven for too long—it’ll dry out.
Freezing: Honestly, this doesn’t freeze well because of the dairy. The texture can get grainy or separated when thawed. Make it fresh or store in the fridge for up to 4 days.
Pro tip: If leftovers are drying out, stir in a tablespoon of butter and a splash of milk when reheating. Brings back that creamy texture.
Nutrition Information
I’m not a nutritionist, but here’s the breakdown if you’re tracking. This is a rich, calorie-dense dip, so portion control is key.
Per Serving (based on 8 servings, with chips):
- Calories: 380
- Protein: 12g
- Carbs: 18g
- Fiber: 1g
- Sugar: 2g
- Fat: 28g
- Saturated Fat: 14g
- Cholesterol: 65mg
- Sodium: 520mg
What’s Good:
Decent protein from cheese and bacon. Calcium from the cheese. It’s filling because of the fat and protein.
What to Know:
Higher in calories and saturated fat. Contains dairy and gluten (if using standard chips). Moderate sodium. Use low-sodium bacon and cheese to reduce sodium.
My Take:
Look, this is comfort food with cheese and bacon. It’s not a diet recipe. But it’s way better than store-bought appetizers, and I know exactly what’s in it. When I want to make it lighter, I use the low-fat versions and load up on veggies. But usually? I just eat a reasonable portion and enjoy it.
Final Thoughts
So that’s my go-to cheesy jalapeno popper dip! I’ve probably talked your ear off at this point, but when you make a recipe this often, you have a lot to say about it.
This has saved party nights more times than I can count. It’s my answer to “what do I bring?” when I’m tired, don’t want to cook a full meal, and still want something that tastes really good. My family is happy, my friends are happy, and I’m happy because I’m not stressed about cooking.
Make it yours! Try different cheeses, swap in your favorite peppers, adjust the spice. The best recipes are the ones you adapt to your tastes. If you make this, drop a comment and let me know what you think! I love hearing how recipes turn out in your kitchen. And if something doesn’t work, tell me that too—I’m here to help troubleshoot.
Happy cooking! And I hope your kitchen smells half as good as mine does right now.
Frequently Asked Questions
Can I use canned jalapeños instead of fresh?
Yes, you can. Canned jalapeños are milder and softer. If you use them, drain them well and chop them up. You might need to add a little more garlic powder since canned peppers can be watery and less flavorful. I usually use fresh because I like the texture, but canned works in a pinch.
Why did my dip turn out watery?
Usually means you didn’t drain the green chiles or jalapeños enough. Moisture is the enemy of a creamy dip. Make sure you squeeze out excess liquid from the canned chiles and pat the jalapeños dry. Also, don’t overbake it—overbaking can cause the cheese to separate and release oil.
Can I make this ahead for a party?
Absolutely. Mix it up the night before, cover it, and store it in the fridge. Let it sit at room temperature for 15-20 minutes before baking. This helps it bake evenly. I do this all the time for parties so I’m not rushing on the day of.
Can I use smoked paprika instead of bacon?
If you’re avoiding pork, yes! Use smoked paprika (1 teaspoon) and maybe a little liquid smoke (a few drops) to mimic the smoky flavor. Add some crispy fried onions or toasted breadcrumbs for crunch. It won’t be exactly the same, but it’s a good vegetarian alternative.
How do I reheat leftovers without it getting dry?
Add a splash of milk or cream to a skillet, add your leftover dip, and heat gently over low heat, stirring frequently. The extra liquid brings back the creamy texture. Microwave sort of works but tends to dry it out. If you do microwave, definitely add a splash of milk first and heat in short bursts, stirring between.
Can I double this recipe?
Yes! Double everything and use a larger baking dish (like a 9×13). The cooking time might increase by 5-10 minutes. Check it at 25 minutes and see if it’s bubbling. I do this when I’m feeding a crowd. Just make sure your dish is big enough so the dip doesn’t overflow.
Pin This Recipe!


Cheesy Jalapeno Popper Dip: Best 5-Ingredient Party Appetizer
- Total Time: 30 minutes
- Yield: 8 servings 1x
Description
A creamy, spicy, and smoky party appetizer made with cream cheese, cheddar, jalapeños, and bacon. This easy dip comes together in under 30 minutes and is perfect for gatherings.
Ingredients
- 8 oz block cream cheese (softened)
- 1.5 cups shredded sharp cheddar cheese
- 1 can (4 oz) diced green chiles, drained
- 2–3 medium fresh jalapeños, minced
- 6 slices crispy bacon, cooked and crumbled
- 1 teaspoon garlic powder
- 2 stalks green onions, sliced
- Tortilla chips for serving
Instructions
- Preheat oven to 375°F (190°C).
- Chop jalapeños, cook and crumble bacon, shred cheese, and slice green onions.
- In a large bowl, combine softened cream cheese, shredded cheddar, drained green chiles, minced jalapeños, garlic powder, and half of the crumbled bacon. Stir until well combined.
- Spread the mixture evenly into a 10-inch cast iron skillet or 8×8 baking dish.
- Bake for 20 minutes until edges are bubbling and cheese is melted and slightly golden.
- Remove from oven and sprinkle with remaining bacon bits and sliced green onions.
- Let cool for 5 minutes before serving with tortilla chips.
Notes
Do not use whipped cream cheese; use a block. Shred your own cheese to avoid anti-caking agents. Wear gloves when handling jalapeños. Let dip cool for 5 minutes to set. Can be made ahead and refrigerated for up to 24 hours before baking.
- Prep Time: 10 minutes
- Cook Time: 20 minutes
- Category: Appetizer
- Cuisine: American
Nutrition
- Serving Size: 1/8 of the batch
- Calories: 380
- Sugar: 2
- Sodium: 520
- Fat: 28
- Saturated Fat: 14
- Carbohydrates: 18
- Fiber: 1
- Protein: 12
Keywords: jalapeno popper dip, cheesy dip, party appetizer, bacon dip, cream cheese dip, easy recipes, 5 ingredient recipes


