It was the third quarter of the championship game, the kind of Sunday where the air feels electric and every tackle sends a shiver through the stands. I was sitting on a folding chair that was definitely too small for my legs, wearing a jersey three sizes too big, and staring at a plastic tray of sad, cold dip that had been sitting out since kickoff. It was beige. It was watery. It tasted like regret and store-bought cheese spread. My friends were complaining about the quality of the food, and I was silently plotting my escape to the car to order pizza. That was the moment I realized I needed to take over the snack game. I didn’t want to bring another dish that got lost in the shuffle of chips and salsa. I wanted something that demanded attention. Something that looked like a tower of deliciousness and tasted like a party in every bite.
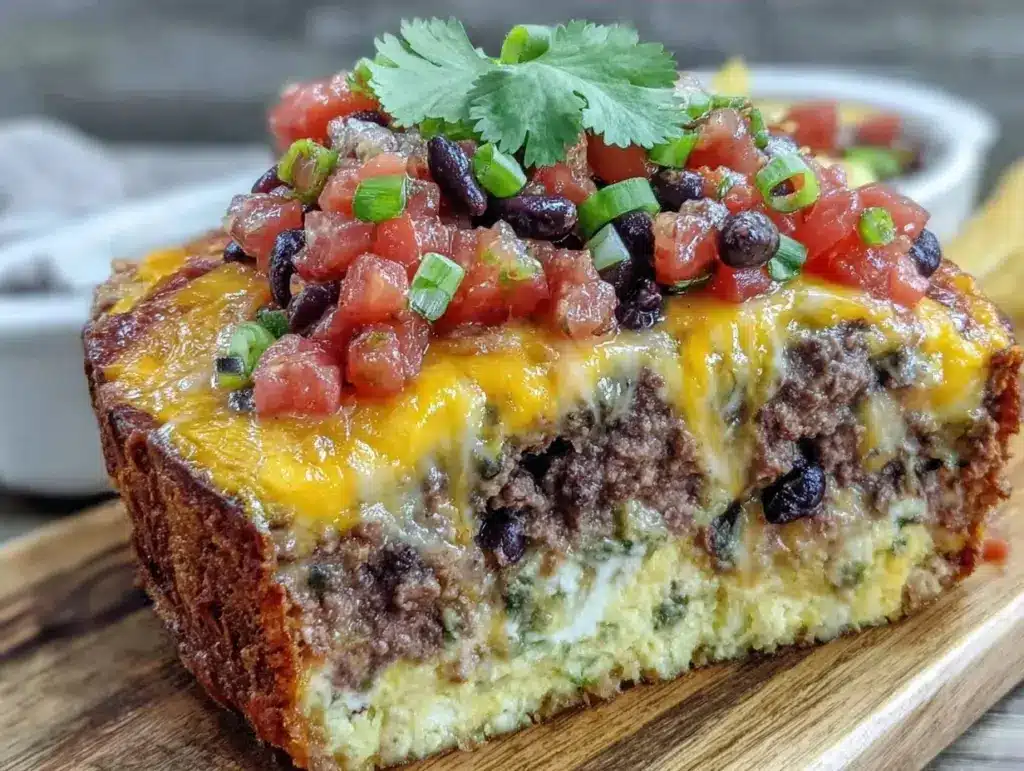
So, I went home and I built the Football Tailgate Layered Taco Dip with Ground Beef. I tested it at the next game, and let me tell you, the difference was night and day. People stopped talking about the score for a minute just to grab a second scoop. They lined up. They asked for the recipe. It became the star of the tailgate, right alongside the grill. This isn’t just dip; it’s a centerpiece. It’s the kind of dish that says, “I know what I’m doing in the kitchen,” even if you’re just throwing it together in a crockpot while watching the warmups. It’s hearty, it’s messy in the best way possible, and it’s infinitely better than anything you’d buy at a grocery store.
I’ve made this layered taco dip at least a dozen times now—sometimes for massive tailgates with fifty people, sometimes for a cozy movie night with just my partner. Every time, it disappears faster than the good parking spots. The secret isn’t just in the layers; it’s in the depth of flavor you get from browning the beef properly and letting those cheeses melt into a gooey, golden blanket. It’s comfort food that feels like an event. If you’re tired of bringing the same old potato salad or bland bean dip to your game day gatherings, this is your answer. It’s rich, it’s spicy, and it’s absolutely impossible to mess up.
Why You’ll Love This Layered Taco Dip
There are about ten reasons I keep making this dip, but here are the big ones that make it a game-day legend.
It Looks Like a Tower of Power — Seriously, the presentation is everything. When you pull that crockpot lid off and see those distinct, colorful layers of refried beans, seasoned beef, corn, and melted cheese, it looks like something you’d see at a high-end appetizer bar. It’s vibrant and inviting. Guests don’t even need an invitation to dig in; the visual does the work for them. It’s the kind of dish that stops the conversation.
Zero Stress Cooking — I know what you’re thinking: “Layered dip? That sounds like work.” It’s not. Once you’ve chopped the peppers and browned the beef, the rest is just assembly. You dump, you spread, you sprinkle. You can have this ready to go into the slow cooker in 15 minutes. That leaves you with your hands free to handle the grill, manage the drinks, or actually enjoy the game instead of standing in the kitchen sweating over a stove.
It Feeds a Crowd Without Breaking the Bank — We’re talking about ground beef, beans, corn, and cheese. These are staples. You can feed a small army for under $25. Compared to catering or buying expensive appetizers, this is a budget miracle. And because it’s served family-style, you don’t have to plate individual portions. Just grab a chip and dive in. It’s casual, it’s generous, and it’s perfect for the chaotic energy of a tailgate.
Customizable Heat Levels — Not everyone in your group wants the same spice level, and that’s okay. You can control the heat by choosing your salsa, your cheese, and your jalapeños. I like mine spicy, so I use a bold salsa and extra jalapeños. If you’re serving a mixed crowd, you can keep the jalapeños on the side or use mild cheese. It’s adaptable, which is crucial when you’re feeding a group with different tastes.
It’s Better Than Takeout — I know, I know, ordering in is easy. But have you ever tried takeout dip? It’s usually lukewarm and soggy. This dip is hot, fresh, and packed with real ingredients. The beef is seasoned with cumin and chili powder, not just salt. The cheese is melted to perfection, not congealed. It tastes like you spent hours in the kitchen, even though you didn’t. It’s the kind of food that makes people ask, “Did you make this?” and then you get to say, “Yeah, and it’s easy enough for you to make too.”
This dip has completely changed our game day routine. It’s my go-to when I need to impress without the stress. It’s reliable, delicious, and always a hit. Whether you’re cheering for your team or just cheering for good food, this layered taco dip delivers.
Ingredients You’ll Need
Here’s the best part: you probably have most of this already in your pantry or fridge. This recipe relies on bold, familiar flavors that come together to create something special. I’m particular about a few things here, and I’ll tell you exactly why.
Ground Beef (1 pound / 450g) — I use 80/20 ground beef. Yes, it’s fatty, but that fat carries flavor. If you use lean beef, the dip might dry out a bit. Brown it well! You want those little crispy bits at the bottom of the pan. Drain the excess grease, but leave a little bit for richness.
Taco Seasoning (1 packet or homemade) — A packet is fine, but I always make my own. It’s just cumin, chili powder, paprika, garlic powder, onion powder, and salt. Homemade tastes fresher and doesn’t have that weird metallic aftertaste some store-bought packets have. Use about 2 tablespoons of your homemade blend.
Refried Beans (1 can / 16oz) — This is the foundation. I use traditional pork refried beans for authenticity, but vegetarian ones work too. Warm them up in the microwave before spreading them. Cold beans don’t spread well and create clumps. You want a smooth, even layer.
Shredded Cheese (2 cups / 200g) — I use a Mexican blend cheese, the kind with cheddar, Monterey Jack, and queso quesadilla. It melts beautifully. Pre-shredded cheese has anti-caking agents that can make the texture gritty, so buy a block and shred it yourself if you can. It makes a huge difference in the creaminess.
Black Beans (1 can / 15oz, drained) — These add texture and protein. Don’t skip them. Rinse them well so the dip isn’t watery. You want them to stay firm and distinct in the layers.
Corn Kernels (1 cup / 150g) — Frozen or canned, both work. I prefer frozen because they’re sweeter and pop a bit more. If you use canned, drain them really well. The sweetness of the corn balances the savory beef and spicy salsa perfectly.
Salsa (1 cup / 240g) — This is the top layer, so make it count. I use a medium or bold salsa, depending on how spicy I want it. Chunky salsa is better than smooth here because it adds texture. Look for one with good flavor, not just vinegar and salt.
Jalapeños (½ cup, sliced) — Fresh is best. If you can’t find fresh, pickled jalapeños work, but rinse off the brine. Remove the seeds if you want less heat. I leave them in for that extra kick.
Green Onions (3-4 stalks, chopped) — For garnish. They add a fresh, sharp bite that cuts through the richness of the cheese. Don’t skip the garnish; it makes the dip look professional and adds a pop of color.
Optional Add-ins:
Black Olives (½ cup, sliced) — If you’re a fan of olives, they add a nice salty contrast.
Guacamole — I often dollop fresh guacamole on top right before serving. It’s optional, but it’s my favorite addition.
Personal Tips:
Brand recommendations: I always use Old El Paso taco seasoning if I’m in a rush, but I prefer my own blend. For cheese, Tillamook or Sargento works great.
Shopping shortcuts: Pre-shredded cheese is a time-saver, but I’ve found the texture isn’t as good. If you’re short on time, buy pre-shredded but add an extra minute to the melting time.
Substitutions: Can’t find refried beans? Use a thick bean dip or mashed potatoes for a different twist. Not a fan of beef? Ground turkey works too, though it’s leaner.
Common Questions:
“Can I use canned corn?” Yes, just drain it thoroughly.
“Where do I find pickled jalapeños?” In the pickle aisle, near the pickles and relish.
“Can I make this ahead?” Yes, you can assemble it ahead and cook it later. Just add extra time if it’s cold from the fridge.
Equipment Needed
You don’t need fancy equipment for this. Here’s what I actually use.
Slow Cooker (Crockpot) — I use a 4-quart slow cooker. It’s the perfect size for this recipe. If you don’t have one, you can use a baking dish and bake it in the oven at 350°F for 20-25 minutes. But the slow cooker keeps it warm all game long, which is the whole point.
Large Skillet — For browning the beef. A 12-inch skillet works best. I prefer cast iron because it gives the beef a nice sear, but any heavy-bottomed pan works.
Sharp Knife — For chopping the jalapeños and green onions. Dull knives make you cry more—learned this the hard way with jalapeños. Use a paring knife for precision.
Colander — For draining the black beans and corn. Or just use a fine-mesh sieve.
Measuring Cups and Spoons — Pretty standard stuff. Dollar store versions work fine.
Spatula — For spreading the beans and salsa. A rubber spatula works best to get into the corners.
Grater — If you’re shredding your own cheese. A box grater is fine, or a microplane for finer shreds.
Optional but nice:
Small Bowl — For mixing the taco seasoning with the beef.
Serving Spoons — Have a couple of sturdy spoons ready for serving. Chip spoons work too, but a regular spoon is easier for scooping layers.
How to Make It: Step-by-Step
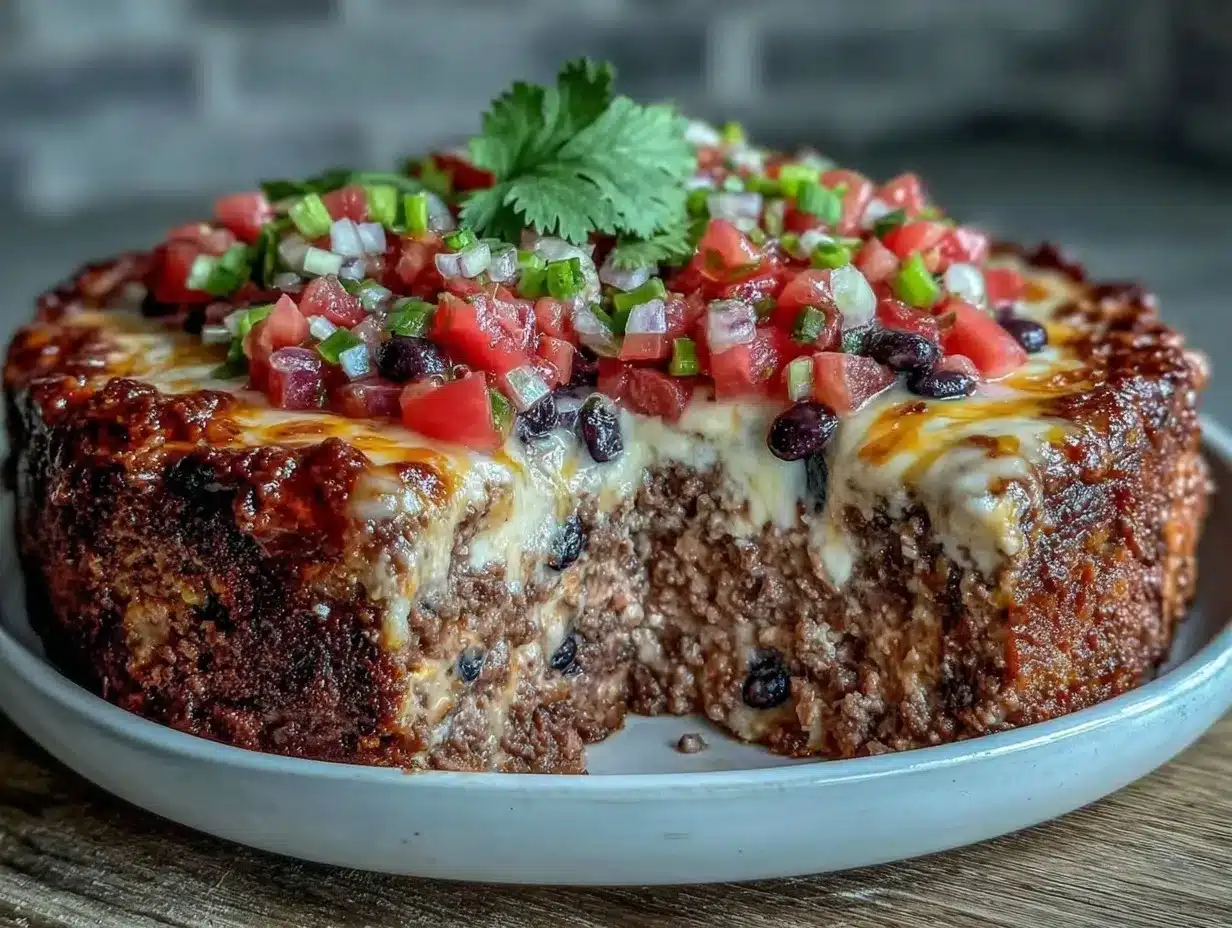
Alright, let’s make this! I’m walking you through exactly how I do it, including the little tricks I’ve picked up.
Step 1: Brown the Beef (10 minutes)
Heat your skillet over medium-high heat. Add the ground beef, breaking it up with a wooden spoon as it cooks. Cook until it’s no longer pink and has some browned bits. This is crucial for flavor. Don’t rush this step. Once it’s cooked, drain the excess grease. I leave about a tablespoon for richness. Stir in the taco seasoning and a splash of water if it looks dry. Let it simmer for 2 minutes so the flavors meld. Set aside.
Step 2: Prep the Layers
While the beef cooks, drain and rinse the black beans. Chop the jalapeños and green onions. If using frozen corn, thaw it. Measure out your cheese. Having everything prepped makes assembly a breeze. You want to have your bowls ready to go.
Step 3: Assemble the Base (5 minutes)
Turn on your slow cooker to LOW. Spread the warmed refried beans evenly across the bottom. This is your foundation. Make sure it goes all the way to the edges. If there are clumps, flatten them with the back of your spoon. You want a smooth, even layer.
Step 4: Add the Beef and Beans
Spread the seasoned ground beef over the bean layer. Then, scatter the black beans and corn evenly on top. Don’t mix them yet! The layers are part of the fun. Make sure the beef is spread out to the edges so every scoop gets some.
Step 5: The Cheese Layer
Sprinkle half of the shredded cheese over the beef and bean layer. This helps bind the layers together. Then, add the remaining cheese on top. You want a thick, even blanket of cheese. It’s going to melt into a golden crust, so don’t be shy.
Step 6: Top with Salsa and Jalapeños
Spoon the salsa over the cheese. Don’t spread it too thin; you want dollops. Scatter the sliced jalapeños over the salsa. This is where you control the heat. If you want it mild, use fewer jalapeños. If you want it spicy, go wild.
Step 7: Cook and Serve
Cover the slow cooker and cook on LOW for 2-3 hours, or until the cheese is melted and bubbly. If you’re using the oven, bake at 350°F for 20-25 minutes. Garnish with chopped green onions before serving. Serve with sturdy tortilla chips. I like thick, restaurant-style chips because they can handle the weight of the dip.
Total Time: About 30 minutes active, 2-3 hours cooking.
Built-in Troubleshooting:
Dip is too watery? Make sure you drained the beans and corn well. Also, don’t use a salsa that’s too thin. Chunky salsa is better.
Cheese isn’t melting? Turn up the heat to HIGH for the last 30 minutes, or cover tightly to trap steam.
Layers are mixing? Don’t stir it! Scoop from the edge. The layers are meant to stay separate until they hit the chip.
Expert Tips & Tricks
Here’s everything I’ve learned from making this dozens of times. These tips will save you from my mistakes.
Warm the Beans
Cold refried beans are hard to spread. Microwave them for 30-60 seconds before adding to the slow cooker. It makes a smoother base and helps the layers adhere better.
Don’t Skimp on Seasoning
The beef is the star, so make sure it’s well-seasoned. If you use a packet, add an extra pinch of cumin or chili powder for depth. Taste the beef before adding it to the dip. It should taste good on its own.
Use Sturdy Chips
Thin chips will break under the weight of the dip. Look for thick, restaurant-style tortilla chips. They hold up better and provide a better crunch. I also like to serve them on the side so people can control their scoop size.
Keep it Warm
If you’re tailgating, keep the slow cooker on LOW the entire time. The dip stays warm and safe to eat for hours. If you’re serving at home, keep it on WARM once it’s done cooking.
Common Mistakes (and how to avoid them):
Mistake: Dip is too salty
Fix: Use low-sodium beans and salsa. Taste the beef before adding salt. You can always add more, but you can’t take it away.
Mistake: Layers are muddy
Fix: Don’t stir! Scoop from the edge. The layers are meant to stay separate until they hit the chip.
Pro Tricks I’ve Learned:
For Extra Creaminess
Add a dollop of sour cream or Greek yogurt on top before serving. It adds a cool, tangy contrast to the hot, spicy dip.
For Better Texture
Toast the corn in a dry skillet for 2 minutes before adding it. It adds a nutty flavor and prevents it from being soggy.
Make-Ahead Strategy
Assemble the dip the night before and store it in the fridge. In the morning, just put it in the slow cooker and turn it on. It will save you time and reduce stress.
Variations & Substitutions
Once you’ve nailed the basic version, here’s how you can mix it up. I’ve tried all of these.
Turkey Version
Swap ground beef for ground turkey. It’s leaner and lighter. I like to add a little extra oil to the pan to keep it moist. My family prefers this version when we want something a bit lighter.
Veggie-Loaded
Add diced bell peppers and onions to the beef layer. Sauté them first so they’re soft. This adds volume and nutrients. It’s a great way to sneak in more vegetables.
Spicy Jalapeño
Use a spicy salsa and add extra jalapeños. If you really like heat, add a diced habanero pepper. This is for the brave souls who want a kick.
Lighter Version
Use low-fat cheese and low-fat refried beans. It’s not as rich, but it’s still tasty. I make this when I’m trying to be “healthy,” but honestly, the full-fat version is worth the indulgence.
Mushroom Lover’s
Sauté sliced mushrooms with the beef. They add an earthy flavor and make the dip feel more substantial. It’s a great addition for meat-lovers who want more texture.
Lemon Garlic
Add zest of 1 lemon and 2 tablespoons lemon juice to the salsa. It brightens everything up. Great for summer tailgates.
Dietary Modifications:
Gluten-Free
This recipe is naturally gluten-free. Just check your taco seasoning and salsa labels to be sure.
Dairy-Free
Replace cheese with dairy-free cheese shreds or nutritional yeast. It’s different, but still tasty. My lactose-intolerant friend requests this version.
Lower-Carb
Use zucchini slices instead of chips, or serve with celery sticks. Reduce the beans and corn. I won’t lie—it’s not the same, but it works if you’re watching carbs.
Vegan
Use plant-based ground “meat,” vegan cheese, and vegan refried beans. Add black beans and corn for protein. It’s hearty and satisfying.
Serving & Storage
How to Serve:
I usually serve this straight from the slow cooker at the dinner table—it looks rustic and stays warm. But here are other ways I’ve enjoyed it:
Side Dishes:
Tacos (obviously)
Cauliflower rice
Simple green salad
Roasted sweet potatoes
Toppings Bar:
When I have guests, I put out: extra sour cream, guacamole, jalapeños, cilantro, lime wedges. Everyone customizes their bowl.
Storage Instructions:
Refrigerator:
Store in an airtight container for up to 3 days. The flavors actually get better the next day.
Reheating:
Best method: Add to a skillet with a splash of water or broth over low heat. Stir until heated through.
Microwave method: Heat in 30-second intervals, stirring between. Add a splash of water if it’s too thick.
Never works: Trying to reheat in the slow cooker on HIGH. It can burn. Stick to LOW or the skillet.
Freezing:
Honestly, this doesn’t freeze well because of the dairy. The cheese separates when thawed. Make it fresh or store in the fridge for up to 3 days.
Pro tip: If leftovers are drying out, stir in a tablespoon of butter and a splash of milk when reheating. Brings back that creamy texture.
Nutrition Information
I’m not a nutritionist, but here’s the breakdown if you’re tracking.
Per Serving (based on 8 servings):
- Calories: 380
- Protein: 22g
- Carbs: 28g
- Fiber: 6g
- Sugar: 4g
- Fat: 18g
- Saturated Fat: 8g
- Cholesterol: 55mg
- Sodium: 650mg
- Calcium: 200mg
What’s Good:
High protein from beef and beans.
Good fiber from beans and corn.
Calcium from cheese.
What to Know:
Higher in calories from cheese and beef.
Contains dairy.
Moderate sodium (use low-sodium beans and salsa to reduce).
My Take:
Look, this is comfort food. It’s not a diet recipe. But it’s way better than takeout, costs less, and I know exactly what’s in it. When I want to make it lighter, I use the turkey version and load up on vegetables. But usually? I just eat a reasonable portion and enjoy it.
Dietary Notes:
Contains: dairy, gluten (check seasoning)
Can be made: gluten-free, vegetarian, vegan
Not suitable for: dairy-free (without modifications)
Final Thoughts
So that’s my go-to Football Tailgate Layered Taco Dip with Ground Beef! I’ve probably talked your ear off at this point, but when you make a recipe this often, you have a lot to say about it.
This has saved game day dinners more times than I can count. It’s my answer to “what’s for the tailgate?” when I’m tired, don’t want to cook a full meal, and still want something that tastes really good. My friends are happy, my family’s happy, and I’m happy because I’m not stressed about cooking.
Make it yours! Try different add-ins, swap in your favorite vegetables, adjust the garlic (though more is always better in my opinion). The best recipes are the ones you adapt to your family’s tastes. If you’re looking for more easy crowd-pleasers, check out my high-protein turkey taco skillet for a weeknight version, or my loaded cheeseburger casserole for another hearty, cheesy favorite.
If you make this, drop a comment and let me know what you think! I love hearing how recipes turn out in your kitchen. And if something doesn’t work, tell me that too—I’m here to help troubleshoot.
Happy tailgating! And I hope your kitchen smells half as good as mine does right now.
Frequently Asked Questions
Can I use canned corn instead of frozen?
Yes, but make sure to drain it really well. Canned corn can be watery, which might make the dip soggy. I prefer frozen because it’s sweeter and has better texture, but canned works in a pinch.
Why did my dip turn out watery?
Usually means you didn’t drain the beans and corn well enough, or you used a salsa that’s too thin. Use chunky salsa and drain the beans thoroughly. Also, don’t add extra liquid unless the beef is very dry.
Can I make this ahead for a party?
Absolutely! Assemble the dip the night before and store it in the fridge. In the morning, just put it in the slow cooker and turn it on. It will save you time and reduce stress. Just add 30 minutes to the cooking time if it’s cold from the fridge.
Why did my cheese get grainy?
The heat was too high when you added the cheese, or you used pre-shredded cheese with anti-caking agents. Always use freshly shredded cheese and keep the heat on LOW. If it’s already grainy, whisk in a splash of cream to smooth it out.
Can I use ground turkey instead of beef?
Yes, but turkey is leaner, so the dip might be less rich. I recommend adding a little extra oil to the pan and maybe a splash of broth to keep it moist. It’s a lighter option, but still delicious.
How do I reheat leftovers without it getting dry?
Add a splash of water or broth to a skillet, add your leftover dip, and heat gently over low heat, stirring frequently. The extra liquid brings back the creamy texture. Microwave sort of works but tends to dry it out. If you do microwave, definitely add a splash of water first and heat in short bursts, stirring between.
Can I double this recipe?
Yes, but you’ll need a larger slow cooker (at least 6-quart). Double all the ingredients and cook on LOW for 3-4 hours. The cooking time might increase slightly because of the larger volume.
Pin This Recipe!
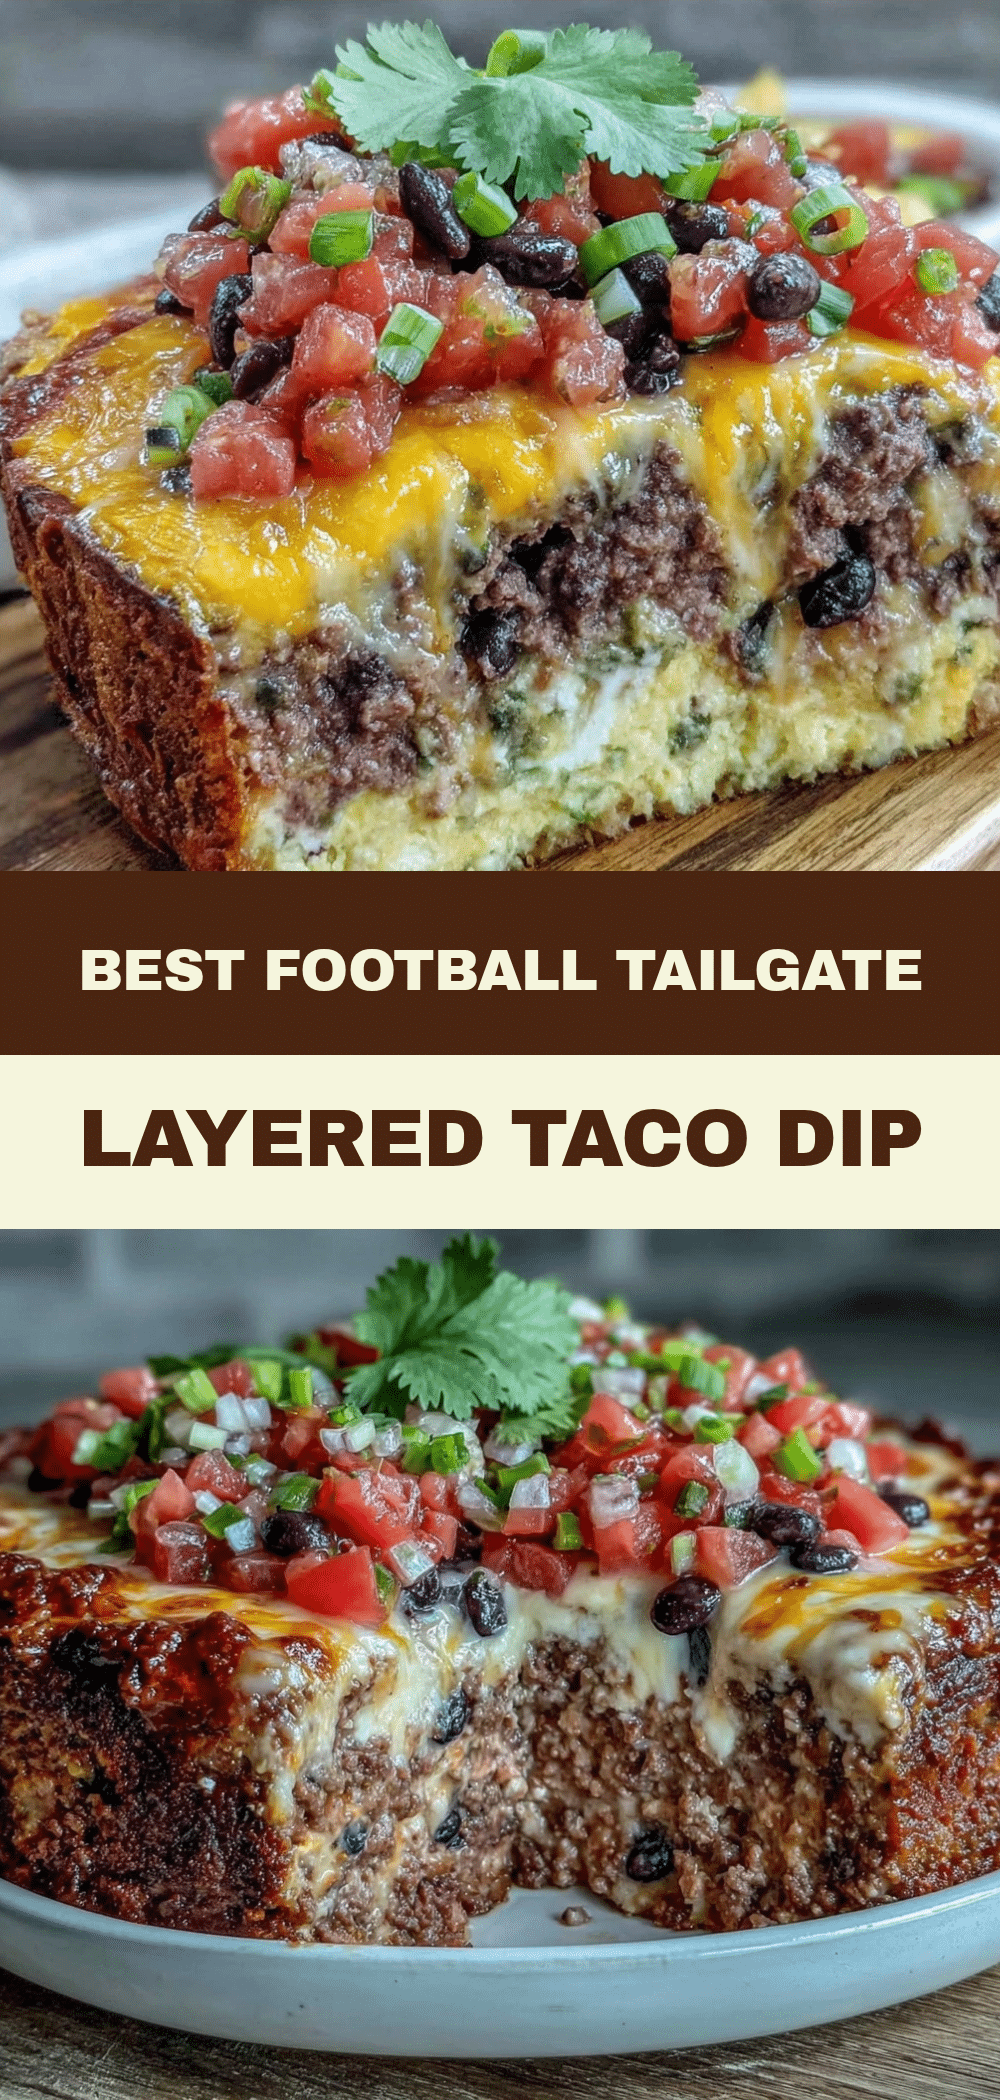
Football Tailgate Layered Taco Dip with Ground Beef
- Total Time: 2 hours 15 minutes
- Yield: 8 servings 1x
Description
A hearty, customizable layered taco dip perfect for game day. Featuring seasoned ground beef, refried beans, corn, and melted cheese, this slow cooker recipe is easy to make and feeds a crowd.
Ingredients
- 1 pound (450g) 80/20 ground beef
- 1 packet (or 2 tbsp homemade) taco seasoning
- 1 can (16oz) refried beans (warmed)
- 2 cups (200g) Mexican blend shredded cheese
- 1 can (15oz) black beans, drained and rinsed
- 1 cup (150g) corn kernels (frozen or canned, drained)
- 1 cup (240g) chunky salsa (medium or bold)
- 1/2 cup sliced jalapeños
- 3–4 stalks green onions, chopped
- Optional: 1/2 cup sliced black olives
- Optional: Fresh guacamole for topping
Instructions
- Heat a large skillet over medium-high heat. Add ground beef and cook, breaking it up with a wooden spoon, until browned and no longer pink (about 10 minutes).
- Drain excess grease, leaving about 1 tablespoon for richness. Stir in taco seasoning and a splash of water if needed. Simmer for 2 minutes and set aside.
- Drain and rinse black beans. Chop jalapeños and green onions. If using frozen corn, thaw it.
- Turn slow cooker to LOW. Spread the warmed refried beans evenly across the bottom to form the base layer.
- Spread the seasoned ground beef over the bean layer. Scatter black beans and corn evenly on top.
- Sprinkle half of the shredded cheese over the beef and bean layer, then add the remaining cheese on top.
- Spoon salsa over the cheese and scatter sliced jalapeños on top.
- Cover and cook on LOW for 2-3 hours, or until cheese is melted and bubbly. Alternatively, bake in a dish at 350°F for 20-25 minutes.
- Garnish with chopped green onions before serving. Serve with sturdy tortilla chips.
Notes
Warm the refried beans before spreading to ensure a smooth layer. Use chunky salsa to prevent watery dip. For a lighter version, swap ground beef for ground turkey. This dip does not freeze well due to the dairy content.
- Prep Time: 15 minutes
- Cook Time: 2-3 hours
- Category: Appetizer
- Cuisine: Mexican
Nutrition
- Serving Size: 1 scoop with chips
- Calories: 380
- Sugar: 4
- Sodium: 650
- Fat: 18
- Saturated Fat: 8
- Carbohydrates: 28
- Fiber: 6
- Protein: 22
Keywords: taco dip, tailgate recipe, slow cooker dip, game day food, layered dip, ground beef dip, party appetizer


