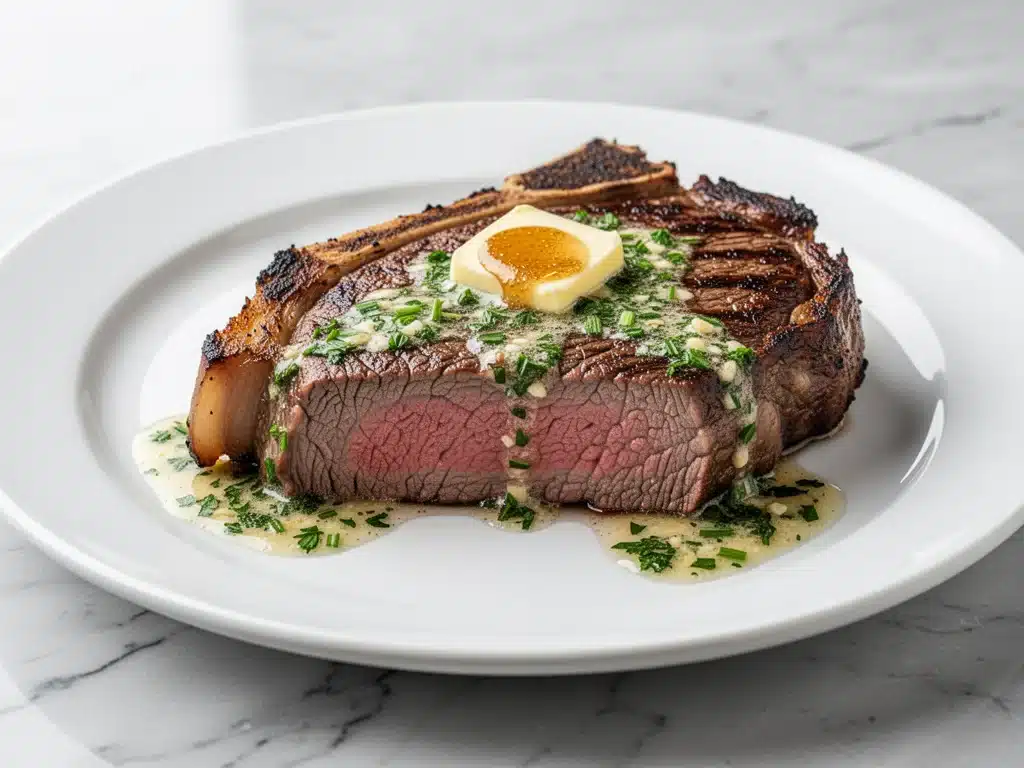
There is a specific kind of magic that happens when a cold, thick-cut ribeye hits a screaming-hot cast iron skillet. It’s not just cooking; it’s theater. I remember the first time I pulled a steak out of the freezer and decided to try this method. I was tired, broke, and absolutely exhausted by the idea of waiting in line at a steakhouse for three hours just to get a lukewarm meal. I wanted the restaurant experience, but I wanted it on my own terms, in my pajamas, for a fraction of the price.
That night, I made a mess. I overcooked the butter. I under-salted the meat. But when I finally took that first bite—crispy, peppery crust giving way to a tender, juicy center infused with roasted garlic and fresh thyme—I realized I didn’t need to go out. I had just reinvented my Friday nights. This cast iron ribeye steak isn’t just a recipe; it’s a confidence booster. It’s the dish that makes you feel like a culinary master, even if your only other skill is boiling water.
I’ve tested this method dozens of times, tweaking the heat, the butter additions, and the resting times, until I landed on what I can only describe as foolproof. The secret isn’t fancy equipment or expensive ingredients. It’s patience, high heat, and a garlic herb butter that acts as the final, luxurious seal on the deal. Once you learn how to cook a ribeye in a cast iron skillet, takeout stops looking so appealing. Let’s get your kitchen smelling like the best bistro in town.
Why You’ll Love This Cast Iron Ribeye
There are a lot of ways to cook a steak, but few methods deliver the texture and flavor profile of a pan-seared ribeye. Here is why this recipe has permanently replaced my dinner plans at local restaurants.
Restaurant-Quality Crust at Home — The Maillard reaction is your best friend here. When you get that cast iron screaming hot, you create a deep, dark, peppery crust that is impossible to achieve in an oven or on a gentle grill. It’s crunchy, savory, and absolutely addictive. I’ve had steaks at places charging $80 that didn’t come close to this crust.
Garlic Herb Butter Magic — This is the game-changer. Most people just salt their steak. But basting it with butter, garlic, thyme, and rosemary while it cooks infuses the meat with aromatic flavors that sit on the surface and penetrate the crust. It’s rich, buttery, and deeply savory. It turns a simple steak into a gourmet experience.
Speed and Simplicity — Despite the fancy result, this is actually one of the fastest dinners you can make. If you have a good steak, you’re looking at 15-20 minutes total. There’s no marinating overnight, no complex sauce preparation, no waiting for a grill to heat up. It’s immediate gratification.
Cost-Effective Luxury — A ribeye might cost $12-$15 per pound, but a 12-ounce steak costs around $15-$20. Compare that to a $45 steak dinner at a restaurant with a side of veggies and a drink, and you’re saving money while eating better. Plus, you control the quality of the meat.
Leftovers Are Amazing — Seriously. Cold ribeye straight from the fridge is delicious. Or, chop it up and put it on a salad, in a sandwich, or over mashed potatoes the next day. The garlic butter flavors hold up incredibly well. I often make two steaks because I know I’ll want the second one for lunch.
This recipe is my go-to when I want to treat myself or impress a date without the stress. It’s reliable, it’s delicious, and it makes you feel like you’ve achieved something significant with just a skillet and some butter.
Ingredients You’ll Need
The beauty of this cast iron ribeye steak recipe is that the ingredient list is short. You don’t need a pantry full of exotic spices. You need quality basics, and you need to treat them with respect. Here is exactly what you need and why I’m picky about certain items.
For the Steak
Ribeye Steak (12-16 oz / 340-450g) — This is the star. Look for a steak that is at least 1.5 inches thick. Thin steaks cook too fast and you’ll never get a good crust before the center overcooks. I prefer bone-in for flavor, but boneless works fine. Make sure it’s well-marbled; those white streaks of fat are what keep the steak juicy and flavorful.
Cooking Oil (2 tablespoons) — You need an oil with a high smoke point. Avocado oil is my top choice because it can handle the high heat without burning. Grapeseed oil is a great second option. Do not use extra virgin olive oil here; it will burn and taste bitter. Butter burns too, so we’ll add that later.
Kosher Salt (1 teaspoon) — Use kosher salt, not table salt. Table salt is too fine and can easily over-salt the meat. Kosher salt has a cleaner flavor and is easier to distribute evenly. I like Diamond Crystal, but Morton’s works too.
Freshly Cracked Black Pepper (½ teaspoon) — Freshly cracked is non-negotiable. Pre-ground pepper has lost its volatile oils and tastes dusty. Get a pepper mill and crack it fresh right before you cook. It adds a sharp, spicy bite that cuts through the richness of the butter.
For the Garlic Herb Butter Baste
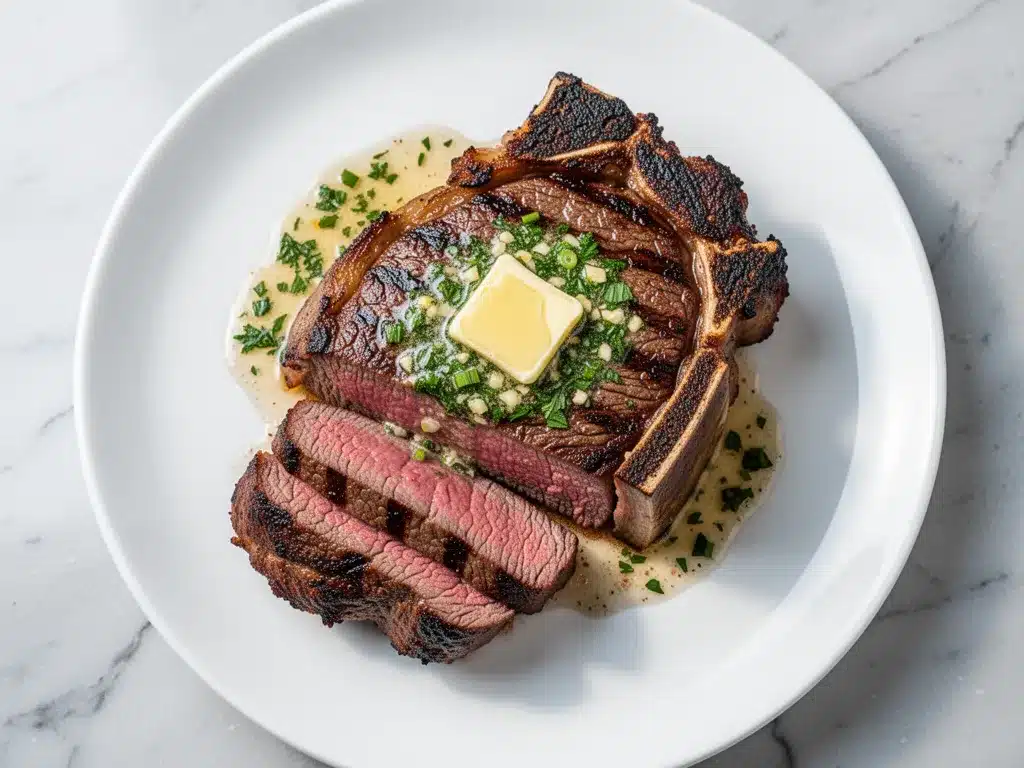
Unsalted Butter (3 tablespoons) — Use good quality butter. If you can find European-style butter with a higher fat content, even better. It browns beautifully and adds a nutty depth. Unsalted lets you control the sodium level.
Garlic Cloves (4-5 cloves, smashed) — Don’t mince the garlic for the basting phase. Smash it with the flat side of your knife. This exposes the surface area to the butter and heat, infusing the flavor without burning the small pieces. Smashed cloves are easier to remove later too.
Fresh Thyme Sprigs (3-4 sprigs) — Fresh thyme is essential. Dried thyme is too woody and will turn bitter in the hot butter. Fresh thyme releases a subtle, floral, earthy aroma that pairs perfectly with beef.
Fresh Rosemary Sprigs (2 sprigs) — Rosemary is strong, so don’t overdo it. Two sprigs provide a piney, aromatic counterpoint to the garlic and butter. It’s a classic steak herb for a reason.
Optional: Red Pepper Flakes (pinch) — If you like a little heat, add a pinch of red pepper flakes during the basting stage. It adds a subtle warmth that complements the black pepper.
Equipment Needed
You don’t need a lot of fancy gear, but you do need the right tools to make this work. Here is what I use.
Cast Iron Skillet — This is the most important piece of equipment. Cast iron retains heat incredibly well, which is crucial for searing. A 10-inch or 12-inch skillet works best. If you don’t have cast iron, a heavy-bottomed stainless steel skillet is the next best option. Non-stick pans are a no-go here; you need that high heat and fond (the browned bits) for flavor.
Meat Thermometer — I know some people judge you for using a thermometer, but it’s the only way to guarantee perfect doneness every time. Instant-read thermometers are cheap and fast. They take the guesswork out of cooking and prevent you from ruining a good steak.
Tongs — Use long metal tongs to handle the steak. Forks pierce the meat and let the juices escape. Tongs allow you to flip and turn the steak without damaging it.
Basting Spoon — A metal spoon is perfect for spooning the hot butter over the steak. Silicone spoons might melt. I use a simple stainless steel tablespoon.
Cutting Board — Use a board that can handle juices. I prefer wood or heavy plastic. Make sure you have a clean spot for resting the steak.
Fork — Just a regular fork to help smash the garlic cloves if needed.
How to Make It: Step-by-Step
Alright, let’s get cooking. This process is straightforward, but timing is everything. I’m walking you through exactly how I do it, including the little tricks that make the difference between good and great.
Step 1: Prep the Steak (10 minutes before cooking)
Take your ribeye out of the fridge at least 30-45 minutes before you plan to cook. Let it come to room temperature. This sounds like a chef’s pretension, but it’s actually science. If you put a cold steak into a hot pan, the center cooks unevenly, leading to a gray band of overcooked meat. Pat the steak completely dry with paper towels. Moisture is the enemy of a good sear. If it’s wet, it steams. Dry it well on all sides.
Step 2: Season Generously
Just before you’re ready to cook, season both sides of the steak with kosher salt and freshly cracked black pepper. Don’t be shy. The salt should be visible on the surface. I like to press the pepper into the meat so it sticks. This seasoning layer will form part of that delicious crust.
Step 3: Get the Pan Screaming Hot
Place your cast iron skillet on the stove over high heat. Let it heat up for about 3-5 minutes. You want it smoking slightly. If you’re unsure, drop a few drops of water in the pan; they should evaporate instantly. This high heat is critical for the Maillard reaction. Turn on your exhaust fan or open a window, because it’s going to get smoky.
Step 4: Sear the Steak
Add the avocado oil to the hot skillet. It should shimmer immediately. Carefully lay the steak into the pan, away from you to avoid oil splatter. You should hear a loud sizzle. Do not touch it for 2-3 minutes. Let it sear. If it sticks to the pan, don’t panic. It will release on its own when the crust forms. After 2-3 minutes, flip the steak. You should see a deep brown, crispy crust.
Step 5: Add the Butter and Aromatics
Once you’ve flipped the steak, reduce the heat to medium-high. Add the butter, smashed garlic cloves, thyme, and rosemary to the pan. As the butter melts, tilt the pan slightly so the melted butter pools on one side. Using your basting spoon, continuously spoon the hot, infused butter over the top of the steak. This basting process cooks the steak gently while infusing it with flavor. Do this for the remaining cooking time.
Step 6: Check the Temperature
This is where the thermometer comes in. For medium-rare, you want an internal temperature of 130°F (54°C). For medium, aim for 140°F (60°C). Remember, the steak will continue to cook after you take it off the heat, so pull it off the pan 5 degrees before your target temperature. Baste constantly while you wait for the temp to rise.
Step 7: Rest the Steak (Crucial!)
Once the steak reaches temperature, remove it from the pan and place it on a cutting board or warm plate. Pour any remaining butter from the pan over the top of the steak. Let it rest for at least 5-10 minutes. Do not skip this! Resting allows the juices to redistribute throughout the meat. If you cut into it immediately, all those delicious juices will run out onto the board, leaving you with dry steak.
Step 8: Slice and Serve
After resting, slice the steak against the grain. This cuts the muscle fibers, making each bite tender. Serve immediately with the extra garlic butter from the pan drizzled on top. Pair with roasted potatoes, asparagus, or a simple green salad.
Total Time: About 20-25 minutes (including prep and resting).
Expert Tips & Tricks
Here’s everything I’ve learned from making this steak dozens of times. These tips will save you from my early mistakes.
Don’t Crowd the Pan
If you’re cooking multiple steaks, do it in batches. Crowding the pan lowers the temperature and steams the meat instead of searing it. You want that high heat. If you’re cooking for a crowd, cook one steak, rest it, then cook the next.
Butter Doesn’t Burn if You Baste
People worry about butter burning, but when you’re basting, the butter is constantly moving and cooling slightly as it hits the steak. Just keep the heat at medium-high, not full blast, once you add the butter. If the garlic starts to brown too quickly, remove the pan from the heat for a minute.
Smash the Garlic, Don’t Mince
As mentioned, smashed garlic infuses the butter without burning. Mincing it creates tiny pieces that turn black and bitter in seconds. Smash them with the flat of your knife and leave the skins on if you want; they’ll come off easily after cooking.
Use a Thermometer
I cannot stress this enough. Visual cues are unreliable. A thermometer is the only way to know for sure. It takes the stress out of cooking and ensures consistent results every time.
Resting is Non-Negotiable
I know you want to eat it now. I know the smell is driving you crazy. Wait. Five minutes. Ten minutes. The difference in juiciness is night and day. It’s the most important step in the process.
Against the Grain
Look at the direction the muscle fibers run on the steak. Cut perpendicular to that direction. Shorter fibers mean a more tender bite. It’s a simple technique that makes a huge difference in texture.
Variations & Substitutions
Once you’ve mastered the basic cast iron ribeye steak, here are some ways to mix it up. I’ve tried all of these, and they all work well.
Parmesan Crust Ribeye
In the last minute of cooking, mix 2 tablespoons of grated Parmesan cheese with 1 tablespoon of breadcrumbs and press it onto the top of the steak. Let it crisp up. It adds a salty, umami-rich crust that is incredible.
Blue Cheese Butter
Skip the garlic and herbs. Instead, crumble 2 tablespoons of blue cheese into the butter during the basting stage. It melts into a tangy, creamy sauce that pairs beautifully with the beef. Serve with blue cheese crumbles on top.
Mushroom & Shallot Variation
Remove the steak after the first sear. Sauté sliced mushrooms and shallots in the same pan with a little butter. Add them back in with the steak for the basting phase. It adds an earthy, savory depth.
Spicy Cajun Ribeye
Season the steak with a Cajun spice rub instead of just salt and pepper. Use butter infused with cayenne pepper and paprika. It’s smoky, spicy, and totally different.
Dietary Modifications
Gluten-Free: This recipe is naturally gluten-free. Just ensure your pepper and salt are certified gluten-free if you have celiac disease.
Dairy-Free: Skip the butter baste. Use ghee (clarified butter) which has the milk solids removed, or just stick to the oil sear. You’ll miss the garlic herb flavor, but the steak will still be delicious.
Lower-Fat: Use less butter and more oil. Or, after basting, remove the steak and scrape out the excess butter from the pan before serving. It’s still rich, just slightly less indulgent.
Serving & Storage
How to Serve:
I usually serve this steak straight from the cutting board, sliced and drizzled with the remaining pan juices. It looks rustic and appetizing. Classic sides include garlic mashed potatoes, roasted asparagus, creamed spinach, or a simple arugula salad with lemon vinaigrette. A glass of red wine, like a Cabernet Sauvignon or Malbec, is the perfect pairing.
Storage Instructions:
Refrigerator: Store leftover steak in an airtight container for up to 3 days. It’s best to store the steak whole rather than sliced to retain moisture.
Reheating: The worst way to reheat steak is in the microwave. It turns it rubbery. The best way is to let it come to room temperature, then sear it quickly in a hot pan for 30-60 seconds per side. Alternatively, warm it gently in a 250°F oven until just heated through. Add a pat of butter on top after reheating to restore moisture.
Freezing: I don’t recommend freezing cooked steak. The texture changes significantly, and it often becomes dry. It’s best to freeze the raw steak if you aren’t going to cook it immediately, using it within 3 months.
Pro Tip: If you have leftover garlic butter, save it! Freeze it in an ice cube tray. You can drop a cube into pasta, over vegetables, or on bread later for an instant flavor boost.
Nutrition Information
I’m not a nutritionist, but here’s the breakdown if you’re tracking. Keep in mind that nutrition varies based on the specific cut and size of the steak.
Per Serving (1 steak with garlic butter):
- Calories: 650-750
- Protein: 50g
- Carbs: 1g
- Fat: 50g
- Saturated Fat: 20g
- Cholesterol: 180mg
- Sodium: 400mg (varies based on salt)
What’s Good:
This is a high-protein, low-carb meal. It’s rich in B vitamins, iron, and zinc. The garlic and herbs add antioxidants. It’s a nutrient-dense meal that keeps you full.
What to Know:
It’s high in saturated fat due to the butter and the marbling in the ribeye. If you’re watching your fat intake, use less butter or choose a leaner cut like a sirloin. But honestly, this is a treat meal. Enjoy it as part of a balanced diet.
Final Thoughts
So that’s my foolproof cast iron ribeye steak! I’ve probably talked your ear off at this point, but when you make a recipe this often, you have a lot to say about it. This method has saved my weeknight dinners more times than I can count. It’s my answer to “what’s for dinner” when I want something luxurious but don’t want to leave the house.
Make it yours! Try different herbs, add some spice, or experiment with different sides. The best recipes are the ones you adapt to your tastes. If you make this, drop a comment and let me know how it turned out! I love hearing how recipes work in your kitchen. And if something doesn’t work, tell me that too—I’m here to help troubleshoot.
Happy cooking! I hope your kitchen smells as good as mine did.
Frequently Asked Questions
Can I use a different cut of steak?
Absolutely. This method works great for New York strips, filets mignons, and T-bones. Just adjust the cooking time based on thickness. Filets are leaner, so they cook faster and don’t need as much butter. Strips have more marbling and can handle a bit more heat.
Why is my steak tough?
Tough steak is usually caused by cutting against the grain or overcooking. Make sure you slice against the grain. Also, don’t overcook it! Ribeye is best at medium-rare to medium. If you cook it to well-done, it will be tough and dry.
Can I use a stainless steel pan instead of cast iron?
Yes, but cast iron is better because it holds heat better. Stainless steel works, but you need to preheat it thoroughly and be careful not to move the steak around too much. If the pan isn’t hot enough, the steak will stick. Cast iron is more forgiving.
How do I know when the steak is done without a thermometer?
You can use the touch test. Compare the firmness of the steak to the base of your thumb. When your hand is relaxed, the fleshy part at the base of your thumb is soft like rare. When you touch your thumb to your index finger, that area firms up like medium-rare. Touch your thumb to your pinky for medium. It takes practice, so a thermometer is still recommended for beginners.
Can I make this in the oven?
You can sear the steak in the pan and then finish it in the oven. Preheat your oven to 400°F. Sear the steak for 2 minutes per side, then transfer the entire skillet to the oven. Cook for 5-10 minutes, depending on thickness. Add the butter and aromatics in the last 2 minutes of oven time.
Why did my butter burn?
Butter has milk solids that burn at high temperatures. If you kept the heat on high after adding the butter, it likely burned. Always reduce to medium-high when adding butter. If you want a nuttier flavor, you can brown the butter first, but be careful not to let it get too dark.
Pin This Recipe!
Foolproof Cast Iron Ribeye Steak: Best Easy Garlic Butter
- Total Time: 25 minutes
- Yield: 1 serving 1x
Description
A foolproof method for cooking a thick-cut ribeye steak in a cast iron skillet, featuring a crispy peppery crust and a rich garlic herb butter baste for a restaurant-quality meal at home.
Ingredients
- 12–16 oz (340-450g) Ribeye Steak (at least 1.5 inches thick)
- 2 tablespoons Avocado oil (or Grapeseed oil)
- 1 teaspoon Kosher salt
- ½ teaspoon Freshly cracked black pepper
- 3 tablespoons Unsalted butter
- 4–5 cloves Garlic (smashed)
- 3–4 sprigs Fresh thyme
- 2 sprigs Fresh rosemary
- Pinch Red pepper flakes (optional)
Instructions
- Take the steak out of the fridge 30-45 minutes before cooking to reach room temperature. Pat the steak completely dry with paper towels.
- Season both sides of the steak generously with kosher salt and freshly cracked black pepper.
- Place a cast iron skillet on the stove over high heat for 3-5 minutes until it is smoking slightly.
- Add avocado oil to the hot skillet. Carefully lay the steak in the pan away from you to avoid splatter. Do not touch for 2-3 minutes to allow a crust to form.
- Flip the steak. You should see a deep brown, crispy crust.
- Reduce heat to medium-high. Add butter, smashed garlic, thyme, and rosemary to the pan.
- Tilt the pan and continuously spoon the hot, infused butter over the steak (basting) for the remaining cooking time.
- Check internal temperature with a meat thermometer: 130°F (54°C) for medium-rare or 140°F (60°C) for medium. Remove from heat 5 degrees before target temp.
- Transfer steak to a cutting board and pour remaining butter over it. Let rest for 5-10 minutes.
- Slice the steak against the grain and serve immediately with extra pan juices.
Notes
Do not crowd the pan; cook in batches if making multiple steaks. Smash garlic cloves rather than mincing to prevent burning. Resting the steak is crucial to retain juices. Slice against the grain for maximum tenderness. For dairy-free, use ghee or skip the butter baste.
- Prep Time: 10 minutes
- Cook Time: 15 minutes
- Category: Main Course
- Cuisine: American
Nutrition
- Serving Size: 1 steak (12-16 oz)
- Calories: 700
- Sodium: 400
- Fat: 50
- Saturated Fat: 20
- Carbohydrates: 1
- Protein: 50
Keywords: cast iron ribeye, garlic butter steak, easy steak recipe, pan-seared steak, high heat cooking, keto steak, gluten-free dinner


