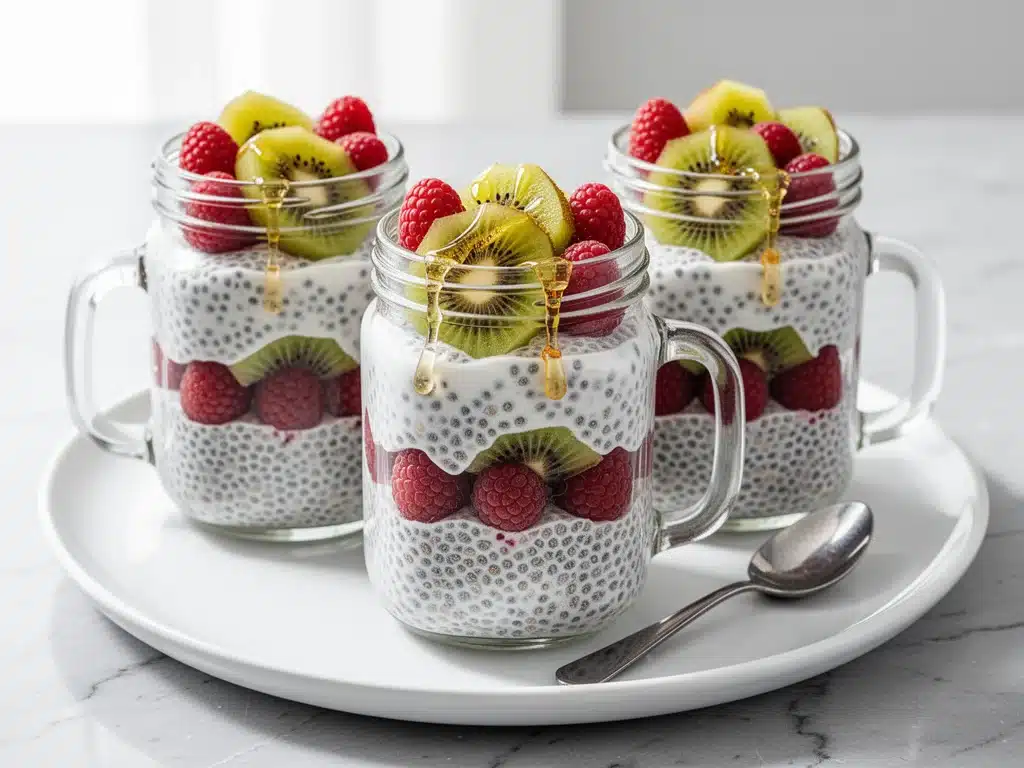
There was a Tuesday in November when I literally dropped my keys in the snow while trying to zip up my coat. I was late for a meeting, my coffee was cold, and I had eaten nothing but a stale granola bar from 2019. I pulled into the drive-thru of the first coffee shop I saw and stared at the menu board for a solid minute, realizing I didn’t have the mental bandwidth to make a decision. I ordered a muffin. It was dry. It was $6. And by 10 AM, I was hungry again.
That was the breaking point. I realized I was treating breakfast like an afterthought, a hurdle to clear before I could start my actual day. I wanted something fast, but I also wanted something that didn’t taste like cardboard. I didn’t want to stand over a stove flipping pancakes when I had ten minutes to spare. I needed fuel that was already ready.
That’s when I finally committed to the overnight chia pudding method. I’d seen the viral TikTok videos, sure, but I was skeptical. Chia seeds? Pudding? It sounded like a science experiment. But after making three different versions on a Sunday night and grabbing a jar out of the fridge on Monday morning without touching a pan, I was hooked. This isn’t just a diet food or a trendy breakfast hack. It’s my lifeline for busy mornings. It’s creamy, it’s sweet, it keeps me full until lunch, and best of all, it makes itself.
Now, my mornings look different. I grab a jar, maybe a spoon if I’m feeling fancy (or just eat it straight from the container while I’m putting on my shoes), and I’m out the door feeling fed and prepared. If you’re tired of the morning scramble, this overnight chia pudding recipe is going to change your routine. Let’s get into why this simple combination of seeds, milk, and fruit is the best grab-and-go breakfast you’ll ever make.
Why You’ll Love This Grab-and-Go Breakfast
I’ve tried so many “healthy” breakfast options over the years—protein shakes that tasted like chalk, overnight oats that got soggy and weird, and smoothie bowls that melted before I could finish them. But this chia pudding? It’s the one that sticks. Here’s why I keep coming back to it, and why I think you will too.
- Zero Morning Effort — Seriously. You mix it up at night. You sleep. You wake up. It’s ready. I’ve made this recipe while half-asleep, and it still turns out perfect. No chopping, no cooking, no cleanup. Just a spoon and a shaker.
- Stays Creamy for Days — Unlike oats, which turn into mush after day two, chia seeds hold their texture beautifully. I’ve eaten leftovers on Thursday that were just as good as Monday’s batch. The gel forms around the seeds, creating this luxurious, mousse-like texture that doesn’t break down.
- Actually Keeps You Full — I used to be hungry an hour after breakfast. With this overnight chia pudding, the fiber and healthy fats from the seeds keep my blood sugar stable. I’m not raiding the pantry by 10 AM. It’s the difference between having energy and having the 10 AM slump.
- Endlessly Customizable — You can make this sweet or savory, fruity or chocolatey. I make one batch for my partner (chocolate peanut butter) and three for myself (different fruits every week). It’s the perfect canvas for whatever is in your fridge.
- Budget-Friendly — Chia seeds are cheap in bulk. Milk is cheap. Fruit is cheap. This costs about $1.50 per serving if you buy your ingredients in bulk. That’s cheaper than the coffee shop muffin disaster I mentioned earlier.
This is my go-to when I’m trying to eat better but don’t have time to cook. It’s reliable, it’s delicious, and it respects my morning time.
Ingredients You’ll Need
Here’s the best part: you probably have most of this already. The beauty of this overnight chia pudding is that it relies on pantry staples and fresh fruit. I’m particular about a few things, though, so pay attention to the details.
For the Base
Chia seeds (1/2 cup / 60g) — This is the star. Don’t buy the pre-flavored packets; they’re expensive and full of sugar. Buy plain black or white chia seeds. They swell up and create that pudding texture. I use Bob’s Red Mill because they’re consistently fresh.
Milk of choice (1 1/2 cups / 360ml) — I use unsweetened almond milk for a lighter option, but oat milk makes it creamier. Dairy milk works perfectly too. Just make sure it’s unsweetened if you’re controlling sugar. The liquid-to-seed ratio is key: 3 parts liquid to 1 part seeds.
Maple syrup (2 tablespoons / 30ml) — I prefer real maple syrup over honey because it blends smoother and has a deeper flavor. But honey works if that’s what you have. Use a high-quality, dark maple syrup for better taste.
Vanilla extract (1 teaspoon / 5ml) — Pure vanilla, not imitation. It sounds like a small detail, but it makes the pudding taste like dessert rather than breakfast. If you don’t have vanilla, skip it, but you’ll miss the warmth.
Pinch of salt — This is non-negotiable. Salt balances the sweetness and enhances the flavor of the milk. Don’t skip it.
For the Mix-Ins
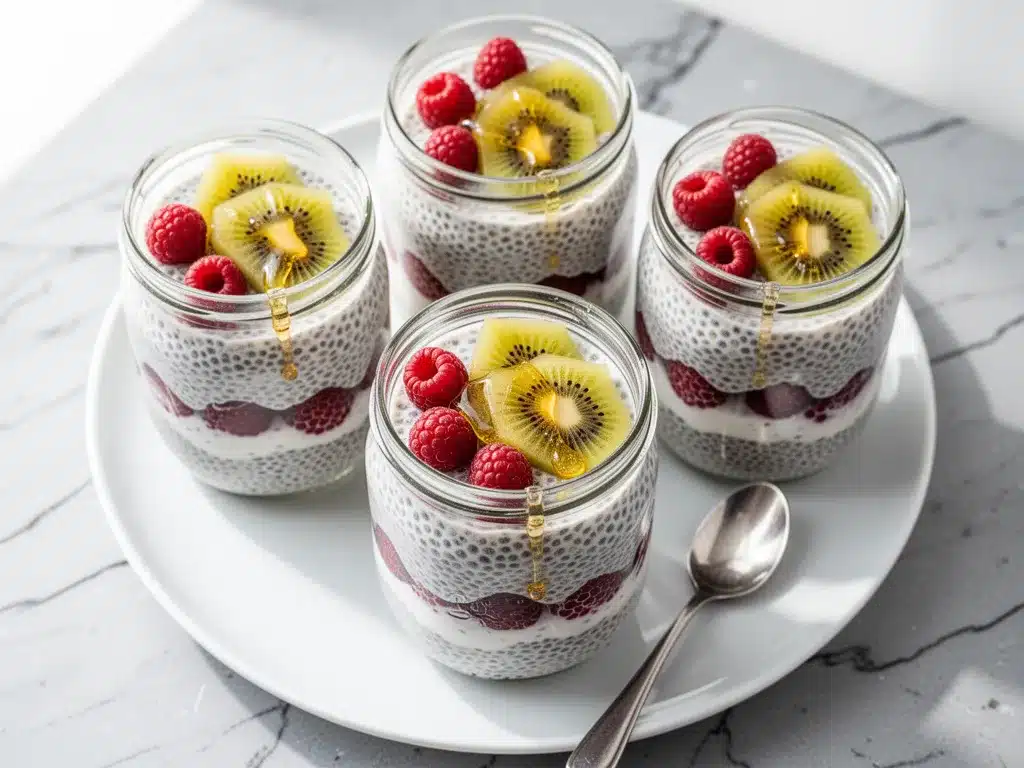
Fresh or frozen berries (1 cup / 150g) — I love blueberries and raspberries because they’re small and don’t get soggy. Frozen berries are great too—they thaw overnight and create little pockets of jammy sweetness. Avoid bananas here; they turn brown and mushy.
Nut butter (1 tablespoon / 15g) — I swirl in almond butter or peanut butter for extra protein and healthy fats. It adds richness and makes the pudding feel more like a meal.
Optional Toppings (Add Before Eating)
Granola — For crunch. If you add this the night before, it gets soggy. Always add granola right before you eat.
Coconut flakes — Toasted coconut adds a nice texture contrast.
Shredded coconut — For extra flavor.
Remember, the base is simple. The magic is in how you customize it. I keep the base ingredients stocked so I can throw this together in under 5 minutes every Sunday.
Equipment Needed
You don’t need fancy gadgets for this. Here’s what I actually use in my kitchen.
4 Mason jars (8 oz / 240ml each) — I use small mason jars because they’re the perfect single-serving size. They stack well in the fridge and are easy to grab. You can also use small glass storage containers with lids. Just make sure they have tight-fitting lids so they don’t leak in your bag.
Whisk — A small whisk is helpful to break up clumps of chia seeds. If you don’t have a whisk, a fork works fine. The goal is to disperse the seeds evenly so you don’t get a big clump at the bottom.
Measuring cups and spoons — Standard stuff. I keep a set near my fridge so I don’t have to dig them out.
Spoons — For mixing and eating. I eat mine straight from the jar with a long spoon, but you can use a regular tablespoon.
Optional: Shaker bottle — Some people like to shake the mixture vigorously in a shaker bottle to ensure no clumps. I usually just whisk it in the jar, but either way works.
That’s it. No blenders, no stoves, no complicated tools. Just jars and a whisk.
How to Make It: Step-by-Step
Alright, let’s make this! I’m walking you through exactly how I do it, including the little tricks I’ve picked up to ensure your overnight chia pudding is perfect every time.
Step 1: Prep Your Jars (2 minutes)
Wash your mason jars and let them dry. You don’t need to sterilize them, just make sure they’re clean. If you’re making multiple servings, set them out on the counter so you can work efficiently.
Step 2: Mix the Base (3 minutes)
In each jar, add 2 tablespoons of chia seeds. Then pour in 3/4 cup of milk. Add 1 tablespoon of maple syrup and 1/4 teaspoon of vanilla extract. Sprinkle in a tiny pinch of salt. Now, here’s the critical step: whisk it well. You want to make sure the chia seeds are fully dispersed in the liquid. If you don’t whisk enough, they’ll clump together at the bottom and create a weird texture. Whisk for about 30 seconds until it looks uniform.
Step 3: Let It Sit (5 minutes)
Let the mixture sit for 5 minutes, then whisk it again. This second whisk is important because the chia seeds start to swell and gel up quickly. The second whisk breaks up any new clumps that formed. You don’t need to do it for long—just a quick stir.
Step 4: Add Mix-Ins
Now add your fruit and nut butter. I usually put half the berries at the bottom, then swirl in the nut butter, then top with the rest of the berries. This creates layers. If you’re using frozen berries, they’ll thaw overnight and release juices, which is delicious. If you’re using fresh berries, they’ll stay firm.
Step 5: Refrigerate
Put the lids on the jars and place them in the fridge. They need to sit for at least 4 hours, but overnight (8-12 hours) is best. The seeds need time to fully hydrate and create that pudding texture. If you’re in a rush, 4 hours works, but it won’t be as thick.
Step 6: Serve
In the morning, give the pudding a good stir. It might have separated slightly, with some liquid on top. Just stir it back in. If you’re adding granola or coconut flakes, add them now. Eat it cold, straight from the jar. It’s that simple.
Total Time: 5 minutes active, 8 hours inactive.
Built-in Troubleshooting: If it’s too thick, add a splash of milk. If it’s too thin, add a teaspoon of chia seeds and let it sit for another hour. If it’s too sweet, add a squeeze of lemon juice to balance it out.
Expert Tips & Tricks
Here’s everything I’ve learned from making this dozens of times. These tips will save you from my early mistakes.
Whisk Twice
I can’t stress this enough. Whisk immediately after mixing, and then whisk again after 5 minutes. This prevents clumping. I learned this the hard way when I had a jar of chia seed globs that I couldn’t stir apart. Now I whisk twice, every time.
Use Cold Milk
Start with cold milk from the fridge. It helps the seeds hydrate faster and keeps the pudding cooler for longer in the morning. If you use room temperature milk, it might get a bit warm in the jar.
Don’t Skimp on Liquid
The ratio is 3:1. If you use less liquid, the pudding will be too thick and chewy. If you use more, it’ll be soup. Stick to the ratio for the perfect texture.
Label Your Jars
If you’re making multiple flavors, label them with masking tape or a dry-erase marker. Otherwise, you’ll forget which one is the chocolate one and which one is the berry one. I’ve made that mistake more than once.
Pro Trick: The Nut Butter Swirl
Instead of mixing the nut butter in, swirl it on top. It creates a nice visual effect and lets you control how much you get in each bite. Plus, it looks fancy when you take a photo for Instagram.
Variations & Substitutions
Once you’ve nailed the basic version, here’s how you can mix it up. I’ve tried all of these, and they’re all winners.
Chocolate Peanut Butter
Add 1 tablespoon of cocoa powder and 1 tablespoon of peanut butter to the base. This tastes like a dessert but is actually healthy. My partner’s favorite.
Strawberry Banana
Add sliced strawberries and a mashed banana to the base. The banana makes it sweeter and creamier. Use ripe bananas for maximum sweetness.
Tropical Mango
Add diced mango and a squeeze of lime juice. Use coconut milk instead of almond milk for a dairy-free, tropical vibe. This is my summer favorite.
Matcha Green Tea
Add 1 teaspoon of matcha powder to the base. It adds a subtle earthy flavor and a nice green color. Great for a caffeine kick without the coffee jitters.
Dietary Modifications
Vegan: This recipe is naturally vegan if you use plant-based milk and maple syrup. Check your nut butter to ensure it doesn’t contain honey.
Gluten-Free: This is naturally gluten-free. Just make sure your granola is certified gluten-free if you’re adding it as a topping.
Low-Sugar: Skip the maple syrup and use stevia or monk fruit sweetener if you’re watching sugar. The fruit provides natural sweetness.
Serving & Storage
How to Serve: I usually serve this straight from the jar at the dinner table—it looks rustic and stays warm. But here are other ways I’ve enjoyed it:
- With Granola — For crunch. Add it right before eating.
- With Fresh Fruit — Top with sliced kiwi, berries, or peaches.
- With Nuts — Sprinkle with almonds, walnuts, or pistachios.
Storage Instructions:
Refrigerator: Store in the fridge for up to 5 days. The pudding will thicken over time, so you might need to add a splash of milk before eating on day 4 or 5.
Freezing: Honestly, this doesn’t freeze well. The texture changes and becomes grainy. Make it fresh or store in the fridge for up to 5 days.
Meal Prep: Make 4 jars on Sunday. They’ll last all week. This is my secret to a stress-free work week.
Pro tip: If leftovers are drying out, stir in a tablespoon of milk when reheating. Brings back that creamy texture.
Nutrition Information
I’m not a nutritionist, but here’s the breakdown if you’re tracking.
Per Serving (based on 4 servings):
Calories: 220
Protein: 6g
Carbs: 24g
Fiber: 10g
Sugar: 12g
Fat: 12g
Saturated Fat: 1.5g
Cholesterol: 0mg
Sodium: 50mg
What’s Good: High in fiber, good source of omega-3s, moderate protein. Can add more protein with nut butter or protein powder.
What to Know: Higher in calories from nuts and seeds. Contains dairy (if using dairy milk). Moderate sugar (depends on fruit and sweetener).
My Take: Look, this is healthy comfort food. It’s not a diet recipe, but it’s way better than a muffin. I know exactly what’s in it. When I want to make it lighter, I use almond milk and skip the added sweetener. But usually? I enjoy the full version.
Final Thoughts
So that’s my overnight chia pudding method! I’ve probably talked your ear off at this point, but when you make a recipe this often, you have a lot to say about it.
This has saved my mornings more times than I can count. It’s my answer to “what’s for breakfast” when I’m tired, don’t want takeout, and still want something that tastes really good. My kids are happy, my husband’s happy, and I’m happy because I’m not stressed about cooking.
Make it yours! Try different fruits, swap in your favorite nut butter, adjust the sweetness. The best recipes are the ones you adapt to your family’s tastes.
If you make this, drop a comment and let me know what you think! I love hearing how recipes turn out in your kitchen. And if something doesn’t work, tell me that too—I’m here to help troubleshoot.
Happy cooking! And I hope your mornings feel half as peaceful as mine do now.
Frequently Asked Questions
Can I use water instead of milk?
You can, but the pudding will be less creamy and less flavorful. Milk adds richness and protein. If you must use water, add an extra tablespoon of nut butter or coconut milk for creaminess. I recommend sticking with milk for the best texture.
Why did my chia pudding turn out watery?
This usually means you didn’t use enough chia seeds or you didn’t let it sit long enough. The ratio should be 3 parts liquid to 1 part seeds. Let it sit for at least 4 hours, but overnight is best. If it’s still watery, add more chia seeds and let it sit for another hour.
Can I make this ahead for a week?
Yes! This is perfect for meal prep. Make 4-5 jars on Sunday, and they’ll last in the fridge for up to 5 days. Just add fresh toppings like granola or nuts right before you eat them to keep the crunch.
Why did my chia pudding get clumpy?
This happens when you don’t whisk the seeds enough. Chia seeds clump together if they’re not dispersed evenly. Whisk immediately after mixing, and then whisk again after 5 minutes. This breaks up the clumps and ensures a smooth texture.
Can I use honey instead of maple syrup?
Yes, honey works well. It’s sweeter than maple syrup, so you might need less. Just make sure it’s liquid honey, not crystallized honey. If it’s crystallized, warm it up slightly before adding.
How do I reheat leftovers?
You don’t need to reheat this. It’s best served cold. If you prefer warm pudding, you can microwave it for 30 seconds, but the texture might change slightly. I prefer it cold, straight from the fridge.
Can I double this recipe?
Absolutely! Double the ingredients and use a larger container. The cooking times stay the same. I do this when I’m feeding a crowd or meal-prepping for the whole family. Just make sure your container is big enough to hold the mixture.
Pin This Recipe!
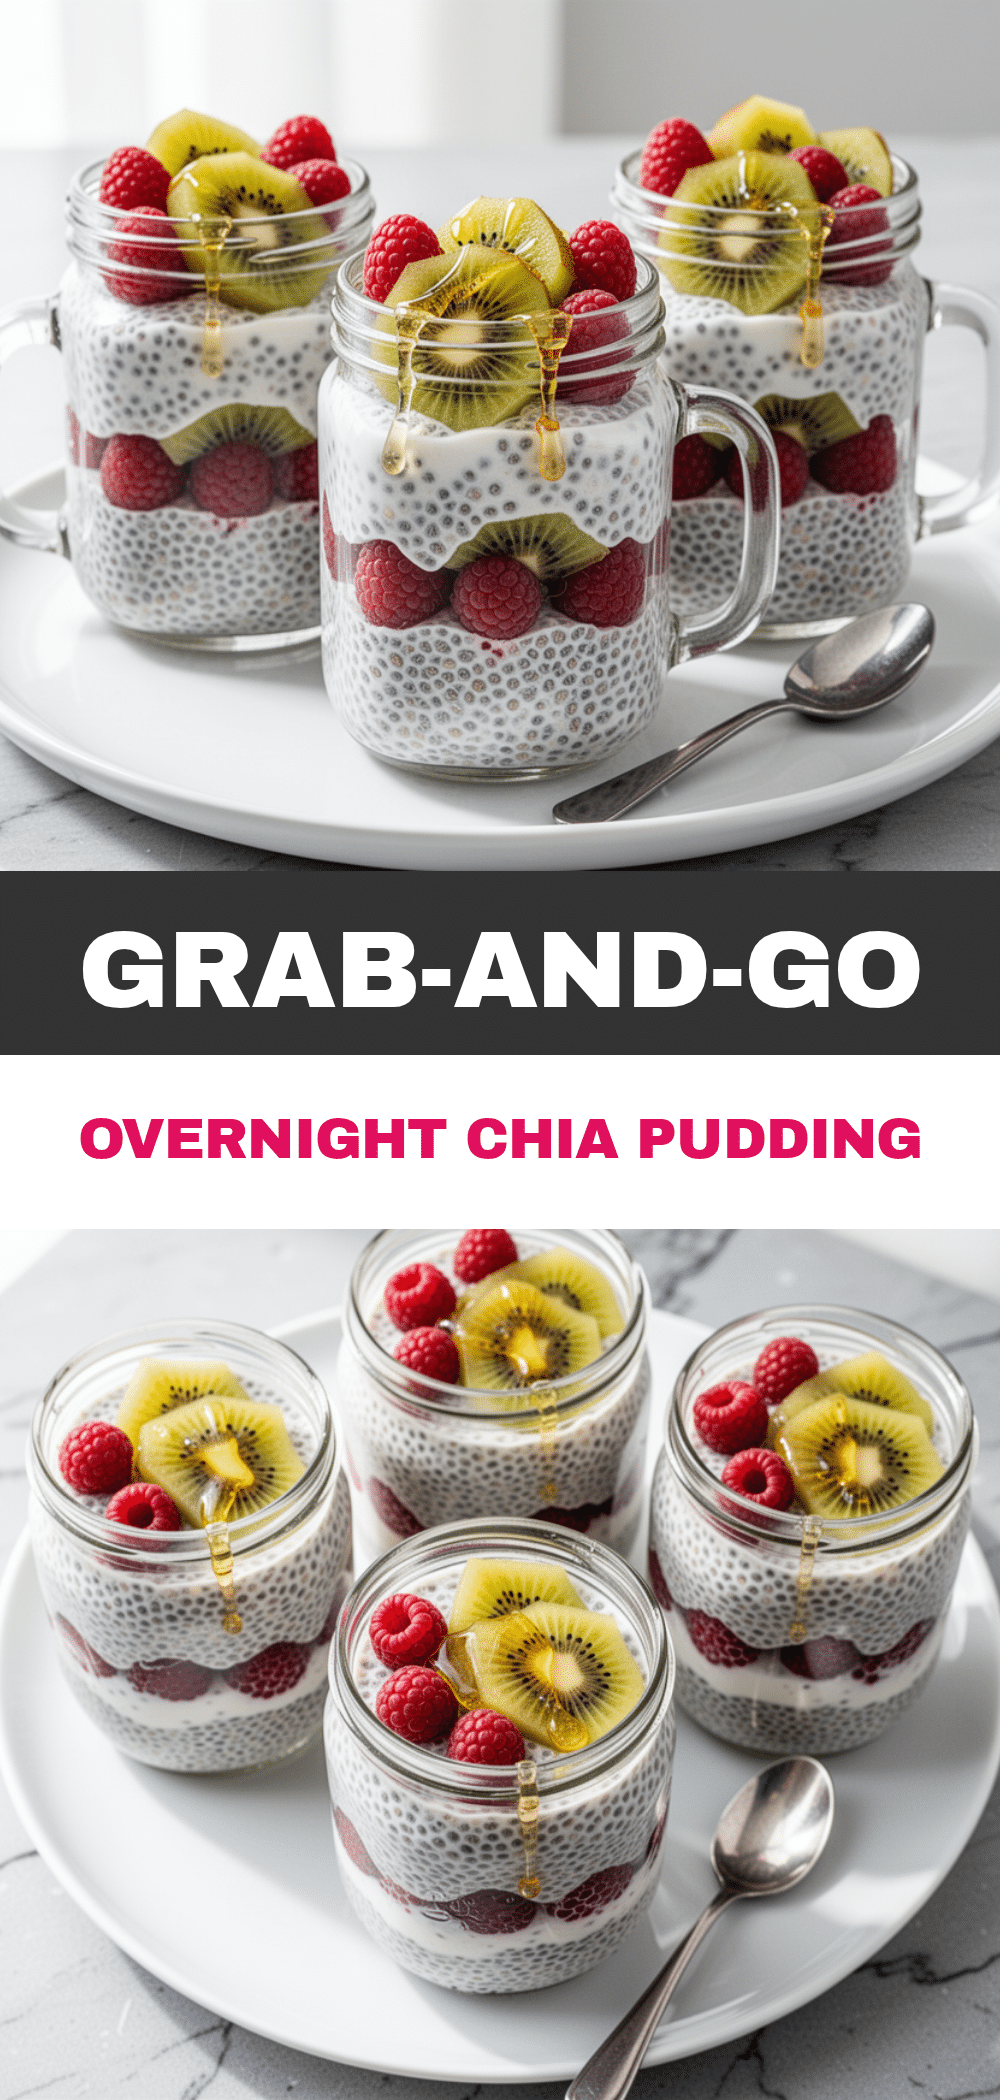
Overnight Chia Pudding: 3 Easy Grab-and-Go Cups
- Total Time: 8 hours
- Yield: 4 servings 1x
Description
A simple, creamy, and customizable overnight chia pudding that requires zero morning effort. Perfect for busy schedules, this grab-and-go breakfast keeps you full and energized all morning.
Ingredients
- 1/2 cup (60g) plain chia seeds
- 1 1/2 cups (360ml) milk of choice (unsweetened almond, oat, or dairy)
- 2 tablespoons (30ml) maple syrup
- 1 teaspoon vanilla extract
- Pinch of salt
- 1 cup (150g) fresh or frozen berries
- 1 tablespoon (15g) nut butter (almond or peanut)
- Granola (optional, for topping)
- Coconut flakes (optional, for topping)
Instructions
- Wash and dry 4 mason jars (8 oz each).
- Divide chia seeds evenly among the jars (2 tablespoons per jar).
- Pour milk into each jar (3/4 cup per jar).
- Add maple syrup, vanilla extract, and a pinch of salt to each jar.
- Whisk vigorously for 30 seconds to disperse seeds and prevent clumping.
- Let the mixture sit for 5 minutes, then whisk again to break up any new clumps.
- Add berries and swirl in nut butter for layers.
- Secure lids and refrigerate for at least 4 hours, preferably overnight (8-12 hours).
- In the morning, stir well. Add toppings like granola or coconut flakes just before eating.
Notes
Whisk twice (immediately and after 5 minutes) to prevent clumping. Use cold milk for better hydration. If too thick, add a splash of milk; if too thin, add more chia seeds. Do not freeze as texture becomes grainy. Store in fridge for up to 5 days.
- Prep Time: 5 minutes
- Cook Time: 0 minutes
- Category: Breakfast
- Cuisine: American
Nutrition
- Serving Size: 1 jar (8 oz)
- Calories: 220
- Sugar: 12
- Sodium: 50
- Fat: 12
- Saturated Fat: 1.5
- Carbohydrates: 24
- Fiber: 10
- Protein: 6
Keywords: overnight chia pudding, grab-and-go breakfast, healthy breakfast, meal prep, chia seed recipe, vegan breakfast, gluten-free breakfast


