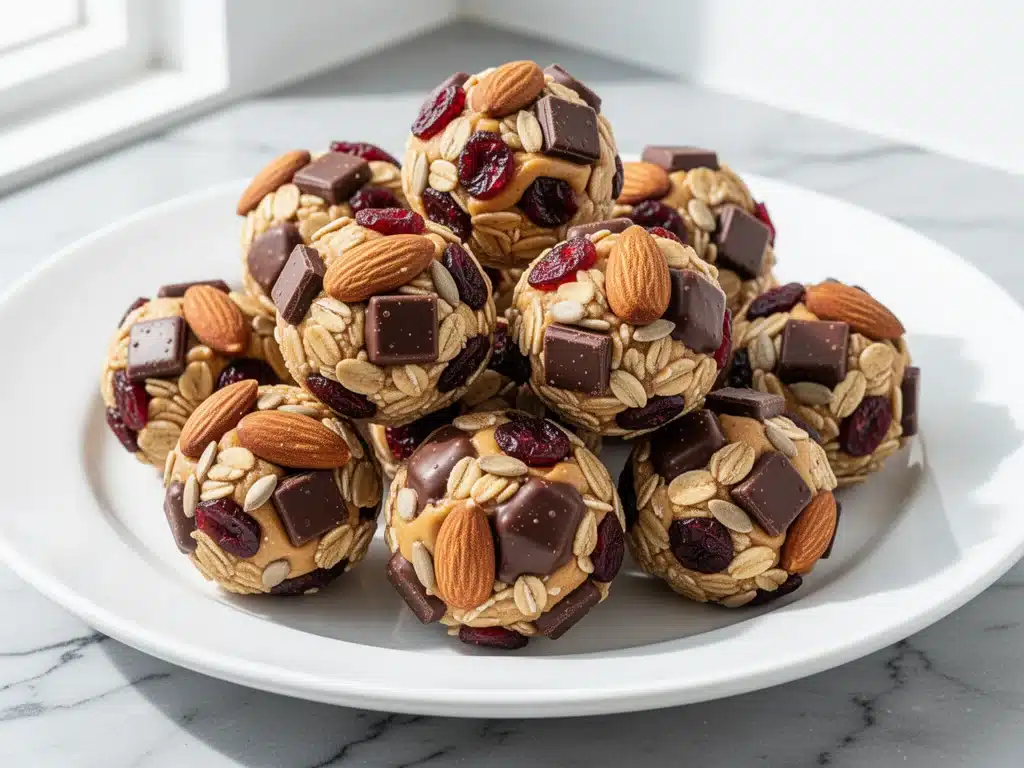
It was 3:30 PM on a rainy Tuesday, and I was staring into the abyss of my pantry. You know that feeling. Your stomach is growling, your afternoon energy is flatlining, and the only thing between you and a meltdown is a snack. But my pantry was a disaster zone of half-used spice jars, a lonely bag of stale crackers, and a single, sad almond.
I was craving something sweet but also felt guilty about eating another granola bar loaded with sugar and preservatives. I wanted something that tasted like a treat but actually fueled me. I wanted something with crunch, something with chocolate, and something I could make in under ten minutes without turning my kitchen into a war zone.
So, I did what any desperate home cook does: I threw everything I had into a bowl. I had oats. I had peanut butter. I had honey. And, miraculously, a bag of dark chocolate chips and a jar of almonds that had been sitting there since Christmas. I mixed it up, rolled it into little balls, and stuck them in the freezer while I finished an email.
When I pulled them out twenty minutes later, they were firm, cool, and absolutely delicious. The crunch of the almond against the chewy oat and the snap of the dark chocolate was perfect. I ate one. Then another. Then I had to stop myself from eating the whole batch before dinner.
That was six months ago. Since then, I’ve made these healthy no-bake trail mix bites at least once a week. They’ve become my secret weapon for busy afternoons, my go-to lunchbox addition for my kids, and the item I always have stocked for guests who ask, “What is that smell?” (It’s chocolate, obviously).
People think making healthy snacks from scratch is complicated. It requires measuring cups, timers, and actual effort. But this recipe? It’s stupid simple. It uses just five ingredients. You don’t need an oven. You don’t need fancy equipment. And honestly? It tastes better than anything you’ll buy at the store. I’ve tested this recipe with different nut butters, different chocolates, and different nuts, and I’ve finally nailed down the ratio that gives you that perfect balance of sweet, salty, and crunchy.
If you’re tired of dry, crumbly energy balls or overly sweet protein bars, you need to try these. Seriously. Once you make them, you’ll wonder why you ever bought processed snacks again.
Why You’ll Love This Recipe
I’m not exaggerating when I say these bites have changed my afternoon routine. Here’s why I keep coming back to this specific combination of ingredients, and why I think you will too.
Actually Healthy, Not Just “Diet” Food
Most “healthy” snacks taste like cardboard. These don’t. By using dark chocolate and natural nut butter, you get healthy fats and antioxidants without the sugar crash. I use almonds for their crunch and protein, and the oats provide slow-burning energy. It’s food that actually makes you feel good, not sluggish.
Five Ingredients. That’s It.
I love recipes that respect my time. You don’t need a dozen items from the specialty aisle. You probably have most of these in your kitchen right now. Oats, nut butter, honey, chocolate, and nuts. That’s the whole list. If you can stir a bowl, you can make this.
The Texture Is Everything
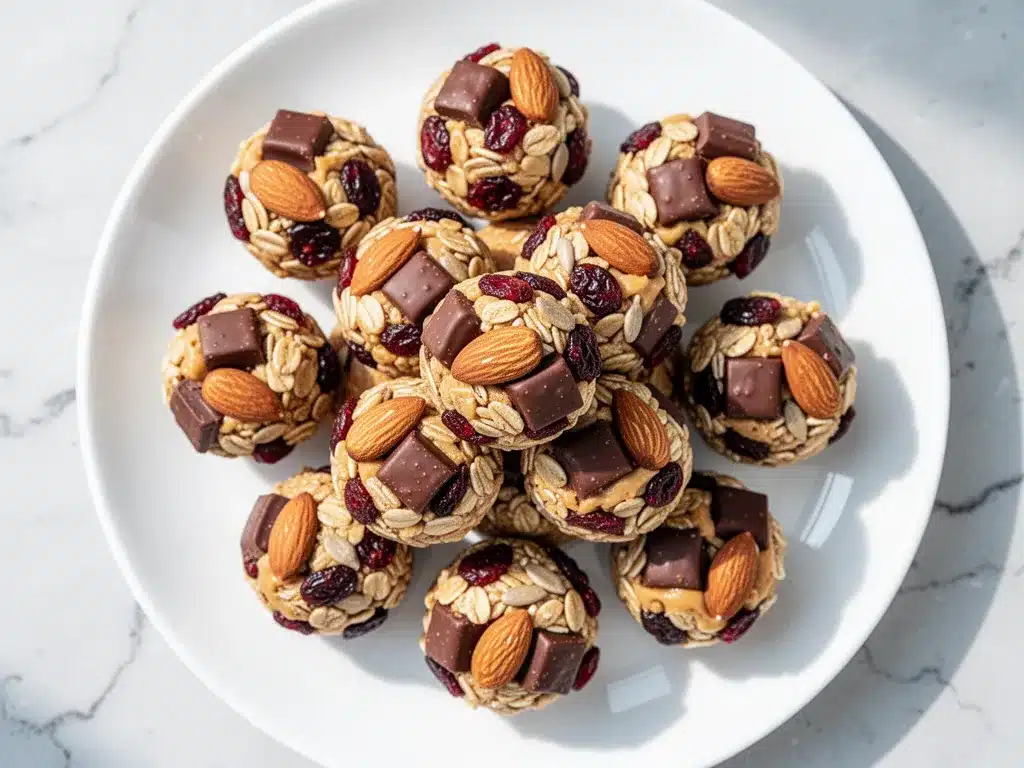
I’ve tried no-bake recipes that were too sticky, too dry, or too soft. These hit the sweet spot. The almond adds a necessary structural crunch that keeps the bite from being mushy, and the dark chocolate snaps when you bite into it. It’s a mouthfeel that feels luxurious, not like a dieting punishment.
Perfect for Meal Prep
I make a big batch on Sunday night. I portion them into a container and grab two every afternoon. They last all week in the fridge. This means I never have to make a decision when I’m hungry and tired. They’re just there, ready to save me.
Kid-Approved (Surprisingly)
I was skeptical my kids would eat something with 70% dark chocolate and raw almonds. But because the honey and nut butter sweeten it enough, they think it’s a cookie. I’ve hidden these in their lunchboxes, and they disappear faster than the fruit snacks.
Ingredients You’ll Need
Here’s the best part: this recipe is incredibly forgiving. You don’t need to be precise with measurements like you are with baking a cake. However, I am particular about the quality of these few items because they are the stars of the show. Here’s what you need and why I choose them.
The Base
Old-Fashioned Rolled Oats (1 cup / 90g) — Don’t use instant oats or steel-cut oats. Instant oats turn to mush, and steel-cut are too hard to chew raw. You need the texture of rolled oats. I buy the store brand because it’s cheaper and works just as well as the fancy organic stuff.
Natural Peanut Butter (½ cup / 120g) — This is the glue. Use creamy, natural peanut butter. If it’s separated, just stir it well before measuring. Almond butter or sunflower seed butter work too if you have nut allergies, but peanut butter has that classic flavor that pairs best with chocolate. Avoid the kind with added sugar and hydrogenated oils—look for the jar that says “peanuts” and “salt” and nothing else.
Honey (⅓ cup / 100ml) — Honey adds sweetness and stickiness. Maple syrup works if you want to make these vegan, but honey gives a nicer chew. Use raw honey if you have it for extra flavor, but regular honey is fine.
The Crunch and Flavor
Raw Almonds (½ cup / 50g, chopped) — This is the key ingredient that sets these apart from basic oat balls. The almonds add protein, healthy fats, and that essential crunch. Chop them roughly. You don’t want huge chunks, but you don’t want powder either. Think small pebbles.
Dark Chocolate Chips (½ cup / 85g) — Use semi-sweet or dark chocolate chips (at least 60% cocoa). Milk chocolate will make these too sweet and they might not set properly in the fridge due to the higher sugar content. I like Ghirardelli or Lindt, but any good quality dark chip works. If you want a more intense flavor, chop up a dark chocolate bar instead of using chips.
Optional Boosters
Sea Salt (½ teaspoon) — A pinch of flaky sea salt on top before they set makes the chocolate flavor pop. Don’t skip this. It’s the difference between “good” and “amazing.”
Vanilla Extract (1 teaspoon) — I always add this. It adds a subtle warmth that makes them taste more like a dessert than a health snack.
Chia Seeds (1 tablespoon) — I toss these in sometimes for extra omega-3s. They’re tiny, so you barely notice them, but it’s an easy way to boost nutrition without changing the taste.
Equipment Needed
You don’t need anything fancy. In fact, the beauty of this recipe is that it uses tools you already have cluttering your drawers.
Medium Mixing Bowl — Any bowl that’s big enough to hold all the ingredients. I use a ceramic bowl because it’s heavy and doesn’t slide around while I’m mixing.
Spatula — A silicone spatula is best for scraping the bowl. You want to get every bit of that sticky mixture out.
Spoon or Measuring Cups — To measure your oats and nut butter. If you’re lazy like me, you can eyeball it, but being close helps.
Knife and Cutting Board — For chopping the almonds. A sharp knife makes this go faster and safer.
Baking Sheet or Plate — To line with parchment paper. Parchment paper is crucial because these are sticky. Wax paper works too, but parchment is non-stick.
Refrigerator or Freezer — You need a cold spot to set these. The freezer works faster (20 minutes), but the fridge is better if you’re making them ahead for the week (1 hour).
How to Make It: Step-by-Step
Alright, let’s make these. I’m walking you through exactly how I do it, including the little tricks I’ve picked up so you don’t end up with a sticky mess on your hands.
Step 1: Prep Your Station (2 minutes)
Line a baking sheet or a large plate with parchment paper. This is non-negotiable. If you don’t use parchment, your bites will stick, and you’ll be fighting them when you try to take them off. Set it aside. Chop your almonds into small pieces. If you’re using a food processor, pulse them briefly—but be careful not to turn them into almond butter. You want chunks.
Step 2: Mix the Wet Ingredients (2 minutes)
In your medium mixing bowl, combine the peanut butter and honey. If your peanut butter is cold and stiff from the fridge, microwave it for 15-20 seconds to soften it up. This makes mixing so much easier. Stir them together until they are smooth and combined. Add the vanilla extract and a pinch of salt if you’re using it.
Step 3: Add the Dry Ingredients (2 minutes)
Pour in the rolled oats and the chopped almonds. Stir everything together. At this point, the mixture will look dry and shaggy. That’s okay. Use your hands now. Yes, get your hands dirty. Mixing with your hands ensures every oat is coated in the nut butter mixture. It’s faster and more thorough than a spoon.
Step 4: Incorporate the Chocolate (1 minute)
Stir in the dark chocolate chips. You want them distributed evenly throughout the mixture. If you prefer large chunks of chocolate, chop a bar into pieces instead of using chips. Mix until everything is well combined.
Step 5: Roll the Bites (5 minutes)
This is the fun part. Take a tablespoon-sized amount of mixture and roll it between your palms to form a ball. Don’t press too hard, or they’ll become dense. Just gently shape them. If the mixture is too sticky to handle, wet your hands slightly with water. If it’s too dry and crumbly, add another teaspoon of honey or peanut butter.
Place the rolled balls onto your prepared baking sheet. Try to keep them uniform in size so they set evenly. You should get about 15-20 bites from this recipe.
Step 6: Chill and Set (20-60 minutes)
Put the tray in the freezer for 20 minutes if you’re impatient (like me). Or put them in the fridge for an hour if you’re planning ahead. The cold solidifies the peanut butter and chocolate, giving the bites their firm texture. Once they’re firm to the touch, they’re ready to eat.
Expert Tips & Tricks
Here’s everything I’ve learned from making these dozens of times. These tips will save you from my mistakes.
Don’t Skimp on the Almonds
I know it’s tempting to skip them to save money or time, but the almonds are what give these bites their identity. Without them, you’re just making chocolate oat balls. The fat and crunch from the almonds balance the sweetness of the honey and chocolate. Keep them in.
Use Cold Peanut Butter
It sounds counterintuitive, but using peanut butter straight from the fridge makes it easier to roll. Warm peanut butter is oily and sticky. Cold peanut butter holds its shape better. If you forget to take it out, just pop the jar in the freezer for 10 minutes.
Chop Almonds Uniformly
Try to chop your almonds into similar-sized pieces. If you have huge chunks, they might poke through the surface and make the ball unstable. Small, even pieces create a smoother, more professional-looking bite.
Storage is Key
Once they’re set, store them in an airtight container. They keep in the fridge for up to two weeks. If you want them to last longer, freeze them. I keep a container in the freezer at all times. They thaw in about 5 minutes, and they taste frozen-cold, which is even better.
Adjust Sweetness to Taste
Not all dark chocolates are created equal. Some are very bitter. If you’re using a high-percentage chocolate (70% or more), you might want to add an extra tablespoon of honey. Taste your mixture before rolling—if it’s too bitter, add more sweetener. If it’s too sweet, add more oats.
Double the Batch
This recipe doubles easily. I often make two batches at once because they disappear so fast. Just use a larger bowl and mix in batches to ensure everything is coated evenly.
Variations & Substitutions
Once you’ve nailed the basic version, here’s how you can mix it up. I’ve tried all of these, and they’re all winners.
Almond Butter Version
Swap the peanut butter for almond butter. This makes the almond flavor more intense and feels a bit more gourmet. It’s slightly more expensive, but worth it for weekends.
Chocolate Chip Cookie Dough
Add 1 teaspoon of cinnamon and use milk chocolate chips instead of dark. It tastes exactly like cookie dough. Add a handful of white chocolate chips for extra sweetness.
Protein-Packed
Add 1 scoop of your favorite protein powder. Note: This will absorb moisture, so you may need to add an extra tablespoon of honey or peanut butter to get the right consistency. Chocolate protein powder works best here.
Vegan Option
Use maple syrup instead of honey and ensure your chocolate chips are vegan (many dark chocolates are, but check the label). Use almond butter or sunflower seed butter instead of peanut butter if you have allergies.
Seed-Free (Nut-Free)
For school-safe snacks, swap the almonds for sunflower seeds or pumpkin seeds (pepitas). Swap the peanut butter for sunflower seed butter. The texture is slightly different but still delicious.
Chewy Oatmeal Raisin
Swap the almonds for raisins and add a dash of cinnamon. Add a tablespoon of flaxseed for fiber. These taste like oatmeal raisin cookies.
Salty Snack
Use less honey and add a generous amount of sea salt. These are perfect for pairing with coffee or tea in the afternoon.
Serving & Storage
How to Serve
I usually eat these straight out of the container, but here are other ways I’ve enjoyed them:
- With Coffee: A cold, chocolatey bite with a hot latte is my favorite afternoon ritual.
- In Lunchboxes: They don’t melt as easily as candy bars, making them perfect for school lunches.
- With Fruit: Pair one bite with an apple or banana for a balanced snack.
- As Dessert: Serve three bites with a cup of Greek yogurt for a light, satisfying dessert.
Storage Instructions
Refrigerator: Store in an airtight container for up to 2 weeks. Layer them between parchment paper if stacking to prevent sticking.
Freezer: Store in a freezer-safe bag or container for up to 3 months. They freeze beautifully. Just let them sit on the counter for 5 minutes before eating.
Room Temperature: I don’t recommend leaving them out for more than a few hours, especially in warm weather. The peanut butter and chocolate can melt and make a mess.
Nutrition Information
I’m not a nutritionist, but here’s the breakdown if you’re tracking. Note that this is an estimate based on standard ingredients.
Per Serving (2 bites):
- Calories: 180
- Protein: 5g
- Carbs: 18g
- Fiber: 2g
- Sugar: 10g (natural sugars from honey and chocolate)
- Fat: 10g (healthy fats from nuts and chocolate)
What’s Good:
- Good source of healthy fats from almonds and peanut butter.
- Provides sustained energy from oats.
- Antioxidants from dark chocolate.
What to Know:
- Higher in calories than you might think, so portion control is key.
- Contains nuts, so not suitable for severe nut allergies.
- Contains honey, so not vegan.
My Take:
Look, these are snacks. They’re meant to be enjoyed. They’re not a salad. But they’re way better than a bag of chips or a candy bar. I stick to two at a time, and I feel satisfied without overeating.
Final Thoughts
So that’s my go-to healthy no-bake trail mix bites recipe! I’ve probably talked your ear off at this point, but when you find a recipe that works this well, you want to make sure you get all the details right.
These bites have saved me from afternoon slumps, impressed my kids, and kept my pantry stocked with something healthy and accessible. They’re my answer to “What can I grab quickly that won’t ruin my dinner?”
Make it yours! Try different chocolates, swap the almonds for walnuts, or add a splash of espresso powder for a mocha twist. The best recipes are the ones you adapt to your taste.
If you make this, drop a comment and let me know what you think! I love hearing how recipes turn out in your kitchen. And if something doesn’t work, tell me that too—I’m here to help troubleshoot.
Happy cooking! And I hope your kitchen smells half as good as mine does right now.
Frequently Asked Questions
Can I use almond butter instead of peanut butter?
Absolutely. Almond butter works great and tastes delicious with dark chocolate. It’s slightly more expensive, but the flavor is richer. Just make sure it’s natural almond butter without added sugars or oils.
Why are my bites too sticky?
This usually happens if your peanut butter is too warm or if you didn’t add enough oats. Chill your peanut butter before mixing, or add another tablespoon of oats. If they’re still sticky, wet your hands with water before rolling.
Can I freeze these bites?
Yes! They freeze very well. Store them in an airtight container or freezer bag for up to 3 months. They thaw quickly, so you can grab them straight from the freezer for a cold, fudgy treat.
Can I make these gluten-free?
Yes, as long as you use certified gluten-free oats. Regular oats are often processed in facilities that handle wheat, so check the label if you have celiac disease or a severe gluten intolerance.
Can I use mini chocolate chips?
Mini chips are great because they distribute more evenly throughout the bite. You might need to use a slightly larger amount (¾ cup) to get the same chocolate flavor. They also make the bites look more uniform.
How long do these last in the fridge?
They last up to two weeks in an airtight container in the fridge. After that, they might start to dry out or lose their texture. If you’re making a big batch, freeze half of them.
Can I add protein powder?
You can, but it changes the texture. Protein powder absorbs moisture, so you’ll need to add extra liquid (honey or nut butter) to bind the mixture. Start with ¼ cup of protein powder and adjust as needed.
Pin This Recipe!
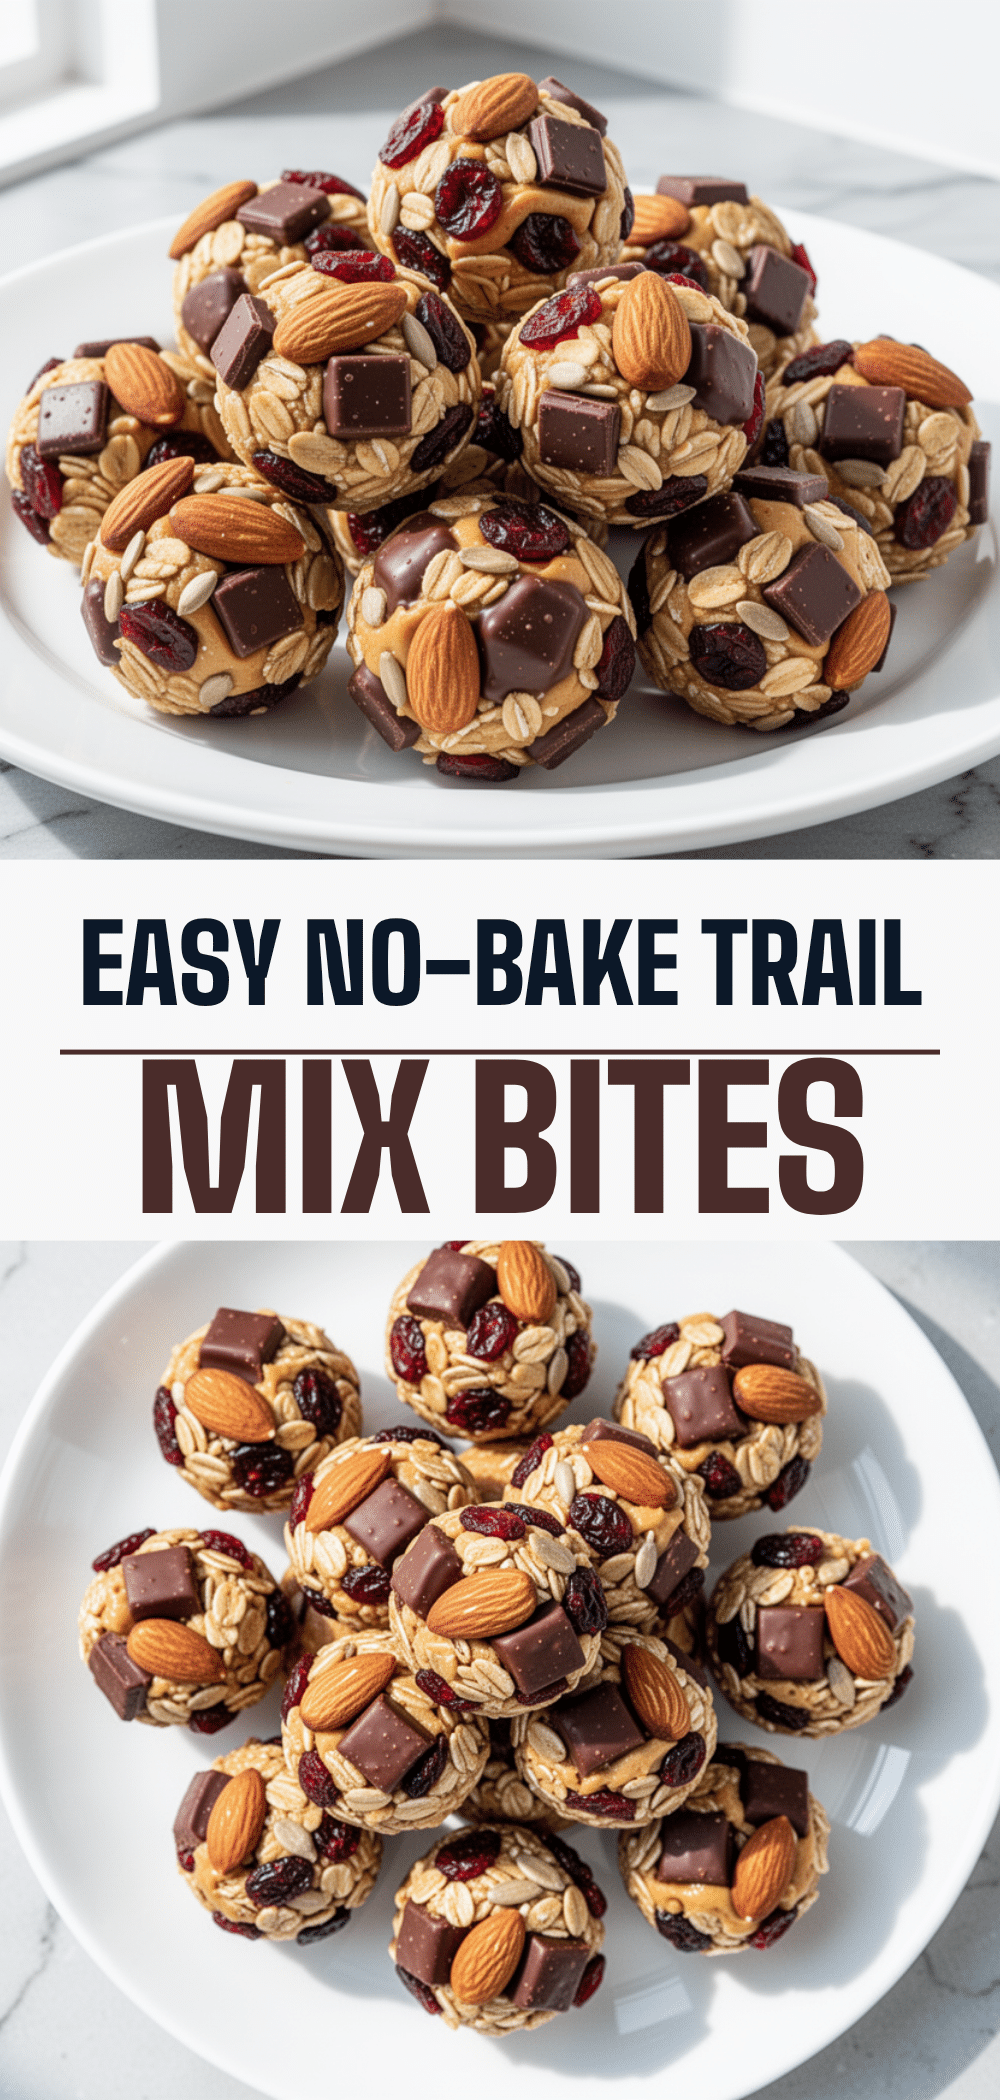
Healthy No-Bake Trail Mix Bites: Easy 5-Ingredient Dark Chocolate Snack
- Total Time: 20 minutes
- Yield: 15-20 servings 1x
Description
These healthy no-bake trail mix bites are a simple, 5-ingredient snack made with oats, peanut butter, honey, almonds, and dark chocolate. They provide a perfect balance of sweet, salty, and crunchy flavors without requiring an oven.
Ingredients
- 1 cup (90g) Old-Fashioned Rolled Oats
- ½ cup (120g) Natural Peanut Butter
- ⅓ cup (100ml) Honey
- ½ cup (50g) Raw Almonds, chopped
- ½ cup (85g) Dark Chocolate Chips (at least 60% cocoa)
- ½ teaspoon Sea Salt (optional)
- 1 teaspoon Vanilla Extract (optional)
- 1 tablespoon Chia Seeds (optional)
Instructions
- Line a baking sheet or large plate with parchment paper and set aside.
- Chop the raw almonds into small, uniform pieces.
- In a medium mixing bowl, combine the peanut butter and honey. If the peanut butter is cold, microwave it for 15-20 seconds to soften.
- Stir the wet ingredients until smooth. Add vanilla extract and sea salt if using.
- Add the rolled oats and chopped almonds to the bowl. Mix with a spoon or your hands until every oat is coated.
- Stir in the dark chocolate chips until evenly distributed.
- Take a tablespoon-sized amount of mixture and roll it between your palms to form a ball. If the mixture is too sticky, wet your hands slightly with water.
- Place the rolled balls onto the prepared baking sheet.
- Chill in the freezer for 20 minutes or in the refrigerator for 1 hour until firm.
- Store in an airtight container in the fridge for up to 2 weeks or in the freezer for up to 3 months.
Notes
Use natural peanut butter without added sugars or oils. For a vegan version, substitute honey with maple syrup and ensure chocolate chips are vegan. If using protein powder, add extra liquid to bind the mixture. Store in the freezer for longer shelf life.
- Prep Time: 15 minutes
- Cook Time: 0 minutes
- Category: Snack
- Cuisine: American
Nutrition
- Serving Size: 2 bites
- Calories: 180
- Sugar: 10
- Sodium: 50
- Fat: 10
- Saturated Fat: 3
- Carbohydrates: 18
- Fiber: 2
- Protein: 5
Keywords: no-bake, healthy snack, trail mix bites, dark chocolate, peanut butter, oats, gluten-free option, meal prep


