It was 7:15 AM on a Tuesday in September, and I was standing in the kitchen holding a Tupperware container like it was a bomb I needed to defuse. Inside was a sad-looking apple slice that had already started to brown, a handful of crackers that were crumbling into dust, and a block of cheddar cheese that was taking up half the container. My three-year-old looked at it, sighed a sigh that sounded way too heavy for someone who hadn’t even had coffee yet, and said, “I’m not hungry.”
I know that sigh. I’ve heard it a thousand times. But this time, something clicked. I realized I wasn’t feeding a toddler; I was managing logistics. I was trying to make nutrition fit into a chaotic morning routine, and failing miserably. The problem wasn’t the food. It was the presentation. It was the effort. It was the fact that by the time I got him dressed and out the door, the snack was either ruined or forgotten.
That morning, I dumped everything into a small plastic cup, added some grapes and a few cheese cubes, and shoved it in his backpack. He didn’t even look at it until recess. And you know what? He ate it all. Every last grape. Every cheese cube. No complaints. No “I’m not hungry.” Just happy little bites.
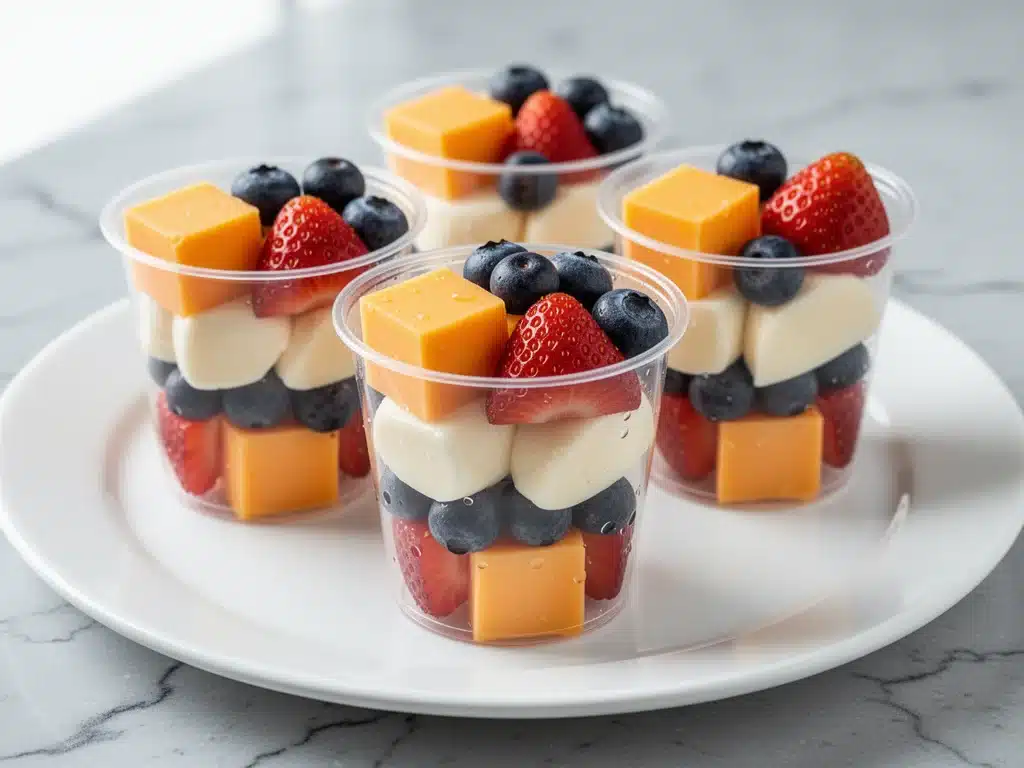
That was the birth of my preschool snack cups with fruit and cheese cubes for back-to-school. What started as a desperate morning hack has turned into a weekly ritual that saves my sanity and keeps my kids fed. It’s not just about convenience (though it is incredibly convenient). It’s about giving them a snack that feels special, that’s easy to handle, and that actually stays fresh until snack time. If you’re drowning in the back-to-school rush and trying to figure out how to pack a lunch that’s healthy, fun, and requires less than five minutes of your time, you need to try this.
Why You’ll Love These Preschool Snack Cups
Look, I’m not going to lie to you. The first few weeks of school are a whirlwind. You’re buying new backpacks, buying new pencils, and trying to remember if they have gym class on Tuesdays. You do not have time for complex food prep. These snack cups are your best friend during this season. Here’s why they’ve become a non-negotiable in our house:
- Zero Mess, Maximum Satisfaction — The biggest issue with loose snacks is that they roll under desks or get crushed in the bottom of a lunchbox. In a cup? They stay put. My kids can carry them around, eat them one by one, and not make a single crumb trail. It’s a game-changer for teachers, too.
- Healthy Fats and Protein Combo — Fruit alone just gives a sugar spike and crash. Cheese gives you protein and fat to keep them full. This combination keeps their energy stable until lunchtime. I’ve noticed they’re not hangry by 10:30 AM anymore. That’s huge.
- Customizable for Picky Eaters — My son loves grapes but hates strawberries. My daughter loves strawberries but won’t touch a grape. With snack cups, I can make two different cups in the same amount of time. No arguments. No “I don’t like this” negotiations at the drop-off line.
- Prep in Under 5 Minutes — Seriously. I can wash fruit, cube cheese, and fill ten cups in the time it takes to brew a pot of coffee. I do this on Sunday nights while watching Netflix. By Monday morning, they’re done. It’s that simple.
- Portion Control Made Easy — Toddlers and preschoolers don’t need a whole apple. They need four bites. These cups are pre-portioned so I’m not constantly asking, “Did you eat it all?” because the answer is always yes.
This is my go-to when I need dinner to just work. No complicated techniques, no weird ingredients, just reliable, delicious food that makes everyone happy. And it works for preschool, too.
Ingredients You’ll Need
The beauty of these preschool snack cups with fruit and cheese cubes for back-to-school is that you probably already have most of this in your fridge. I’m not asking you to go to a specialty store. I’m asking you to grab what’s already there and make it work.
For the Fruit Base
Sweet Grapes (1 pint, halved) — Grapes are the king of snack cups. They’re sweet, juicy, and easy to eat. I always halve them for younger kids to prevent choking, and it also makes them fit better in the cup. Red or green grapes work, but I prefer red for their sweetness.
Strawberries (1 cup, hulled and quartered) — If your kid likes berries, these are a great addition. Quartering them makes them bite-sized. I buy fresh ones when they’re in season, but frozen (thawed and drained) work in a pinch. Just make sure they’re not watery.
Cantaloupe or Honeydew Melon (1 cup, cubed) — Melon adds a nice crunch and sweetness. Cut it into small cubes—about half an inch. It’s refreshing and goes well with cheese. I use this in the summer when berries are expensive.
Apple Slices (1 small apple, sliced thin) — Apples are classic, but they brown fast. If you use apples, toss them in a little lemon juice to keep them bright. I slice them thin so they’re easy for little hands to hold.
For the Cheese Component
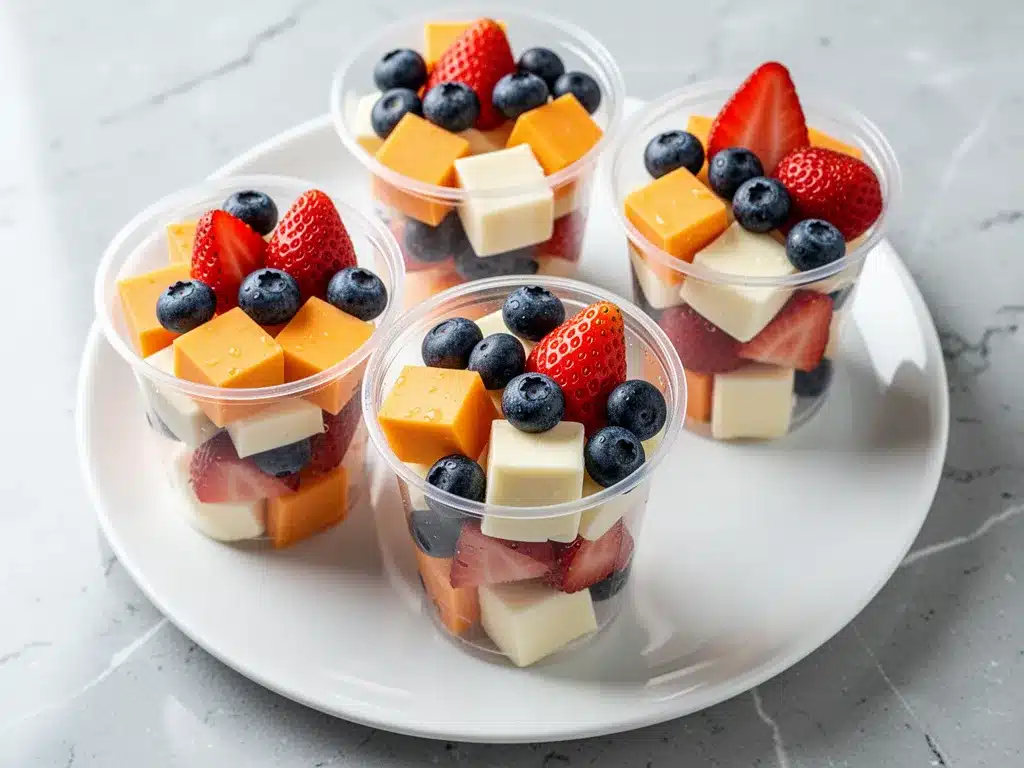
Cheddar Cheese (1 block, cubed) — Sharp cheddar is my go-to. It has a strong flavor that kids usually love. Cut it into small cubes, about the size of a dice. I buy the block and cut it myself because pre-cut cheese sticks are too big and expensive for this.
Mozzarella Balls (1 cup, mini) — These are the little pearl mozzarella balls you find in the deli section. They’re naturally portioned and super soft. My kids love them because they’re mild. Great for kids who are scared of strong cheese flavors.
Gouda or Swiss Cheese (½ block, cubed) — For variety, I sometimes swap in Gouda. It’s slightly sweeter and has a nice texture. It’s a good way to introduce new flavors without overwhelming them.
Optional Add-ins for Texture
Whole Grain Crackers (½ cup) — I add a few crackers for crunch. I like the whole grain ones because they’re more filling. Just make sure they’re small enough to fit in the cup without breaking.
Sunflower Seeds (2 tablespoons) — If your school allows nuts and seeds, these add a nice protein boost. I sprinkle them on top. If not, skip this.
Dried Cranberries (2 tablespoons) — For a chewy texture and tartness. I use these sparingly because they’re sweet. A little goes a long way.
Equipment Needed
You don’t need fancy equipment for this. Here’s what I actually use:
- Small Plastic Cups — I use 4-6 oz cups. They’re the perfect size for a preschooler. I buy reusable ones from the dollar store and wash them weekly. If you’re using disposable ones, get the compostable kind to feel better about the planet.
- Sharp Knife — For cutting fruit and cheese. I use a paring knife for precision. Dull knives make you cry more—learned this the hard way with onions, but it applies here too.
- Cutting Board — Any size works. I use plastic for easier cleanup.
- Bowl — For holding the cut fruit while I prep. I like a wide bowl so I can toss the fruit easily.
- Spoon — For scooping fruit into the cups. Or just use your hands if you’re feeling casual.
Optional but nice:
– Apple Corer — If you’re using apples a lot, this tool saves time. It cores and slices in one go.
– Small Tongs — For picking up cheese cubes. Hygiene is nice, but not strictly necessary.
How to Make It: Step-by-Step
Alright, let’s make these preschool snack cups with fruit and cheese cubes for back-to-school! I’m walking you through exactly how I do it, including the little tricks I’ve picked up.
Step 1: Wash and Prep the Fruit (10 minutes)
Start by washing all your fruit. If you’re using grapes, run them under cold water and pat them dry. I always cut them in half lengthwise. This isn’t just for size—it’s for safety. Halved grapes are easier for little kids to chew and swallow. If you’re using strawberries, hull them and cut them into quarters. For melon or apples, peel if needed and cut into small cubes or thin slices. Toss apple slices in a little lemon juice to prevent browning.
Step 2: Cube the Cheese (5 minutes)
While the fruit is prepping, take your cheese block and cut it into small cubes. Aim for half-inch cubes. They should be small enough to fit comfortably in the cup but big enough to be satisfying. If you’re using mozzarella balls, just rinse them and pat them dry. Set them aside in a bowl.
Step 3: Assemble the Cups (15 minutes)
Now for the fun part. Take your cups and start layering. I like to alternate colors and textures. Start with a layer of fruit—maybe grapes or strawberries. Then add a layer of cheese cubes. Then maybe some melon or apple. Top it off with a few crackers or seeds if you’re using them. You want a mix of everything in every bite, so distribute the ingredients evenly.
Pro Tip: Don’t pack them too tight. Leave a little room at the top so the lid can close easily. If you overpack, the fruit will get squished, and nobody likes squished fruit.
Step 4: Seal and Store (5 minutes)
Once the cups are assembled, seal them with lids. If you’re using disposable cups, snap the lids on tight. If you’re using reusable ones, make sure the seal is secure. Place them in the fridge immediately. They’ll keep for up to 3 days, but I usually eat them within 2 days to ensure maximum freshness.
Expert Tips & Tricks
Here’s everything I’ve learned from making these dozens of times. These tips will save you from my mistakes.
Keep It Cold — Cheese and fruit can spoil if they sit out too long. Always keep the cups in the fridge until you’re ready to pack them in the lunchbox. If you’re packing them in the morning, put them in the lunchbox right before you leave. Use an ice pack if it’s a hot day.
Rotate Your Fruits — Don’t get stuck in a rut. If you always use grapes and cheddar, your kid might get bored. Try blueberries and mozzarella. Try pineapple and gouda. Variety keeps things interesting.
Check Allergies — Always check with your school about nut and seed policies. Some schools are nut-free zones. If so, skip the sunflower seeds and stick to fruit and cheese.
Make It a Game — Let your kid help assemble the cups. They’re more likely to eat something they helped make. Let them choose the colors or the order. It’s a great way to get them involved in healthy eating.
Use Seasonal Produce — Buy what’s in season. Strawberries in spring, melon in summer, apples in fall. It’s cheaper and tastes better. Plus, it teaches your kids about seasons and food.
Variations & Substitutions
Once you’ve nailed the basic version, here’s how you can mix it up. I’ve tried all of these.
Vegetarian Protein Boost — Add hummus. A tablespoon of hummus at the bottom of the cup adds protein and a savory flavor. Dip the fruit and cheese in it. My kids love this version.
Low-Sugar Option — Use berries instead of grapes. Berries have less sugar and more fiber. Pair them with a mild cheese like mozzarella or provolone. This is great for kids who are sensitive to sugar spikes.
Fun Shapes — Use cookie cutters to cut the cheese and fruit into stars or hearts. It’s cute and makes snack time feel like a party. My daughter loves star-shaped cheese cubes.
Dairy-Free — Swap the cheese for dairy-free cheese cubes or avocado slices. Avocado adds healthy fats and a creamy texture. It’s a great substitute for kids who are lactose intolerant.
Gluten-Free — Skip the crackers or use gluten-free crackers. Everything else is naturally gluten-free. I use rice crackers for a light crunch.
Serving & Storage
How to Serve:
I usually serve these straight from the fridge. They’re best cold. But here are other ways I’ve enjoyed them:
- With a Dip — Serve with yogurt dip or hummus on the side.
- As a Breakfast Snack — Eat one with breakfast if your kid is hungry later in the morning.
- As a Post-School Snack — Perfect for when they get home from school. It’s a quick energy boost.
Storage Instructions:
Refrigerator:
Store in an airtight container for up to 3 days. The fruit will stay fresh, and the cheese will hold up well. Make sure the lids are tight to prevent drying out.
Freezing:
Honestly, this doesn’t freeze well. The fruit will get mushy when thawed, and the cheese might change texture. Make them fresh or store in the fridge for up to 3 days.
Meal Prep:
Make the cups on Sunday night. They’ll last through the week. I usually make 10 cups at a time. It takes about 30 minutes total, but it saves me so much time during the week.
Nutrition Information
I’m not a nutritionist, but here’s the breakdown if you’re tracking. This is per cup (based on 10 cups).
Per Serving:
– Calories: 120
– Protein: 5g
– Carbs: 15g
– Fiber: 2g
– Sugar: 10g
– Fat: 5g
– Saturated Fat: 2g
– Cholesterol: 10mg
– Sodium: 150mg
– Calcium: 100mg
What’s Good:
– Good source of calcium from cheese
– Fiber from fruit
– Natural sugars for energy
– Low in sodium
What to Know:
– Contains dairy
– Can be made gluten-free
– Sugar content varies based on fruit choice
My Take:
Look, this is a snack, not a meal. It’s meant to bridge the gap between breakfast and lunch. It’s not a diet recipe, but it’s better than processed snacks. When I want to make it lighter, I use more berries and less cheese. But usually? I just eat a reasonable portion and enjoy it.
Final Thoughts
So that’s my go-to preschool snack cups with fruit and cheese cubes for back-to-school! I’ve probably talked your ear off at this point, but when you make a recipe this often, you have a lot to say about it.
This has saved weeknight mornings more times than I can count. It’s my answer to “what’s for snack” when I’m tired, don’t want to buy processed stuff, and still want something that’s healthy. My kids are happy, I’m happy because I’m not stressed about cooking, and the teacher is happy because there’s no mess.
Make it yours! Try different fruits, swap in your favorite cheese, adjust the portions. The best snacks are the ones you adapt to your family’s tastes.
If you make this, drop a comment and let me know what you think! I love hearing how recipes turn out in your kitchen. And if something doesn’t work, tell me that too—I’m here to help troubleshoot.
Happy snacking! And I hope your kitchen smells half as good as mine does right now.
Frequently Asked Questions
Can I use frozen fruit?
You can, but it needs to be thawed and drained well. Frozen fruit releases a lot of water, which can make the snack soggy. If you use frozen berries, thaw them in the fridge overnight and pat them dry with a paper towel. I don’t recommend frozen grapes or melon—they get too soft.
My kid doesn’t like cheese. What can I use?
Try avocado slices or hummus. Avocado has a creamy texture similar to cheese and adds healthy fats. Hummus adds protein and a savory flavor. You can also try tofu cubes if your kid is open to it. Start with small amounts to see if they’ll try it.
How long do these snack cups last?
They last up to 3 days in the fridge. After that, the fruit might start to get soft or brown. I usually eat them within 2 days to ensure they’re fresh and tasty. Always check the fruit before serving if it’s been more than 2 days.
Can I make these ahead for the whole week?
Yes, you can make them on Sunday for the whole week. Just make sure to store them in the fridge and use them within 3 days. I usually make 15 cups at a time. It takes about 45 minutes, but it saves me so much time during the week.
Are these safe for school?
Yes, they are generally safe for school. Just check with your school’s policy on nuts and seeds. Some schools are nut-free zones. If so, skip the sunflower seeds and stick to fruit and cheese. Also, make sure the fruit is cut small enough to prevent choking.
Can I add nuts or seeds?
Only if your school allows them. If you’re at home, go for it. Sunflower seeds, pumpkin seeds, or chopped nuts add a nice crunch and protein. I use them sparingly because they’re calorie-dense. A little goes a long way.
How do I prevent the fruit from browning?
Toss apple slices in a little lemon juice. This prevents oxidation and keeps them bright. For other fruits, like strawberries or melon, browning isn’t as big of an issue. Just store them in the fridge and use them within 2 days.
Pin This Recipe!
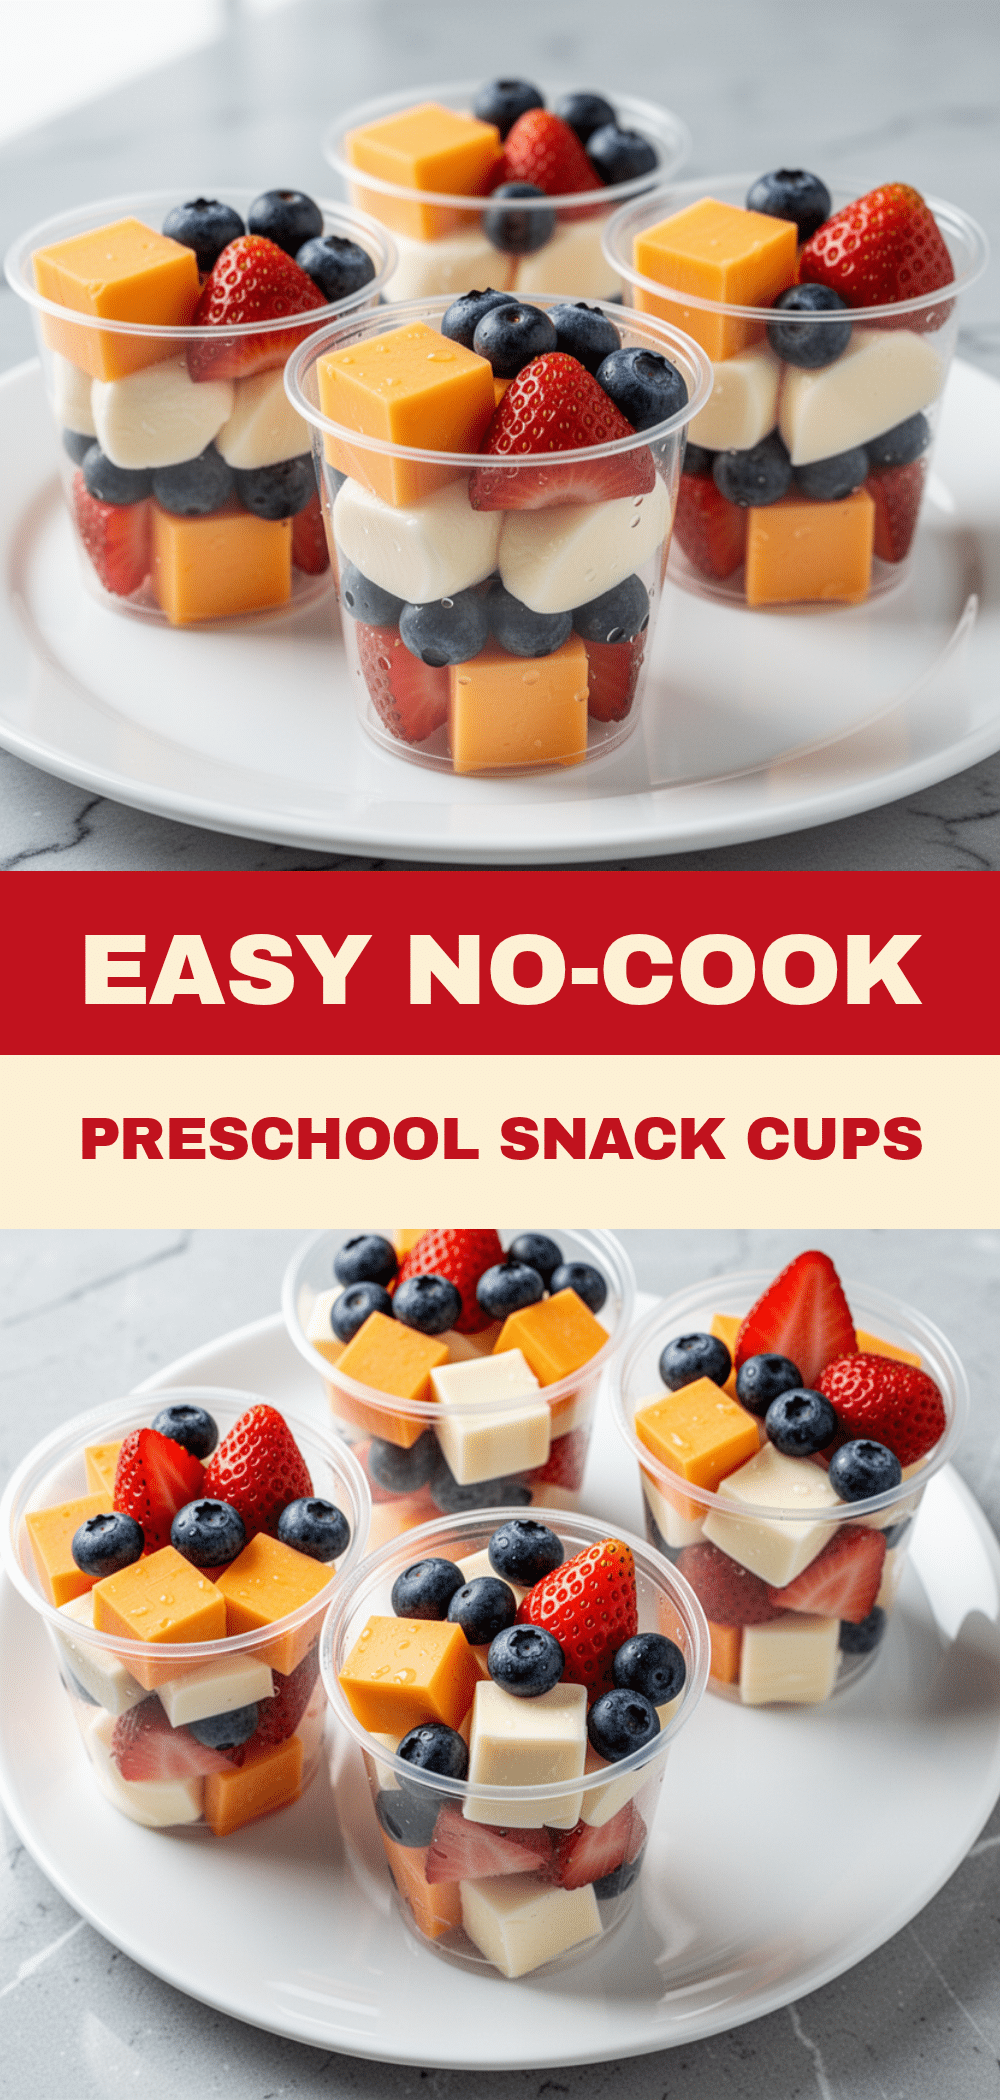
Preschool Snack Cups: Easy Back-to-School Fruit & Cheese
- Total Time: 15 minutes
- Yield: 10 servings 1x
Description
A quick, mess-free, and healthy snack solution for preschoolers that combines fruit and cheese cubes in a portable cup, perfect for back-to-school routines.
Ingredients
- 1 pint sweet grapes, halved
- 1 cup strawberries, hulled and quartered
- 1 cup cantaloupe or honeydew melon, cubed
- 1 small apple, sliced thin
- 1 block cheddar cheese, cubed
- 1 cup mini mozzarella balls
- ½ block Gouda or Swiss cheese, cubed
- ½ cup whole grain crackers (optional)
- 2 tablespoons sunflower seeds (optional)
- 2 tablespoons dried cranberries (optional)
- Lemon juice (for tossing apple slices)
Instructions
- Wash all fruit thoroughly. Pat grapes dry and cut them in half lengthwise for safety. Hull and quarter strawberries. Peel and cube melon or slice apples thinly. Toss apple slices in a little lemon juice to prevent browning.
- Cube the cheese block into small, half-inch cubes. If using mozzarella balls, rinse and pat them dry. Place cheese in a bowl.
- Take small plastic cups (4-6 oz) and begin layering ingredients. Alternate between fruit and cheese to distribute flavors evenly. Add optional crackers or seeds on top.
- Do not pack cups too tightly; leave room at the top for the lid to close securely.
- Seal cups with lids and place them in the refrigerator immediately. They can be stored for up to 3 days.
Notes
[‘Keep cups cold until serving time to prevent spoilage.’, ‘Check school policies regarding nuts and seeds before adding sunflower seeds.’, ‘Frozen fruit can be used if thawed and drained well to avoid sogginess.’, ‘For dairy-free options, swap cheese for avocado slices or dairy-free cheese.’, ‘Do not freeze these cups as the fruit texture will become mushy.’]
- Prep Time: 15 minutes
- Cook Time: 0 minutes
- Category: Snack
- Cuisine: American
Nutrition
- Serving Size: 1 cup
- Calories: 120
- Sugar: 10
- Sodium: 150
- Fat: 5
- Saturated Fat: 2
- Carbohydrates: 15
- Fiber: 2
- Protein: 5
Keywords: preschool snack, back-to-school, fruit and cheese, healthy snacks for kids, easy snack ideas, meal prep for kids, gluten-free snack, vegetarian snack


