It’s 7:00 PM on a Tuesday. The dinner dishes are done, the homework is signed, and the house is finally quiet. I could sit on the couch and scroll through my phone until I fall asleep, or I could head into the kitchen with my seven-year-old, Leo, to make something that smells like heaven and feels like a game. We choose the kitchen. Every time.
That’s why this sourdough focaccia with rosemary and olive oil has become our Friday night ritual. It’s not about speed. It’s not about being a fancy chef. It’s about getting our hands messy, watching dough rise like magic, and learning that baking is just cooking with patience. And honestly? The best part is that Leo actually *wants* to help. He loves the tactile feel of the dough, the fun of pressing dimples, and the pride of sprinkling coarse salt and rosemary leaves on top. It’s one of those rare recipes where the “work” feels like play.
If you’ve been intimidated by sourdough because you think you need a degree in bread science, let me stop you right there. You don’t. You just need a bit of starter, some flour, water, salt, and about 15 minutes of active time spread over a day. The rest is waiting. And while the dough waits, you can watch a movie, read a book, or help Leo with his Lego sets. This beginner-friendly sourdough focaccia with rosemary and olive oil is forgiving, flexible, and incredibly rewarding. It’s the kind of bread that makes your house smell like a cozy Italian bakery, and it’s perfect for dipping in olive oil or serving alongside a warm bowl of vegan creamy mushroom stroganoff for a comforting meal.
Why You’ll Love Making This Together
There are about a dozen reasons I keep coming back to this recipe, but the big ones are really simple. This isn’t just bread; it’s a bonding experience that tastes amazing.
Kid-Proof Fun — Seriously, if your child can sprinkle salt and press their fingers into dough, they can make this. There’s no chopping, no dangerous knives, no high heat until the very end. It’s safe, messy, and satisfying. Leo loves the “dimple game”—how many can we make before the dough is full? We usually get about 40.
Zero Stress Timing — Unlike traditional sourdough loaves that require precise folding schedules every few hours, this focaccia is a “stretch and fold” recipe. You mix it up, let it sit, stretch it a bit, and let it rest again. You can do this while the kids are at soccer practice or doing their own thing. It fits into a real family schedule, not a baker’s fantasy schedule.
Incredibly Forgiving — I’ve burned this twice (okay, once, but it felt like twice) because I got distracted by a phone call. The bread was still edible! Focaccia is dense and moist, so it rarely turns out “wrong.” It might be slightly denser or lighter, but it will always taste good. This forgiveness builds confidence for beginner bakers.
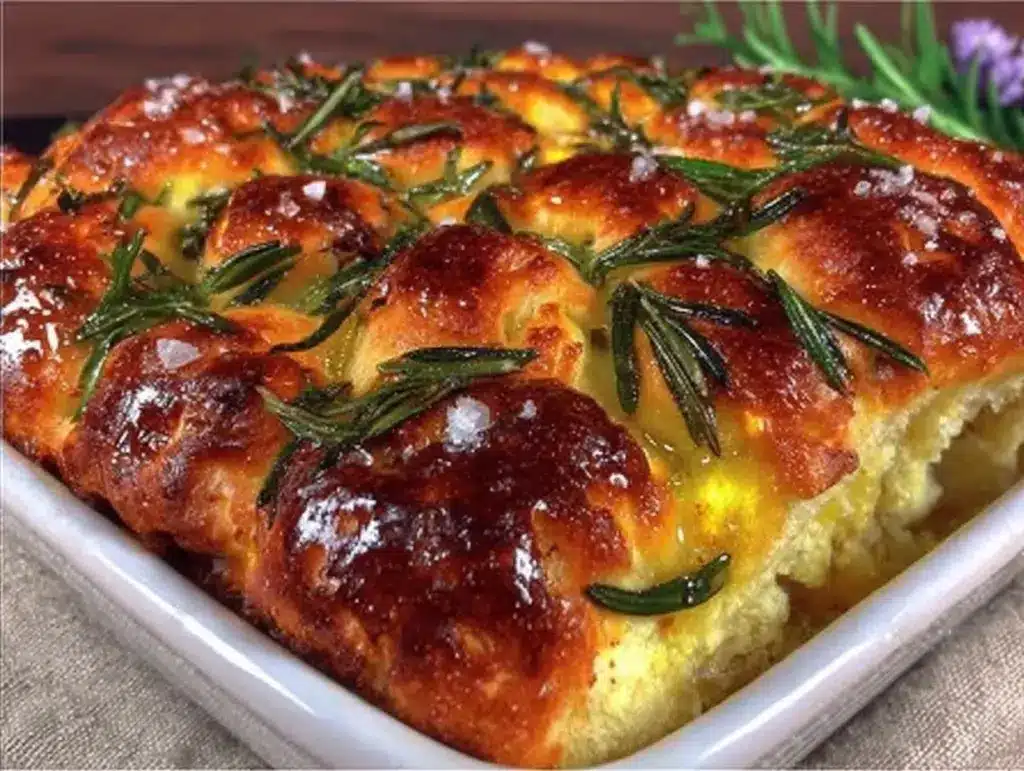
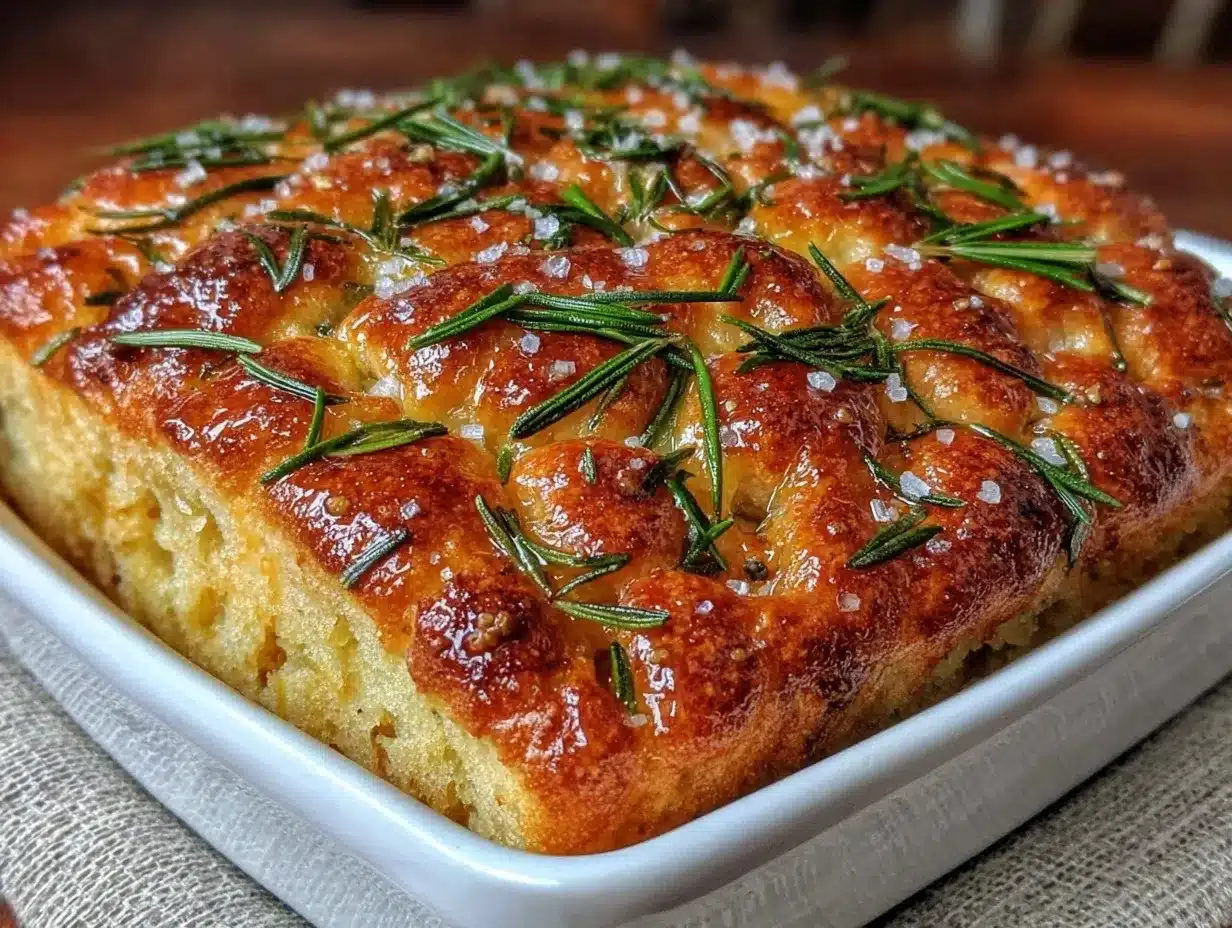
Smells Like Happiness — There is nothing quite like the scent of baking rosemary and garlic in a home. It’s warm, earthy, and inviting. It turns a regular evening into a special occasion. Plus, the crust is crispy, the inside is pillowy soft, and the olive oil pools in those dimples like little pools of gold.
Great for Leftovers — We usually make a full sheet pan. If we don’t eat it all fresh, the leftovers are amazing toasted the next day for breakfast or lunch. Leo loves dipping cold focaccia into his soup, which is a win in my book.
This recipe has saved our weeknight routine. It’s not a quick fix, but it’s a high-reward activity that gets us out of our screens and into the kitchen. It’s my go-to when I need to connect with my kids, and I think you’ll find it works the same way for your family.
Ingredients You’ll Need
Here’s the best part: you probably have most of this already. This isn’t a recipe that requires a trip to three different specialty stores. It’s simple, honest ingredients that let the sourdough flavor shine.
For the Dough:
All-purpose flour (400g / 3 ¼ cups) — I use King Arthur or Bob’s Red Mill. Bread flour works too and gives a chewier crumb, but all-purpose is easier for beginners and still yields great results. Don’t use self-rising flour; it won’t rise right.
Active sourdough starter (100g / ⅓ cup) — This needs to be fed and bubbly! If your starter is sluggish, feed it 4-6 hours before you start. It’s the engine of this bread. If you don’t have a starter, check out my fall maple pecan sticky buns for a yeast-based alternative, but honestly, once you get the hang of sourdough, you won’t go back.
Warm water (300g / 1 ¼ cups) — About 80-85°F. It should feel like warm baby bathwater. Not hot! Hot water kills the yeast. I test it on my wrist—it should feel barely warm.
Fine sea salt (8g / 1 ½ teaspoons) — For flavor and to control the yeast. I use Diamond Crystal or Maldon. If you use table salt, reduce to 1 teaspoon.
For the Topping:
Extra virgin olive oil (½ cup / 120ml) — Don’t skimp here. This is what makes focaccia focaccia. I use a good quality oil that tastes good on its own, because you’ll taste it in the bread. EVOO pools in the dimples, creating those crispy, flavorful pockets.
Fresh rosemary (2 tablespoons, chopped) — Fresh is key. Dried rosemary gets bitter and tough in this application. I buy a fresh sprig from the grocery store and chop it finely. It’s worth the extra step.
Coarse sea salt (for sprinkling) — This adds that perfect crunch and visual appeal. Flaky salt like Maldon is beautiful, but kosher salt works too.
Garlic (optional) — I love adding two cloves of minced garlic to the olive oil before pouring it over the dough. It infuses the oil with a subtle garlic flavor that’s amazing. Leo likes it mild, so I sometimes skip it, but my husband insists it’s mandatory.
Equipment Needed
You don’t need fancy equipment for this. Here’s what I actually use.
9×13 inch baking pan — I use a metal pan. Glass or ceramic works, but metal conducts heat better for that crispy bottom. If you don’t have one, a large rimmed baking sheet works too, but the bread will be thinner.
Large mixing bowl — Something wide enough to stretch the dough easily. I use a 6-quart bowl. Plastic or glass is fine.
Digital scale — I can’t stress this enough. Baking with sourdough is wet and sticky. Measuring by weight is way more accurate than cups. It’s the #1 reason beginners fail. Get a cheap one from Amazon; it’s worth every penny.
Plastic wrap or damp towel — To cover the bowl during rising. I use plastic wrap because it’s less messy than a towel that needs washing.
Pastry brush — For brushing more olive oil on top before baking. A silicone brush is easiest to clean.
Sharp knife or bench scraper — For scoring the dough if you want decorative patterns, though I usually just use my fingers for dimples.
How to Make It: Step-by-Step
Alright, let’s make this! I’m walking you through exactly how I do it, including the little tricks I’ve picked up so Leo and I don’t get frustrated.
Step 1: Mix the Dough (10 minutes)
In your large bowl, combine the warm water and sourdough starter. Whisk until the starter is dissolved and the water looks cloudy. Add the flour and salt. Mix with your hands or a sturdy spoon until no dry flour remains. It will look shaggy and messy. That’s good. Cover the bowl and let it rest for 30 minutes. This rest period makes the gluten development easier later.
Step 2: Stretch and Fold (5 minutes)
Wet your hands with water (this prevents sticking). Grab one side of the dough, stretch it up, and fold it over the center. Do this for all four sides. Rotate the bowl and repeat. You’re building structure. Do this every 30 minutes for the next 2 hours. That’s four sets total. Leo loves this part—he calls it “kneading the dough hug.” By the end, the dough should be smooth, elastic, and jiggly.
Step 3: The First Rise (4-6 hours)
After the last fold, cover the bowl and let it rise at room temperature until it’s puffy and has grown by about 50%. This usually takes 4-6 hours, depending on your kitchen temperature. It’s ready when you can see bubbles under the surface and the dough jiggles like Jell-O when you shake the bowl. Don’t rush this. If it’s not bubbly, it needs more time.
Step 4: Prep the Pan (5 minutes)
Generously coat your 9×13 pan with olive oil. You want a good layer. Pour in half the olive oil, swirl it around, then dump the dough into the pan. It will be sticky. Don’t panic. Use oiled hands to gently press and stretch the dough into the corners. If it resists, let it rest for 10 minutes, then try again. The gluten has relaxed, and it will stretch easier. Top with the remaining olive oil.
Step 5: The Dimple Game (5 minutes)
This is Leo’s favorite part. Use your fingertips to press deep dimples into the dough. Go all the way to the bottom of the pan. Leave some space between dimples, but cover most of the surface. Sprinkle with chopped rosemary and coarse sea salt. If you’re using garlic, sprinkle it now. Cover loosely with plastic wrap and let it rise again for 1-2 hours until puffy and airy.
Step 6: Bake (30-35 minutes)
Preheat your oven to 425°F (220°C). Place the pan in the oven and bake for 25-30 minutes. The bread is done when it’s deep golden brown on top and the bottom sounds hollow when you tap it. If it’s browning too fast, tent it with foil. Let it cool in the pan for 10 minutes, then turn it out onto a wire rack to cool completely. Or, if you’re impatient like me, tear off a piece while it’s still warm. It’s dangerous but delicious.
Expert Tips & Tricks
Here’s everything I’ve learned from making this dozens of times. These tips will save you from my mistakes.
Know Your Starter
Your starter must be active. If you feed it in the morning, it should be at its peak by evening. If it sinks when you stir it, it’s over-proofed and will make flat bread. If it’s still dense, it needs more time. Test it with a float test: drop a spoonful in water. If it floats, it’s ready.
Wet Hands are Your Friend
Sourdough dough is wetter than regular bread dough. If you try to handle it dry, it will stick to everything. Always wet your hands with water or oil before touching the dough. It makes stretching and folding so much easier.
Don’t Skip the Rest Periods
When stretching the dough into the pan, if it snaps back, it’s not ready. Let it rest for 10-15 minutes. The gluten needs to relax. Forcing it will tear the dough and make it tough. Patience pays off.
Olive Oil Quality Matters
Since you’re using so much oil, use one you enjoy eating. Cheap oil tastes bitter. Good EVOO adds a fruity, peppery note that complements the rosemary perfectly.
Cooling is Crucial
I know it’s hard, but don’t slice it immediately. The interior is still cooking. If you cut it hot, the steam escapes and the texture becomes gummy. Wait at least 20 minutes for the best texture.
Variations & Substitutions
Once you’ve nailed the basic version, here’s how you can mix it up. I’ve tried all of these with Leo.
Tomato & Mozzarella
Add halved cherry tomatoes and torn mozzarella cheese in the last 10 minutes of baking. It’s like a pizza on bread. Leo’s new favorite.
Sausage & Fennel
Crumble cooked Italian sausage over the dough before the second rise. Add a pinch of fennel seeds. It’s savory and hearty.
Olives & Sun-Dried Tomatoes
Chopped Kalamata olives and rehydrated sun-dried tomatoes add a Mediterranean kick. Great with cozy fall slow-cooker white chicken chili.
Sweet Version
Skip the rosemary and salt. Add cinnamon sugar and chopped walnuts. Drizzle with honey after baking. It’s like a cinnamon roll bread.
Gluten-Free
Use a 1:1 gluten-free flour blend. The dough will be stickier, so use more oil on your hands. It rises differently but still tastes great.
Serving & Storage
How to Serve:
Serve warm or at room temperature. Tear it into pieces rather than slicing for a rustic look. Dip in extra olive oil, balsamic vinegar, or hummus. It’s amazing with butter too.
Storage:
Store in an airtight container at room temperature for up to 3 days. Reheat in a 350°F oven for 5 minutes to crisp up. It freezes well too! Wrap tightly in plastic and foil, then freeze for up to 2 months. Thaw and reheat.
Meal Prep:
Make the dough ahead. After the first rise, punch it down, store in the fridge for up to 24 hours. Bring to room temp, stretch into pan, and bake. This is great for busy weeknights.
Nutrition Information
I’m not a nutritionist, but here’s the breakdown if you’re tracking. Per serving (based on 12 pieces):
– Calories: 280
– Protein: 6g
– Carbs: 35g
– Fiber: 2g
– Sugar: 1g
– Fat: 12g
– Saturated Fat: 2g
– Cholesterol: 0mg
– Sodium: 320mg
It’s relatively healthy compared to other breads because of the olive oil and lack of added sugar. It’s a great source of carbs for energy and has some healthy fats. Just be mindful of portion size if you’re dipping in lots of oil!
Final Thoughts
So that’s my go-to sourdough focaccia! I’ve probably talked your ear off at this point, but when you make a recipe this often, you have a lot to say about it. This bread has saved our weeknight routine. It’s my answer to “what are we doing together?” when I want to create a memory, not just a meal. My kids are happy, my husband’s happy, and I’m happy because I’m not stressed about cooking.
Make it yours! Try different add-ins, swap in your favorite herbs, adjust the garlic. The best recipes are the ones you adapt to your family’s tastes. If you make this, drop a comment and let me know what you think! I love hearing how recipes turn out in your kitchen. And if something doesn’t work, tell me that too—I’m here to help troubleshoot.
Happy cooking! And I hope your kitchen smells half as good as mine does right now.
Frequently Asked Questions
Can I use bread flour instead of all-purpose?
Yes! Bread flour will give a chewier, more elastic crumb. All-purpose is softer and more tender. Both work great. I usually use all-purpose because it’s what I have on hand, but bread flour is a good upgrade if you want that artisan bakery texture.
My dough didn’t rise—what happened?
Usually, this means the starter wasn’t active enough or the water was too hot/cold. Check your starter’s float test. Also, ensure your kitchen is warm (70-75°F is ideal). If it’s cold, put the bowl in a turned-off oven with the light on to create a warm spot.
Can I make this ahead for a party?
Absolutely. Make the dough the night before. After the first rise, punch it down, cover, and refrigerate. Take it out 2 hours before baking to come to room temp, then stretch, dimple, and bake. It’s a lifesaver for entertaining.
Why is my focaccia dense?
This usually happens if the dough didn’t rise long enough or if you deflated it too much when stretching. Don’t press all the air out when transferring to the pan. Be gentle. Also, ensure your starter was bubbly and active.
Can I use dried rosemary?
You can, but it won’t be as flavorful or pretty. Dried rosemary can be bitter and woody. If you must use it, use half the amount and chop it finely. Fresh is always better for focaccia.
How do I reheat leftovers?
Reheat in a 350°F oven for 5-10 minutes to crisp the crust. Microwave will make it soft and chewy, which some people like, but it loses the crispy texture. Toast slices for breakfast!
Can I freeze this bread?
Yes! Wrap tightly in plastic wrap and then foil. Freeze for up to 2 months. Thaw at room temperature and reheat in the oven. It tastes almost as good as fresh.
Pin This Recipe!

Beginner-Friendly Sourdough Focaccia with Rosemary
- Total Time: 45 minutes
- Yield: 12 servings 1x
Description
A forgiving, kid-friendly sourdough focaccia recipe that requires minimal active time. This easy bread features crispy edges, pillowy soft interiors, and is topped with fresh rosemary, coarse salt, and olive oil.
Ingredients
- 400g (3 ¼ cups) all-purpose flour
- 100g (⅓ cup) active sourdough starter
- 300g (1 ¼ cups) warm water (80-85°F)
- 8g (1 ½ teaspoons) fine sea salt
- ½ cup (120ml) extra virgin olive oil, divided
- 2 tablespoons fresh rosemary, chopped
- Coarse sea salt for sprinkling
- 2 cloves garlic, minced (optional)
Instructions
- In a large bowl, whisk warm water and sourdough starter until dissolved. Add flour and salt, mixing until no dry flour remains. Cover and rest for 30 minutes.
- Wet hands with water. Perform a ‘stretch and fold’ by grabbing one side of the dough, stretching it up, and folding it over the center. Repeat for all four sides. Rotate the bowl and repeat. Do this every 30 minutes for 2 hours (4 sets total).
- Cover the bowl and let the dough rise at room temperature for 4-6 hours until puffy and jiggly.
- Generously coat a 9×13 inch baking pan with olive oil. Pour half the oil into the pan, add the dough, and gently press/stretch it into the corners. If it resists, let it rest for 10 minutes. Top with remaining olive oil.
- Press fingertips deep into the dough to create dimples. Sprinkle with chopped rosemary, coarse sea salt, and minced garlic (if using). Cover loosely and let rise for 1-2 hours until puffy.
- Preheat oven to 425°F (220°C). Bake for 25-30 minutes until deep golden brown and the bottom sounds hollow when tapped. Tent with foil if browning too fast.
- Cool in the pan for 10 minutes, then transfer to a wire rack to cool completely before slicing.
Notes
Ensure your sourdough starter is active and bubbly before starting. Wet your hands when handling the dough to prevent sticking. If the dough snaps back when stretching, let it rest for 10-15 minutes to allow gluten to relax. Do not slice immediately after baking; wait at least 20 minutes to prevent a gummy texture.
- Prep Time: 15 minutes
- Cook Time: 30 minutes
- Category: Side Dish
- Cuisine: Italian
Nutrition
- Serving Size: 1 piece (approx. 1/1
- Calories: 280
- Sugar: 1
- Sodium: 320
- Fat: 12
- Saturated Fat: 2
- Carbohydrates: 35
- Fiber: 2
- Protein: 6
Keywords: sourdough focaccia, rosemary bread, easy sourdough recipe, kid-friendly baking, Italian bread, olive oil focaccia, beginner sourdough


