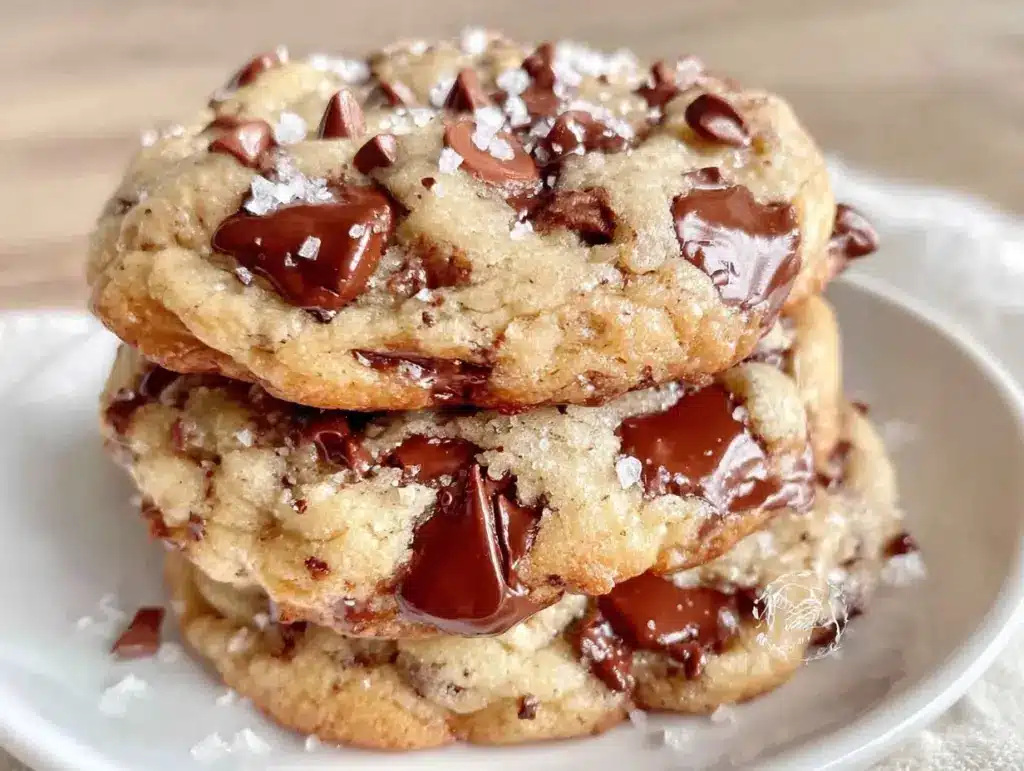
Most people think baking cookies is a weekend leisure activity. You put on some jazz, melt some butter, and feel cozy. I tried that for about two years. Then I realized I was spending my entire Sunday afternoon standing over a hot oven, and my cookies were still stale by Wednesday.
That’s when I switched to batch baking. Specifically, I started making four full batches of brown butter chocolate chip cookies on one Sunday, freezing them, and having fresh cookies for breakfast, lunch, snack, and dinner all week long. It sounds excessive until you taste one. And let me tell you, once you’ve had a cookie that’s warm from the oven, gooey in the center, and nutty from the browned butter, you’ll never go back to a standard chocolate chip cookie again.
I’ve tested this method so many times that I can do it in my sleep. I’ve made mistakes—like over-baking the first batch or forgetting to label my freezer bags. But now? It’s a system. A delicious, chocolatey, perfectly portioned system. This isn’t just about cookies; it’s about having a reliable, high-quality treat ready to go when you need it, without the stress of baking on a Tuesday night.
If you’re someone who likes to plan ahead (and who doesn’t, really?), this is your new best friend. We’re going to cover exactly how to make these brown butter chocolate chip cookies best for batch baking, how to store them so they don’t turn into freezer bricks, and how to reheat them so they taste like they just came out of the oven. Let’s get organized.
Why You’ll Love This Batch-Baking System
There’s a specific kind of magic in pulling a container of cookie dough from the freezer at 3 PM and having warm cookies in your mouth by 3:15 PM. It feels like a win. Here’s why this method has completely changed my week:
- Zero Weeknight Stress — Seriously, if you can use a microwave or toaster oven, you can make dinner here. I keep these baked and frozen, or I keep the dough frozen. Either way, no thinking required after 5 PM.
- Consistent Quality — When you bake one batch, you worry about the last few being overdone. When you bake four batches, you perfect the timing on the first, and the next three are just repeats. I’ve nailed the timing.
- Grab-and-Go Portioning — I freeze them in sets of two. One set for my lunchbox, one for the kids’ after-school snack. It’s like having a bakery in my freezer.
- Cost Effective — Making four batches at home costs me about $12 in ingredients. Buying four dozen premium cookies at the bakery? That’s $40+. The savings add up fast.
- Meal Prep Friendly — These freeze beautifully. Unlike some delicate pastries, these sturdy cookies hold up to the freezer and the reheating process without falling apart.
This is my go-to when I need dessert to just work. No complicated techniques, no weird ingredients, just reliable, delicious food that makes everyone happy. And honestly? It’s easier than making a moist lemon blueberry loaf if you’re being honest with yourself.
Ingredients You’ll Need for Four Batches
Here’s the best part: you probably have most of this already. I’m particular about three ingredients here, and I’ll tell you exactly why. Since we’re making four batches, I’m using larger amounts, but the ratios stay the same.
For the Base (The Brown Butter Part)
Unsalted butter (32 tablespoons / 450g total) — This is the star. You need to brown it. I use high-quality butter like Kerrygold or Plugra. The fat content matters here because browning changes the flavor profile entirely. You’ll need a large saucepan for this.
Granulated sugar (4 cups / 800g) — I use standard white granulated. It helps create those crispy edges. Don’t swap this for brown sugar exclusively, or they’ll be too cakey.
Brown sugar (4 cups / 800g) — Light or dark brown sugar both work. I usually mix them 50/50. This keeps the centers chewy and moist. If you buy pre-mixed, great. If not, make sure it’s not hardened into a rock.
For the Structure
Large eggs (8 large) — Room temperature is best. If you forgot to take them out, just crack them into a bowl of warm water for 5 minutes. Cold eggs can seize the brown butter.
Vanilla extract (4 teaspoons / 20ml) — Use real vanilla, not imitation. It makes a huge difference in the depth of flavor. I keep a big bottle of Nielsen-Massey in my pantry.
All-purpose flour (6 cups / 750g) — Spoon and level method, please. Don’t scoop directly from the bag, or you’ll pack in too much flour and get dry cookies. I use Gold Medal or King Arthur.
Baking soda (4 teaspoons / 12g) — Fresh baking soda is crucial. If your container has been open for more than 6 months, toss it and buy new. Old baking soda = flat cookies.
Salt (2 teaspoons kosher salt) — I use Diamond Crystal. If you use Morton, reduce to 1.5 teaspoons. Salt enhances the chocolate and balances the sweetness.
For the Flavor
Chocolate chips (6 cups / 1kg total) — I use a mix. 3 cups semi-sweet chocolate chips for structure, and 3 cups chopped chocolate bars (like Ghirardelli or Callebaut) for those melty pockets. Chopped chocolate distributes better than chips.
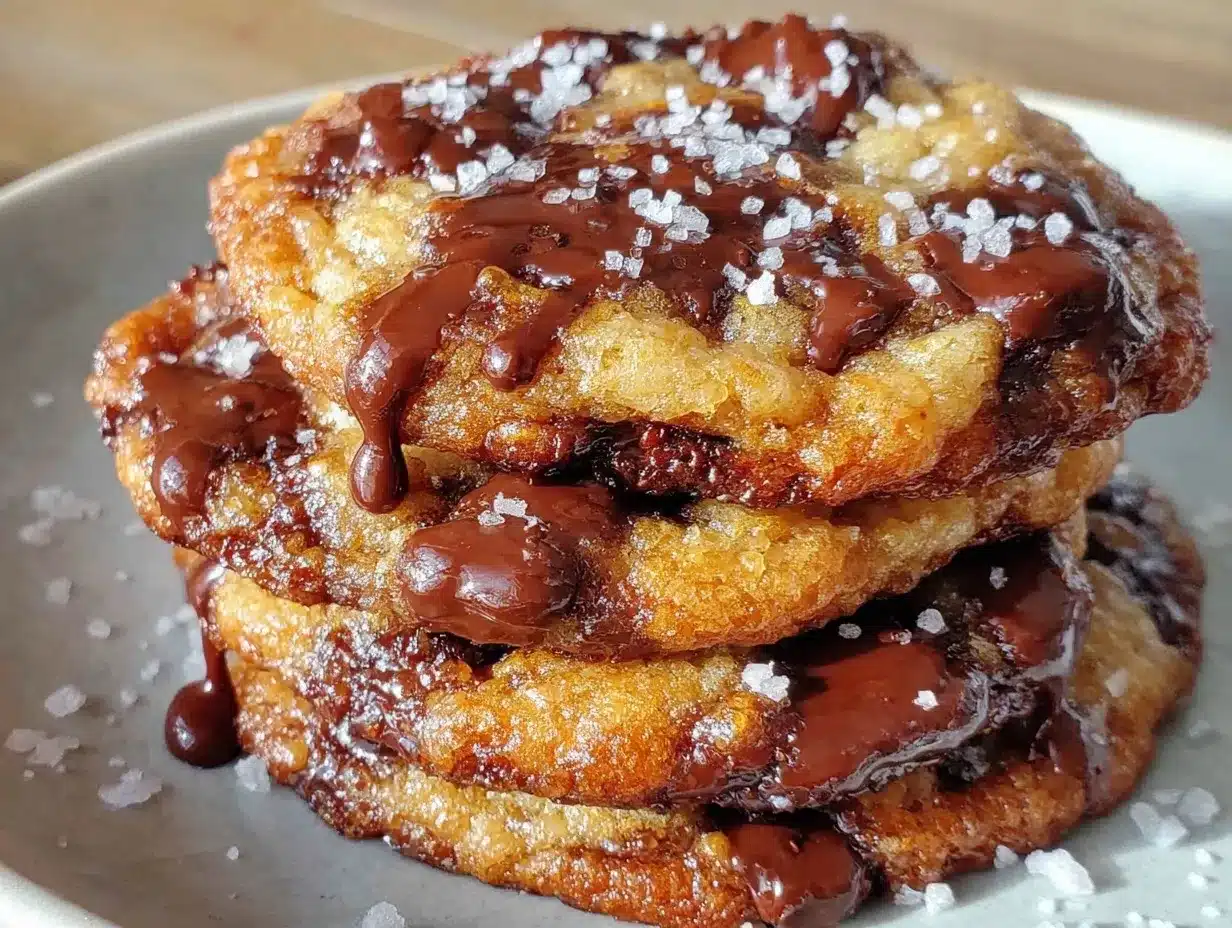
Flaky sea salt (for finishing) — Maldon is my go-to. Sprinkling this on top right after baking elevates everything. It’s the difference between homemade and bakery-quality.
Equipment Needed
You don’t need fancy equipment for this. Here’s what I actually use to keep things efficient.
Large saucepan (3-quart or larger) — I use a stainless steel saucepan. It’s heavy enough to distribute heat evenly so the butter doesn’t burn in spots. My old non-stick pan works, but stainless is easier to clean.
Stand mixer or Hand mixer — I have a KitchenAid, but a hand mixer works fine. You need to cream the butter and sugars thoroughly. Doing this by hand takes arm muscles I don’t have on a Sunday.
Large mixing bowls — I use three large bowls. One for dry ingredients, one for wet, and one for mixing everything together. Having separate bowls speeds up the process.
Sheet pans (6-8 pans) — You’ll be baking multiple batches. Make sure you have enough pans. If you don’t, you can bake one batch while the next dough is mixing, but it’s slower.
Wire cooling racks — Essential. You need to cool the cookies completely before freezing. If you freeze them warm, you’ll get condensation and ice crystals. Trust me on this.
Freezer-safe bags or containers — I use gallon-sized Ziploc bags. I lay them flat in the freezer to save space. You can also use airtight containers, but bags are easier to stack.
Cooling rack or parchment paper — For cooling the baked cookies. I keep a few sheets of parchment on hand to line my cooling rack so cookies don’t stick.
How to Make It: Step-by-Step
Alright, let’s make this! I’m walking you through exactly how I do it, including the little tricks I’ve picked up over four years of batch baking.
Step 1: Brown the Butter (10 minutes per batch)
Start by melting your butter in a large saucepan over medium heat. Stir constantly. At first, it will bubble and foam. Then, the foam will subside, and you’ll see little brown specks at the bottom. That’s the milk solids browning. The smell will change from milky to nutty and toasty. This is the most critical step. If you smell burning, it’s too late. Pull it off the heat just as it smells like hazelnuts. Pour it into a heatproof bowl to stop the cooking. Let it cool for 10 minutes.
Step 2: Mix the Wet Ingredients (5 minutes)
In your stand mixer, combine the cooled brown butter, granulated sugar, and brown sugar. Beat on medium-high for 2-3 minutes until the mixture looks grainy and slightly lighter in color. This incorporates air. Add the eggs one at a time, beating well after each. Mix in the vanilla extract.
Step 3: Combine Dry and Wet (5 minutes)
In a separate large bowl, whisk together the flour, baking soda, and salt. Gradually add the dry ingredients to the wet mixture on low speed. Mix just until combined. Do not overmix! Overmixing develops gluten, and we want tender cookies, not bread.
Step 4: Add the Chocolate (3 minutes)
Stir in the chocolate chips and chopped chocolate by hand with a spatula. Make sure it’s evenly distributed. I usually divide the dough into four portions now, either into separate bowls or onto parchment paper, ready for baking.
Step 5: Bake the Cookies (12-15 minutes per batch)
Preheat your oven to 350°F (175°C). Line your sheet pans with parchment paper. Scoop dough balls (about 2 tablespoons each) onto the pans, spacing them 2 inches apart. Bake for 10-12 minutes. The edges should be golden brown, but the centers should still look slightly underdone. They will continue to cook on the hot pan. This is the key to chewy centers.
Step 6: Cool Completely (30 minutes)
Let the cookies sit on the pan for 5 minutes, then transfer them to a wire rack to cool completely. This step is non-negotiable for freezing. Warm cookies = soggy frozen cookies.
Step 7: Package for Freezing
Once completely cool, place cookies in freezer bags. I put two cookies per bag, with a small piece of parchment between them so they don’t stick. Label the bag with the date and “Brown Butter Chocolate Chip Cookies.” Squeeze out as much air as possible.
Expert Tips & Tricks
Here’s everything I’ve learned from making this dozens of times. These tips will save you from my mistakes.
Don’t Skip the Cooling
I know it’s tempting. But if you freeze warm cookies, the moisture turns to ice crystals. When you thaw them, they get soggy. Cool them on a rack for at least 30 minutes. I usually let them cool while I start the next batch.
Portion Control
Use a small cookie scoop (1.5 tablespoons). It ensures uniform size, which means even baking. If you scoop by hand, some cookies will be huge and some tiny, and you’ll have to bake them for different times.
Double the Salt
With four batches, you’re making a lot of cookies. Don’t be shy with the salt. The salt balances the sweetness and enhances the chocolate flavor. If you under-salt, they’ll taste cloying.
Freeze Dough Instead?
You can freeze the dough balls on a baking sheet, then transfer to a bag. This lets you bake fresh cookies on demand. However, I find baking the cookies first is more efficient for my schedule. I can just grab a bag and heat it up. Both methods work, but baked-and-frozen is faster for reheating.
Reheating Matters
Don’t just eat them cold from the freezer. They’re hard as rocks. Reheat them for 15-20 seconds in the microwave. The center will be gooey and warm.
Variations & Substitutions
Once you’ve nailed the basic version, here’s how you can mix it up. I’ve tried all of these.
White Chocolate Macadamia
Swap the chocolate chips for white chocolate chips and add 2 cups of chopped macadamia nuts. It’s rich and tropical. My kids love this variation.
Peanut Butter Chip
Use peanut butter chips instead of semi-sweet. The combination of brown butter and peanut butter is incredible. I add a drizzle of peanut butter on top after baking for extra flavor.
Gluten-Free
Use a 1-to-1 gluten-free flour blend. I use Bob’s Red Mill. The texture is slightly different, but still delicious. Make sure your baking soda is GF certified.
Vegan
Use vegan butter (like Miyoko’s) and flax eggs. The brown butter flavor won’t be exactly the same, but it’s still tasty. I’ve made this for vegan friends, and they loved it.
Dark Chocolate Intense
Use 100% dark chocolate chunks. It’s bitter and rich. I like this version when I want something less sweet. Pair it with a cup of pumpkin spice hot chocolate for a cozy treat.
Serving & Storage
I usually serve these straight from the freezer bag, reheated. But here are other ways I’ve enjoyed them:
How to Reheat
Microwave for 15-20 seconds. The center should be soft. If you have a toaster oven, heat at 350°F for 5 minutes. It gets crispy edges, which I love.
Storage
Freezer: Store in airtight bags for up to 3 months. They stay fresh the whole time. I rotate my freezer stock so I always have fresh cookies.
Counter: If you’re eating them within a few days, store in an airtight container at room temperature. Add a slice of bread to the container to keep them soft.
Thawing
You don’t need to thaw them. Just reheat from frozen. Thawing makes them soggy.
Nutrition Information
I’m not a nutritionist, but here’s the breakdown if you’re tracking. Per cookie (based on 48 cookies per batch, 4 batches total):
Calories: 180
Protein: 2g
Carbs: 24g
Fiber: 1g
Sugar: 16g
Fat: 9g
Saturated Fat: 5g
Cholesterol: 20mg
Sodium: 150mg
Look, this is a cookie. It’s sugar and butter and chocolate. It’s not a health food. But it’s better than store-bought, and you know exactly what’s in it. When I want to make it lighter, I reduce the sugar by 10% and add more chocolate chips. But usually? I just eat one or two and enjoy it.
Final Thoughts
So that’s my system for brown butter chocolate chip cookies best for batch baking. I’ve probably talked your ear off at this point, but when you make a recipe this often, you have a lot to say about it.
This has saved my weeknights more times than I can count. It’s my answer to “what’s for dessert” when I’m tired, don’t want takeout, and still want something that tastes really good. My kids are happy, my husband’s happy, and I’m happy because I’m not stressed about baking.
Make it yours! Try different chocolates, adjust the salt, or add nuts. The best recipes are the ones you adapt to your family’s tastes. If you make this, drop a comment and let me know what you think! I love hearing how recipes turn out in your kitchen.
Happy baking! And I hope your kitchen smells half as good as mine does right now.
Frequently Asked Questions
Can I freeze the cookie dough instead of the baked cookies?
Yes! You can scoop the dough into balls, freeze them on a baking sheet until solid, then transfer to a bag. Bake from frozen, adding 1-2 minutes to the baking time. This gives you fresh-baked cookies on demand, but it takes more time to bake individually.
Why did my brown butter burn?
Brown butter goes from perfect to burnt very quickly. Keep a close eye on it, especially in the last minute. If it smells like burning, discard it. Burnt brown butter tastes bitter and ruins the cookies. Use a light-colored pan so you can see the color change.
Can I use salted butter?
You can, but reduce the added salt in the recipe by half. Different butter brands have different salt levels, so start with less salt and adjust to taste.
How long do these cookies last in the freezer?
Up to 3 months. After that, they might develop freezer burn or lose flavor. I usually use them within 6-8 weeks.
Can I double the recipe again?
Absolutely! I make four batches because I eat them that fast. If you want to make eight, just double the equipment and time. Make sure you have enough freezer space.
Do I need to let the brown butter cool completely?
It needs to cool for at least 10 minutes. If it’s too hot, it will melt the chocolate chips when you add them, and it can affect the texture of the cookies. Lukewarm is perfect.
Can I use milk chocolate chips?
Yes, but they are sweeter. I recommend using semi-sweet or dark chocolate to balance the sweetness of the brown butter and brown sugar. Milk chocolate might make them too sweet.
Pin This Recipe!
Brown Butter Chocolate Chip Cookies: 4 Freezer-Friendly Batches
- Total Time: 45 minutes per batch
- Yield: 48 cookies per batch (192 total) 1x
Description
A batch-baking system for making four full batches of brown butter chocolate chip cookies, freezing them, and reheating for fresh, chewy cookies all week long.
Ingredients
- 32 tablespoons (450g) unsalted butter
- 4 cups (800g) granulated sugar
- 4 cups (800g) brown sugar (light or dark)
- 8 large eggs, room temperature
- 4 teaspoons (20ml) vanilla extract
- 6 cups (750g) all-purpose flour
- 4 teaspoons (12g) baking soda
- 2 teaspoons kosher salt
- 6 cups (1kg) chocolate chips (3 cups semi-sweet, 3 cups chopped chocolate bars)
- Flaky sea salt (for finishing)
Instructions
- Brown the butter: Melt butter in a large saucepan over medium heat, stirring constantly until it smells nutty and has brown specks. Pour into a heatproof bowl and cool for 10 minutes.
- Mix wet ingredients: In a stand mixer, beat cooled brown butter, granulated sugar, and brown sugar on medium-high for 2-3 minutes until grainy and lighter. Add eggs one at a time, then mix in vanilla.
- Combine dry and wet: Whisk flour, baking soda, and salt in a separate bowl. Gradually add to wet mixture on low speed, mixing just until combined.
- Add chocolate: Stir in chocolate chips and chopped chocolate by hand. Divide dough into four portions.
- Bake: Preheat oven to 350°F (175°C). Scoop 2-tablespoon dough balls onto parchment-lined sheet pans, spacing 2 inches apart. Bake for 10-12 minutes until edges are golden but centers look slightly underdone.
- Cool: Let cookies sit on pan for 5 minutes, then transfer to wire racks to cool completely.
- Package for freezing: Place cooled cookies in freezer bags with parchment between them. Label and squeeze out air.
Notes
Ensure brown butter is cooled for at least 10 minutes before mixing to prevent melting chocolate. Cool cookies completely before freezing to avoid ice crystals. Reheat frozen cookies in microwave for 15-20 seconds for a gooey center. Can substitute with gluten-free flour blend or vegan butter for dietary restrictions.
- Prep Time: 30 minutes
- Cook Time: 12-15 minutes per batch
- Category: Dessert
- Cuisine: American
Nutrition
- Serving Size: 1 cookie
- Calories: 180
- Sugar: 16
- Sodium: 150
- Fat: 9
- Saturated Fat: 5
- Carbohydrates: 24
- Fiber: 1
- Protein: 2
Keywords: brown butter chocolate chip cookies, batch baking, freezer friendly cookies, cookie dough, meal prep, dessert, baking


