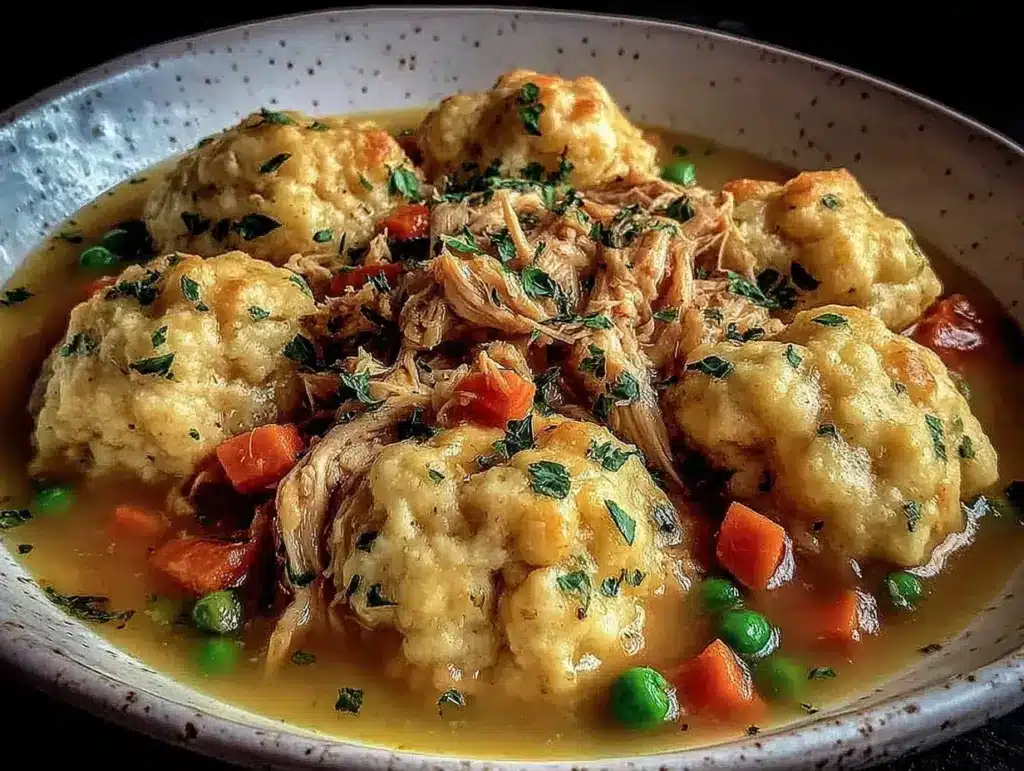
I learned to cook chicken and dumplings when I was broke, tired, and living in a studio apartment with a hot plate that barely worked. It wasn’t some romanticized memory of grandma’s kitchen. It was 11 PM on a Tuesday, I had exactly $12 in my bank account, and I needed dinner that would fill my stomach and my soul without breaking the rest of my budget for the week. So I dug into the pantry, found a half-pound of chicken thighs, a bag of carrots about to go soft, and a can of biscuits I was too lazy to make from scratch. That night, I threw together what I thought would be a sad, watery mess. Instead, I got the creamiest, most comforting bowl of comfort food I’d ever tasted. It cost me less than $4. And it tasted like I’d spent hours simmering a stock pot in a farmhouse kitchen.
That meal started a habit. Whenever rent was due or the month was running long, I made my old-fashioned chicken and dumplings. It’s the ultimate budget dinner hack. It stretches cheap ingredients into something that feels luxurious. It uses up veggies that are past their prime. It turns a single serving into a meal so satisfying that you’ll forget you’re eating alone in your pajamas. This recipe is specifically designed for the solo cook who wants big flavor without big costs. It’s practical, it’s forgiving, and it’s cheap. Like, “buy one thing and use it three times” cheap.
Over the years, I’ve refined this method. I’ve swapped out expensive cuts for cheaper ones. I’ve figured out how to make dumplings that don’t turn into doughy bricks. I’ve learned how to get that rich, golden broth without buying fancy chicken stock. This isn’t a fancy restaurant recipe. It’s a real-deal, wallet-friendly, one-person comfort food classic. And honestly? It’s better than anything I’ve ever ordered out.
Why You’ll Love This Recipe
There are a lot of reasons to keep this old-fashioned chicken and dumplings recipe in your rotation, but let’s be real: it’s about the value. Here’s why this specific version works so well for a solo budget:
- Pennies Per Serving — Seriously, this costs about $3.50 to make for one person. That’s less than a dollar store snack. I use chicken thighs (cheaper than breasts), cheap vegetables, and simple pantry staples. The cost adds up to almost nothing.
- Leftover Goldmine — One pot makes enough for two hearty meals. I eat half now and save the rest for lunch the next day. The flavors actually get better after sitting in the fridge overnight. It’s like getting two dinners for the price of one.
- Pantry Staples Only — You probably have 90% of this already. Flour, baking powder, salt, butter, carrots, celery, onions. No weird ingredients you need to drive to three stores to find. It’s the ultimate “I need to eat but I don’t want to shop” meal.
- Uses Up “Ugly” Veggies — Those limp carrots? The onion starting to sprout? The celery that’s seen better days? This recipe is their rescue mission. The long simmer softens everything, so texture doesn’t matter. Waste nothing, save money.
- One-Pot Wonder — Less cleanup means less stress. I hate doing dishes after a long day. This cooks in a single pot. Stir, simmer, eat, rinse. Done. It’s efficient cooking for efficient people.
This is my go-to when I need dinner to just work. No fancy techniques, no expensive cuts of meat, just reliable, delicious food that makes me feel taken care of. It’s cheap, it’s easy, and it tastes like home.
Ingredients You’ll Need
Here’s the best part: this ingredient list is short, sweet, and incredibly budget-friendly. I’m particular about a few things, but mostly, this is about using what you have. This looks like a basic list because it is. That’s the point.
For the Broth and Chicken
Chicken thighs (1.5 lbs / 680g) — Bone-in, skin-on thighs are cheaper than breasts and stay juicy. I buy the family pack, cook what I need, and freeze the rest. If you’re on a super tight budget, look for sales. If thighs are too pricey, a whole chicken cut up works, but thighs are the budget king here.
Chicken broth (4 cups / 960ml) — Use low-sodium so you can control the salt. I buy the cheapest carton available. The flavor comes from the chicken, not the broth. If you’re super frugal, use water and a bouillon cube, but the carton is easier and consistent.
Carrots (3 medium, chopped / about 300g) — Don’t worry about perfect cuts. Roughly chop them. They’ll soften and melt into the broth. Buy the bag, not the pre-cut stuff. Pre-cut veggies are a rip-off.
CELERY (3 stalks, chopped / about 150g) — Classic mirepoix base. Chop it up, including the leaves if they’re not too wilted. They add great flavor. Again, buy whole stalks, not the pre-chopped bag.
Yellow onion (1 medium, diced / about 150g) — Sweet onions work too, but yellow gives better depth. White onions are too sharp for this. Dicing it small helps it break down into the sauce.
Garlic (4 cloves, minced / about 2 tablespoons) — Fresh only. No jarred garlic in this recipe. It tastes metallic and ruins the comfort vibe. Mincing takes two minutes.
Dried thyme (1 teaspoon) — Or use dried sage if you have it. Thyme is cheap and pairs perfectly with chicken. Fresh herbs wilt too fast and cost more. Dried is better for budget cooking.
Bay leaf (1) — Cheap flavor booster. Toss it in and forget it. Removes before eating.
Butter (2 tablespoons) — For sautéing. Salted or unsalted doesn’t matter much since we control the salt later. I use whatever is on sale.
Flour (2 tablespoons) — To thicken the broth into a gravy-like consistency. All-purpose is fine. Don’t overthink it.
For the Dumplings
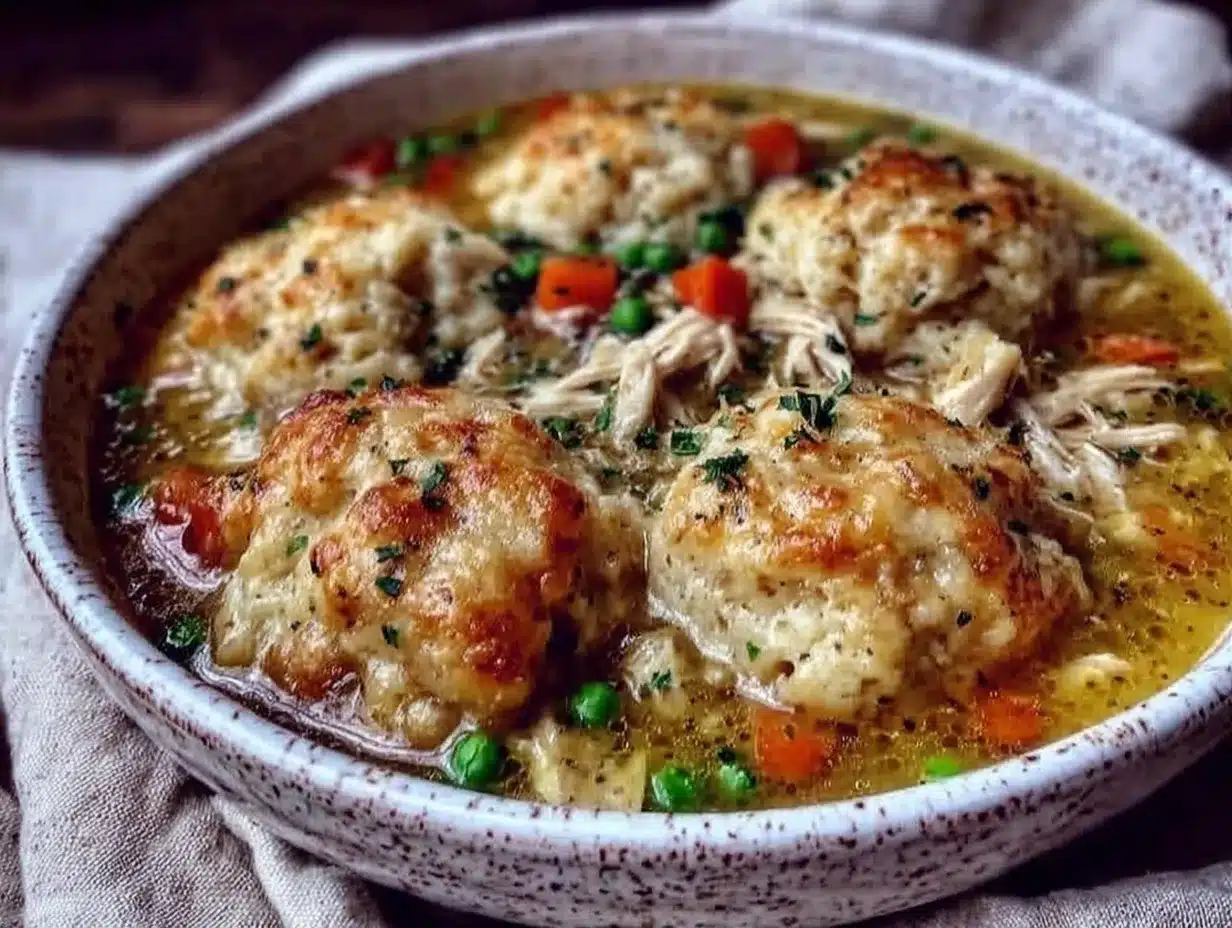
Self-rising flour (1.5 cups / 180g) — This is the secret weapon. It has baking powder and salt already mixed in. No need to buy separate leavening agents. If you only have all-purpose, add 2 teaspoons baking powder and ½ teaspoon salt to the flour.
Heavy cream or whole milk (½ cup / 120ml) — Heavy cream makes richer dumplings, but milk works fine if you’re watching costs. I use milk more often. The difference is minimal.
Butter, melted (2 tablespoons) — Mixed into the dumpling dough. Adds flavor and tenderness.
Salt and pepper — To taste. Always season your dumpling dough. It’s bland otherwise.
Optional: Frozen peas (½ cup) — Throw them in at the end for color and extra veggies. They’re cheap in the frozen aisle and last forever. Great way to stretch the meal further.
Shopping Tips for Budget Cooks
- Buy chicken thighs in bulk — They freeze well. Cook them all at once if you want to save time later.
- Choose store-brand broth — It’s identical to name brands in taste for cooking. Save your money for the good cheese later.
- Use dried herbs — They last months in the cabinet and cost pennies compared to fresh.
- Check the “reduced to clear” section — Veggies that are about to go bad are often 50% off. Perfect for this recipe.
Equipment Needed
You don’t need fancy equipment for this. Here’s what I actually use in my tiny kitchen:
Large Dutch oven or heavy-bottomed pot — I use a 6-quart pot. It needs to fit the chicken, veggies, and dumplings comfortably. My cheap enamel pot from the thrift store works fine. Just make sure it has a lid.
Wooden spoon — For stirring. Silicone works too. Don’t use metal if your pot is non-stick.
Knife and cutting board — For chopping veggies. Dull knives are dangerous and frustrating. Sharpen yours.
Measuring cups and spoons — Pretty standard stuff. Dollar store versions work fine. Accuracy matters more for the dumplings than the broth.
Slotted spoon — To remove the chicken from the broth. Or just use tongs. Whatever you have.
Fork — For shredding the chicken. Two forks work great.
Spatula — For stirring the dumplings gently. Don’t stir too much or they’ll fall apart.
Optional but nice:
– Cheese grater — Not needed for this, but useful if you want to add cheese later.
– Meat thermometer — Good for checking chicken doneness, but thighs are forgiving.
Tool Tips:
– Don’t have a Dutch oven? Any big pot works. Just make sure it’s heavy enough to simmer without burning.
How to Make It: Step-by-Step
Alright, let’s make this! I’m walking you through exactly how I do it, including the little tricks I’ve picked up to keep costs down and flavor up.
Step 1: Prep Your Ingredients (5 minutes)
Before you start cooking, chop your onion, carrots, and celery. Mince your garlic. Measure out your flour and baking powder for the dumplings. I know it seems fussy, but it makes the actual cooking way less stressful. Once the broth is simmering, things move fast. Have everything ready.
Step 2: Sauté the Veggies (5 minutes)
Melt butter in your large pot over medium heat. Add the diced onion, carrots, and celery. Cook for 3-4 minutes, stirring occasionally, until the onions are translucent and soft. Don’t brown them too much. You want them sweet, not crispy. Add the garlic and dried thyme in the last minute. Stir constantly so the garlic doesn’t burn. It should smell amazing.
Step 3: Simmer the Chicken (20 minutes)
Add the chicken thighs to the pot. Pour in the chicken broth and toss in the bay leaf. Bring it to a boil, then reduce heat to low. Cover and simmer for 15-20 minutes, or until the chicken is cooked through (165°F internal temp). The chicken will release flavor into the broth, making it rich without extra cost. If you’re using bone-in thighs, leave them whole. If you’re using boneless, you can cook them for less time, but bone-in is cheaper and tastier.
Step 4: Shred the Chicken (5 minutes)
Remove the chicken from the pot with a slotted spoon. Let it cool for 5 minutes. Then, use two forks to shred the meat. Discard the skin and bones (save the bones if you want to make stock later, but for now, toss them). Chop the shredded chicken into bite-sized pieces. This step is crucial for texture. You want chunks, not mush.
Step 5: Thicken the Broth (3 minutes)
While the chicken cools, stir the 2 tablespoons of flour into the simmering broth. Whisk it in well to avoid lumps. Let it simmer for 2-3 minutes. The broth will thicken into a light gravy. This is what gives the dumplings something to cling to. If it’s too thin, add a teaspoon more flour. If it’s too thick, add a splash of water or more broth.
Step 6: Make the Dumplings (5 minutes)
In a small bowl, mix the self-rising flour, melted butter, and cream/milk. Stir until a soft dough forms. It will be sticky. Don’t overmix. Wet your hands slightly to handle the dough. Drop spoonfuls of dough into the simmering broth. Don’t crowd the pot. Do 4-6 dumplings at a time. They need space to expand.
Step 7: Cook the Dumplings (15 minutes)
Cover the pot and simmer for 15 minutes. Do NOT lift the lid. This is the most important rule. Steam cooks the dumplings. If you peek, they’ll fall apart. After 15 minutes, check one. It should be cooked through (no raw dough in the center). If they’re still doughy, cook for 2-3 more minutes.
Step 8: Combine and Serve
Stir the shredded chicken back into the pot. Add frozen peas if using. Simmer for 1 more minute to heat everything through. Taste and add salt and pepper as needed. The broth should be seasoned well. Serve hot, straight from the pot. It’s rustic, messy, and perfect.
Total Time: About 45 minutes (15 minutes active, 30 minutes mostly hands-off)
Expert Tips & Tricks
Here’s everything I’ve learned from making this dozens of times on a budget. These tips will save you from my mistakes.
The Game-Changers
Don’t Skimp on Salt in the Broth — Your broth should taste seasoned before you add the dumplings. Dumplings are bland, so the broth needs to carry the flavor. I use about 1 teaspoon salt per quart of broth. Adjust to taste.
Use Self-Rising Flour — This is non-negotiable for easy dumplings. It has the leavening already mixed in. If you use all-purpose, you MUST add baking powder and salt. Otherwise, they’ll be dense bricks.
Don’t Over-Stir — Dumplings are fragile. Once they’re in the pot, let them be. Stirring breaks them. Gently nudge them if they stick to the bottom, but leave them alone otherwise.
Keep the Lid On — I can’t stress this enough. The steam is what cooks the dumplings. Lifting the lid releases heat and moisture. They’ll turn into gummy dough. Trust the process.
Common Mistakes (and how to avoid them)
Mistake: Dumplings are doughy in the middle
Fix: They needed more time. Or the heat was too high. Simmer, don’t boil. Check after 15 minutes.
Mistake: Broth is too thin
Fix: You didn’t let the flour simmer long enough. Or you added too much liquid. Simmer uncovered for 5 more minutes to reduce.
Mistake: Chicken is dry
Fix: You cooked it too long. Thighs are forgiving, but boneless breasts dry out fast. Stick to thighs for budget and juiciness.
Pro Tricks I’ve Learned
For Extra Flavor — Add a splash of soy sauce to the broth. It adds umami depth without tasting like soy. It’s a secret restaurant trick.
For Better Texture — Shred the chicken into small pieces. Large chunks can be tough to chew with the dumplings. Small pieces mix better.
Make-Ahead Strategy — Make the broth and chicken ahead. Store in the fridge. Make the dumplings fresh when you’re ready to eat. They’re best warm.
Variations & Substitutions
Once you’ve nailed the basic version, here’s how you can mix it up. I’ve tried all of these on a budget.
Budget Swaps
Use Rotisserie Chicken — If you find a cheap rotisserie chicken, use that instead of raw thighs. Shred it and add it at the end. Saves cooking time.
Vegetable Broth — If you’re vegetarian, use vegetable broth and skip the chicken. Add extra veggies like potatoes or corn. It’s still hearty.
Milk Instead of Cream — I use milk 90% of the time. It’s cheaper and works just fine. The dumplings are still fluffy.
Dietary Modifications
Gluten-Free — Use gluten-free self-rising flour. Or mix 1 cup GF flour with 1 tsp baking powder and ½ tsp salt. It works well.
Dairy-Free — Use olive oil instead of butter. Use water instead of milk/cream. The dumplings will be slightly denser, but still good.
Flavor Variations
Creamy Version — Stir in ½ cup heavy cream at the end. Richer, but costs more.
Herb-Forward — Add extra thyme, sage, or parsley. Fresh herbs are expensive, but dried are cheap. Use more dried herbs.
Spicy Version — Add a pinch of cayenne or red pepper flakes to the broth. It’s a nice kick.
Serving & Storage
How to Serve
I usually serve this straight from the pot. It’s rustic and keeps warm. But here are other ways I’ve enjoyed it:
- With Crusty Bread — Dip the bread in the broth. Cheap and satisfying.
- With a Simple Salad — Green salad with vinegar and oil. Light contrast to the heavy dumplings.
- With Pickles — A few pickles on the side cut the richness. Classic combo.
Storage Instructions
Refrigerator: Store in an airtight container for up to 4 days. The dumplings will soften in the fridge. This is normal. They’ll absorb the broth.
Reheating: Best method: Add a splash of water or broth to a skillet, add leftovers, and heat gently over low heat. Stir until warmed through. The dumplings will rehydrate. Microwave works too, but add a splash of liquid first or they’ll dry out.
Freezing: Honestly, this doesn’t freeze well. The dumplings turn to mush when thawed. Make it fresh or store in the fridge for up to 4 days.
Meal Prep: Make the broth and chicken on Sunday. Store in the fridge. Make dumplings fresh each night. Takes 10 minutes and tastes way better than reheated dumplings.
Nutrition Information
I’m not a nutritionist, but here’s the breakdown if you’re tracking. This is comfort food, so it’s not diet food.
Per Serving (based on 2 servings):
– Calories: 450
– Protein: 30g
– Carbs: 40g
– Fiber: 3g
– Sugar: 4g
– Fat: 18g
– Saturated Fat: 8g
– Cholesterol: 85mg
– Sodium: 650mg
– Calcium: 80mg
What’s Good:
– Decent protein from chicken
– Fiber from veggies
– Can add more veggies to boost nutrition
What to Know:
– Higher in sodium from broth
– Contains dairy and gluten
– Moderate calories from dumplings
My Take:
Look, this is comfort food. It’s not a salad. But it’s way better than takeout, costs less, and I know exactly what’s in it. When I want to make it lighter, I use less butter and more veggies. But usually? I just eat a reasonable portion and enjoy it.
Final Thoughts
So that’s my old-fashioned chicken and dumplings! I’ve probably talked your ear off at this point, but when you make a recipe this often, you have a lot to say about it.
This has saved weeknight dinners more times than I can count. It’s my answer to “what’s for dinner” when I’m tired, broke, and don’t want takeout. It’s cheap, it’s easy, and it tastes like home. My wallet is happy, my stomach is happy, and I’m happy because I’m not stressed about cooking.
Make it yours! Try different veggies, swap the herbs, adjust the spices. The best recipes are the ones you adapt to your tastes. If you make this, drop a comment and let me know what you think! I love hearing how recipes turn out in your kitchen. And if something doesn’t work, tell me that too—I’m here to help troubleshoot.
Happy cooking! And I hope your kitchen smells half as good as mine does right now.
Frequently Asked Questions
Can I use chicken breasts instead of thighs?
You can, but thighs are cheaper and stay juicier. Breasts dry out fast in soup. If you use breasts, cook them for less time (10-12 minutes) and shred immediately. Thighs are the budget king for a reason.
Why did my dumplings fall apart?
You probably stirred them too much. Dumplings are fragile. Drop them in the pot and leave them alone. Also, make sure your dough isn’t too wet. It should be sticky but hold together.
Can I make this ahead for a dinner party?
Sort of. Make the broth and chicken up to 2 days ahead. Make the dumplings fresh right before serving. They’re best warm. I do this all the time for parties.
Why did my broth turn out watery?
You didn’t simmer the flour long enough. Or you added too much liquid. Let the broth simmer with the flour for 3-4 minutes to thicken. If it’s already watery, simmer uncovered for 5 more minutes.
Can I use jarred garlic?
You can, but fresh tastes so much better. Jarred garlic has a metallic taste that shows up in broth. If you must use it, use half the amount. But honestly, mincing 4 cloves takes 2 minutes.
How do I reheat leftovers without it getting dry?
Add a splash of water or broth to a skillet, add leftovers, and heat gently over low heat. Stir frequently. The extra liquid brings back the creamy texture. Microwave works too, but add liquid first.
Can I double this recipe?
Absolutely! Double everything and use your biggest pot. The cooking times stay the same. Just make sure your pot is big enough for the dumplings to expand.
Pin This Recipe!
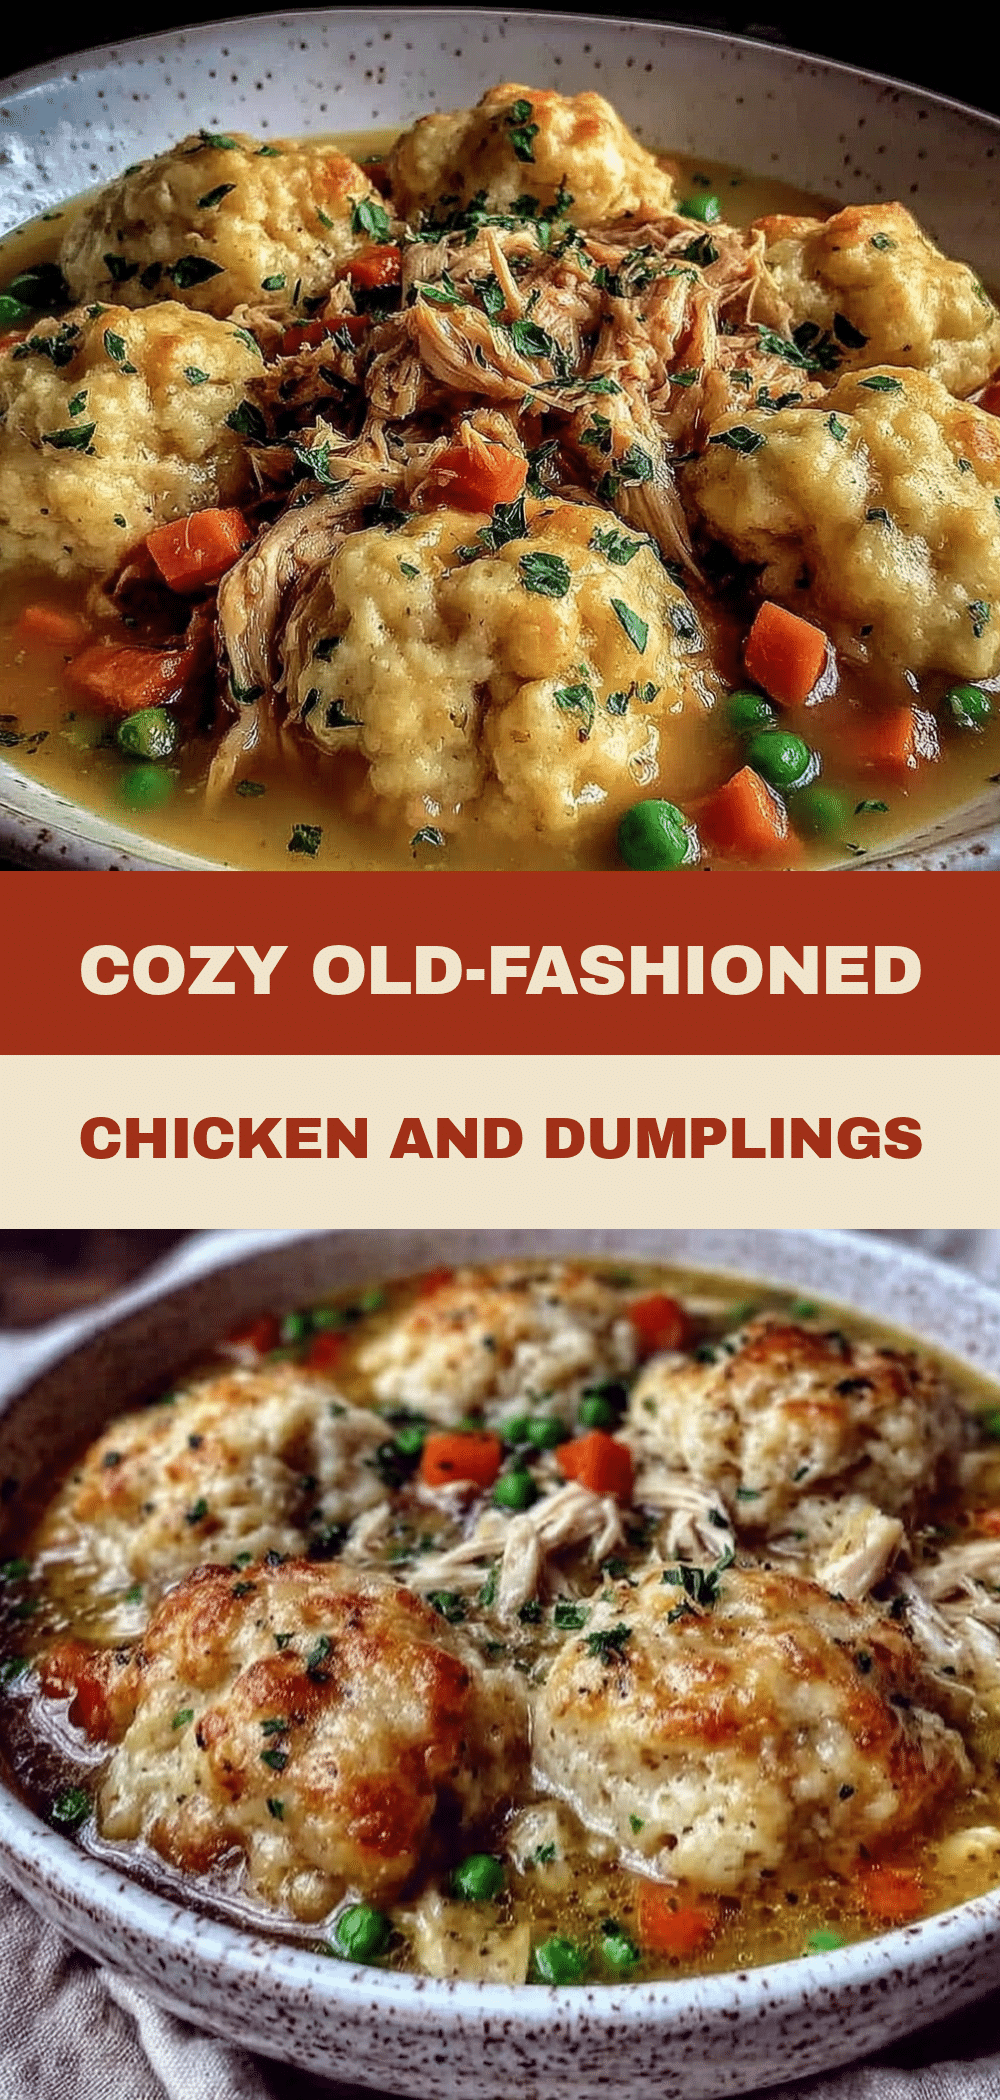
Old-Fashioned Chicken and Dumplings: Cheap One-Serve
- Total Time: 45 minutes
- Yield: 2 servings 1x
Description
A budget-friendly, one-pot chicken and dumplings recipe designed for solo cooks. It uses inexpensive ingredients like chicken thighs and pantry staples to create a comforting, creamy meal that costs less than $4 per serving.
Ingredients
- 1.5 lbs chicken thighs (bone-in, skin-on)
- 4 cups chicken broth (low-sodium)
- 3 medium carrots, roughly chopped
- 3 stalks celery, chopped
- 1 medium yellow onion, diced
- 4 cloves garlic, minced
- 1 teaspoon dried thyme
- 1 bay leaf
- 2 tablespoons butter
- 2 tablespoons all-purpose flour
- 1.5 cups self-rising flour
- ½ cup heavy cream or whole milk
- 2 tablespoons butter, melted
- Salt and pepper to taste
- ½ cup frozen peas (optional)
Instructions
- Prep ingredients by chopping onion, carrots, and celery, mincing garlic, and measuring flour.
- Melt 2 tablespoons butter in a large Dutch oven or heavy-bottomed pot over medium heat.
- Add diced onion, carrots, and celery; sauté for 3-4 minutes until soft and translucent.
- Add garlic and dried thyme; stir for 1 minute until fragrant.
- Add chicken thighs, chicken broth, and bay leaf. Bring to a boil, then reduce heat to low.
- Cover and simmer for 15-20 minutes until chicken reaches 165°F internal temperature.
- Remove chicken from pot; let cool for 5 minutes, then shred meat using two forks, discarding skin and bones.
- Stir 2 tablespoons flour into the simmering broth to thicken; simmer for 2-3 minutes until gravy-like.
- In a bowl, mix self-rising flour, melted butter, and cream/milk to form a sticky dough.
- Drop spoonfuls of dough into the simmering broth (4-6 at a time); do not crowd.
- Cover and simmer dumplings for 15 minutes without lifting the lid.
- Check dumplings for doneness; cook 2-3 more minutes if doughy.
- Stir shredded chicken and optional peas back into the pot; simmer 1 minute to heat through.
- Season with salt and pepper to taste and serve hot.
Notes
Do not lift the lid while dumplings are cooking, as steam is required for them to rise. If using all-purpose flour instead of self-rising, add 2 teaspoons baking powder and ½ teaspoon salt to the flour. The recipe freezes poorly due to the dumplings; store leftovers in the fridge for up to 4 days.
- Prep Time: 15 minutes
- Cook Time: 30 minutes
- Category: Main Course
- Cuisine: American
Nutrition
- Serving Size: 1 bowl
- Calories: 450
- Sugar: 4
- Sodium: 650
- Fat: 18
- Saturated Fat: 8
- Carbohydrates: 40
- Fiber: 3
- Protein: 30
Keywords: chicken and dumplings, budget recipes, one pot meals, cheap dinner, solo cooking, comfort food, easy dinner, weeknight meals


