Last year, I was standing in my kitchen at 4:30 PM on Thanksgiving, staring at a spreadsheet on my laptop that had more color-coded tabs than a child’s crayon box. The turkey was in the oven. The gravy was simmering. The mashed potatoes were about to turn into glue. And then I remembered: I hadn’t prepped the vegetables. Not even a little.
My brain went blank. I had thirty minutes before everyone sat down to eat, and I was supposed to make something that looked festive, tasted amazing, and didn’t require me to wash another pot. So, I did what any stressed-out cook does: I opened the pantry, looked at the root vegetables gathering dust in the crisper drawer, and threw them on a sheet pan with whatever liquid was in my fridge.
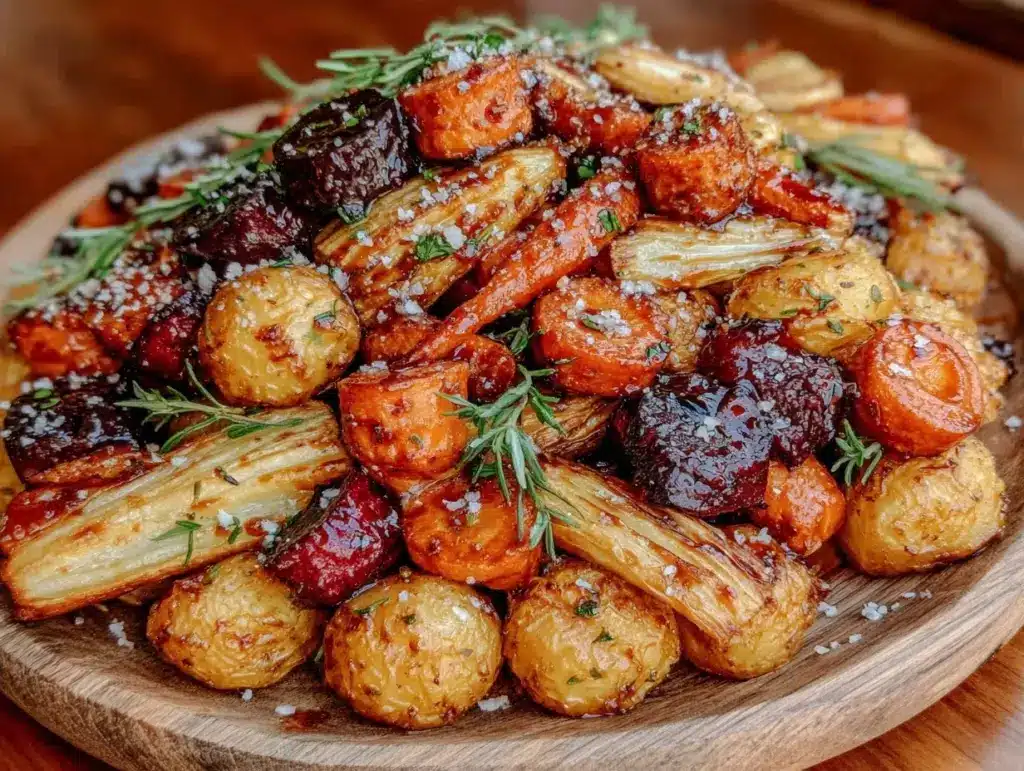
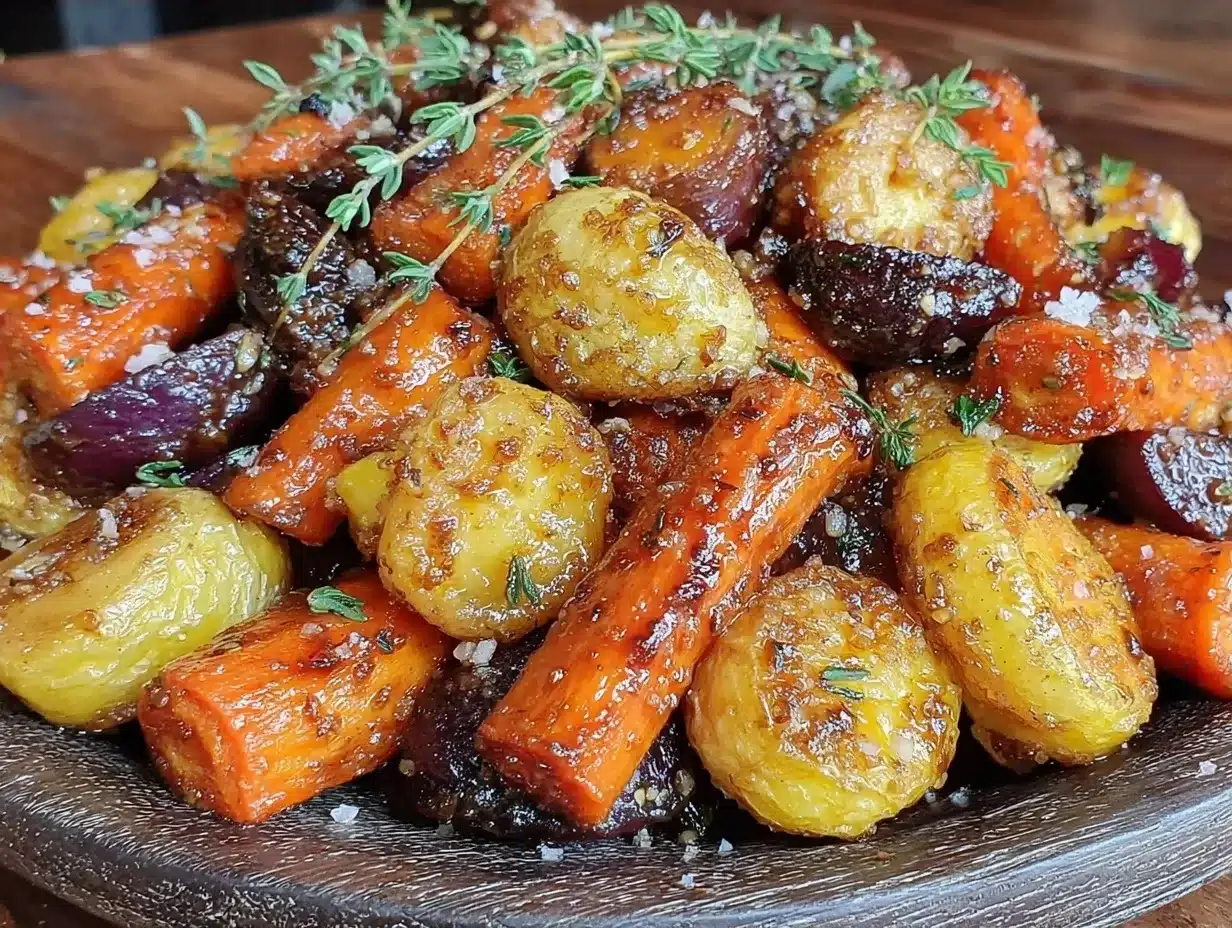
That impulsive move turned into the best side dish I’ve ever made. It’s sweet, it’s tangy, it’s caramelized, and it looks like I spent hours on it (when I actually spent twelve minutes). These Maple Balsamic Roasted Root Vegetables have been my Thanksgiving savior for the last three years. They’re crispy on the edges, tender in the middle, and that balsamic-glaze magic makes even picky eaters ask for seconds.
If you’re dreading the side dish lineup this year, or if you just want a weeknight dinner that feels fancy but takes zero effort, this is your answer. Seriously. I’ve made this recipe so many times that I can probably do it in my sleep (though I usually wake up to check the oven, because I’m a nervous wreck). Let me walk you through how to make it perfectly, every single time.
Why You’ll Love This Recipe
There are about ten reasons I keep coming back to these roasted root vegetables, but here are the big ones that actually matter when you’re running around a kitchen like a headless chicken.
One Pan, Zero Stress — This is the ultimate cleanup hack. You chop everything, toss it on one sheet pan, roast it, and then you have literally one pan to wash. No colander. No saucepan. No fancy roasting rack. Just one pan. My husband thinks I’m a genius when I tell him there’s only one dish to wash after dinner.
Stupid Simple Flavor — You don’t need a culinary degree to understand this combo. Maple syrup brings the sweetness, balsamic vinegar brings the tang, and roasted vegetables bring the earthiness. It’s a flavor profile that just works. I’ve served this to my vegetarian aunt, my meat-loving brother-in-law, and my gluten-free neighbor. Everyone loved it. Everyone.
Make-Ahead Friendly — This is huge for Thanksgiving. You can chop all the vegetables the day before and store them in a bag in the fridge. On the big day, you just toss them with the glaze and pop them in the oven. It frees up so much oven space for your turkey and mashed potatoes. I usually prep these the morning of Thanksgiving while the coffee is brewing. It’s peaceful.
Actually Tastes Better the Next Day — I know, I know. Nobody expects leftovers from Thanksgiving sides. But if you do have any (unlikely, but possible), they taste even better the next day. The flavors meld together overnight. I’ve been known to eat these cold out of the fridge for lunch the next day. Don’t judge me.
Budget-Smart — Root vegetables are cheap, especially in the fall. You can get a huge bag of mixed veggies for under $10. This feeds a crowd without breaking the bank. It’s comfort food that doesn’t cost a fortune.
This is my go-to when I need dinner to just work. No complicated techniques, no weird ingredients, just reliable, delicious food that makes everyone happy.
Ingredients You’ll Need
Here’s the best part: you probably have most of this already. This isn’t a recipe that requires a trip to three different specialty stores. It’s pantry-friendly and vegetable-focused.
For the Vegetables:
Carrots (3 medium, peeled and chopped / about 300g) — I use orange carrots for that classic look, but purple carrots are gorgeous and add nice variety. Cut them into 1-inch chunks so they cook evenly. Don’t slice them too thin or they’ll turn into mush.
Potatoes (2 medium Yukon Gold or Russet, diced / about 400g) — Yukon Golds are my favorite because they’re buttery and hold their shape. Russets work too, but they’re starchier. Cut them into 1-inch cubes. Consistency is key here—try to make all the pieces roughly the same size so everything roasts at the same rate.
Sweet Potatoes (2 medium, peeled and diced / about 400g) — These add natural sweetness and a beautiful orange color. Again, 1-inch cubes. If you’re not a fan of sweet potatoes, you can swap them for parsnips, which have a similar texture but a more earthy flavor.
Parsnips (2 medium, peeled and chopped / about 200g) — Optional, but highly recommended. Parsnips taste like carrots but sweeter and more aromatic. If you can’t find them, just use extra carrots or potatoes.
Beets (2 medium, roasted and cubed / about 200g) — I like to roast the beets separately or buy them pre-roasted. Raw beets take forever to cook and will stain everything pink. If you use raw beets, cut them very small and roast them longer than the other veggies. For ease, I usually buy vacuum-sealed roasted beets. They’re a lifesaver.
For the Glaze:
Maple Syrup (3 tablespoons / 45ml) — Use real maple syrup, not pancake syrup. The label should say “100% Pure Maple Syrup.” It has a distinct flavor that makes a huge difference. I keep a bottle of Grade B (darker) maple syrup because it has a more robust, caramel-like flavor that stands up to roasting.
Balsamic Vinegar (2 tablespoons / 30ml) — Good quality balsamic vinegar is worth the extra dollar. It’s less acidic and has a nicer depth. I use a standard table balsamic for everyday cooking, but for this, I splurge on a bottle that’s been aged a bit. It adds that tangy sweetness that cuts through the rich veggies.
Olive Oil (2 tablespoons / 30ml) — Use extra virgin olive oil for the best flavor. It helps the vegetables crisp up and carry the maple-balsamic glaze.
Garlic (3 cloves, minced / about 1 tablespoon) — Fresh garlic is non-negotiable here. Jarred garlic just doesn’t have the same punch. Mince it finely so it distributes evenly. Don’t burn it! If it burns, it tastes bitter.
Dijon Mustard (1 teaspoon) — This is the secret weapon. It adds a subtle sharpness that balances the sweet and tangy. You won’t taste the mustard directly, but you’ll miss it if it’s not there. Trust me on this.
Dried Thyme (1 teaspoon) — Thyme pairs beautifully with root vegetables. If you have fresh thyme, use a tablespoon. It’s even better. But dried works fine in a pinch.
Salt and Black Pepper (to taste) — Don’t skimp on the salt. Root vegetables need seasoning to bring out their natural flavors. Use coarse kosher salt if you have it.
Optional Garnish:
Fresh Parsley (2 tablespoons, chopped) — Adds a pop of green color and fresh flavor. It makes the dish look more polished. I sprinkle it on right before serving.
Pumpkin Seeds (1 tablespoon) — For a little crunch. I love the texture contrast. Toast them in a dry pan for a minute before sprinkling on top.
Equipment Needed
You don’t need fancy equipment for this. Here’s what I actually use.
Large Sheet Pan — I use a standard half-sheet pan (18×13 inches). It needs to be big enough to hold all the vegetables in a single layer. If your pan is too small, the vegetables will steam instead of roast, and you won’t get that crispy edge. I’ve learned this the hard way. If you don’t have a big enough pan, use two pans.
Large Mixing Bowl — For tossing the vegetables with the glaze. Any big bowl works. I use a stainless steel bowl because it’s durable and easy to clean.
Sharp Knife — For chopping the vegetables. A chef’s knife is ideal. Dull knives make you cry more—literally and figuratively. I keep my knives sharp because it makes chopping faster and safer.
Peeler — For peeling the carrots, sweet potatoes, and parsnips. A Y-peeler is easier to handle than a straight peeler. I have a cheap one from the dollar store that works perfectly.
Measuring Spoons — For the glaze. Pretty standard stuff. Dollar store versions work fine.
Pastry Brush — Optional, but nice for brushing extra glaze on the veggies halfway through. I usually just toss them well at the beginning, but if I’m feeling fancy, I’ll brush them again.
Aluminum Foil or Parchment Paper — For lining the sheet pan. Parchment paper is easier to clean up, but foil is good for easy disposal. I usually use parchment paper because I hate scrubbing baked-on sugar off foil.
How to Make It: Step-by-Step
Alright, let’s make this! I’m walking you through exactly how I do it, including the little tricks I’ve picked up.
Step 1: Prep Your Oven and Pan (5 minutes)
Preheat your oven to 400°F (200°C). This is the sweet spot for roasting root vegetables. Lower temps make them soggy; higher temps burn the sugars too fast. Line your sheet pan with parchment paper or aluminum foil. I prefer parchment because cleanup is a breeze.
Step 2: Chop the Vegetables (10 minutes)
Peel and chop all your vegetables into 1-inch chunks. Try to keep them uniform in size so they cook evenly. Carrots and parsnips should be cut into rounds or chunks. Potatoes and sweet potatoes should be cubed. If you’re using raw beets, cut them very small. Toss all the chopped vegetables into your large mixing bowl.
Step 3: Make the Glaze (2 minutes)
In a small bowl, whisk together the maple syrup, balsamic vinegar, olive oil, minced garlic, Dijon mustard, dried thyme, salt, and black pepper. The mixture should be smooth and glossy. If it’s too thick, add a teaspoon of water. If it’s too thin, add a teaspoon more maple syrup.
Step 4: Toss the Vegetables (2 minutes)
Pour the glaze over the chopped vegetables. Toss everything together until every piece is coated. Use your hands if you need to—it’s faster and ensures even coverage. I usually do this over the sink or a trash can to avoid mess.
Step 5: Roast the Vegetables (30-40 minutes)
Spread the vegetables in a single layer on the prepared sheet pan. Don’t overcrowd the pan! If they’re touching too much, they’ll steam instead of roast. Give them some space. Roast in the preheated oven for 30-40 minutes, stirring halfway through. You want them to be tender when pierced with a fork and caramelized on the edges.
Step 6: Check and Finish (5 minutes)
After 30 minutes, check the vegetables. If they’re not tender enough, roast for another 5-10 minutes. If they’re getting too dark, cover them loosely with foil. Once they’re done, remove them from the oven. Taste and adjust salt if needed.
Step 7: Serve
Transfer the roasted vegetables to a serving dish. Sprinkle with fresh parsley and pumpkin seeds if using. Serve immediately while hot. They’re best eaten right out of the oven, but they’re also good at room temperature.
Total Time: About 50 minutes (15 minutes active, 35 minutes hands-off)
Expert Tips & Tricks
Here’s everything I’ve learned from making this dozens of times. These tips will save you from my mistakes.
Don’t Overcrowd the Pan
This is the #1 mistake people make. If the vegetables are packed too tightly, they steam instead of roast. You want that crispy, caramelized edge. If you have a small oven or a small pan, use two pans. It’s better to roast in batches than to have soggy vegetables.
Uniform Cuts
Try to cut all the vegetables into similar-sized pieces. If you have tiny carrot bits and huge potato chunks, the carrots will burn before the potatoes are cooked. Uniformity ensures even cooking.
Use Real Maple Syrup
Don’t use fake maple syrup or pancake syrup. It’s full of corn syrup and artificial flavor. Real maple syrup has a depth of flavor that makes a huge difference. It’s worth the extra few dollars.
Roast Beets Separately
If you’re using raw beets, roast them separately or buy them pre-roasted. Raw beets take much longer to cook than carrots or potatoes, and they will stain everything pink. Pre-roasted beets are a huge time-saver.
Stir Halfway
Stirring the vegetables halfway through cooking ensures they roast evenly. It also prevents them from sticking to the pan. I usually set a timer so I don’t forget.
Common Mistakes (and how to avoid them):
Mistake: Vegetables are soggy
Fix: You overcrowded the pan or the oven temp was too low. Make sure you have space between the vegetables and preheat your oven fully.
Mistake: Vegetables are burnt
Fix: The sugars in the maple syrup burn easily. If they’re getting too dark, cover them with foil. Also, make sure your pan isn’t too close to the heating element.
Mistake: Vegetables are undercooked
Fix: The pieces were too large. Cut them smaller next time. Or roast them for a few more minutes.
Variations & Substitutions
Once you’ve nailed the basic version, here’s how you can mix it up. I’ve tried all of these.
Gluten-Free Version
This recipe is naturally gluten-free, as long as you use gluten-free balsamic vinegar (most are, but check the label). I use a standard bottle that’s certified gluten-free.
Vegan Version
This recipe is already vegan. No modifications needed. Just make sure your maple syrup is vegan (some are processed with bone char, though rare). I use a brand that’s certified vegan.
Spicy Version
Add a pinch of cayenne pepper or red pepper flakes to the glaze. It adds a nice kick that balances the sweetness. I like to add this when I want something with a bit more heat.
Herb-Forward Version
Use fresh rosemary or sage instead of thyme. Rosemary pairs beautifully with root vegetables. I chop the fresh herbs finely and toss them in with the glaze.
Different Vegetables
You can add Brussels sprouts, cauliflower, or even apples. Brussels sprouts roast well but take less time, so add them in the last 15 minutes. Cauliflower works too, but it’s lighter and doesn’t hold up as well to long roasting. Apples add a nice tartness, but they’ll get soft. I usually stick to root veggies for consistency.
Protein Boost
Add chickpeas or white beans to the pan for extra protein. They’ll get crispy and delicious. I toss them in with the vegetables and roast them together. It’s a great way to make the dish more filling.
Serving & Storage
How to Serve:
I usually serve this straight from the sheet pan at the dinner table—it looks rustic and stays warm. But here are other ways I’ve enjoyed it:
Side Dishes:
– Roasted turkey or chicken
– Mashed potatoes
– Stuffing
– Green bean casserole
Wine Pairing:
Not a wine expert, but my wine-snob friend says a Pinot Noir or a Chardonnay works great with this. The acidity in the wine cuts through the sweetness of the maple.
Storage Instructions:
Refrigerator:
Store in an airtight container for up to 4 days. The vegetables will soften in the fridge—totally normal.
Reheating:
Best method: Reheat in the oven at 350°F for 10-15 minutes. This helps them crisp up again.
Microwave method: Heat in 30-second intervals, stirring between. They’ll be softer, but still tasty.
Freezing:
Honestly, this doesn’t freeze well because the texture of the vegetables changes. They’ll get mushy when thawed. Make it fresh or store in the fridge for up to 4 days.
Pro tip: If leftovers are drying out, drizzle a little olive oil over them before reheating. Brings back that richness.
Nutrition Information
I’m not a nutritionist, but here’s the breakdown if you’re tracking.
Per Serving (based on 8 servings):
- Calories: 180
- Protein: 3g
- Carbs: 32g
- Fiber: 5g
- Sugar: 14g
- Fat: 6g
- Saturated Fat: 1g
- Cholesterol: 0mg
- Sodium: 120mg
- Calcium: 60mg
What’s Good:
- High in fiber from the root vegetables
- Good source of vitamins A and C
- Low in saturated fat
- Gluten-free and vegan
What to Know:
- Higher in sugar from the maple syrup
- Contains natural sugars from the vegetables
- Low in protein (add beans or chickpeas if you need more)
My Take:
Look, this is a vegetable dish with maple syrup. It’s not a diet recipe. But it’s way better than takeout, costs less, and I know exactly what’s in it. When I want to make it lighter, I reduce the maple syrup to 2 tablespoons. But usually? I just eat a reasonable portion and enjoy it.
Final Thoughts
So that’s my go-to Maple Balsamic Roasted Root Vegetables for Thanksgiving! I’ve probably talked your ear off at this point, but when you make a recipe this often, you have a lot to say about it.
This has saved Thanksgiving dinners more times than I can count. It’s my answer to “what’s for dinner” when I’m tired, don’t want takeout, and still want something that tastes really good. My family is happy, my guests are happy, and I’m happy because I’m not stressed about cooking.
Make it yours! Try different add-ins, swap in your favorite vegetables, adjust the garlic (though more is always better in my opinion). The best recipes are the ones you adapt to your family’s tastes.
If you make this, drop a comment and let me know what you think! I love hearing how recipes turn out in your kitchen. And if something doesn’t work, tell me that too—I’m here to help troubleshoot.
Happy cooking! And I hope your kitchen smells half as good as mine does right now.
Frequently Asked Questions
Can I use frozen root vegetables?
You can, but the texture won’t be as good. Frozen vegetables release a lot of water, so they’ll steam instead of roast. If you must use them, thaw them first and pat them dry thoroughly. But fresh is always better for this recipe.
Why did my vegetables turn out soggy?
Usually means you overcrowded the pan or the oven temp was too low. Make sure you have space between the vegetables and preheat your oven fully. Also, don’t skip the parchment paper—it helps with even heat distribution.
Can I make this ahead for a dinner party?
Sort of. You can chop all the vegetables the day before and store them in a bag in the fridge. On the day of, toss them with the glaze and roast them. It saves time and reduces stress. I do this all the time.
Can I use honey instead of maple syrup?
You can, but the flavor will be different. Honey is sweeter and less complex than maple syrup. If you use honey, reduce the amount slightly because it’s sweeter. But honestly, maple syrup is the traditional choice for a reason.
How do I reheat leftovers without them getting dry?
Reheat in the oven at 350°F for 10-15 minutes. This helps them crisp up again. If you microwave them, add a splash of water or olive oil to keep them moist. They’ll be softer, but still tasty.
Can I double this recipe?
Absolutely! Double everything and use two sheet pans. The cooking times stay the same. I do this when I’m feeding a crowd. Just make sure your oven has enough room for both pans, and rotate them halfway through for even cooking.
Why did my vegetables burn?
The sugars in the maple syrup burn easily. If they’re getting too dark, cover them with foil. Also, make sure your pan isn’t too close to the heating element. And don’t leave them unattended—sugar burns fast.
Pin This Recipe!
Maple Balsamic Roasted Root Vegetables: Easy Thanksgiving Side
- Total Time: 50 minutes
- Yield: 8 servings 1x
Description
A stress-free, one-pan side dish featuring sweet and tangy roasted root vegetables glazed with maple syrup and balsamic vinegar. Perfect for Thanksgiving or weeknight dinners.
Ingredients
- 3 medium carrots, peeled and chopped into 1-inch chunks (about 300g)
- 2 medium Yukon Gold or Russet potatoes, diced into 1-inch cubes (about 400g)
- 2 medium sweet potatoes, peeled and diced into 1-inch cubes (about 400g)
- 2 medium parsnips, peeled and chopped (about 200g)
- 2 medium beets, roasted and cubed (about 200g)
- 3 tablespoons pure maple syrup
- 2 tablespoons balsamic vinegar
- 2 tablespoons extra virgin olive oil
- 3 cloves garlic, minced
- 1 teaspoon Dijon mustard
- 1 teaspoon dried thyme (or 1 tablespoon fresh thyme)
- Salt and black pepper to taste
- 2 tablespoons fresh parsley, chopped (optional garnish)
- 1 tablespoon pumpkin seeds, toasted (optional garnish)
Instructions
- Preheat oven to 400°F (200°C). Line a large half-sheet pan (18×13 inches) with parchment paper or aluminum foil.
- Peel and chop all vegetables (carrots, potatoes, sweet potatoes, parsnips, beets) into uniform 1-inch chunks to ensure even cooking.
- Place all chopped vegetables into a large mixing bowl.
- In a small bowl, whisk together maple syrup, balsamic vinegar, olive oil, minced garlic, Dijon mustard, dried thyme, salt, and black pepper until smooth.
- Pour the glaze over the vegetables and toss thoroughly until every piece is evenly coated.
- Spread the vegetables in a single layer on the prepared sheet pan, ensuring they are not overcrowded to allow for proper roasting.
- Roast in the preheated oven for 30-40 minutes, stirring halfway through, until vegetables are tender and caramelized on the edges.
- Check for doneness; if not tender, roast for an additional 5-10 minutes. If browning too quickly, cover loosely with foil.
- Remove from oven, taste and adjust seasoning if needed.
- Transfer to a serving dish and garnish with fresh parsley and toasted pumpkin seeds if desired. Serve immediately.
Notes
[‘Do not overcrowd the pan; vegetables need space to roast rather than steam. Use two pans if necessary.’, ‘Cut vegetables into uniform sizes for even cooking.’, ‘Use real maple syrup, not pancake syrup, for the best flavor.’, ‘If using raw beets, roast them separately or cut them very small as they take longer to cook and stain easily. Pre-roasted beets are recommended for convenience.’, ‘Stirring halfway through ensures even browning and prevents sticking.’, ‘This dish tastes even better the next day as flavors meld.’]
- Prep Time: 15 minutes
- Cook Time: 35 minutes
- Category: Side Dish
- Cuisine: American
Nutrition
- Serving Size: 1 cup
- Calories: 180
- Sugar: 14
- Sodium: 120
- Fat: 6
- Saturated Fat: 1
- Carbohydrates: 32
- Fiber: 5
- Protein: 3
Keywords: roasted root vegetables, maple balsamic, thanksgiving side dish, one pan dinner, vegan side dish, gluten-free, healthy vegetables, easy dinner


