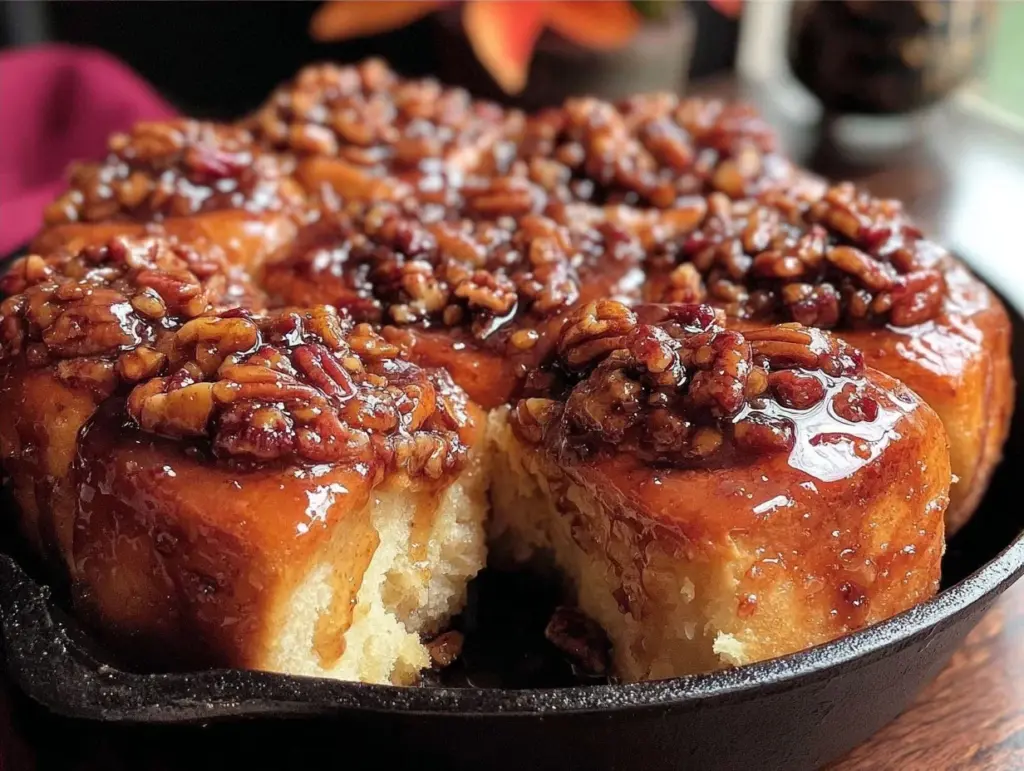
It was last Saturday morning when I realized I had completely lost my mind. The house smelled like a bakery in Vermont, my husband was still asleep, and I was standing in my kitchen at 6:30 AM, staring at a pan of gooey, caramel-drenched dough that was just barely rising. I had spent the previous evening prepping the dough, letting it rise in the fridge, and this morning I just had to bake it. Thirty minutes later, the timer went off, and I flipped the pan over. That sound—the *shhh-thwack* as the sticky buns slid out onto the platter—is my favorite sound in the world.
These fall maple pecan sticky buns have completely hijacked our weekend brunch routine. Before this, Saturday mornings were a chaotic rush of cereal bowls and burnt toast. Now? We wake up to the smell of brown sugar, cinnamon, and toasted nuts. It’s become the one treat I make specifically to slow us down, to give us an hour where no one touches their phones and we just eat. And the best part? They’re surprisingly easy. You don’t need fancy equipment or expensive ingredients. Just some pantry staples and a little patience.
I’ve tested this recipe at least eight times over the last two months. I’ve tried different yeasts, different flours, even swapped the maple syrup for honey once (don’t do that—the flavor profile gets weird). This version is the winner. It’s soft, pillowy, and soaked in a glaze that you’ll want to eat with a spoon. If you’re looking for a way to make your autumn weekends feel cozy and special without spending a fortune or stressing out in the kitchen, this is the one. It’s better than any bakery version I’ve ever bought, and honestly, it’s cheaper too.
Why You’ll Love This Sticky Bun Recipe
I know what you’re thinking. “Sticky buns? That sounds like a lot of work.” But here’s the truth: this recipe is actually one of the most forgiving breads you can make. It’s forgiving of your timing, forgiving of your skill level, and forgiving of your kitchen temperature. Here’s why these fall maple pecan sticky buns have earned a permanent spot in our meal rotation:
- The Make-Ahead Magic — This is the game-changer. You mix and shape the dough on Friday night, let it rise in the fridge overnight, and just bake it Saturday morning. I can’t stress this enough. It means I’m not waking up at 5 AM to knead dough. I’m waking up at 6:30 AM to put a pan in the oven. This alone has saved our weekends.
- Stretches Your Dollar — Flour, yeast, butter, sugar, milk. These are pantry staples. You’re not buying expensive cream cheese or exotic spices. A batch feeds 8-10 people for under $8. That’s less than $1 per person, which is a steal compared to the $6 buns at the coffee shop down the street.
- Kid-Approved Gooeyness — My kids are picky. They usually reject anything that looks “too sweet” or “too complicated.” But these? They’re obsessed. The pecans add a nice crunch, and the maple glaze is irresistible. I’ve made these for playdates, and other parents always ask for the recipe. It’s a crowd-pleaser that works for everyone.
- Freezer-Friendly — I’ve learned that these freeze beautifully. If I have leftovers (which is rare), I wrap them individually and freeze them. To reheat, I just pop one in the microwave for 20 seconds. They’re still soft and gooey. Perfect for a quick grab-and-go breakfast on a busy school day.
- Minimal Cleanup — You only need a few bowls and one pan. No fancy piping bags, no complex decorating. Just mix, rise, bake, flip, and eat. The cleanup is literally just a skillet and a spoon. I love that.
This recipe isn’t about being fancy. It’s about making something warm and comforting that brings the family together. It’s the kind of food that makes you feel like you’re treating yourself, even when you’re just using what you already have.
Ingredients You’ll Need
Here’s the good news: you probably have 90% of this stuff in your pantry right now. I’m not asking you to go to three different stores for obscure ingredients. This is practical, budget-friendly cooking. Here’s exactly what you need, and why each part matters.
For the Dough
Active dry yeast (2 teaspoons / 1 packet) — I use the standard red packet. It’s cheap and reliable. Make sure it’s not expired! I’ve made the mistake of using old yeast twice, and the dough didn’t rise. Just check the date on the packet.
Warm milk (1 cup / 240ml) — Whole milk makes the softest dough, but I’ve used 2% with good results. Don’t use cold milk. It needs to be warm, like bathwater. If it’s too hot, you’ll kill the yeast. If it’s too cold, the yeast won’t activate. Test it on your wrist—it should feel warm, not hot.
Granulated sugar (¼ cup / 50g) — This feeds the yeast and adds a little sweetness to the dough itself. You can use brown sugar for a deeper flavor, but white sugar works fine and is cheaper.
Unsalted butter (¼ cup / 55g, melted) — Room temperature butter is best, but melted works. It adds richness and helps the dough stay soft. I use regular unsalted butter, not fancy European butter. Save the expensive stuff for when you’re really trying to impress someone.
Large egg (1, room temperature) — The egg binds the dough and adds structure. Room temperature eggs incorporate better. If you forget, just put the egg in a bowl of warm water for 5 minutes.
All-purpose flour (3 to 3½ cups / 375-440g) — This is the backbone. Don’t use bread flour unless you want a chewier, denser bun. All-purpose gives that soft, pillowy texture we want. Add it slowly—your dough might need less than 3½ cups depending on your humidity. You want a dough that’s slightly sticky but pulls away from the sides of the bowl.
Salt (1 teaspoon) — Essential for flavor. Don’t skip it. It balances the sweetness.
For the Filling
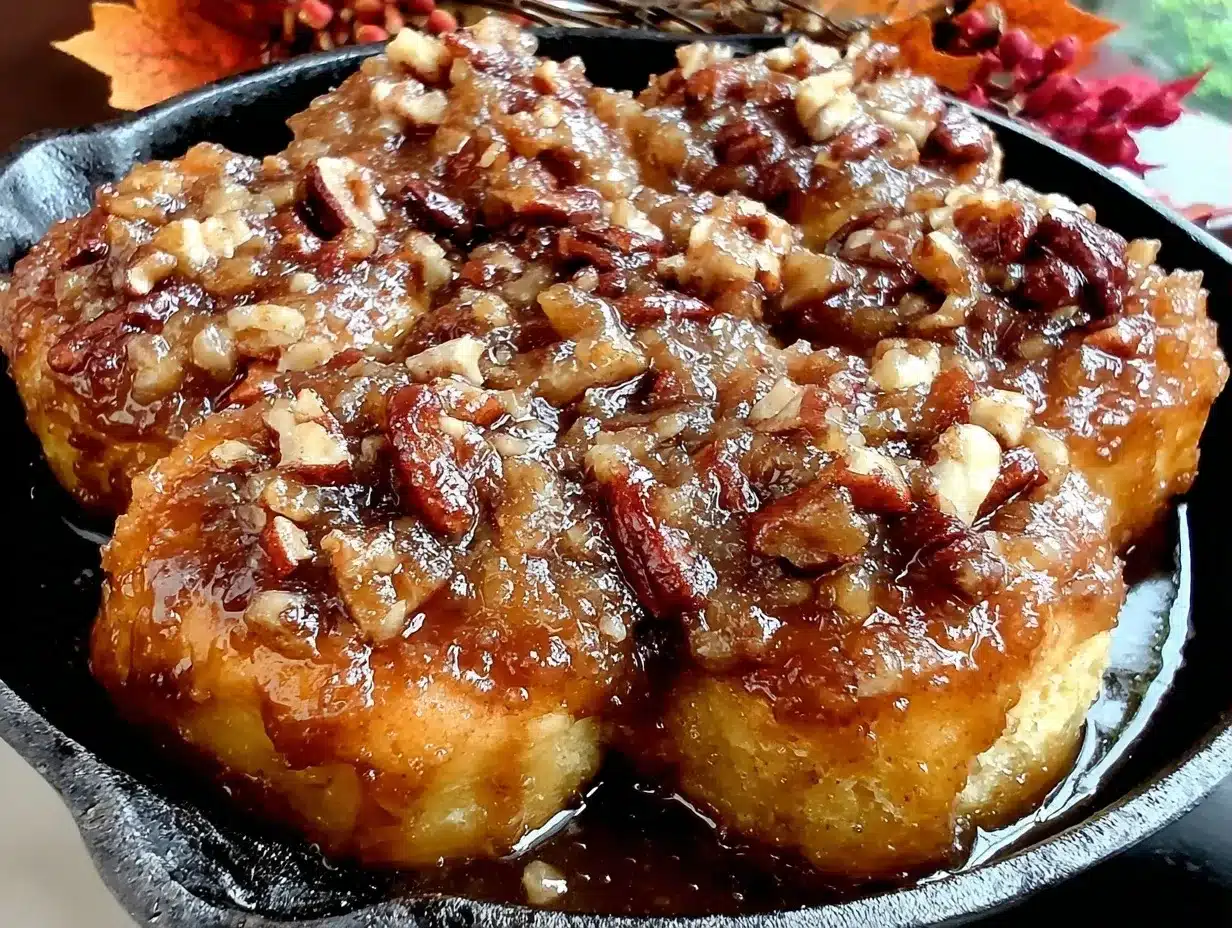
Unsalted butter (½ cup / 115g, softened) — This is what holds the filling together. Soften it on the counter for 30 minutes. Don’t microwave it or it’ll melt too much.
Packed brown sugar (1 cup / 200g) — Dark brown sugar has more molasses, which gives a deeper, caramel-like flavor. I prefer dark brown, but light brown works too. Pack it tightly into the cup.
Ground cinnamon (2 teaspoons) — Use good quality cinnamon. The cheap stuff tastes dusty. This is where the fall flavor comes from.
Pecan halves (1 cup / 115g) — Toasting them first makes a huge difference. It releases the oils and makes them crunchy. I buy pecan pieces if halves are too expensive—they taste the same and cost less.
For the Maple Glaze
Maple syrup (½ cup / 120ml) — Not maple-flavored syrup. Real maple syrup. It’s pricier, but you only need a little, and it makes all the difference. Look for Grade B or “Dark Robust” for a stronger flavor.
Heavy cream (2 tablespoons / 30ml) — Adds richness to the glaze. Half-and-half works if you don’t have heavy cream.
Confectioners’ sugar (1 cup / 120g) — Also called powdered sugar. It sweetens and thickens the glaze. If you don’t have this, you can make your own by blending granulated sugar in a blender for 30 seconds, but it won’t be as fine.
Pinch of salt — Just a tiny pinch to balance the sweetness.
Equipment Needed
You don’t need anything fancy. Here’s what I actually use in my everyday kitchen:
Large mixing bowl — I use a 5-quart stainless steel bowl. Plastic works too, just make sure it’s big enough to hold the dough as it rises.
9×13 inch baking dish — Glass or ceramic is best. Metal works too, but it might brown the bottoms faster. I use a Pyrex dish because I can see the bottom browning.
Stand mixer or hand mixer — Optional but helpful. I have a stand mixer, and it makes kneading easier. But you can absolutely do this by hand. It takes a little more arm work, but it’s fine. I’ve made this dough by hand many times.
Rolling pin — A standard wooden rolling pin works perfectly. No need for a fancy marble one.
Pastry brush — For brushing the melted butter on the dough before adding the filling. A silicone brush is easier to clean than a bristle one.
Small saucepan — For heating the milk and melting the butter for the glaze. Any small pot works.
Whisk — For mixing the glaze until it’s smooth. A fork works too, but a whisk is faster.
Offset spatula — Optional, but helpful for spreading the filling evenly. A regular butter knife works fine.
How to Make Fall Maple Pecan Sticky Buns: Step-by-Step
Alright, let’s get baking! I’m going to walk you through exactly how I do it, including the little tricks I’ve picked up over the years. This process is broken into two parts: Friday night prep and Saturday morning bake.
Step 1: Make the Dough (Friday Night)
In a large bowl, combine the warm milk, yeast, and sugar. Stir gently and let it sit for 5-10 minutes until it gets foamy. If it doesn’t get foamy, your yeast is dead. Start over. Once it’s foamy, add the melted butter, egg, and salt. Whisk until combined.
Add the flour one cup at a time. If you’re using a mixer, use the dough hook on low speed. If you’re doing it by hand, stir until it gets too thick to stir, then turn it out onto a floured surface. Knead for about 8-10 minutes until the dough is smooth and elastic. It should pass the “windowpane test”—if you stretch a small piece of dough, it should get thin enough to see light through it without tearing.
Place the dough in a lightly oiled bowl, cover it with plastic wrap or a damp towel, and let it rise in a warm spot for 1-2 hours, or until doubled in size. If you’re doing the make-ahead method, punch it down, cover it tightly, and put it in the fridge overnight. The slow rise in the fridge develops better flavor.
Step 2: Prepare the Pan and Filling (Saturday Morning)
Take the dough out of the fridge if you’re doing the make-ahead method. Let it sit on the counter for 30 minutes to take the chill off. Meanwhile, preheat your oven to 350°F (175°C).
In a small saucepan, melt the ½ cup of butter for the filling. In a small bowl, mix the brown sugar and cinnamon. Set these aside.
Butter your 9×13 inch baking dish generously. This is crucial. If you don’t butter it enough, the buns will stick, and you’ll be scraping caramel off the pan for hours. I use about 2 tablespoons of butter, melted, and spread it all over the bottom and up the sides.
Pour the remaining ¼ cup of butter (the one you melted for the filling) over the bottom of the pan. Sprinkle the pecan halves evenly over the butter. Then, sprinkle the brown sugar-cinnamon mixture over the pecans. You want an even layer.
Step 3: Shape the Buns
On a lightly floured surface, roll the dough out into a large rectangle, about 12×18 inches. It doesn’t have to be perfect, but try to keep the edges even. Brush the dough with the remaining melted butter (if you have any left, or just use a little extra). Sprinkle the cinnamon-sugar mixture evenly over the entire surface of the dough.
Starting from the long end, roll the dough up tightly into a log. Pinch the seam to seal it. If the dough tears, just patch it. Cut the log into 12 equal pieces. I use a sharp knife or a piece of dental floss (yes, floss works great for cutting dough without squishing it). Place each piece, cut-side up, into the prepared pan. They’ll be tight together, which is good—it helps them rise up, not out.
Step 4: Final Rise and Bake
Cover the pan loosely with plastic wrap or a towel. Let the buns rise in a warm spot for 30-45 minutes. They should look puffy and jiggly. If you’re doing the make-ahead method, you can skip this step and bake them straight from the fridge, but they’ll need a few extra minutes in the oven.
Bake at 350°F (175°C) for 25-30 minutes, or until the tops are golden brown. If they’re browning too fast, cover them loosely with foil for the last 10 minutes.
Step 5: Make the Glaze and Finish
While the buns bake, make the glaze. In a small saucepan, combine the maple syrup and heavy cream. Heat over medium heat until it just starts to simmer. Remove from heat and whisk in the confectioners’ sugar and salt until smooth. If it’s too thick, add a teaspoon of milk. If it’s too thin, add a little more sugar.
As soon as the buns come out of the oven, pour the warm glaze evenly over them. Don’t wait! The heat helps the glaze soak in. Let them cool in the pan for 10-15 minutes. This is the hardest part—waiting. But if you flip them too soon, they’ll fall apart. If you wait too long, the caramel hardens and sticks.
After 15 minutes, run a knife around the edges, then place a large serving platter upside down over the pan. Flip it over with a confident shake. The buns should slide out beautifully. Lift the pan off. If any stick, just scrape them off and put them on top. They’ll still taste amazing.
Expert Tips & Tricks for Perfect Sticky Buns
I’ve made enough sticky buns to know what works and what doesn’t. Here’s everything I’ve learned so you don’t have to make my mistakes.
Don’t Rush the Rise — The most common mistake is not letting the dough rise enough. If the buns are dense, it’s because they didn’t rise. Be patient. If it’s cold in your kitchen, put the dough in the oven with the light on. It creates a warm environment.
Toast Your Pecans — I can’t stress this enough. Toast the pecans in a dry skillet for 2-3 minutes before adding them to the pan. It makes them so much more flavorful. Raw pecans can taste bland in comparison.
Use Real Maple Syrup — I know it’s expensive, but it’s the star of the show. If you use pancake syrup, the glaze will taste artificial. Buy the real stuff. It lasts forever in the fridge.
Butter the Pan Generously — I’ve learned this the hard way. Once, I was lazy and only used a little butter. The buns stuck, and I lost half of them when I tried to flip them. Now I use a lot. It’s worth the extra butter.
Glaze While Hot — Pour the glaze over the buns immediately after they come out of the oven. The heat helps it soak in. If you wait, it sits on top and gets sticky and hard.
Doubling the Batch — You can double this recipe, but you’ll need two 9×13 pans. The baking time stays the same. I often double it for holidays or big family gatherings. It freezes well, so I freeze one batch for later.
Variations & Substitutions
Once you’ve mastered the basic recipe, here are some ways to mix it up. I’ve tried all of these, and they’re all good.
Maple Walnut Version — Swap the pecans for walnuts. It’s a classic combination. Walnuts are slightly more bitter, which balances the sweetness well.
Maple Bourbon — Add 1 tablespoon of bourbon to the glaze. It adds a sophisticated kick. Great for adult brunches.
Maple Brown Butter — Brown the butter for the filling before using it. It adds a nutty, toasty flavor that’s incredible with maple.
Gluten-Free — Use a 1:1 gluten-free flour blend. The texture might be slightly different, but it works. I’ve used Bob’s Red Mill and King Arthur, and both work well.
Dairy-Free — Use coconut milk instead of dairy milk, and coconut oil instead of butter. For the glaze, use coconut cream instead of heavy cream. It’s not exactly the same, but it’s still delicious.
Vegan — Use flax eggs (1 tablespoon ground flaxseed mixed with 3 tablespoons water per egg) instead of the egg. Use maple syrup and coconut oil/butter. The glaze can be made with maple syrup and coconut cream. It’s surprisingly good.
Serving & Storage
These fall maple pecan sticky buns are best served warm, right after you flip them out of the pan. They’re perfect for weekend brunch, holiday mornings, or whenever you need a little comfort food.
Side Dishes — I usually serve them with scrambled eggs or bacon. A simple fruit salad or some roasted apples also go well. For drinks, coffee or hot chocolate is a must. If you want to pair it with something sweet, these fall pumpkin spice overnight oats are a great lighter option, or if you’re feeling indulgent, try some maple cinnamon cold foam iced coffee to go with them.
Storage — Store leftovers in an airtight container at room temperature for up to 2 days. The glaze will keep them soft. If you live in a hot climate, store them in the fridge.
Reheating — Reheat in the microwave for 20-30 seconds. They’ll be soft and gooey again. You can also reheat them in a 350°F oven for 10 minutes, but the microwave is faster and keeps them moist.
Freezing — These freeze beautifully. Let them cool completely, then wrap them individually in plastic wrap and put them in a freezer bag. They’ll last for up to 3 months. To serve, thaw at room temperature and microwave for 20 seconds. They taste almost as good as fresh.
Meal Prep Tip — I often make these on Sunday night for the whole week. They stay good for 2-3 days. I just reheat one in the morning and grab a coffee. It’s a great way to start the week feeling special.
Nutrition Information
I’m not a nutritionist, but here’s the breakdown if you’re tracking. Keep in mind that this is a sweet treat, so it’s higher in calories and sugar.
Per Serving (1 bun, based on 12 servings):
- Calories: 380
- Protein: 6g
- Carbs: 52g
- Fiber: 2g
- Sugar: 32g
- Fat: 16g
- Saturated Fat: 8g
- Cholesterol: 35mg
- Sodium: 220mg
What’s Good: It has some protein from the egg and milk, and the pecans add healthy fats. It’s more filling than it looks.
What to Know: It’s high in sugar and carbs. If you’re watching your intake, enjoy one or two and pair it with a protein-rich breakfast like eggs. It’s not a diet food, but it’s a treat. Moderation is key.
Final Thoughts
So there you have it—my go-to fall maple pecan sticky buns. I’ve probably talked your ear off at this point, but when you make a recipe this often, you have a lot to say about it. These buns have saved our weekends. They’ve turned chaotic mornings into cozy rituals. My kids love them, my husband loves them, and I love that I can make them on a budget with ingredients I already have.
Make them your own! Try different nuts, add some maple bacon, or swap the cinnamon for nutmeg. The best recipes are the ones you adapt to your family’s tastes. If you make these, drop a comment and let me know how they turned out. I love hearing how recipes work in your kitchen. And if something doesn’t work, tell me that too—I’m here to help troubleshoot.
Happy baking! And I hope your kitchen smells half as good as mine does right now.
Frequently Asked Questions
Can I use instant yeast instead of active dry yeast?
Yes, you can! Instant yeast doesn’t need to be activated in warm milk first. You can mix it directly into the dry ingredients. The rising time might be slightly faster, so keep an eye on it. I’ve used instant yeast many times, and it works just as well.
Why did my sticky buns stick to the pan?
This usually happens if you didn’t butter the pan enough, or if you flipped them before the glaze had time to soften the caramel. Make sure you use a generous amount of butter, and wait at least 15 minutes after pouring the glaze before flipping. If they do stick, just scrape them off and put them on top. They’ll still taste good.
Can I make these ahead of time and bake them later?
Yes! This is the make-ahead method I mentioned. Shape the buns, let them rise in the fridge overnight, and bake them Saturday morning. You might need to add 5-10 minutes to the baking time since the dough is cold. This is my preferred method because it makes Saturday morning so much easier.
Can I freeze the dough before baking?
Yes, you can. After shaping the buns, freeze them on the pan until solid, then transfer them to a freezer bag. When you’re ready to bake, thaw them in the fridge overnight, let them rise at room temperature, and then bake. It works well, though the texture might be slightly less fluffy than fresh dough.
What if I don’t have a 9×13 pan?
You can use a 9-inch round cake pan or a 10-inch pie dish, but you’ll need to adjust the number of buns. You’ll probably fit 8-10 buns instead of 12. The baking time will be the same, but keep an eye on them so they don’t burn.
Can I use maple extract instead of maple syrup?
I don’t recommend it. Maple extract is very strong and artificial-tasting. Real maple syrup is worth the cost. If you’re on a budget, you can use half maple syrup and half brown sugar for the glaze, but real syrup is best.
Pin This Recipe!
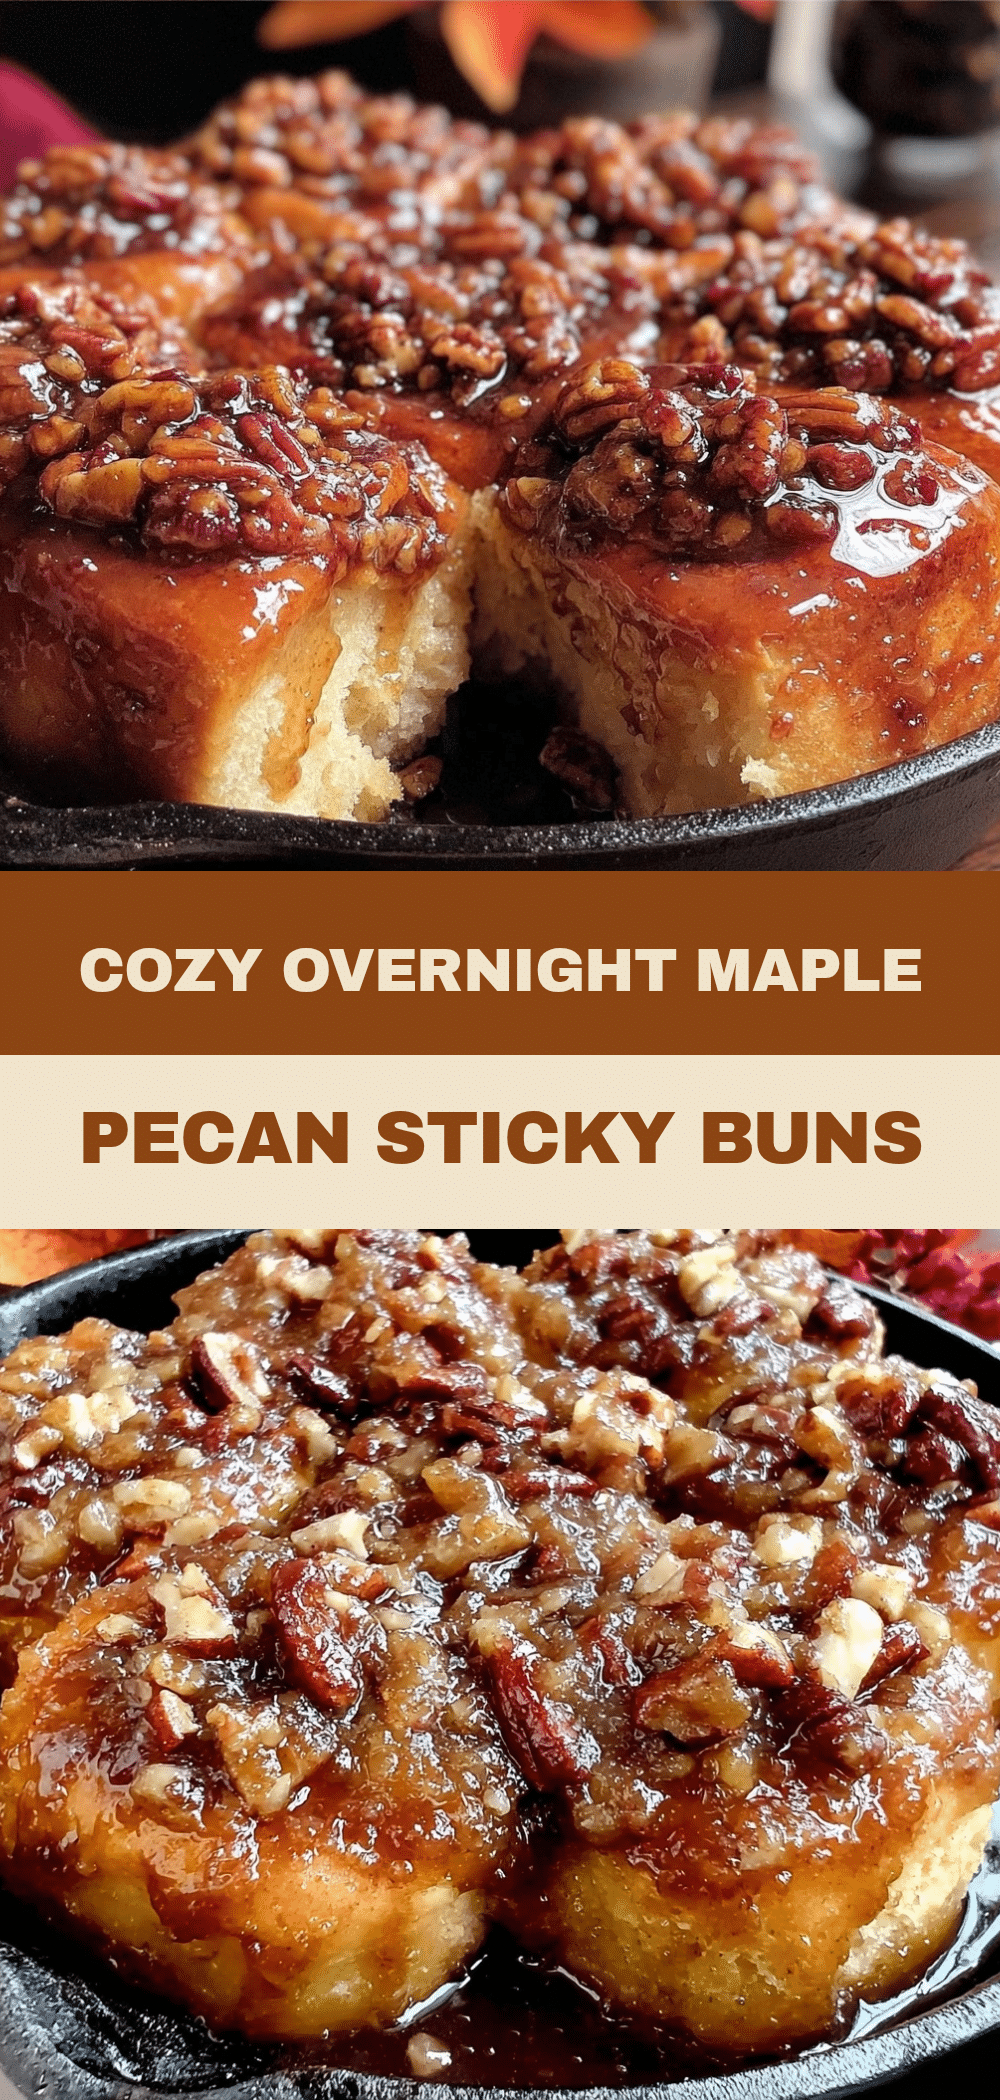
Fall Maple Pecan Sticky Buns: Easy Brunch Recipe
- Total Time: 1 hour
- Yield: 12 servings 1x
Description
Soft, pillowy sticky buns soaked in a rich maple pecan glaze. This forgiving, make-ahead recipe uses pantry staples to create a cozy weekend brunch treat that is kid-approved and budget-friendly.
Ingredients
- 2 teaspoons active dry yeast (1 packet)
- 1 cup warm milk (whole or 2%)
- ¼ cup granulated sugar
- ¼ cup unsalted butter, melted
- 1 large egg, room temperature
- 3 to 3½ cups all-purpose flour
- 1 teaspoon salt
- ½ cup unsalted butter, softened (for filling)
- 1 cup packed brown sugar (dark preferred)
- 2 teaspoons ground cinnamon
- 1 cup pecan halves
- ½ cup real maple syrup
- 2 tablespoons heavy cream
- 1 cup confectioners’ sugar
- Pinch of salt (for glaze)
Instructions
- In a large bowl, combine warm milk, yeast, and sugar. Let sit for 5-10 minutes until foamy.
- Whisk in melted butter, egg, and salt.
- Add flour one cup at a time. Knead for 8-10 minutes until smooth and elastic (passing the windowpane test).
- Place dough in an oiled bowl, cover, and let rise for 1-2 hours until doubled. For make-ahead, refrigerate overnight.
- Preheat oven to 350°F (175°C).
- Butter a 9×13 inch baking dish generously. Pour remaining melted butter into the pan, sprinkle with toasted pecans, then brown sugar and cinnamon mixture.
- Roll dough into a 12×18 inch rectangle. Brush with butter and sprinkle with remaining cinnamon-sugar mixture.
- Roll dough tightly into a log, pinch seam, and cut into 12 equal pieces.
- Place buns cut-side up in the prepared pan. Cover and let rise for 30-45 minutes until puffy.
- Bake for 25-30 minutes until golden brown. Cover with foil if browning too fast.
- While baking, heat maple syrup and heavy cream in a saucepan until simmering. Remove from heat and whisk in confectioners’ sugar and pinch of salt until smooth.
- Pour warm glaze over hot buns immediately after removing from oven.
- Let cool in pan for 10-15 minutes. Run a knife around edges, place a platter upside down over the pan, and flip to release buns.
Notes
Toast pecans in a dry skillet for 2-3 minutes before adding to the pan for better flavor. Use real maple syrup, not pancake syrup, for the glaze. Butter the pan generously to prevent sticking. If using instant yeast, mix directly into dry ingredients. For make-ahead, shape buns and refrigerate overnight, adding 5-10 minutes to bake time.
- Prep Time: 30 minutes
- Cook Time: 30 minutes
- Category: Breakfast
- Cuisine: American
Nutrition
- Serving Size: 1 bun
- Calories: 380
- Sugar: 32
- Sodium: 220
- Fat: 16
- Saturated Fat: 8
- Carbohydrates: 52
- Fiber: 2
- Protein: 6
Keywords: sticky buns, maple pecan buns, fall brunch, make-ahead breakfast, easy yeast dough, homemade sticky buns, weekend baking


