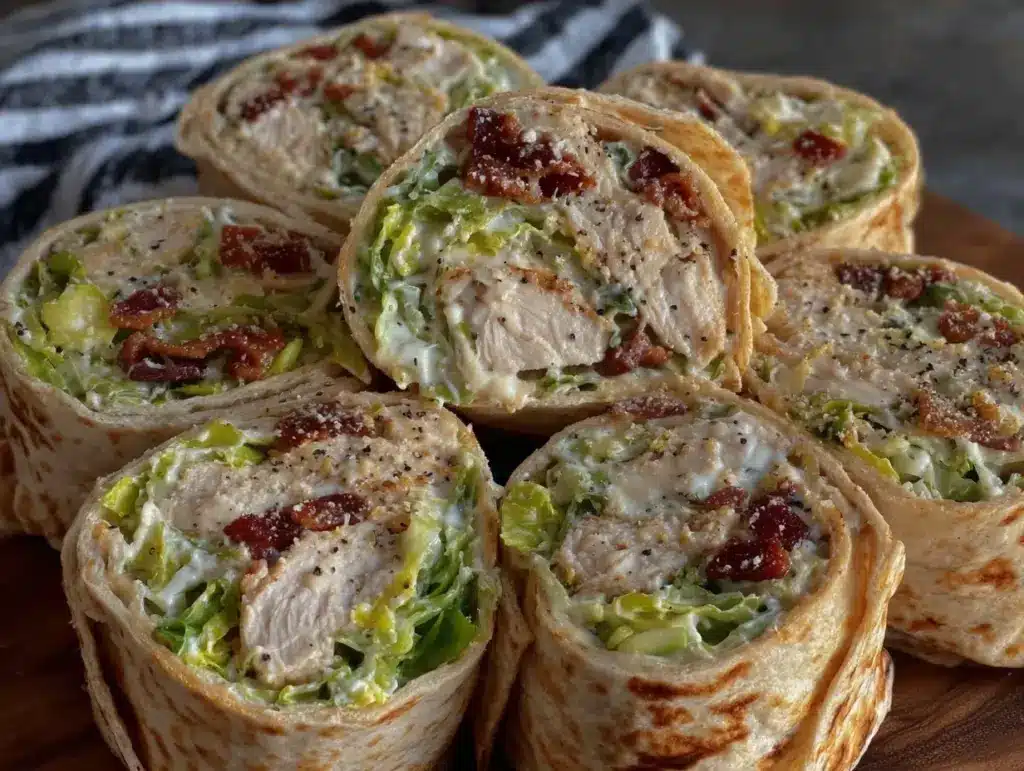
It was 6:15 PM on a Tuesday in early September. The house was quiet, which meant my kids were either asleep or hiding in their rooms doing homework. I had just finished the chaotic dance of getting everyone to the bus stop, dropping off dry cleaning, and rushing to pick up the oldest from soccer practice. I walked into the kitchen with three options: order takeout (expensive and sad), eat cereal (again), or actually cook something.
Usually, I’d go for the cereal. But that night, I was staring at a rotisserie chicken from Costco, a bag of romaine hearts, and a bottle of Caesar dressing that was half-empty. I didn’t want a heavy dinner. I wanted something that felt like a treat but didn’t require me to stand over a hot stove for an hour. So, I grabbed some large flour tortillas, shredded the chicken, and threw together what I thought would be a quick snack.
Thirty minutes later, my teenagers came out of their rooms, sniffing the air. “Is that… Caesar salad?” my son asked, eyeing the wrap skeptically. I handed him one. He took a bite, paused, and then nodded. “This is actually good. Can we have this for dinner tonight?”
That was the moment Back to School Chicken Caesar Wraps was born. Or rather, re-born. I had made them before, but this was the version that stuck. It’s not just a lunchbox filler or a quick bite. It’s a legitimate, satisfying weeknight dinner that takes about 10 minutes of active time. If you can shred chicken and spread dressing, you can make this. And if you can make this, you can survive the first month of school without ordering pizza again.
I’ve made these wraps at least twenty times since that Tuesday. I’ve tweaked the amount of cheese, swapped the tortillas for lettuce cups when I’m feeling fancy, and even added a spicy kick for my husband who likes things with a little heat. But the core idea remains the same: crisp romaine, savory chicken, creamy dressing, and gooey cheese, all wrapped up in a warm tortilla that doesn’t fall apart. It’s the kind of meal that feels like you’re at a restaurant, but you’re actually eating it on the couch in your pajamas.
Why You’ll Love This Recipe
There are days when cooking feels like a chore. Days when the last thing you want to do is chop vegetables or monitor a simmering pot. This recipe is my antidote to that stress. Here’s why it has earned a permanent spot in my weekly rotation:
- Stupidly Fast — Seriously, ten minutes. That’s it. I’m not exaggerating. From pulling the chicken out of the fridge to taking the first bite, you’re looking at ten minutes of hands-on time. The rest is just assembly. I make this on nights when I’m exhausted and just want to sit down.
- Uses Leftovers — We all have that rotisserie chicken sitting in the fridge, or maybe some leftover grilled chicken from last night’s sheet pan Greek chicken. This recipe is the perfect way to use up poultry that’s been hanging around. It transforms leftovers into something fresh and exciting.
- Kid-Approved (Even the Picky Ones) — My kids love the familiar flavors of Caesar salad, but they hate “salad” because it’s messy and cold. Wrapping it up makes it feel like a burrito or a taco, which is always a win. Plus, the warm tortilla softens the romaine just enough to make it more palatable for the little ones.
- Customizable for Everyone — My husband likes his extra cheesy. My daughter prefers hers with a little jalapeño heat. I like mine with extra lemon zest. Because everything is assembled individually, you can make each wrap exactly how that person likes it. No more arguing over who gets the last piece of bacon.
- Light but Satisfying — After a summer of heavy, hot meals, I crave something that feels fresh but still fills you up. The protein from the chicken and the fats from the cheese and dressing keep you full without that heavy, sluggish feeling you get after a big pasta dinner. It’s perfect for busy nights when you still need energy for soccer practice or homework help.
This isn’t just a quick meal; it’s a reliable one. It’s the dinner that saves me when I’m running on empty. It’s the one that makes my family happy without requiring a trip to the grocery store. And honestly? It tastes better than most of the fast-casual spots downtown.
Ingredients You’ll Need
Here’s the best part: you probably have most of these ingredients already. This recipe relies on simple, high-quality components that come together to create something much bigger than the sum of its parts. I’m particular about a few things here, so pay attention to the details.
For the Filling
Rotisserie Chicken (2 cups / shredded) — This is your time-saver. Use a store-bought rotisserie chicken for speed, or use leftover grilled chicken. I prefer dark meat for these wraps because it stays juicier, but white meat works too. Just make sure it’s shredded into bite-sized pieces, not chopped into tiny bits.
Romaine Lettuce (2 large heads) — You want sturdy leaves that won’t wilt immediately. Look for heads that are tight and crisp. I wash and dry them thoroughly—wet lettuce makes soggy wraps. If you can’t find romaine, iceberg works, but romaine has that essential crunch.
Caesar Dressing (½ cup) — I’m a stickler for this. Use a good-quality bottled dressing if you’re in a rush, but if you have ten extra minutes, my homemade Caesar dressing is worth the effort. Look for one with anchovies for that authentic umami flavor. Avoid the “light” versions; they’re watery and taste artificial.
Parmesan Cheese (½ cup / freshly grated) — Buy a block of Parmigiano-Reggiano and grate it yourself. Pre-grated cheese has anti-caking agents that prevent it from melting properly. You want those little shreds of cheese that melt into the warm chicken and wrap. It makes a huge difference in flavor.
Cherry Tomatoes (1 cup / halved) — These add a burst of freshness and acidity that cuts through the richness of the dressing and cheese. I use red ones, but yellow or grape tomatoes work too. Make sure they’re dry before adding them, or they’ll make the wrap soggy.
Croutons (½ cup) — Yes, croutons in a wrap. I know it sounds odd, but the crunch is essential. I like to crush them slightly so they fit better in the wrap. If you’re avoiding gluten, use gluten-free croutons or skip them entirely. I usually buy the seasoned ones for extra flavor.
For the Wrap
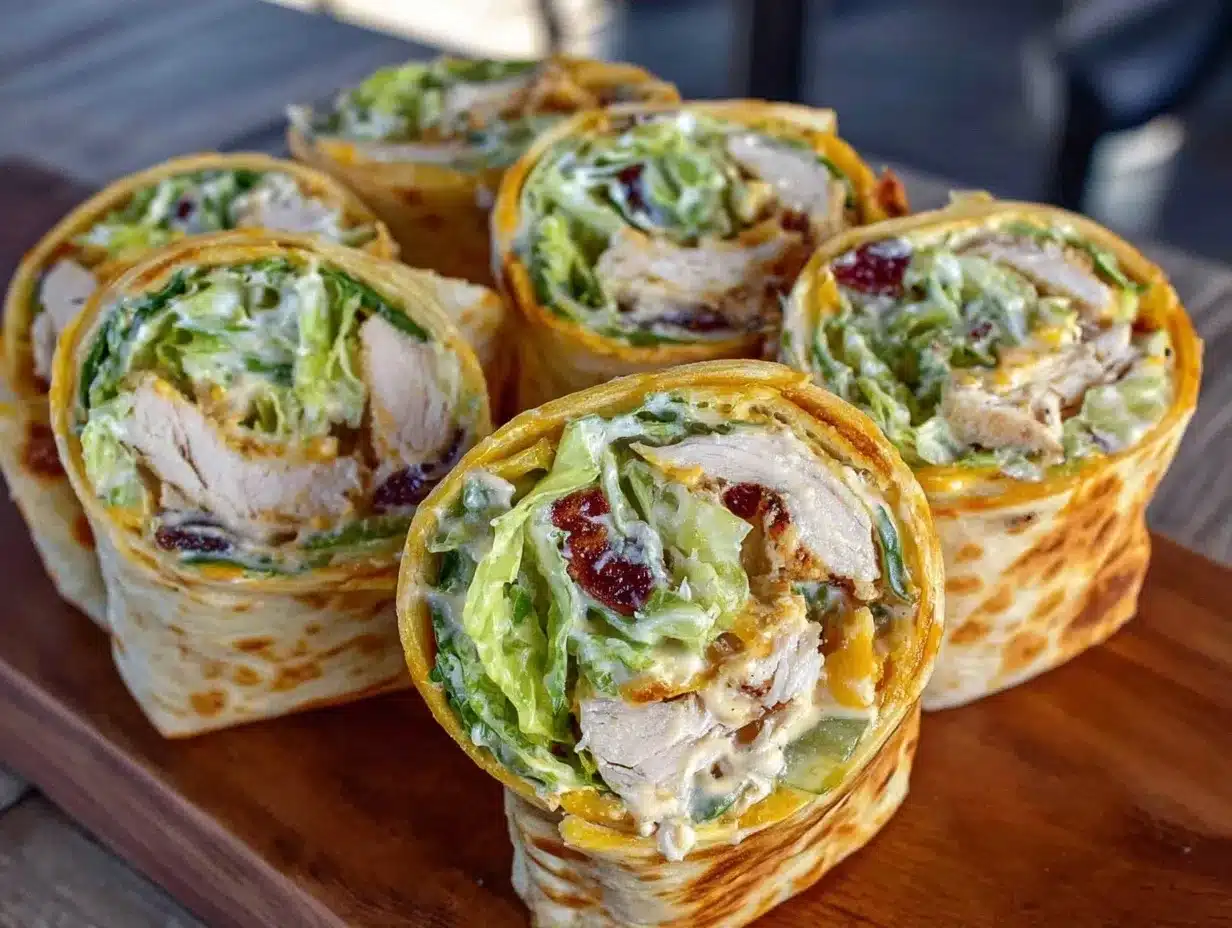
Large Flour Tortillas (6-8 / 10-inch) — You need large, pliable tortillas that won’t tear when you roll them. I prefer the burrito-sized ones (10-12 inches) because they have more room to hold the filling. Warm them up slightly before assembling—they become more flexible and less likely to crack.
Butter (1 tablespoon / optional) — For a restaurant-quality finish, I lightly butter the outside of the wrapped tortillas and pan-fry them for a minute on each side. It adds a golden, crispy exterior that contrasts beautifully with the cool, creamy interior. It’s optional, but highly recommended.
Lemon (1 / for zest and juice) — A squeeze of fresh lemon juice brightens everything up. I like to zest the lemon over the filling before wrapping it. The zest adds aroma, and the juice adds a tangy kick that balances the creamy dressing.
Black Pepper (freshly ground) — Freshly cracked pepper is non-negotiable. Pre-ground pepper loses its flavor quickly. Grind it fresh over the filling just before wrapping.
Equipment Needed
You don’t need any fancy gadgets for this. Here’s what I actually use:
Large Skillet or Griddle — If you’re going for the pan-fried version, a large non-stick skillet or a flat griddle works best. I use a 12-inch skillet because it gives me room to cook two wraps at a time. If you’re serving them cold, you don’t need this at all.
Mixing Bowls — One medium bowl for tossing the chicken with dressing, and one smaller bowl for the croutons. I use glass bowls because I can see what’s inside easily.
Cutting Board and Sharp Knife — For halving the tomatoes and zesting the lemon. A sharp knife makes quick work of the tomatoes without crushing them.
Microplane or Zester — For getting that fine lemon zest. I love my microplane because it gives me tiny flecks of zest that distribute evenly. A regular grater works too, but it might give you larger pieces.
Measuring Cups and Spoons — Standard stuff. I keep a set of nesting cups for easy cleanup.
Pastry Brush — If you’re buttering the outside of the wraps, a pastry brush makes it easy to apply a thin, even layer. You can also just rub the butter on with your fingers, but a brush is cleaner.
How to Make It: Step-by-Step
Alright, let’s make this! I’m walking you through exactly how I do it, including the little tricks I’ve picked up over time.
Step 1: Prep the Chicken and Dressing (3 minutes)
Start by shredding the chicken. If you’re using a rotisserie chicken, just pull the meat off the bones and shred it with two forks. If you’re using leftover grilled chicken, chop it into bite-sized pieces. Place the chicken in a medium bowl. Add the Caesar dressing and toss until the chicken is evenly coated. I like to let it sit for a minute so the flavors meld together.
Step 2: Prep the Vegetables (2 minutes)
Wash and thoroughly dry the romaine lettuce. Tear the leaves into bite-sized pieces. You want them chunky enough to hold up in the wrap but small enough to eat easily. Halve the cherry tomatoes and set them aside. If you’re using croutons, crush them slightly in a bag or with your hands. I like them to be about half their original size.
Step 3: Warm the Tortillas (1 minute)
This is a crucial step that people often skip. Cold tortillas crack when you roll them. Warm them up! You can do this in a dry skillet for 30 seconds per side, or microwave them wrapped in a damp paper towel for 15 seconds. They should be soft and pliable. Stack them on a plate and cover with a clean kitchen towel to keep them warm.
Step 4: Assemble the Wraps (4 minutes)
Take a warm tortilla and lay it flat. Place a few leaves of romaine in the center. Top with the dressed chicken, cherry tomatoes, croutons, and a generous sprinkle of grated Parmesan. Zest half a lemon over the filling, then squeeze a little juice over it. Season with freshly cracked black pepper.
Now, the rolling technique: Fold the bottom of the tortilla up over the filling, tucking it in tightly. Fold in the sides, then roll it up from the bottom. It should be tight enough to hold together but not so tight that the tortilla bursts. If it’s leaking, you put too much filling in. Use less next time.
Step 5: Pan-Fry (Optional but Recommended) (2 minutes)
If you want that restaurant-quality crunch, heat a skillet over medium heat. Add a thin layer of butter. Place the wraps seam-side down in the skillet. Cook for 1-2 minutes until golden brown and crispy. Flip carefully and cook the other side for another minute. Transfer to a cutting board and slice in half diagonally. This step adds a wonderful texture contrast.
Step 6: Serve Immediately
Serve the wraps right away while they’re warm. If you’re serving them cold, just skip the pan-frying step. Garnish with extra Parmesan or a sprig of parsley if you want to look fancy. I usually serve these with a side of pickles or a simple green salad, but they’re substantial enough to be a meal on their own.
Total Time: About 10 minutes (active) + optional 2 minutes for frying.
Expert Tips & Tricks
Here’s everything I’ve learned from making these dozens of times. These tips will save you from my mistakes.
Don’t Skip the Drying Step
Wet lettuce is the enemy of a good wrap. After washing the romaine, spin it dry in a salad spinner or pat it dry with paper towels. If the lettuce is damp, it will make the tortilla soggy and the wrap will fall apart. I learned this the hard way with a messy, dripping wrap that ended up on the floor.
Warm the Tortillas
I can’t stress this enough. Warm tortillas are flexible; cold tortillas are brittle. If you skip this step, you’ll be picking tortilla shards out of your teeth. Warm them in the microwave or a dry skillet for just 15-30 seconds. They’ll be ready to roll without cracking.
Use a Good Quality Dressing
The dressing is the star of the show. Don’t skimp on it. If you’re using bottled dressing, look for one that’s creamy and has a robust flavor. If you have time, make your own. A simple emulsion of mayo, Parmesan, garlic, lemon juice, and anchovy paste is all you need. It’s fresher and tastes way better.
Don’t Overfill
It’s tempting to pile on the filling, but if you overfill the wrap, it will burst when you try to roll it. Use about ½ cup of filling per wrap. It’s better to have a neat, tight wrap than a messy, overflowing one. You can always make a second wrap if you have extra filling.
For Extra Crunch
If you’re pan-frying the wraps, make sure the skillet is hot before adding them. This creates a quick sear that keeps the tortilla crispy. If the skillet isn’t hot enough, the tortilla will absorb the butter and become greasy instead of crisp.
Variations & Substitutions
Once you’ve nailed the basic version, here’s how you can mix it up. I’ve tried all of these, and they’re all delicious in their own way.
Spicy Caesar Wraps
Add a diced jalapeño or a spoonful of spicy habanero salsa to the filling. Or, use a spicy Caesar dressing. This is great for my husband who likes things with a kick.
Avocado Caesar Wraps
Add sliced avocado for creaminess and healthy fats. I love this version in the summer when avocados are cheap and ripe. The avocado pairs beautifully with the tangy dressing.
Gluten-Free Wraps
Use gluten-free tortillas or large lettuce leaves (like butter lettuce or romaine hearts) as the wrap. If using lettuce, you’ll need to eat it with a fork, but it’s a great low-carb option. I’ve used almond flour tortillas, and they work well, though they’re more delicate.
Veggie-Loaded Wraps
Add roasted vegetables like zucchini, bell peppers, or mushrooms. I often use leftover veggies from sheet pan dinners. They add color and nutrition, and they hold up well in the wrap.
Turkey Caesar Wraps
Swap the chicken for shredded turkey. This is a great way to use up leftover turkey from Thanksgiving. The flavor is similar, and it’s a nice change of pace.
Low-Carb Wraps
Skip the tortilla entirely and serve the filling in a bowl, or use large lettuce leaves as cups. You can also use low-carb wraps, though they tend to be more expensive. I usually just eat the filling with a fork on low-carb days.
Serving & Storage
These wraps are best served fresh, but here’s how to handle leftovers and meal prep.
How to Serve
I usually serve these straight from the skillet, hot and crispy. They look rustic and inviting. But if you’re packing them for lunch, serve them cold or at room temperature. They hold up well for a few hours. I usually pack them in a bento box with some carrot sticks or apple slices on the side.
Storage Instructions
Refrigerator: Store leftover filling in an airtight container for up to 3 days. The tortillas should be stored separately. If you’ve already assembled the wraps, they will get soggy. It’s best to assemble them fresh when you’re ready to eat. If you must store assembled wraps, wrap them tightly in plastic wrap and refrigerate for up to 24 hours. They won’t be as crispy, but they’ll still be tasty.
Reheating
If you have leftover pan-fried wraps, reheat them in a skillet over medium heat for a minute on each side to restore the crispiness. Don’t microwave them—they’ll get chewy and soggy. If you have leftover filling, you can toss it with fresh lettuce and tortillas the next day for a quick lunch.
Meal Prep
I often prep the filling on Sunday for the week ahead. Shred the chicken, chop the tomatoes, and mix them with the dressing. Store in the fridge. When it’s time to eat, just grab a tortilla, add the filling, and roll it up. It saves so much time during the week.
Nutrition Information
I’m not a nutritionist, but here’s the breakdown if you’re tracking. Please note that these values are estimates and will vary depending on the specific brands and amounts you use.
Per Wrap (based on 6 wraps):
- Calories: 380
- Protein: 22g
- Carbs: 32g
- Fiber: 3g
- Sugar: 4g
- Fat: 18g
- Saturated Fat: 5g
- Cholesterol: 60mg
- Sodium: 650mg
What’s Good: Good source of protein from the chicken. The romaine adds some fiber and vitamins. The Parmesan provides calcium.
What to Know: Higher in sodium due to the dressing and cheese. If you’re watching sodium, use low-sodium dressing and less cheese. The calories are moderate, making it a balanced meal.
Final Thoughts
So, that’s my go-to Back to School Chicken Caesar Wraps! I’ve probably talked your ear off at this point, but when you make a recipe this often, you have a lot to say about it.
This has saved weeknight dinners more times than I can count. It’s my answer to “what’s for dinner” when I’m tired, don’t want takeout, and still want something that tastes really good. My kids are happy, my husband’s happy, and I’m happy because I’m not stressed about cooking. It’s the kind of meal that feels special but doesn’t require any special effort.
Make it yours! Try different add-ins, swap in your favorite vegetables, adjust the spice level. The best recipes are the ones you adapt to your family’s tastes. And if you’re feeling extra fancy, pan-fry them. Trust me, it’s worth the extra minute.
If you make this, drop a comment and let me know what you think! I love hearing how recipes turn out in your kitchen. And if something doesn’t work, tell me that too—I’m here to help troubleshoot. Happy cooking! And I hope your kitchen smells half as good as mine does right now.
Frequently Asked Questions
Can I use chicken breast instead of rotisserie chicken?
Absolutely! You can use grilled chicken breast, baked chicken breast, or even poached chicken breast. Just make sure it’s shredded or chopped into bite-sized pieces. If you’re cooking it from scratch, you’ll need to add extra time to your prep, but the flavor will be just as good. I often use leftover chicken from slow cooker meals for this.
Why did my wrap fall apart?
Usually, this happens because the tortilla was cold and brittle, or you overfilled it. Always warm the tortillas before rolling them. Also, don’t put too much filling in. Use about ½ cup per wrap. If you’re using large lettuce leaves, they’re more fragile, so handle them gently.
Can I make these ahead of time?
You can prep the filling ahead of time, but it’s best to assemble and cook the wraps just before serving. If you assemble them ahead, the tortillas will absorb the dressing and become soggy. If you must, wrap them tightly in plastic wrap and refrigerate for up to 24 hours. Reheat in a skillet to restore crispiness.
Can I freeze these?
I don’t recommend freezing assembled wraps. The lettuce will wilt and become mushy when thawed. You can freeze the cooked chicken and cheese filling, but not the assembled wrap. It’s best to make these fresh.
Is there a dairy-free option?
Yes! Use a dairy-free Caesar dressing (many brands make good ones) and skip the Parmesan cheese, or use a nutritional yeast sprinkle for a cheesy flavor. You can also use dairy-free tortillas. It won’t be exactly the same, but it’s still delicious.
Can I use whole wheat tortillas?
Yes, whole wheat tortillas work great. They have a nuttier flavor and more fiber. Just make sure they’re large enough to hold the filling. Some whole wheat tortillas are more brittle, so be extra careful when rolling them.
Pin This Recipe!
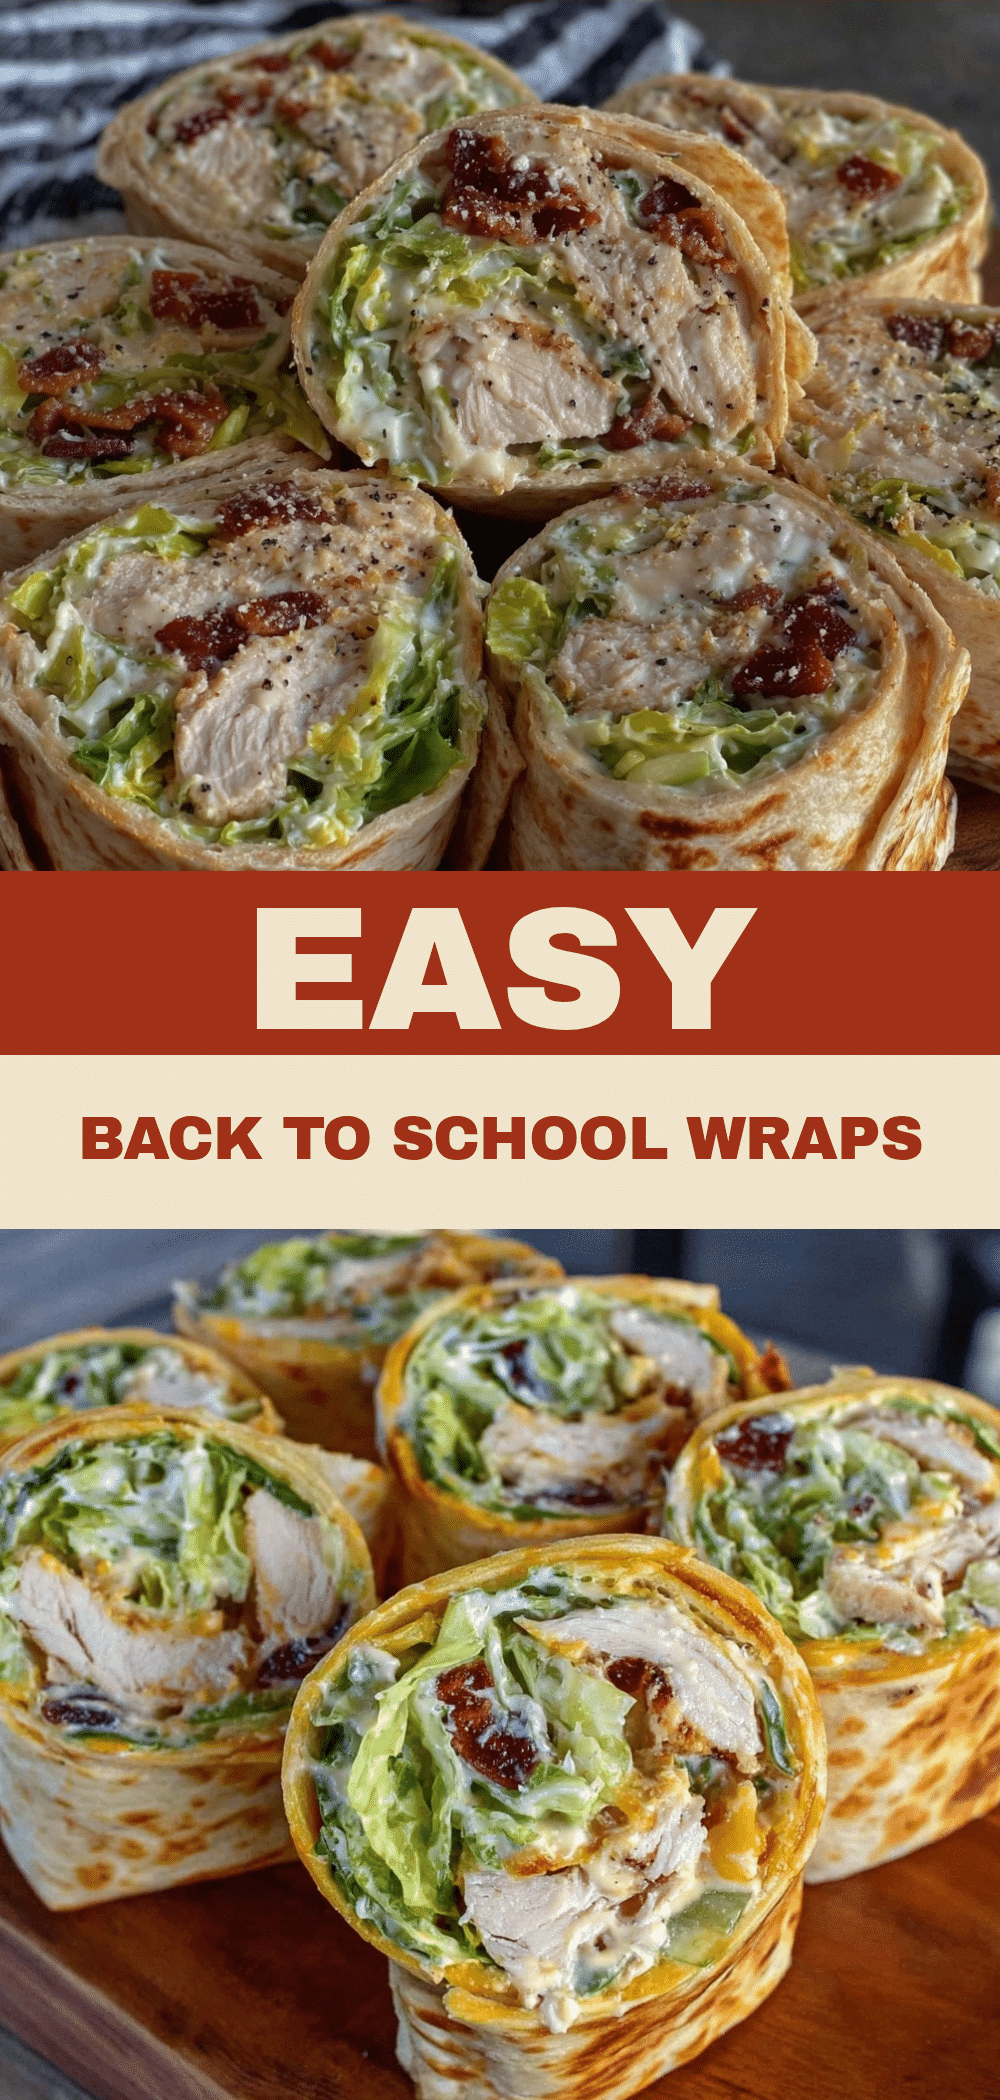

Back to School Chicken Caesar Wraps
- Total Time: 12 minutes
- Yield: 6 servings 1x
Description
A quick and satisfying weeknight dinner that takes only 10 minutes of active time. These wraps combine shredded rotisserie chicken, crisp romaine, creamy Caesar dressing, and melted Parmesan in a warm tortilla, optionally pan-fried for extra crunch.
Ingredients
- 2 cups shredded rotisserie chicken (or leftover grilled chicken)
- 2 large heads romaine lettuce, washed, dried, and torn into bite-sized pieces
- 1/2 cup Caesar dressing
- 1/2 cup freshly grated Parmesan cheese
- 1 cup cherry tomatoes, halved and dried
- 1/2 cup croutons, slightly crushed
- 6–8 large flour tortillas (10-inch)
- 1 tablespoon butter (optional, for pan-frying)
- 1 lemon (for zest and juice)
- Freshly ground black pepper
Instructions
- Shred the chicken and place it in a medium bowl. Add the Caesar dressing and toss until evenly coated. Let sit for a minute to meld flavors.
- Wash and thoroughly dry the romaine lettuce. Tear leaves into bite-sized pieces. Halve the cherry tomatoes and set aside. Slightly crush the croutons.
- Warm the tortillas in a dry skillet for 30 seconds per side or microwave for 15 seconds wrapped in a damp paper towel until soft and pliable. Keep covered with a towel.
- Lay a warm tortilla flat. Place romaine leaves in the center, followed by the dressed chicken, tomatoes, croutons, and Parmesan.
- Zest half a lemon over the filling and squeeze a little juice over it. Season with freshly cracked black pepper.
- Fold the bottom of the tortilla up over the filling, tucking it in tightly. Fold in the sides and roll up from the bottom to form a tight wrap.
- Optional: Heat a skillet over medium heat with a thin layer of butter. Place wraps seam-side down and cook for 1-2 minutes until golden brown and crispy. Flip and cook the other side for another minute.
- Serve immediately while warm, sliced in half diagonally.
Notes
Ensure lettuce and tomatoes are thoroughly dried to prevent soggy wraps. Warm tortillas before rolling to prevent cracking. Do not overfill the wraps to avoid bursting. For a dairy-free version, use dairy-free dressing and skip the Parmesan or use nutritional yeast.
- Prep Time: 10 minutes
- Cook Time: 2 minutes
- Category: Main Course
- Cuisine: American
Nutrition
- Serving Size: 1 wrap
- Calories: 380
- Sugar: 4
- Sodium: 650
- Fat: 18
- Saturated Fat: 5
- Carbohydrates: 32
- Fiber: 3
- Protein: 22
Keywords: chicken caesar wraps, quick dinner, rotisserie chicken recipes, weeknight meals, kid-friendly dinner, 10 minute meals, lunchbox ideas