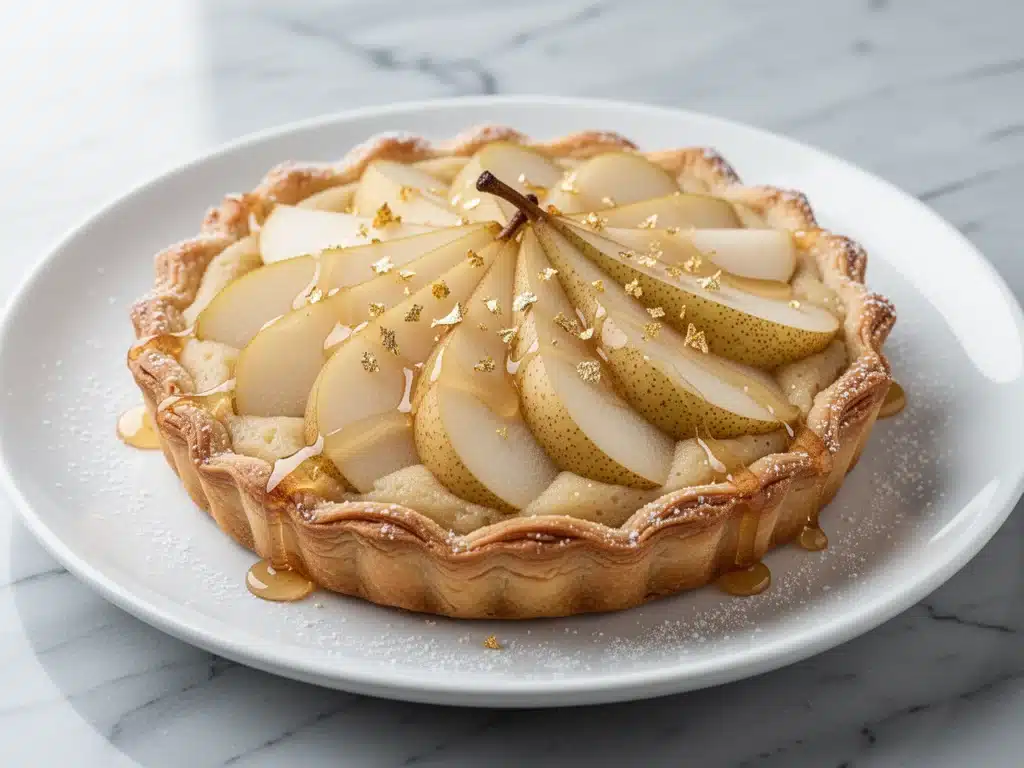
It was a rainy Tuesday in late October, the kind where the sky turns that specific shade of slate gray by 3 PM, and I was standing in my kitchen staring at a bowl of Bosc pears I’d bought on a whim. I had zero plans. No dinner party looming, no holiday to prep for. Just me, a stack of bills, and a desire to feel like I was living in a cozy French bakery rather than a suburban split-level.
I opened the fridge, half-expecting to find nothing but condiments and a sad carton of milk. But then I remembered I had a tub of almond flour gathering dust and a jar of honey that was getting a little too sticky. That’s when I decided to make a frangipane tart. I’d tried making one years ago, back when I thought “fold gently” was a suggestion rather than a commandment. That first attempt was a dense, sad brick that tasted like wet cardboard. I almost threw out the almond flour in shame.
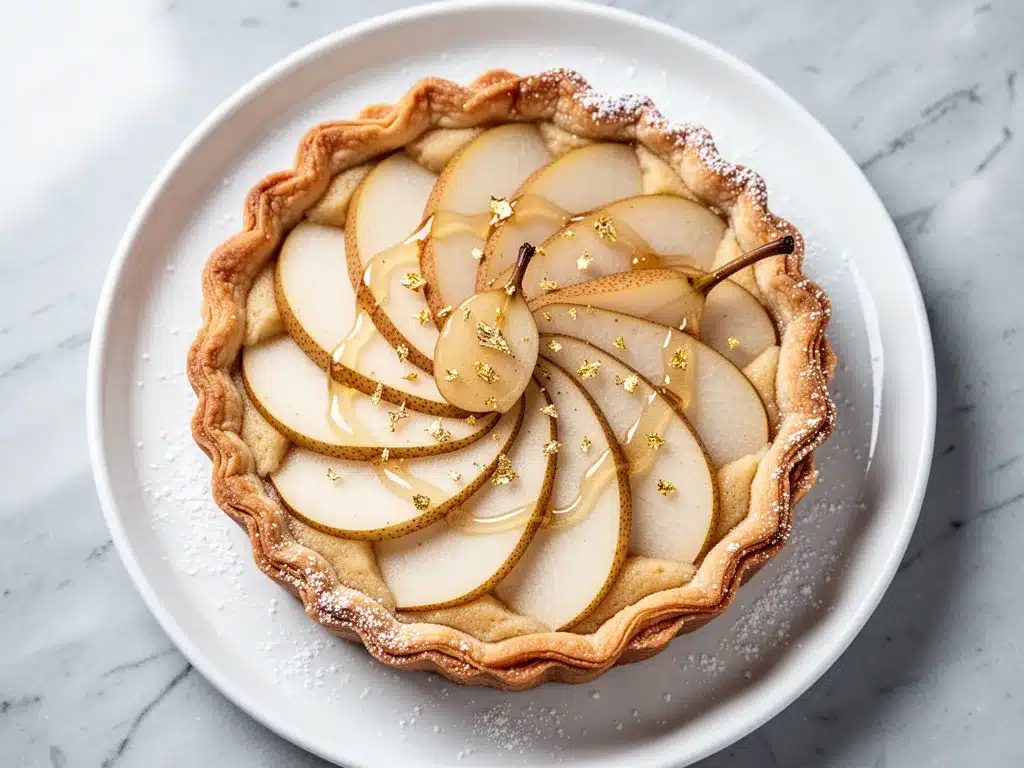
But this time? This time was different. I used a technique I learned from a pastry chef friend who swore by room-temperature ingredients and patience. I sliced the pears so thin they were practically translucent, arranged them like shingles on a roof, and let the oven do the heavy lifting. When I pulled it out, the kitchen smelled like toasted almonds and caramelized sugar. The crust was shatteringly crisp, the filling was creamy and rich without being cloying, and the pears had softened into something utterly luxurious.
I ate a slice while it was still warm, standing at the counter, and I literally smiled. It tasted like autumn itself. It tasted like comfort. That single slice turned into a full dinner party the next weekend, with friends begging for the recipe. Now, every fall, this fall harvest pear frangane tart is the first thing I plan for. It’s elegant enough for guests but simple enough for a Tuesday night treat. If you’ve ever wondered how to make pears taste like a dessert from a fancy patisserie, you’re about to find out. It’s easier than you think, and it’s going to change how you view fruit desserts forever.
Why You’ll Love This Pear Frangipane Tart
I’ve made this tart at least eight times in the last six months, and I’m not even embarrassed to admit it. It has completely taken over my fall baking schedule. Here’s why it’s become my go-to, and why I think it’ll become yours too.
- It Looks Impossible but Isn’t — Seriously. When you pull this out of the oven, people assume you bought it from a high-end bakery. They ask about the piping, the glaze, the “fancy technique.” But it’s just sliced fruit and almond cream. The visual impact is 100% higher than the effort required. I’ve served this to people who bake professionally, and they still asked for the recipe.
- Frangipane is a Flavor Game-Changer — If you’ve never had frangipane (that rich, buttery almond cream filling), your life is missing out. It’s not just sweet; it’s nutty, aromatic, and deeply satisfying. It pairs perfectly with the subtle floral notes of pears. It’s the kind of flavor combination that feels sophisticated but is actually just butter, sugar, eggs, and almond flour.
- Uses Seasonal Pears Perfectly — Autumn pears like Bosc or Anjou are firm and hold their shape beautifully. They don’t turn into mush in the oven. This tart showcases the fruit rather than hiding it. It’s a celebration of what’s fresh right now.
- Make-Ahead Friendly — Unlike many fruit tarts that get soggy if left out, this one actually improves after sitting for a few hours. The flavors meld. The crust stays crisp if you cover it properly. I often make it the night before a dinner party so I’m not stressed the next day.
- Gluten-Free Friendly Base — The crust is naturally gluten-free because it’s made with almond flour and butter. You don’t need a complex gluten-free flour blend. It’s simple, clean, and safe for most guests with sensitivities (just watch out for the apple juice glaze if strictness is a concern).
It’s the kind of dessert that makes you feel like a pro chef, even if you’re wearing pajamas. It’s rich, it’s seasonal, and it’s absolutely worth the 45 minutes of prep time.
Ingredients You’ll Need for the Perfect Tart
Before we dive in, let’s talk about what goes into this fall harvest pear frangipane tart. I’m particular about a few things here. You don’t need fancy equipment, but you do need quality ingredients. The almond flavor should be the star, and the pears need to be the supporting actor that shines.
For the Crust
Unsalted butter (½ cup / 115g, cold and cubed) — This is crucial. The butter needs to be cold so it creates steam pockets in the crust, giving it that flaky, shattery texture. Don’t use salted butter and try to adjust salt later; just use unsalted and control it yourself. Keep it in the fridge until the second you mix it.
All-purpose flour (1 cup / 125g) — I use regular flour for the base. Some people make a pure almond crust, but I like a little flour for structure. It keeps the crust from crumbling apart when you slice it. If you need it fully gluten-free, swap this for a 1:1 gluten-free blend.
Sugar (2 tablespoons / 25g) — Just a touch. We don’t want a sweet crust; we want it to balance the sweet filling. Granulated white sugar works best here.
Salt (¼ teaspoon) — Non-negotiable. It wakes up the flavor of the butter and flour.
Ice water (2-3 tablespoons) — This is what binds it all together. Make sure it’s actually icy cold. If your kitchen is hot, throw the water in the freezer for 10 minutes first.
For the Frangipane Filling
Unsalted butter (½ cup / 115g, softened to room temperature) — Unlike the crust butter, this needs to be soft so you can cream it with the sugar. If it’s too cold, you’ll get lumps. If it’s melted, you’ll lose the airiness. Softened is the goal.
Granulated sugar (½ cup / 100g) — This gives the filling its sweetness and helps it brown nicely in the oven.
Eggs (2 large, room temperature) — Room temperature eggs emulsify better with the butter. Cold eggs can cause the mixture to split. Let them sit on the counter for 30 minutes before you start.
Almond extract (1 teaspoon) — This is the secret weapon. It amplifies the nutty flavor. Don’t skip it. If you don’t have it, you can use vanilla, but the almond flavor will be much more subtle.
Almond flour (1 cup / 100g, finely ground) — Use blanched almond flour (no skins) for the smoothest, lightest texture. Don’t use almond meal (which is coarser) or you’ll get a gritty crust. I buy mine in the baking aisle, not the nut section.
All-purpose flour (2 tablespoons / 15g) — A little bit helps stabilize the filling so it doesn’t become too eggy or custardy.
For the Assembly
Pears (3-4 medium Bosc or Anjou pears) — Bosc pears are my top choice because they’re firm and pear-shaped, making them easy to slice lengthwise. Anjou works too, but they’re rounder. Avoid red pears if you can; the skins can turn the frangipane slightly grayish as it bakes.
Apple juice (2 tablespoons) — I use this for the glaze instead of apricot jam. It’s lighter, less sticky, and has a subtle fruit flavor that complements the pears without overpowering them. If you don’t have apple juice, water with a teaspoon of honey works too.
Honey (1 teaspoon, optional) — Add this to the apple juice for a bit more shine and sweetness.
Flaky sea salt (for finishing) — A tiny pinch on top after baking adds a sophisticated contrast to the sweet filling.
Common Substitutions & Tips
No almond extract? You can use vanilla, but I strongly recommend getting almond extract. It’s cheap and makes a huge difference. Or, increase the almond flour by 2 tablespoons.
Gluten-free? Swap the all-purpose flour in both crust and filling for a high-quality gluten-free blend. The texture will be slightly more tender, almost like a shortbread.
Dairy-free? This is tricky with frangipane because butter is the main fat. You can try a high-quality vegan butter stick, but the flavor won’t be quite as rich. I’d recommend trying a vegan dessert if you’re strictly dairy-free, as this recipe is inherently butter-heavy.
Equipment You’ll Need
You don’t need a fancy kitchen to make this. Here’s what I actually use, and what you can skip.
9-inch Tart Pan with Removable Bottom — This is the most important tool. A removable bottom is essential for getting the tart out cleanly. If you don’t have one, a regular pie plate works, but you’ll have to serve it from the pan, which looks less polished. I use a metal one; glass or ceramic can lead to uneven baking.
Food Processor — I use this for the crust. It cuts the cold butter into the flour evenly and quickly, preventing the butter from melting. You can do it by hand with a pastry cutter, but it takes longer and warms the butter. For the frangipane, I use the food processor to pulse the almond flour and sugar together for a few seconds, ensuring no lumps.
Mixing Bowls — Two medium bowls. One for the crust, one for the filling. I like stainless steel because they’re easy to clean.
Pastry Brush — For the apple juice glaze. A silicone brush works well because it doesn’t shed bristles.
Sharp Knife — For slicing the pears. A serrated knife works if your pears are a bit tough, but a sharp chef’s knife is best for thin, even slices.
Parchment Paper — To line the tart pan. I always line it, even if the pan is non-stick. It makes cleanup a breeze.
How to Make It: Step-by-Step
Alright, let’s make this fall harvest pear frangipane tart! I’m walking you through exactly how I do it, including the little tricks I’ve picked up over the years. Don’t worry if you’re a beginner; this is very forgiving.
Step 1: Make the Crust (10 minutes)
Start by preheating your oven to 375°F (190°C). In a food processor, combine the flour, sugar, and salt. Pulse a few times to mix. Add the cold, cubed butter. Pulse in short bursts until the mixture looks like coarse crumbs with some pea-sized pieces of butter remaining. You don’t want it to be a paste; those little butter bits are what create flakiness.
Pour in the ice water, one tablespoon at a time, pulsing just until the dough starts to clump together. It should hold together when you pinch it. If it’s too dry, add another teaspoon of water. If it’s too wet, add a sprinkle of flour.
Turn the dough out onto a piece of plastic wrap. Form it into a disk, wrap it tightly, and refrigerate for at least 30 minutes. This step is non-negotiable. It relaxes the gluten and re-chills the butter. If you skip it, the crust will shrink in the oven.
Step 2: Blind Bake the Crust (15 minutes)
Once the dough is chilled, roll it out between two sheets of parchment paper. You want it to fit your 9-inch tart pan. Press it gently into the pan, fitting it into the corners and up the sides. Trim the excess edges with a knife. Prick the bottom all over with a fork (this is called docking, and it prevents bubbling).
Line the crust with parchment paper and fill it with pie weights or dried beans. This is called blind baking. Bake for 15 minutes. Then, remove the weights and parchment, and bake for another 5 minutes until the crust is lightly golden and dry to the touch. Let it cool completely on a wire rack. If the crust is warm, the frangipane will start to cook before you even put it in the oven.
Step 3: Make the Frangipane (10 minutes)
In a medium bowl, beat the softened butter and sugar together until light and fluffy. This takes about 2-3 minutes with a hand mixer. It should look pale and airy.
Add the eggs one at a time, beating well after each addition. Then add the almond extract. In a separate small bowl, whisk together the almond flour and the 2 tablespoons of all-purpose flour. Gradually add the dry ingredients to the butter mixture, mixing on low speed until just combined. Don’t overmix; you just want it smooth.
Spread the frangipane evenly into the cooled crust. Use a spatula to smooth the top. It should be about ½ inch thick.
Step 4: Slice and Arrange the Pears (15 minutes)
This is the fun part. Peel the pears. Cut them in half lengthwise, and use a spoon to scoop out the core. Lay each half flat side down and slice lengthwise into thin slices, about ⅛ inch thick. You want them thin enough to be tender but thick enough to hold their shape.
Start at the outer edge of the tart. Place one slice of pear against the edge, slightly overlapping the next. Continue around the entire outer ring. Then, place the next row slightly inside the first, overlapping again. Continue until you reach the center. It should look like fish scales or shingles. If you run out of space, just tuck the smaller pieces in the middle. It doesn’t need to be perfect; rustic is beautiful.
Step 5: Bake the Tart (35-40 minutes)
Place the tart in the preheated oven (375°F / 190°C). Bake for 35-40 minutes. You’ll know it’s done when the frangipane is golden brown on top and puffed up, and the pears are tender. If the edges of the crust start to brown too quickly, cover them with a strip of foil.
Let the tart cool in the pan for 10 minutes, then remove the ring. Let it cool completely on a wire rack. This is hard, I know. But if you cut it while hot, the filling will be runny.
Step 6: Glaze and Serve
Once the tart is completely cool, mix the apple juice and honey in a small bowl. Brush it lightly over the pears. This adds a beautiful shine and keeps the fruit from drying out. Sprinkle with a tiny pinch of flaky sea salt. Slice with a sharp knife and serve.
Total Time: About 1 hour 30 minutes (including cooling time).
Expert Tips & Tricks
Here’s everything I’ve learned from making this dozens of times. These tips will save you from my mistakes.
Keep the Butter Cold
I can’t stress this enough. If your butter melts before the crust hits the oven, you lose the flaky layers. Work quickly. If your kitchen is hot, put the dough back in the fridge for 10 minutes before rolling. If the dough feels warm, it’s too warm.
Don’t Skip the Blind Bake
If you put the wet frangipane into an unbaked crust, the bottom will be soggy. Blind baking creates a barrier. It ensures the crust is crisp all the way through. Trust me, your taste buds will thank you.
Use Room Temperature Eggs
Cold eggs can cause the butter in the frangipane to seize up, creating a curdled look. If you forget to take them out, just put them in a bowl of warm water for 5 minutes. It works every time.
Thin Slices are Key
Thick pear slices won’t cook through in the time it takes the frangipane to set. You’ll end up with raw, crunchy pears. Aim for uniform thin slices so they bake evenly.
Let It Cool Completely
I know it’s tempting. But the frangipane needs time to set. If you cut it hot, it will fall apart. Let it cool for at least an hour, preferably two. The flavors also deepen as it cools.
Storage is Simple
Store leftovers at room temperature, covered, for up to 2 days. If it’s very hot, you can refrigerate it, but let it come to room temperature before serving for the best texture. It doesn’t freeze well because the pear texture changes upon thawing.
Variations & Substitutions
Once you’ve nailed the basic version, here’s how you can mix it up. I’ve tried all of these.
Other Fruits
This technique works with apples, too. Use thin slices of Honeycrisp or Granny Smith apples. Apples are slightly more acidic, so you might want to add an extra teaspoon of sugar to the frangipane. Peaches work well in late summer, but they’re juicier, so reduce the baking time by 5 minutes.
Nut-Free Option
If you have nut allergies, you can swap the almond flour for oat flour or more all-purpose flour. Add 1 teaspoon of vanilla and 1 teaspoon of lemon zest to the filling. It won’t be frangipane, but it will be a delicious cream cheese-style tart.
Add-Ins
Sprinkle ¼ cup of sliced almonds on top of the frangipane before adding the pears. It adds crunch and looks pretty. Or, add a layer of sweetened cranberries between the pears for a tart contrast.
Gluten-Free
As mentioned, swap the all-purpose flour for a gluten-free blend. The result is slightly more tender, like a shortbread cookie. It’s delicious and safe for most guests.
Serving & Storage
How to Serve
I usually serve this plain, maybe with a dollop of whipped cream or a scoop of vanilla ice cream. The tart is rich enough that it doesn’t need much extra sweetness. It pairs beautifully with black tea or a cup of coffee. I’ve also served it with a glass of dessert wine, like a late-harvest Riesling, which complements the pear flavor perfectly.
Storage Instructions
Room Temperature: Store in an airtight container or under a cake dome for up to 2 days. The crust stays crisp for the first day, then softens slightly. This is still delicious.
Refrigerator: If your kitchen is warm, refrigerate it. Let it come to room temperature before serving. Cold frangipane is less flavorful.
Freezing: I don’t recommend freezing this tart. The pears release water when thawed, and the texture becomes mushy. It’s best enjoyed fresh.
Nutrition Information
I’m not a nutritionist, but here’s the breakdown if you’re tracking. This is a rich dessert, so portion control is key.
Per Serving (based on 8 slices):
- Calories: 320
- Protein: 6g
- Carbs: 35g
- Fiber: 3g
- Sugar: 18g
- Fat: 18g
- Saturated Fat: 9g
- Cholesterol: 65mg
- Sodium: 180mg
What’s Good: It has some protein and fiber from the almonds and pears. It’s naturally gluten-free if you skip the wheat flour.
What to Know: It’s high in fat and sugar because of the butter and almond flour. It’s a treat, not a health food. But it’s better than store-bought pastry because you know exactly what’s in it.
Final Thoughts
So that’s my fall harvest pear frangipane tart! I’ve probably talked your ear off at this point, but when you make a recipe this often, you have a lot to say about it. This tart has saved my fall baking repertoire. It’s elegant, it’s seasonal, and it’s surprisingly easy. My friends think I’m a pastry chef, and honestly? I don’t mind letting them believe it.
Make it yours! Try different pears, add nuts, or experiment with the glaze. The best recipes are the ones you adapt to your tastes. If you make this, drop a comment and let me know how it turns out. I love hearing about your kitchen adventures. And if something doesn’t work, tell me—I’m here to help.
Happy baking! And I hope your kitchen smells half as good as mine does right now.
Frequently Asked Questions
Can I use canned pears?
You can, but fresh pears are much better. Canned pears are softer and have more water, which can make the frangipane soggy. If you must use canned, drain them very well and pat them dry with paper towels. But fresh Bosc or Anjou pears are worth the trip to the store.
Why did my frangipane crack?
Cracking usually happens if the oven is too hot or if the tart is overbaked. The frangipane is an egg-based filling, and high heat causes it to puff and then collapse. Make sure your oven is properly calibrated. If your oven runs hot, lower the temperature to 350°F (175°C) and bake for a few minutes longer.
Can I make this ahead?
Yes! The crust can be baked 2 days ahead and stored in an airtight container. The frangipane can be made 1 day ahead and stored in the fridge. Assemble the tart the day you want to serve it. This is my preferred method for dinner parties.
What if I don’t have a tart pan?
A pie plate works fine. Just press the crust into the pie plate and arrange the pears. The presentation won’t be as clean, but the taste will be the same. You’ll just need to serve it from the pan.
Can I use almond meal instead of almond flour?
You can, but the texture will be grainier. Almond flour is finely ground, while almond meal is coarser. If you only have almond meal, pulse it in a food processor a few times to make it finer. It will still be delicious, just not as smooth.
Is this tart too sweet?
It’s moderately sweet. The almonds and pears balance each other out. If you prefer less sweet, reduce the sugar in the frangipane by 2 tablespoons. The pears will still provide enough natural sweetness.
Can I add other nuts?
You can try hazelnuts or pecans, but the flavor profile will change. Hazelnut frangipane is delicious with pears, too. Just toast the nuts first for the best flavor. But almond is the classic choice for a reason.
Pin This Recipe!
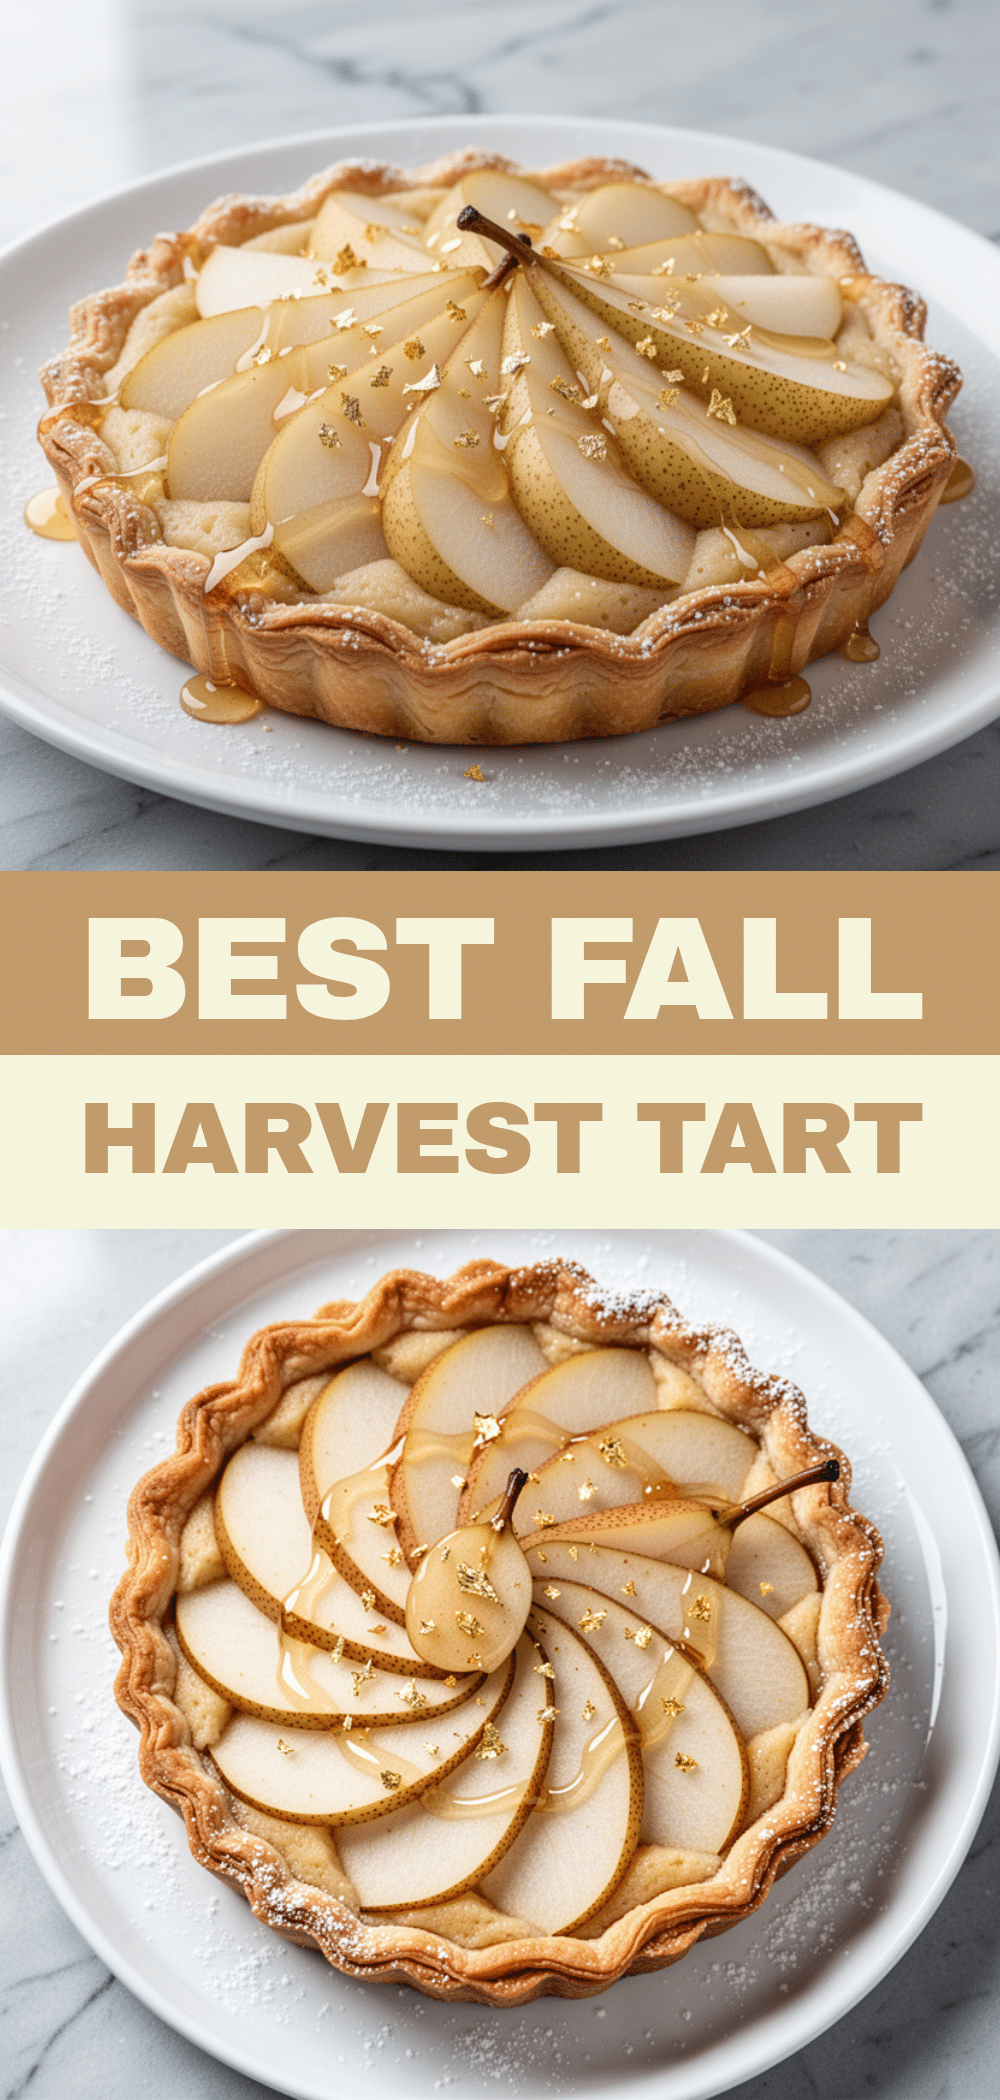
Fall Harvest Pear Frangipane Tart
- Total Time: 1 hour 30 minutes
- Yield: 8 servings 1x
Description
An elegant yet easy-to-make tart featuring a crisp almond-flour crust, rich frangipane filling, and thinly sliced seasonal pears arranged in a shingle pattern.
Ingredients
- For the Crust:
- 1 cup (125g) all-purpose flour
- 2 tablespoons (25g) granulated sugar
- 1/4 teaspoon salt
- 1/2 cup (115g) unsalted butter, cold and cubed
- 2–3 tablespoons ice water
- For the Frangipane Filling:
- 1/2 cup (115g) unsalted butter, softened to room temperature
- 1/2 cup (100g) granulated sugar
- 2 large eggs, room temperature
- 1 teaspoon almond extract
- 1 cup (100g) finely ground blanched almond flour
- 2 tablespoons (15g) all-purpose flour
- For the Assembly:
- 3–4 medium Bosc or Anjou pears, peeled and sliced
- 2 tablespoons apple juice
- 1 teaspoon honey (optional)
- Flaky sea salt, for finishing
Instructions
- Preheat oven to 375°F (190°C).
- Make the crust: In a food processor, pulse flour, sugar, and salt. Add cold butter and pulse until mixture resembles coarse crumbs with pea-sized butter pieces.
- Add ice water one tablespoon at a time, pulsing just until dough clumps together. Form into a disk, wrap in plastic, and refrigerate for at least 30 minutes.
- Blind bake the crust: Roll dough between parchment paper and press into a 9-inch tart pan. Trim edges and prick bottom with a fork. Line with parchment and fill with pie weights.
- Bake for 15 minutes with weights, then remove weights and bake for another 5 minutes until lightly golden. Cool completely on a wire rack.
- Make the frangipane: Beat softened butter and sugar until light and fluffy. Add eggs one at a time, then almond extract. Whisk almond flour and 2 tablespoons all-purpose flour separately, then gradually mix into butter mixture until smooth.
- Spread frangipane evenly into the cooled crust.
- Slice pears lengthwise into thin slices (about 1/8 inch). Arrange slices in overlapping rows starting from the outer edge, working inward like shingles.
- Bake for 35-40 minutes until frangipane is golden brown and puffed, and pears are tender. Cover crust edges with foil if browning too quickly.
- Cool in pan for 10 minutes, then remove ring. Cool completely on a wire rack.
- Glaze: Mix apple juice and honey, brush over cooled pears, and sprinkle with flaky sea salt before serving.
Notes
Ensure butter is cold for the crust to ensure flakiness. Blind baking is crucial to prevent a soggy bottom. Use room temperature eggs for the frangipane to prevent curdling. Let the tart cool completely before slicing to allow the filling to set. Store at room temperature for up to 2 days.
- Prep Time: 45 minutes
- Cook Time: 55 minutes
- Category: Dessert
- Cuisine: French
Nutrition
- Serving Size: 1 slice
- Calories: 320
- Sugar: 18
- Sodium: 180
- Fat: 18
- Saturated Fat: 9
- Carbohydrates: 35
- Fiber: 3
- Protein: 6
Keywords: pear tart, frangipane, fall baking, gluten-free dessert, almond tart, autumn recipes, easy pie recipe


