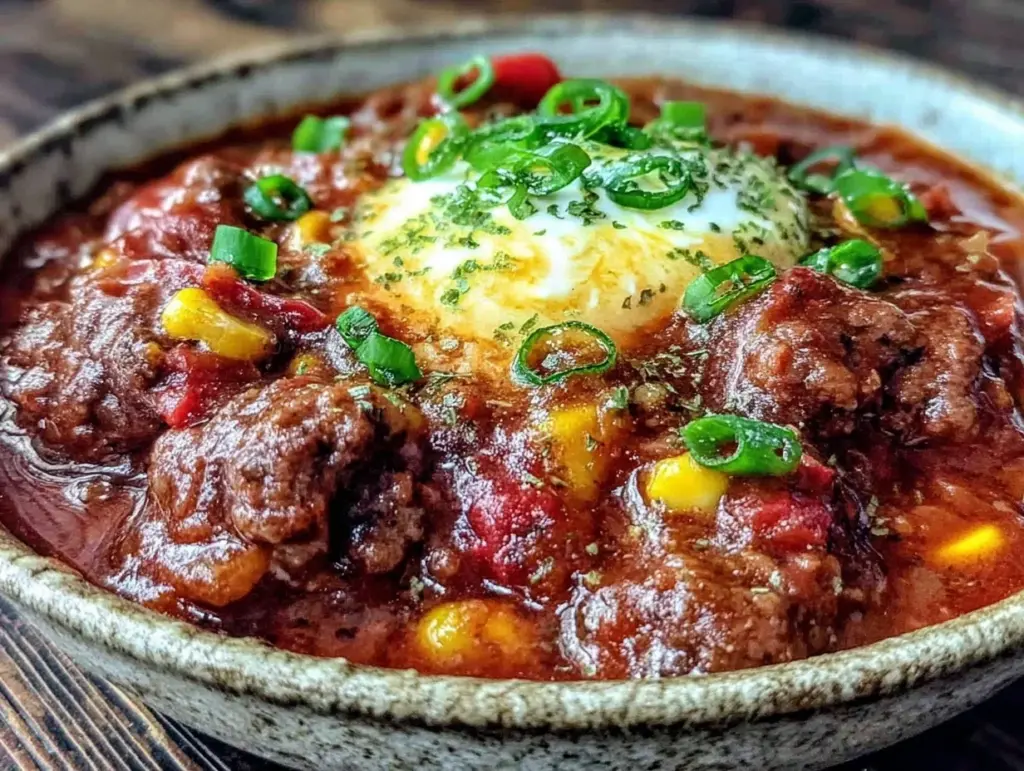
I still remember the first time I served this chili to a room full of skeptical friends. It was a crisp October evening, the kind where you can actually see your breath outside, and I had just moved into a new apartment with a kitchen that felt too big for my cooking skills. I wanted to impress. I wanted warmth. I wanted something that smelled like a hug.
I made the chili in my biggest pot, the one I’d bought at a garage sale for three dollars. When I brought it to the table, there was a moment of silence. Then my friend Sarah took a bite, closed her eyes, and said, “This is the best thing I’ve ever eaten.” It wasn’t just good. It was classic. Rich, meaty, deeply savory, and packed with vegetables that actually tasted like vegetables, not just filler.
The secret? No beans. I know, I know. Traditional chili has beans. But for a dinner party, beans can be a polarizing ingredient. Some people love them; some people think they turn the chili into a stew. By skipping them, you get a concentrated, luxurious texture that feels more like a gourmet steakhouse dish than a backyard cookout staple. It’s hearty enough to satisfy anyone, but refined enough to make your guests ask for the recipe immediately.
This classic beef and vegetable chili no beans has become my go-to for hosting. It’s forgiving (you can prep it hours ahead), it smells incredible as it simmers, and it tastes even better the next day. I’ve tested this recipe dozens of times, tweaking the spice levels and the vegetable ratios, until I landed on the perfect balance. It’s a 5-step process that delivers maximum flavor with minimal stress, making it the ultimate party favorite.
Why You’ll Love This Chili
There are about a dozen reasons I keep making this chili, but here are the big ones that keep it in my regular rotation.
It’s a Crowd-Pleaser — I’ve served this to my vegetarian sister (she swaps the beef for lentils, but the base is the same), my meat-loving dad, and picky eaters alike. Everyone loves it. The rich beef flavor satisfies the carnivores, while the abundance of roasted vegetables appeals to everyone else. It’s a true compromise that actually tastes delicious.
Lightning Fast Prep — Seriously, if you can chop an onion, you can make this. The active cooking time is less than 30 minutes. The rest is just simmering while you get dressed or set the table. I make this on weeknights when I’m tired, but I also make it for weekend dinner parties because I can prep it in the morning and let it do its thing.
Rich, Luxurious Texture — Without beans to bulk it up, this chili has a thick, meaty consistency that feels indulgent. It’s not watery. It’s not soupy. It’s a hearty, spoonable dish that coats your mouth in flavor. The vegetables break down slightly into the sauce, creating a natural thickness that feels like you spent hours on it.
Freezer-Friendly — I deliberately make extra for lunch throughout the week. This chili freezes beautifully for up to 3 months. I portion it into individual containers, and on busy days, I just need 10 minutes to reheat it. It actually tastes better after a day or two in the fridge, as the flavors have time to meld together.
Customizable Heat — I love that you can control the spice level. I make mine medium-hot, but I always keep mild chili powder and hot sauce on the side. That way, everyone can adjust their bowl to their preference. It’s like having a condiment bar built into your dinner.
This is my go-to when I need dinner to just work. No complicated techniques, no weird ingredients, just reliable, delicious food that makes everyone happy. It’s the kind of dish that brings people together.
Ingredients You’ll Need
Here’s the best part: you probably have most of this already. I’m particular about three ingredients here, and I’ll tell you exactly why.
For the Base
Ground beef (2 pounds / 900g) — Use 80/20 fat ratio. Yes, it’s fattier, but that fat is where the flavor lives. Lean beef makes this dry and bland. If you’re worried about grease, you can drain some, but leave a little bit for richness. I always use ground chuck from my local butcher—it’s fresher and tastes better than the pre-packaged stuff.
Yellow onion (2 medium, diced / about 400g) — Sweet onions work too, but yellow gives better depth. White onions are too sharp for this. Dice them small so they melt into the sauce.
Garlic (6 cloves, minced / about 2 tablespoons) — Yes, six cloves. Don’t skimp. Fresh only—no jarred garlic in this recipe. It tastes metallic and bitter in a slow-cooked dish. Buy the pre-peeled cloves if you want to save time, but fresh is best.
Carrots (3 medium, diced / about 300g) — They add natural sweetness and bulk. Dice them to the same size as the onion so they cook evenly. I use orange carrots, but purple ones work too—they just look prettier.
Celery (3 stalks, diced / about 150g) — The classic mirepoix trio. Celery adds a subtle earthiness that balances the sweetness of the carrots and onions.
Bell peppers (2 medium, diced / about 300g) — I use one red and one green for color and flavor contrast. Red is sweeter; green is more peppery. You can use all red if you prefer, or all green for a sharper taste.
For the Flavor
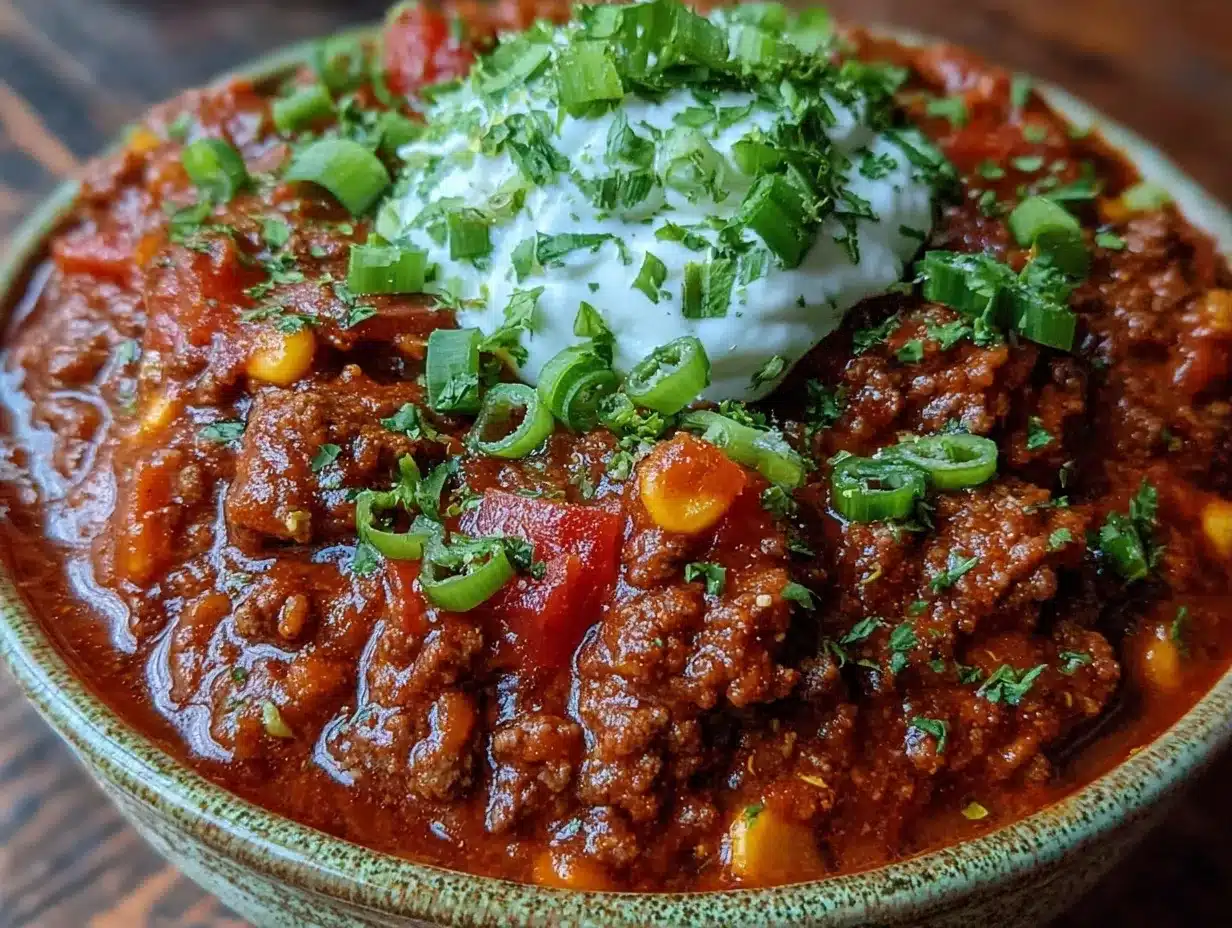
Tomato sauce (2 cans / 28oz each) — Use high-quality canned tomatoes. I prefer Hunt’s or Muir Glen. No added salt, so I can control the sodium. Crushed tomatoes work too, but sauce gives a smoother texture.
Tomato paste (2 tablespoons) — This is the secret weapon. It concentrates the tomato flavor and adds depth. Cook it in the oil for a minute before adding liquids to caramelize it slightly.
Beef broth (2 cups / 480ml) — I use low-sodium so I can control salt. Homemade broth is amazing, but store-bought works fine. Vegetable broth works for a vegetarian version.
Chili powder (3 tablespoons) — Not just cayenne. Chili powder is a blend of dried chilies, cumin, garlic, and oregano. Use a good brand like McCormick or Badia. This is the backbone of the flavor.
Cumin (1 tablespoon) — Ground cumin. It adds that earthy, warm note that defines chili. Toast it in the pan for 30 seconds before adding other spices to release its oils.
Cayenne pepper (½ teaspoon) — Optional, but adds nice kick. Start with less if you’re sensitive to spice. I use ½ teaspoon for medium heat.
Smoked paprika (1 teaspoon) — This adds a smoky depth that mimics slow-cooking over an open fire. It’s a game-changer. Regular paprika works, but smoked is better.
Dried oregano (1 teaspoon) — Mexican oregano is best if you can find it, but regular works fine. It adds a herbal brightness.
Salt and black pepper — To taste. I start with 1 teaspoon salt and ½ teaspoon pepper, then adjust at the end.
For the Finish
Fresh cilantro (½ cup, chopped) — Adds freshness and color. Stir it in right before serving. Don’t skip this—it cuts through the richness.
Lime wedges — For squeezing over the top. The acidity brightens everything up.
Optional Add-ins:
- Dark chocolate (1 square, chopped) — Yes, really. It adds richness and depth, like in mole. It doesn’t make it taste like dessert.
- Hot sauce — For serving. I like Tabasco or Cholula.
- Sour cream — For topping. Cool and creamy contrast to the hot chili.
Equipment Needed
You don’t need fancy equipment for this. Here’s what I actually use.
Large Dutch oven or heavy-bottomed pot — I use a 6-quart pot. Needs to fit 2 pounds of beef and all the veggies comfortably. My ancient pot from college still works fine, but a Dutch oven retains heat better for simmering.
Large skillet — If your pot isn’t wide enough, use a skillet to brown the beef first. I prefer stainless steel or cast iron, but non-stick works too.
Sharp knife — For chopping onions, carrots, and celery. Dull knives make you cry more—learned this the hard way.
Cutting board — Any size works. I use plastic for easier cleanup.
Wooden spoon — For stirring. Silicone works too. Don’t use metal on non-stick.
Measuring cups and spoons — Pretty standard stuff. Dollar store versions work fine.
Ladle — For serving. Or just use a big spoon. I have a ladle that’s perfect for scooping into bowls.
Optional but nice:
- Garlic press — Saves time but not necessary. Mincing works fine.
- Microplane — For grating garlic if you want it super fine.
How to Make It: Step-by-Step
Alright, let’s make this! I’m walking you through exactly how I do it, including the little tricks I’ve picked up.
Step 1: Prep Your Ingredients (10 minutes)
Before you start cooking, chop your onion, dice your carrots and celery, and mince your garlic. I know it seems fussy, but it makes the actual cooking way less stressful. Grate your cheese and chop your cilantro while you’re at it. Once you start cooking, things move fast.
Step 2: Brown the Beef (5-8 minutes)
Heat your Dutch oven or large pot over medium-high heat. Add a splash of oil if your beef is very lean. Add the ground beef, breaking it up with a wooden spoon. Cook for 5-8 minutes until browned and no longer pink. Do not overcrowd the pan—if you’re using a small pot, brown in batches. IMPORTANT: Drain excess grease if there’s too much, but leave a little bit for flavor. Remove the beef with a slotted spoon and set aside on a plate.
Step 3: Sauté the Aromatics (5 minutes)
In the same pot, add a little more oil if needed. Add the diced onions, carrots, and celery. Cook for 5 minutes, stirring occasionally, until the onions are translucent and the carrots start to soften. Add the minced garlic and cook for 1 minute, stirring constantly. The garlic should smell amazing but not brown—browned garlic tastes bitter.
Step 4: Bloom the Spices (1 minute)
Add the chili powder, cumin, smoked paprika, and dried oregano. Stir constantly for 1 minute. This “blooms” the spices, releasing their oils and intensifying their flavor. It’s a crucial step you shouldn’t skip. The kitchen will start smelling incredible.
Step 5: Build the Chili (10 minutes)
Stir in the tomato paste and cook for 1 minute to caramelize it slightly. Add the browned beef back to the pot. Pour in the tomato sauce and beef broth. Stir well to combine, scraping up any browned bits from the bottom of the pot—those are flavor gold. Add salt and black pepper. Bring to a boil, then reduce heat to low.
Step 6: Simmer (20-30 minutes)
Let the chili simmer uncovered for 20-30 minutes. Stir occasionally. The sauce will thicken, and the vegetables will soften. If it gets too thick, add a splash of water or broth. If it’s too thin, let it simmer longer. The chili is ready when the flavors have melded and the sauce coats the back of a spoon.
Step 7: Finish and Serve
Remove from heat. Stir in the fresh cilantro and a squeeze of lime juice. Taste and adjust salt if needed. Serve hot, topped with sour cream, cheese, and extra cilantro. This classic beef and vegetable chili no beans is best served with crusty bread or cornbread on the side.
Total Time: About 45 minutes (15 minutes active, 30 minutes simmering)
Expert Tips & Tricks
Here’s everything I’ve learned from making this dozens of times. These tips will save you from my mistakes.
Bloom Your Spices
This is the #1 tip. Cooking the spices in oil for a minute before adding liquids unlocks their full flavor potential. I forgot this once and the chili tasted flat. Now I always bloom my spices. It takes 60 seconds and makes a huge difference.
Don’t Drain All the Fat
Yes, it’s fat. But it’s flavor fat. If you drain all the grease, the chili will taste dry. Leave a tablespoon or two in the pot to cook the vegetables. You can always skim off excess later if you’re worried about it.
Simmer Low and Slow
Don’t rush the simmer. Letting the chili cook for a full 30 minutes allows the flavors to meld and the vegetables to break down slightly. If you’re short on time, you can simmer for 15 minutes, but it won’t be as good. Patience pays off.
Acid is Key
A squeeze of lime juice or a splash of vinegar at the end brightens the entire dish. Rich, heavy dishes need acid to balance them. I always keep a lime handy for this reason.
Common Mistakes (and how to avoid them):
- Mistake: Chili is too spicy
Fix: Add a splash of cream or sour cream to neutralize the heat. Or add a pinch of sugar to balance it. - Mistake: Chili is too bland
Fix: Add more salt, or a splash of lime juice. Sometimes it just needs time to meld. - Mistake: Vegetables are mushy
Fix: Don’t overcook them. Add harder veggies like carrots early, and softer veggies like peppers later if you want them to retain some bite.
Variations & Substitutions
Once you’ve nailed the basic version, here’s how you can mix it up. I’ve tried all of these.
Vegetarian Version
Swap the beef for lentils or chickpeas. Use vegetable broth instead of beef broth. The spices stay the same. I’ve made this for my vegetarian sister, and she loved it. It’s hearty and satisfying.
Turkey Chili
Use ground turkey instead of beef. It’s leaner and lighter. I add a tablespoon of olive oil to compensate for the lack of fat. It’s still delicious, just different.
Slow Cooker Version
Brown the beef and sauté the veggies on the stove, then transfer to a slow cooker. Add all other ingredients and cook on low for 6-8 hours. This is great for meal prep. I do this when I have a long day at work.
Instant Pot Version
Use the sauté function to brown beef and veggies, then pressure cook for 15 minutes. Quick and easy. I love this for weeknights.
Dietary Modifications:
- Gluten-Free — This recipe is naturally gluten-free. Just check your chili powder and broth labels.
- Dairy-Free — Skip the sour cream and cheese. Use coconut cream as a topping if you want richness.
- Low-Carb — This is already low-carb since there are no beans. Serve with cauliflower rice or zucchini noodles.
For more party-friendly sides, check out my loaded baked potato salad or some spicy chipotle corn on the cob to round out the meal.
Serving & Storage
I usually serve this straight from the pot at the dinner table—it looks rustic and stays warm. But here are other ways I’ve enjoyed it:
How to Serve
- With Cornbread — Classic combo. The sweetness of the cornbread balances the spice.
- With Crusty Bread — For dipping. Good for soaking up the sauce.
- Over Rice — For a heartier meal. I sometimes serve it over white rice.
- With Toppings Bar — Set out sour cream, cheese, cilantro, jalapeños, and hot sauce. Let everyone customize their bowl.
Storage Instructions
Refrigerator: Store in an airtight container for up to 5 days. The flavors actually get better after a day or two.
Freezer: This freezes beautifully for up to 3 months. Portion into individual containers for easy lunches. Thaw in the fridge overnight and reheat gently.
Reheating: Best method: Add to a pot over low heat, stirring occasionally. Add a splash of water or broth if it’s too thick. Microwave works too, but stir every minute to prevent hot spots.
Nutrition Information
I’m not a nutritionist, but here’s the breakdown if you’re tracking.
Per Serving (based on 6 servings):
- Calories: 380
- Protein: 28g
- Carbs: 18g
- Fiber: 5g
- Sugar: 8g
- Fat: 22g
- Saturated Fat: 9g
- Cholesterol: 90mg
- Sodium: 650mg
What’s Good:
- High protein from the beef
- Good amount of fiber from vegetables
- Rich in vitamins from carrots and peppers
What to Know:
- Higher in calories from beef fat
- Contains dairy if topped with cheese/sour cream
- Use low-sodium broth to reduce sodium
Look, this is comfort food. It’s not a diet recipe. But it’s way better than takeout, costs less, and I know exactly what’s in it. When I want to make it lighter, I use leaner beef and skip the toppings. But usually? I just eat a reasonable portion and enjoy it.
Final Thoughts
So that’s my go-to classic beef and vegetable chili no beans! I’ve probably talked your ear off at this point, but when you make a recipe this often, you have a lot to say about it.
This has saved weeknight dinners more times than I can count. It’s my answer to “what’s for dinner” when I’m tired, don’t want takeout, and still want something that tastes really good. My kids are happy, my husband’s happy, and I’m happy because I’m not stressed about cooking.
Make it yours! Try different add-ins, swap in your favorite vegetables, adjust the garlic (though more is always better in my opinion). The best recipes are the ones you adapt to your family’s tastes.
If you make this, drop a comment and let me know what you think! I love hearing how recipes turn out in your kitchen. And if something doesn’t work, tell me that too—I’m here to help troubleshoot.
Happy cooking! And I hope your kitchen smells half as good as mine does right now.
Frequently Asked Questions
Can I use ground turkey instead of beef?
Yes! Ground turkey works great. Just add a tablespoon of olive oil to the pot since turkey is leaner. It’ll be lighter but still delicious. I make this version when I want something a bit healthier.
Why did my chili turn out watery?
Usually means you didn’t simmer it long enough. The sauce needs time to reduce and thicken. Let it simmer uncovered for at least 20-30 minutes. If it’s still thin, you can mash some of the vegetables against the side of the pot to thicken it naturally.
Can I make this ahead for a dinner party?
Absolutely. In fact, it tastes better the next day. Make it up to 2 days ahead and store in the fridge. Reheat gently before serving. This is perfect for party planning because you can do all the work beforehand.
Can I freeze this chili?
Yes! This freezes beautifully for up to 3 months. Portion into individual containers for easy lunches. Thaw in the fridge overnight and reheat gently. It doesn’t separate like some dairy-based soups do.
What’s the best way to reheat leftovers?
Best method: Add to a pot over low heat, stirring occasionally. Add a splash of water or broth if it’s too thick. Microwave works too, but stir every minute to prevent hot spots. Avoid reheating in the microwave for too long, as it can dry out the beef.
Can I add beans to this recipe?
Of course! If you prefer beans, add a can of drained kidney beans or black beans in the last 10 minutes of simmering. Just note that it will change the texture and make it more like traditional chili.
How spicy is this chili?
It’s medium-hot. The cayenne pepper gives it a kick, but it’s not overwhelming. You can adjust the heat by adding more or less cayenne. I always keep hot sauce on the side for those who want extra spice.
Pin This Recipe!


Classic Beef and Vegetable Chili No Beans
- Total Time: 45 minutes
- Yield: 6 servings 1x
Description
A rich, meaty, and deeply savory chili without beans, featuring a luxurious texture and customizable heat. This 5-step party favorite is forgiving, freezer-friendly, and perfect for hosting.
Ingredients
- 2 pounds ground beef (80/20 fat ratio)
- 2 medium yellow onions, diced
- 6 cloves garlic, minced
- 3 medium carrots, diced
- 3 stalks celery, diced
- 2 medium bell peppers (1 red, 1 green), diced
- 2 cans (28oz each) tomato sauce
- 2 tablespoons tomato paste
- 2 cups beef broth (low-sodium)
- 3 tablespoons chili powder
- 1 tablespoon ground cumin
- 1/2 teaspoon cayenne pepper
- 1 teaspoon smoked paprika
- 1 teaspoon dried oregano
- 1 teaspoon salt (or to taste)
- 1/2 teaspoon black pepper (or to taste)
- 1/2 cup fresh cilantro, chopped
- Lime wedges for serving
Instructions
- Prep ingredients: Chop onions, dice carrots and celery, and mince garlic.
- Brown the beef: Heat a large Dutch oven or pot over medium-high heat. Add ground beef and cook for 5-8 minutes until browned, breaking it up with a spoon. Drain excess grease if necessary, leaving some for flavor. Remove beef and set aside.
- Sauté aromatics: In the same pot, add onions, carrots, and celery. Cook for 5 minutes until onions are translucent. Add garlic and cook for 1 minute until fragrant.
- Bloom spices: Add chili powder, cumin, smoked paprika, and oregano. Stir constantly for 1 minute to release oils.
- Build the chili: Stir in tomato paste and cook for 1 minute. Return beef to the pot. Add tomato sauce and beef broth, scraping up browned bits. Add salt and pepper. Bring to a boil, then reduce heat to low.
- Simmer: Let chili simmer uncovered for 20-30 minutes, stirring occasionally, until sauce thickens and vegetables soften.
- Finish and serve: Remove from heat. Stir in fresh cilantro and lime juice. Taste and adjust seasoning. Serve hot with optional toppings.
Notes
Bloom spices in oil for maximum flavor. Do not drain all the beef fat as it adds richness. Simmer low and slow for best results. Add acid (lime/vinegar) at the end to brighten the dish. Can be made vegetarian by swapping beef for lentils and using vegetable broth. Freezes well for up to 3 months.
- Prep Time: 15 minutes
- Cook Time: 30 minutes
- Category: Main Course
- Cuisine: American
Nutrition
- Serving Size: 1 bowl
- Calories: 380
- Sugar: 8
- Sodium: 650
- Fat: 22
- Saturated Fat: 9
- Carbohydrates: 18
- Fiber: 5
- Protein: 28
Keywords: beef chili, no bean chili, vegetable chili, party food, dinner party, comfort food, slow cooker chili, freezer friendly


