I still remember the first time I served this dish to a group of friends who were “hard to please.” You know the type. One person is gluten-free, another claims to be vegetarian (but secretly eats cheese), and the host is just trying to keep everyone from going hungry before the appetizers run out. I was stressed, overthinking my menu, and ready to order three different pizzas. Then I remembered the one-pot chicken and chorizo paella I’d made the month before. It was a disaster-free, single-dish wonder that tasted like I’d spent all day in the kitchen.
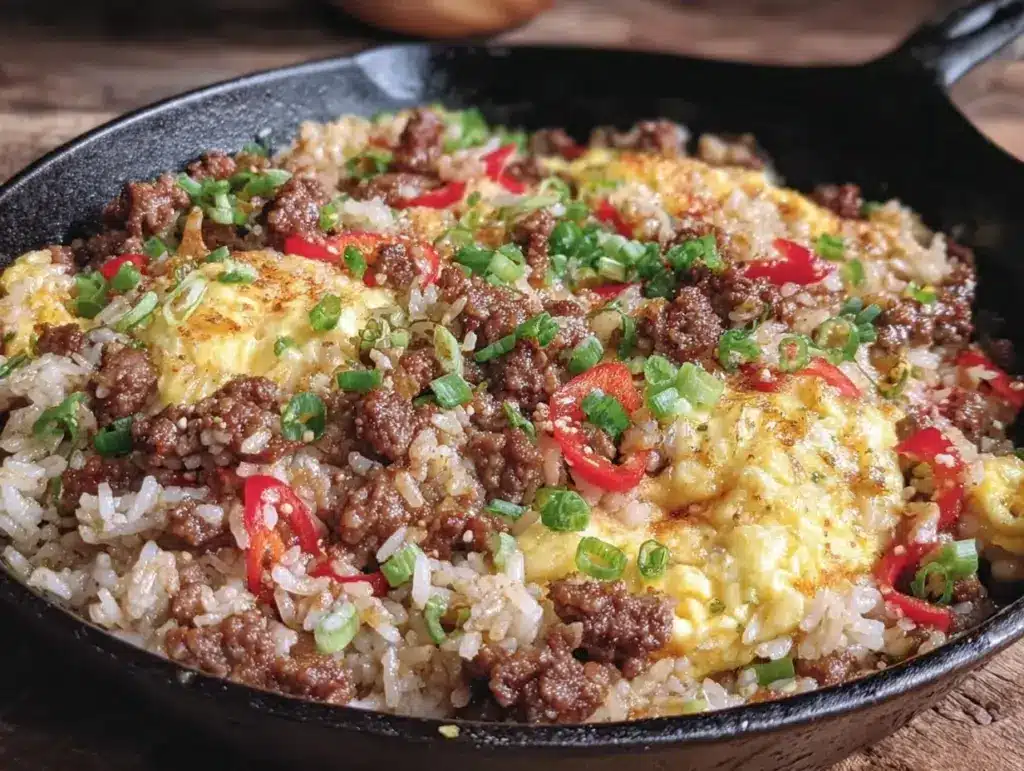
That night, I threw together a One-Pot Ground Beef and Rice Skillet with Bell Peppers that became the hero of the meal. It was rustic, colorful, and smelled incredible. Within ten minutes, the plate was empty. My friends didn’t ask for seconds because they were polite; they asked for seconds because they genuinely couldn’t stop eating it. That’s when I knew: this wasn’t just a weeknight shortcut. This was a legitimate dinner party dish that looks impressive but requires almost zero effort.
Here’s the thing about one-pot meals. They’re usually reserved for lazy Tuesdays or rainy Sundays. But when you add the right amount of spice, the perfect ratio of rice to beef, and enough fresh vegetables, it transforms into something hearty and celebratory. This skillet is my answer to “what’s for dinner?” when I want to feed a crowd without spending my entire evening scrubbing pots. It’s rich, it’s savory, and it’s incredibly forgiving. If you’re looking for a meal that brings everyone to the table, this is it.
Why You’ll Make This One-Pot Beef and Rice Skillet On Repeat
There are about a dozen reasons I keep coming back to this skillet, but let’s be honest—we’re all busy. We need recipes that deliver maximum flavor with minimum cleanup. This one-pot ground beef and rice skillet checks every single box. It’s not just convenient; it’s genuinely delicious.
- Zero Dish Stress — Seriously, one pot. That’s it. I’ve made this for dinner parties where I had to wash everything else, but this skillet went straight into the oven or stayed on the stove. No saucepan for rice, no separate pan for beef, no colander for veggies. Just one pot to wash. My dishwasher (and my sanity) thanks me.
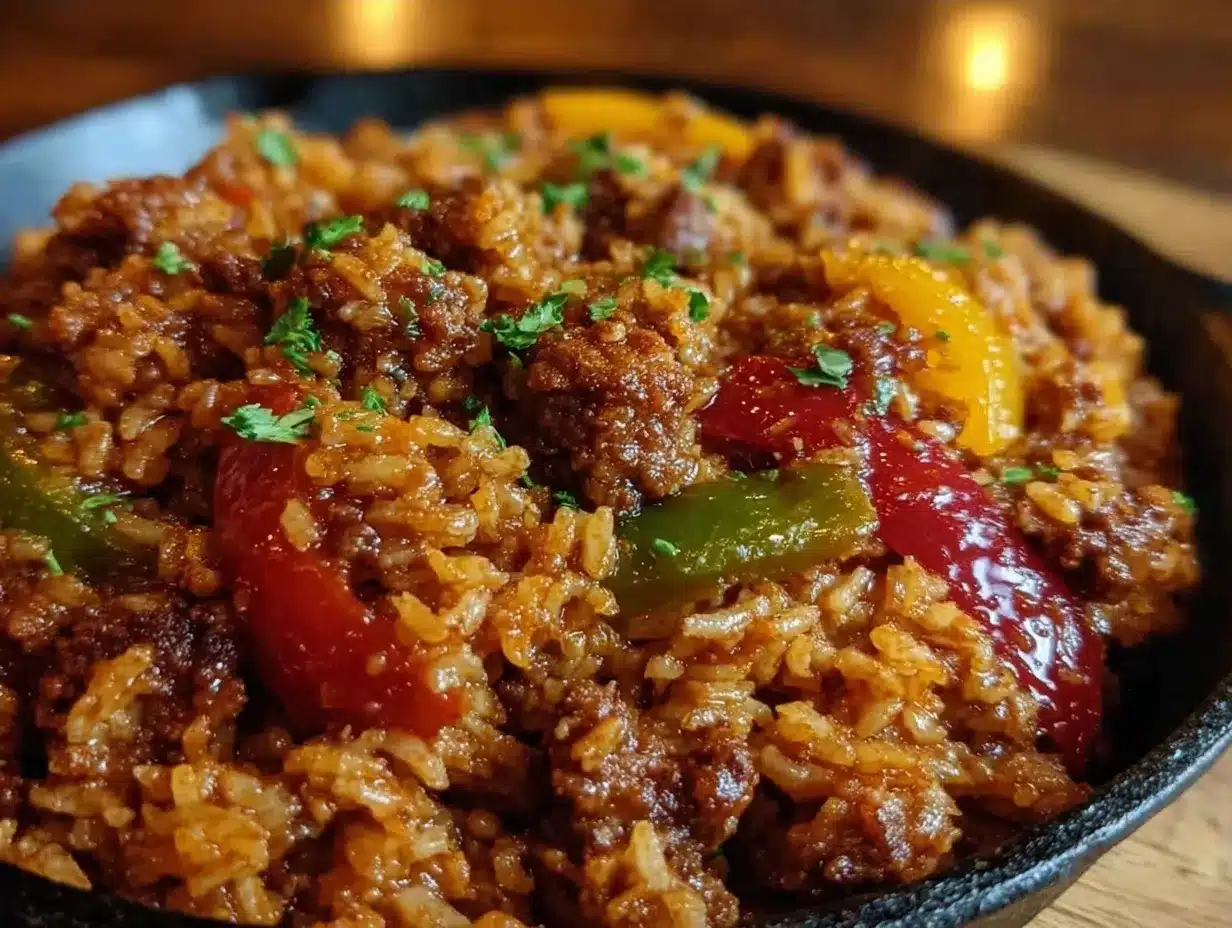
- Looks Like a Showstopper — There’s something deeply satisfying about serving food straight from the skillet. It feels rustic and abundant. The vibrant colors of the red and green bell peppers against the savory beef and fluffy rice make it look like you went to a high-end Mexican or Tex-Mex restaurant. It’s visually stunning without any plating effort.
- Feeds a Crowd for Pennies — I calculated this last week. Feeding six people costs me less than $20. That’s significantly cheaper than ordering takeout, and it’s infinitely healthier. Plus, you get a full vegetable serving in every bite. It’s budget-friendly without feeling like you’re eating “cheap” food.
- Customizable for Everyone — This recipe is a chameleon. Add more cheese for the kids? Done. Make it spicy for the heat-lovers? Easy. Swap the beef for turkey or leave it out entirely for a vegetarian version using lentils or extra beans. It adapts to your family’s tastes instantly. I’ve made it with high-protein turkey taco skillet spices before, and it works just as well if you want a lighter protein.
- Leftovers Taste Better — I know, I know. Usually, rice dishes dry out overnight. But this one? The flavors meld together. The next day, it’s even more flavorful. I love packing this for lunch because it reheats beautifully in the microwave without getting rubbery. Just add a splash of water and stir.
This skillet has completely changed my weeknight routine. It’s my go-to when I want to feel like a good host but don’t have the time to prep five different sides. It’s reliable, it’s filling, and it makes everyone happy.
Ingredients You’ll Need for the Perfect Skillet
Here’s the best part: you probably have most of this already. This isn’t a recipe where you need to run to three different specialty stores. It’s built on pantry staples and fresh produce. I’m particular about a few things here, so pay attention to the notes below.
For the Base
Ground Beef (1.5 lbs / 680g) — I use 80/20 lean-to-fat ratio. Yes, the fat adds flavor. If you use leaner beef, you might need a tablespoon of oil. I prefer the richness, but 90/10 works if you’re watching calories. Brown it well; you want those crispy bits.
Yellow Onion (1 large, diced / about 250g) — This is your flavor foundation. Don’t skip it. It adds sweetness and depth. I dice it finely so it melts into the dish.
Bell Peppers (2 medium, diced / about 300g) — I use one red and one green for color contrast. Red is sweeter; green is more peppery. You can use all red if you prefer, but the mix looks beautiful. Make sure they’re diced to the same size as the onion for even cooking.
Long Grain White Rice (1.5 cups / 300g) — I use standard long grain like Jasmine or Basmati. Do not use instant rice or brown rice unless you adjust the liquid and time. Long grain stays fluffy and doesn’t get mushy. Crispy baked cod might seem unrelated, but the principle of cooking rice perfectly is the same: get the liquid ratio right.
For the Flavor
Garlic (4 cloves, minced / about 2 tablespoons) — Fresh garlic is non-negotiable. Jarred garlic has a metallic taste that ruins the richness here. Mince it finely so it distributes evenly.
Chicken Broth (2.5 cups / 600ml) — Use low-sodium broth so you can control the salt. Vegetable broth works for a vegetarian version. I like to use a good quality brand like Imagine or Kitchen Basics.
Tomato Sauce (1 cup / 240g) — I use a simple 14-oz can, drained slightly if it’s very watery. It adds acidity and body. Don’t use ketchup or tomato paste here; you need the sauce consistency.
Spices — 1 teaspoon cumin, 1 teaspoon chili powder, ½ teaspoon smoked paprika, ½ teaspoon dried oregano, and ½ teaspoon black pepper. This is your taco seasoning profile. I mix it all in one bowl before adding to the pot.
For the Finish
Cheddar Cheese (1 cup / 100g, shredded) — Use a block and shred it yourself. Pre-shredded cheese has anti-caking agents that prevent it from melting smoothly. Sharp cheddar adds the best flavor.
Fresh Cilantro (½ cup, chopped) — Optional but highly recommended. It adds brightness and cuts through the richness.
Lime (1 lime, cut into wedges) — Squeezing fresh lime juice over the top right before serving is the secret weapon. It lifts all the flavors.
Equipment Needed
You don’t need fancy equipment for this. Here’s what I actually use.
12-Inch Skillet with Lid — This is crucial. You need a skillet wide enough to cook the beef and rice in a single layer. Cast iron is my favorite because it distributes heat evenly, but a heavy-bottomed stainless steel or non-stick skillet works too. The lid must fit tightly to trap steam.
Wooden Spoon — For stirring. Silicone works too. Don’t use metal on non-stick.
Measuring Cups and Spoons — Standard stuff. Dollar store versions work fine.
Sharp Knife and Cutting Board — For chopping the onions and peppers. A dull knife makes you cry more—learned this the hard way.
Optional but nice: A cheese grater if you’re shredding your own cheese, and a lime zester if you want to add zest for extra aroma.
How to Make It: Step-by-Step
Alright, let’s make this! I’m walking you through exactly how I do it, including the little tricks I’ve picked up.
Step 1: Prep Your Ingredients (5 minutes)
Before you start cooking, dice your onion and bell peppers. Mince your garlic. Measure out your spices in a small bowl. I know it seems fussy, but it makes the actual cooking way less stressful. Once you start browning the beef, things move fast.
Step 2: Brown the Beef (5-7 minutes)
Heat your 12-inch skillet over medium-high heat. Add the ground beef, breaking it up with your wooden spoon. Cook until browned and no pink remains. If there’s excess grease, drain it off, but leave about a tablespoon for flavor. This step builds the foundation of the dish.
Step 3: Sauté the Veggies (3 minutes)
Add the diced onions and bell peppers to the beef. Cook for 3-4 minutes until the onions are translucent and the peppers start to soften. Add the minced garlic and spices. Stir constantly for 1 minute until fragrant. Don’t let the garlic burn—it tastes bitter. The aroma should be warm and inviting.
Step 4: Add Rice and Liquids (2 minutes)
Pour in the rice, stirring to coat it in the beef and spices. This toasts the rice slightly, which helps it stay fluffy. Then add the chicken broth and tomato sauce. Stir well to scrape up any browned bits from the bottom of the pan. These bits are flavor gold.
Step 5: Simmer (20-25 minutes)
Bring the mixture to a boil, then reduce the heat to low. Cover tightly with the lid. Simmer for 20-25 minutes. Do not lift the lid! This traps the steam and cooks the rice evenly. After 20 minutes, check the rice. If it’s tender and the liquid is absorbed, you’re done. If it’s still crunchy, cover and cook for 5 more minutes.
Step 6: Add Cheese and Rest (5 minutes)
Remove the skillet from heat. Sprinkle the shredded cheese evenly over the top. Cover and let it sit for 5 minutes. The residual heat will melt the cheese perfectly without burning it. This resting period also allows the rice to finish absorbing any remaining liquid.
Step 7: Serve
Fluff the rice with a fork. Garnish with fresh cilantro and serve with lime wedges. The steam rising from the skillet is your cue that dinner is ready.
Total Time: About 40 minutes (10 minutes active, 30 minutes hands-off)
Expert Tips & Tricks
Here’s everything I’ve learned from making this dozens of times. These tips will save you from my mistakes.
Don’t Lift the Lid — This is the #1 rule. Lifting the lid releases steam, which is what cooks the rice. If you peek too early, your rice will be undercooked and watery. Trust the process.
Toast the Rice — Adding the rice to the hot beef and oil for a minute before adding liquid helps keep the grains separate. It’s a small step that makes a big difference in texture.
Use a Heavy Lid — If your skillet lid is loose or lightweight, wrap a clean kitchen towel around the rim before putting the lid on. This creates a tighter seal and ensures even cooking.
Adjust Liquid for Altitude — If you live at high altitude, you may need an extra ½ cup of broth. The water boils at a lower temperature, so it takes longer to cook the rice.
Make It Spicy — Add a diced jalapeño with the onions, or stir in a tablespoon of adobo sauce from a can of chipotle peppers. It adds a smoky heat that’s incredible.
Variations & Substitutions
Once you’ve nailed the basic version, here’s how you can mix it up. I’ve tried all of these.
Turkey Version — Swap ground beef for ground turkey. Use olive oil instead of beef fat. It’s lighter but still flavorful. I often use this version when I want something less heavy.
Vegetarian Version — Skip the beef. Use 1 can of black beans or lentils instead. Add extra veggies like corn or zucchini. It’s just as satisfying and protein-packed.
Seafood Twist — I’ve made this with crispy baked cod flakes added at the end, but it’s more like a seafood risotto. For a true skillet version, try adding shrimp in the last 5 minutes of cooking.
Cheese Variations — Use Monterey Jack for a milder flavor, or Pepper Jack for spice. Queso fresco crumbled on top adds a nice tangy crunch.
Dietary Modifications:
- Gluten-Free — This recipe is naturally gluten-free. Just ensure your broth and spices are certified GF.
- Dairy-Free — Skip the cheese or use a dairy-free alternative. Add a tablespoon of nutritional yeast for a cheesy flavor.
- Low-Carb — Swap rice for cauliflower rice. Reduce broth to 1.5 cups and cook time to 15 minutes. It’s lighter but still delicious.
Serving & Storage
How to Serve: I usually serve this straight from the skillet at the dinner table—it looks rustic and stays warm. But here are other ways I’ve enjoyed it:
- Sides: Simple green salad, loaded baked potato salad for a hearty option, or roasted broccoli.
- Toppings Bar: Sour cream, extra cheese, diced tomatoes, jalapeños, and lime wedges. Let everyone customize their bowl.
- Drinks: This pairs well with a crisp lager or a refreshing watermelon mint sangria for a summer gathering.
Storage Instructions:
Refrigerator: Store in an airtight container for up to 4 days. The rice will absorb more liquid, so it’ll be firmer.
Reheating: Add a splash of water or broth to the skillet or microwave-safe dish. Heat on medium, stirring every 30 seconds, until hot. This restores the moisture.
Freezing: This doesn’t freeze well. The rice becomes mushy upon thawing. Make it fresh or store in the fridge for up to 4 days.
Nutrition Information
I’m not a nutritionist, but here’s the breakdown if you’re tracking.
Per Serving (based on 6 servings):
- Calories: 450
- Protein: 25g
- Carbs: 40g
- Fiber: 3g
- Sugar: 4g
- Fat: 20g
- Saturated Fat: 9g
- Cholesterol: 70mg
- Sodium: 600mg
What’s Good: Decent protein from beef and cheese. Good fiber from vegetables and rice. It’s a balanced meal.
What to Know: Higher in calories from cheese and beef. Contains dairy. Moderate sodium (use low-sodium broth to reduce).
My Take: Look, this is comfort food. It’s not a diet recipe. But it’s way better than takeout, costs less, and I know exactly what’s in it. When I want to make it lighter, I use the turkey version and skip the cheese. But usually? I just eat a reasonable portion and enjoy it.
Final Thoughts
So that’s my go-to One-Pot Ground Beef and Rice Skillet with Bell Peppers! I’ve probably talked your ear off at this point, but when you make a recipe this often, you have a lot to say about it.
This has saved weeknight dinners more times than I can count. It’s my answer to “what’s for dinner” when I’m tired, don’t want takeout, and still want something that tastes really good. My kids are happy, my husband’s happy, and I’m happy because I’m not stressed about cooking.
Make it yours! Try different add-ins, swap in your favorite vegetables, adjust the spice level. The best recipes are the ones you adapt to your family’s tastes. If you make this, drop a comment and let me know what you think! I love hearing how recipes turn out in your kitchen. And if something doesn’t work, tell me that too—I’m here to help troubleshoot.
Happy cooking! And I hope your kitchen smells half as good as mine does right now.
Frequently Asked Questions
Can I use brown rice instead of white rice?
You can, but you’ll need to adjust the cooking time and liquid. Brown rice takes longer to cook (about 45 minutes) and needs more water (about 3 cups). I recommend using a pressure cooker for brown rice to save time. For this skillet method, white rice is much more reliable.
Why did my rice turn out mushy?
This usually means you used too much liquid or cooked it too long. Make sure you’re using long grain rice, not short grain or Arborio. Also, don’t lift the lid while it’s simmering. If your rice is already mushy, spread it out on a baking sheet to let the excess moisture evaporate.
Can I make this ahead for a dinner party?
Sort of. You can prep all the vegetables and spices ahead of time. But the rice cooks best fresh. I recommend prepping everything, then cooking the skillet 15 minutes before you want to serve. It’s fast enough that you don’t need to make it days in advance.
Why did my sauce get watery?
Usually, this means the rice didn’t absorb all the liquid. This can happen if the lid wasn’t tight enough or if the heat was too high. Let it simmer on low for a few more minutes. If it’s still watery, uncover and cook for 2-3 minutes to evaporate the excess.
Can I use canned tomatoes instead of tomato sauce?
Yes, but you’ll need to blend them first or use crushed tomatoes. Whole canned tomatoes are too chunky. If you use diced tomatoes, drain the excess liquid to avoid a soupy dish.
How do I reheat leftovers without it getting dry?
Add a splash of water or broth to the skillet or microwave-safe dish. Heat on medium, stirring every 30 seconds, until hot. This restores the moisture. Avoid heating on high power, which dries out the rice.
Can I double this recipe?
Absolutely! Double everything and use your biggest pot. The cooking times stay the same. I do this when I’m meal-prepping or feeding a crowd. Just make sure your skillet is big enough for the sauce—you might need to use two pans or a very large skillet.
Pin This Recipe!

One-Pot Ground Beef and Rice Skillet with Bell Peppers
- Total Time: 40 minutes
- Yield: 6 servings 1x
Description
A rustic, colorful, and savory one-pot meal that feeds a crowd with minimal cleanup. This skillet combines ground beef, long grain rice, bell peppers, and taco-inspired spices for a dinner party-worthy dish that is ready in about 40 minutes.
Ingredients
- 1.5 lbs ground beef (80/20 lean-to-fat ratio)
- 1 large yellow onion, diced
- 2 medium bell peppers (1 red, 1 green), diced
- 1.5 cups long grain white rice (Jasmine or Basmati)
- 4 cloves garlic, minced
- 2.5 cups chicken broth (low-sodium)
- 1 cup tomato sauce
- 1 teaspoon cumin
- 1 teaspoon chili powder
- 0.5 teaspoon smoked paprika
- 0.5 teaspoon dried oregano
- 0.5 teaspoon black pepper
- 1 cup sharp cheddar cheese, shredded
- 0.5 cup fresh cilantro, chopped
- 1 lime, cut into wedges
Instructions
- Dice the onion and bell peppers, mince the garlic, and measure out the spices in a small bowl.
- Heat a 12-inch skillet with a tight-fitting lid over medium-high heat. Add the ground beef and cook, breaking it up with a wooden spoon, until browned and no pink remains (5-7 minutes). Drain excess grease if necessary, leaving about a tablespoon.
- Add the diced onions and bell peppers to the beef. Cook for 3-4 minutes until onions are translucent and peppers soften. Add the minced garlic and spice mixture, stirring constantly for 1 minute until fragrant.
- Pour in the rice and stir to coat it in the beef and spices for about 1 minute to toast slightly. Add the chicken broth and tomato sauce, stirring to scrape up browned bits from the bottom of the pan.
- Bring the mixture to a boil, then reduce heat to low. Cover tightly with the lid and simmer for 20-25 minutes without lifting the lid. Check for doneness; if rice is still crunchy, cover and cook for 5 more minutes.
- Remove the skillet from heat. Sprinkle shredded cheese evenly over the top. Cover and let rest for 5 minutes to allow cheese to melt and rice to absorb remaining liquid.
- Fluff the rice with a fork, garnish with fresh cilantro, and serve with lime wedges.
Notes
Do not lift the lid while simmering to ensure proper steam cooking. Toasting the rice before adding liquid helps keep grains separate. For high altitude, add an extra 1/2 cup of broth. This recipe can be made vegetarian by swapping beef for black beans or lentils, and gluten-free by ensuring broth and spices are certified GF.
- Prep Time: 10 minutes
- Cook Time: 30 minutes
- Category: Main Course
- Cuisine: Tex-Mex
Nutrition
- Serving Size: 1/6 of the skillet
- Calories: 450
- Sugar: 4
- Sodium: 600
- Fat: 20
- Saturated Fat: 9
- Carbohydrates: 40
- Fiber: 3
- Protein: 25
Keywords: one-pot meal, ground beef, rice skillet, dinner party, easy dinner, tex-mex, family friendly, meal prep


