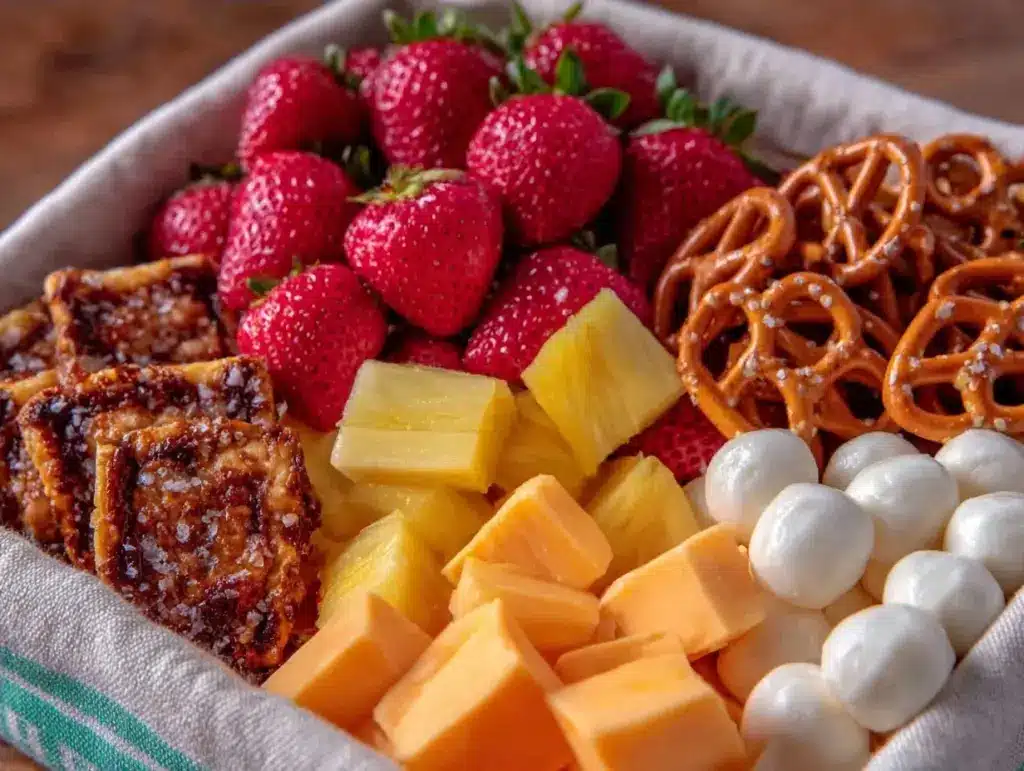
There is a specific kind of panic that sets in around 7:00 PM the night before the school year starts. It’s not just about buying new pencils or ironing uniforms. It’s the realization that for the next nine months, you are responsible for packing a lunch every single day. And not just any lunch—a lunch that my kids will actually eat, that won’t get soggy by third period, and that doesn’t require me to become a gourmet chef before the sun comes up.
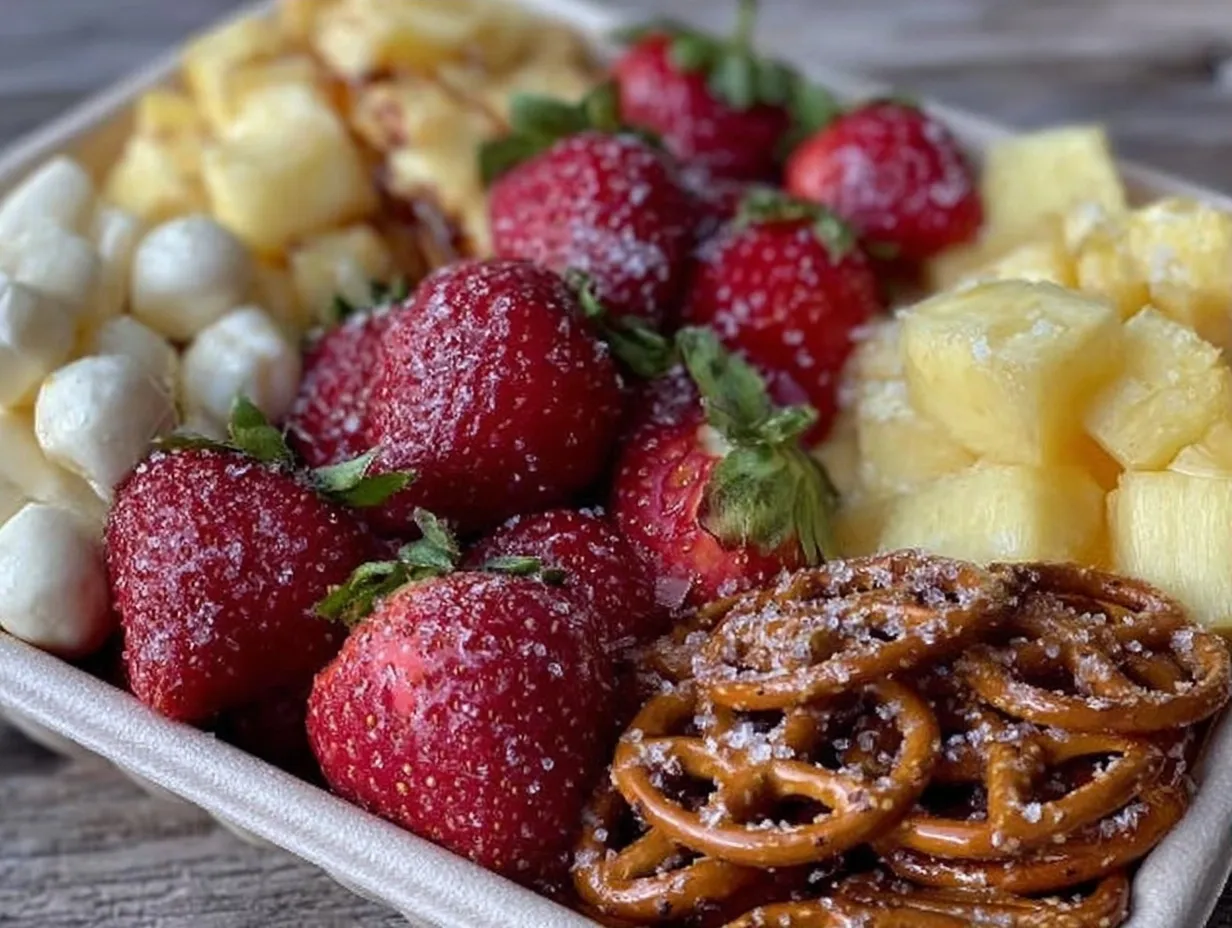
I used to think “lunchable” meant those sad, plastic-wrapped trays from the 90s with the grayish crackers and the slice of processed cheese that tasted like salt and regret. But last year, I decided to reclaim that concept. I wanted to create Back to School Lunchable Snack Boxes with Fruit that felt indulgent, fresh, and genuinely exciting to open. The result? My kids now compete to see who gets the “lunchable” day because they actually look forward to it.
This isn’t about restrictive dieting or packing dry kale. It’s about curating little flavor experiences. It’s about the crunch of a crisp apple slice next to the creamy tang of a cheese cube. It’s about making lunch feel like a treat, not a chore. Whether you’re packing for a picky eater, a growing teenager, or a toddler who needs everything separated, these five themes will save your sanity. I’ve tested these combos in my own kitchen, over-packed them into my kids’ bags, and watched them come home empty. That’s the only review that matters.
Why You’ll Love These Lunchable Snack Boxes
Let’s be real. Packing lunch feels like a second job. But when you lean into the “snack box” format, you’re not just packing food; you’re packing variety. Here is why this approach has completely changed our mornings:
- Zero Soggy Bread — By using crackers, bread sticks, or no-bread options, you eliminate the #1 complaint. No one wants a mushy sandwich. These boxes stay crisp until lunchtime.
- High Protein, Low Mess — We focus on finger foods. Cheese cubes, nuts, dried fruit, and deli meat rolls are easy to eat with fingers or a fork, without the drip-drip-drip of sauce onto homework.
- Customizable for Picky Eaters — If your kid hates grapes but loves strawberries, you swap them. The box format is forgiving. You can pack three different types of crackers and three types of cheese. It’s a tasting menu, not a monolith.
- Prep-Ahead Friendly — I do most of the slicing and portioning on Sunday night. The actual packing takes less than five minutes in the morning. Five minutes! While my coffee brews.
- Budget-Smart — Buying bulk cheese, seasonal fruit, and store-brand crackers is significantly cheaper than buying pre-packaged gourmet snacks or buying lunch at the cafeteria.
This method is my secret weapon for getting through the back-to-school rush. It’s indulgent enough to feel special, but simple enough to actually work.
Ingredients You’ll Need for Your Snack Boxes
Here’s the best part: you probably have most of this already. We aren’t using obscure ingredients. We’re using good basics, assembled with intention. I’m particular about quality where it counts—like the cheese and the fruit.
The Base (Carbs & Crunch)
Whole grain crackers (1 package) — I love Mary’s Gone Crackers or simple wheat thins. They hold up well and add fiber. Avoid the super thin ones; they break too easily.
Pretzel sticks or twists (1 small bag) — For that salty crunch. Great for kids who don’t love crackers.
Sandwich bread (2 slices, optional) — If you’re doing a sandwich day, use sturdy bread like sourdough or multigrain. White bread gets soggy fast.
The Protein (The Star of the Show)
Deluxe deli turkey or chicken (4-6 ounces) — Look for the higher quality stuff, like Boar’s Head or the local deli counter. The low-sodium varieties are best so it doesn’t taste like pure salt.
String cheese or cheese cubes (2-3 pieces) — Mozzarella is mild and kid-friendly. Sharp cheddar adds a punch. I buy the block and cut my own cubes; they look much nicer than the pre-packaged strings.
Hard-boiled eggs (1-2) — A classic. Peel them the night before and keep them in a container with a little water so they don’t dry out.
Roasted chickpeas (2 tablespoons) — For a vegetarian protein boost. I make these in batches or buy them seasoned.
The Fruit & Veg (The Fresh Element)
Seasonal fruit (1 cup) — Grapes (halved for little kids), apple slices (tossed in lemon juice to prevent browning), berries, or melon balls. Fresh fruit keeps it light.
Dried fruit (2 tablespoons) — Dried cranberries, apricots, or mango. These add a chewy texture and natural sweetness.
Cucumber rounds or bell pepper strips (1/2 cup) — For a fresh crunch. If your kids hate raw veggies, skip this or swap for cherry tomatoes.
The “Fun” Factor
Dark chocolate chips or mini M&Ms (1 small handful) — Okay, it’s a snack box. A little sweetness is mandatory.
Granola clusters (2 tablespoons) — Adds texture and acts as a bridge between the sweet and savory.
Equipment Needed
You don’t need fancy gadgets. Here’s what I actually use:
Bento-style lunch box — This is the most important tool. You need compartments to keep things separate. I use the Yumbox or any bento box with 3-4 sections. If you don’t have one, silicone cupcake liners work as dividers.
Sharp knife — For slicing apples, cucumbers, and cutting cheese. A dull knife makes apple slices look messy and bruises the fruit.
Container for prepping — I use a large glass bowl to toss apple slices in lemon water, and separate containers for cheese and crackers.
Small zip-top bags — For portioning out nuts, chocolate chips, or dried fruit. Keeps the box tidy.
How to Make It: Step-by-Step
Alright, let’s assemble these beauty. I’m walking you through the process, including the little tricks I’ve picked up to keep things fresh.
Step 1: Prep the Produce (The Night Before)
Wash and dry all your fruit and vegetables. If you’re using apples or bananas, slice them now. Here’s the trick: toss apple slices in a bowl with a tablespoon of lemon juice and a splash of water. This prevents oxidation (browning) so they look fresh in the morning. Store in an airtight container in the fridge. If you’re using grapes, wash them and halve them if your kids are young.
Step 2: Portion the Protein
Take your cheese block and cut it into cubes or sticks. If using deli meat, lay out the slices. You can roll them up into “sushi” rolls for a fun visual, or fold them into triangles. Place them in a small container or directly into the lunch box if you’re packing that morning. Hard-boiled eggs should be peeled and stored in water to stay moist.
Step 3: Assemble the Base
Open your bento box. Start with the largest compartment. Fill it with your crackers or pretzels. If you’re doing a sandwich, place it in the center, but I recommend wrapping it in parchment paper first to absorb moisture. If doing a snack-only box, fill the remaining large space with the fresh fruit.
Step 4: Fill the Small Compartments
This is where the magic happens. Use the smaller sections for:
- One type of cheese (or two small cubes)
- Protein (rolled deli meat or chickpeas)
- Dried fruit or nuts
- The “fun” treat (chocolate or candy)
The key is color contrast. Red grapes next to yellow cheese next to green pretzels. It looks appetizing and signals variety to the brain.
Step 5: The Final Touch
Check for leaks. If using berries, make sure they are completely dry. Add a napkin and a wet wipe (trust me on the wet wipe—fruit fingers are real). Close the lid tightly. Shake the box gently to ensure nothing shifts during the commute.
Total Time: 5-10 minutes in the morning if prepped the night before.
Expert Tips & Tricks
Here’s everything I’ve learned from packing these for a month straight. These tips will save you from my early mistakes.
- The Lemon Juice Trick — I cannot stress this enough. Apple slices turn brown in 20 minutes without it. A little lemon juice keeps them bright and crisp. It doesn’t change the taste.
- Room Temperature Cheese — Cheese tastes better at room temp. If you pack it cold, it can be waxy. Let the box sit on the counter for 10 minutes before lunch if possible.
- Freeze the Water Bottle — If you’re packing fresh fruit or cheese, freeze a small water bottle the night before. It acts as an ice pack to keep the food safe, and by lunchtime, it’s a cold drink.
- Rotate the Treat — Kids get bored easily. Keep a “treat drawer” with small items like goldfish crackers, dark chocolate, or a small cookie. Rotate it daily so it feels special.
- Involve the Kids — On weekends, let your kids build their own lunch boxes for the week ahead. They’re more likely to eat what they picked out. Plus, it’s a fun bonding activity.
5 Indulgent Lunchable Themes
Once you’ve nailed the basic format, here are five specific combos I swear by. I’ve tested all of these, and they are crowd-pleasers.
1. The Classic “Turkey & Cheddar” Box
This is the ultimate comfort combo.
- Protein: Rolled turkey breast
- Cheese: Sharp cheddar cubes
- Crunch: Whole wheat crackers
- Fruit: Red seedless grapes
- Treat: Dark chocolate chips
The sharpness of the cheddar pairs perfectly with the mild turkey. It’s savory, salty, and satisfying.
2. The Mediterranean Grazing Box
A little more sophisticated, great for older kids or adults.
- Protein: Hummus (2 tablespoons in a small cup) with pita chips
- Cheese: Feta cubes or mozzarella balls
- Crunch: Olive oil croutons or sesame sticks
- Fruit: Melon balls or figs
- Treat: A few almonds
The hummus adds creaminess, and the feta provides a salty kick. It feels like a mini mezze platter.
3. The “Pizza Party” Box
Because everyone loves pizza.
- Protein: Pepperoni slices (folded into roses)
- Cheese: Mozzarella cheese sticks
- Crunch: Garlic breadsticks or bagel chips
- Fruit: Cherry tomatoes (halved)
- Treat: A small piece of dark chocolate
It’s savory and fun. The bagel chips are sturdy and won’t break.
4. The Tropical Sweet & Savory Box
For a lighter, sweeter option.
- Protein: Smoked salmon rolls (if available) or turkey
- Cheese: Cream cheese cubes or brie
- Crunch: Rice cakes or pretzel thins
- Fruit: Mango chunks or pineapple tidbits
- Treat: Dried mango strips
The tropical fruit cuts through the richness of the cheese. It’s refreshing and not too heavy.
5. The “Everything” Box
My go-to when I’m unsure what my kids will want.
- Protein: Hard-boiled egg (halved)
- Cheese: Swiss cheese cubes
- Crunch: Mixed nuts (if no allergy) or sunflower seeds
- Fruit: Apple slices and berries
- Treat: Mini M&Ms
It has a bit of everything. The egg provides solid protein, the nuts add healthy fats, and the fruit balances it out.
Serving & Storage
How to Serve:
These boxes are best served at room temperature. I usually pack them in the morning and they’re ready to go by noon. If you’re packing for yourself, these make a great desk lunch too. They look elegant on a plate if you’re having a casual midday meal at home.
Side Dishes:
If you’re having these at home, pair with a glass of milk or a spiced apple cider mule for a cozy afternoon treat. A simple side salad works too if you want a heavier meal.
Storage Instructions:
- Refrigerator: Prepped fruit and cheese can be stored in airtight containers for up to 3 days. Crackers and pretzels should be kept in a cool, dry place until packing.
- Reheating: No reheating needed. These are cold/room temp foods.
- Freezing: Do not freeze fresh fruit or cheese. Hard-boiled eggs can be frozen but the texture changes. Stick to fridge storage.
Nutrition Information
I’m not a nutritionist, but here’s a rough breakdown per box (varies by ingredients):
| Nutrient | Amount |
|---|---|
| Calories | 350-450 |
| Protein | 15-20g |
| Carbs | 30-40g |
| Fat | 15-20g |
| Fiber | 4-6g |
What’s Good: High protein from cheese and meat, good fiber from whole grains and fruit.
What to Know: Sodium can add up with deli meat and crackers. Opt for low-sodium versions where possible. It’s a balanced, moderate-calorie lunch.
Final Thoughts
So that’s my take on Back to School Lunchable Snack Boxes with Fruit. I know it sounds simple, but the simplicity is the point. You’re not trying to reinvent the wheel; you’re just trying to make sure your kids eat well without you losing your mind. These boxes have saved me on busy mornings, impressed my kids with their variety, and kept me sane during the first month of school.
Make it yours! Swap the cheese, change the fruit, add a new treat. The best recipes are the ones you adapt to your family’s tastes. If you make these, drop a comment and let me know which combo was a hit. I love hearing how these turn out in your kitchen.
Happy packing! And I hope your kids’ lunches smell half as good as my kitchen does right now.
Frequently Asked Questions
Can I use regular sandwich bread instead of crackers?
Yes, but I recommend using sturdy bread like sourdough or multigrain. Wrap the sandwich tightly in parchment paper before putting it in the box to prevent sogginess. I personally prefer the snack box format because it’s less messy, but a good sandwich works too.
My kids hate cheese. What can I substitute?
No problem! Swap cheese for:
- Hard-boiled eggs
- Roasted chickpeas
- Edamame (shelled)
- String cheese made from other milks (if they tolerate dairy differently)
The protein is the key component here, so just ensure you’re getting enough.
How do I keep the fruit fresh for days?
Prep the night before. Store cut apples in lemon water. Keep berries dry until packing. Grapes and melon can be pre-cut and stored in airtight containers. If you’re packing in the morning, cut the fruit 10 minutes before to avoid browning.
Can I pack these for a week ahead?
I do a “Sunday Prep.” I slice all fruit, portion cheese, and boil eggs on Sunday. Then, each morning takes 2 minutes to assemble. Freshness is best if packed the night before, but the components can be prepped 3-4 days ahead.
What if my child is allergic to nuts?
Simply omit nuts. Use seeds (sunflower, pumpkin) or extra crackers and cheese for crunch and fat. Most schools are nut-free, so this is a safe bet anyway.
How do I stop the crackers from breaking?
Use thicker crackers or pretzels. If using thin crackers, place them at the bottom of the box and don’t pack too tightly. You can also use bread sticks which are sturdier.
Can I make these vegan?
Absolutely. Swap cheese for hummus or vegan cheese cubes. Swap deli meat for roasted chickpeas or tofu cubes. Use fruit leather or dark chocolate for the treat. It’s very adaptable.
Pin This Recipe!
Back to School Lunchable Snack Boxes with Fruit
- Total Time: 10 minutes
- Yield: 1 serving
Description
Create customizable, fresh, and indulgent lunch boxes using simple ingredients like deli meat, cheese, fruit, and crackers. These snack-style lunches prevent soggy bread and keep kids excited about eating.
Ingredients
- Whole grain crackers (1 package)
- Pretzel sticks or twists (1 small bag)
- Sandwich bread (2 slices, optional)
- Deluxe deli turkey or chicken (4-6 ounces)
- String cheese or cheese cubes (2-3 pieces)
- Hard-boiled eggs (1-2)
- Roasted chickpeas (2 tablespoons)
- Seasonal fruit (1 cup, e.g., grapes, apple slices, berries)
- Dried fruit (2 tablespoons)
- Cucumber rounds or bell pepper strips (1/2 cup)
- Dark chocolate chips or mini M&Ms (1 small handful)
- Granola clusters (2 tablespoons)
- Lemon juice (for preventing apple browning)
Instructions
- Prep produce the night before: Wash and dry fruit/vegetables. Toss apple slices in lemon juice and water to prevent browning. Store in airtight containers in the fridge.
- Portion protein: Cut cheese into cubes or sticks. Roll or fold deli meat. Peel hard-boiled eggs and store in water to keep moist.
- Assemble the base: Fill the largest compartment of a bento-style lunch box with crackers or pretzels. If using a sandwich, wrap it in parchment paper and place in the center.
- Fill small compartments: Add cheese, protein (rolled meat or chickpeas), dried fruit/nuts, and a small treat to smaller sections. Aim for color contrast.
- Final touch: Ensure berries are dry. Add a napkin and wet wipe. Close lid tightly and shake gently to ensure stability.
Notes
Pack cheese at room temperature for better flavor. Freeze a water bottle to act as an ice pack. Rotate treats daily to keep interest high. For nut-free schools, substitute nuts with seeds or extra crackers.
- Prep Time: 10 minutes
- Cook Time: 0 minutes
- Category: Lunch
- Cuisine: American
Nutrition
- Serving Size: 1 Snack Box
- Calories: 400
- Sugar: 15
- Sodium: 600
- Fat: 17.5
- Saturated Fat: 5
- Carbohydrates: 35
- Fiber: 5
- Protein: 17.5
Keywords: back to school lunch, lunchable snack box, kid friendly lunch, healthy lunch ideas, bento box lunch, no cook lunch, school lunch


