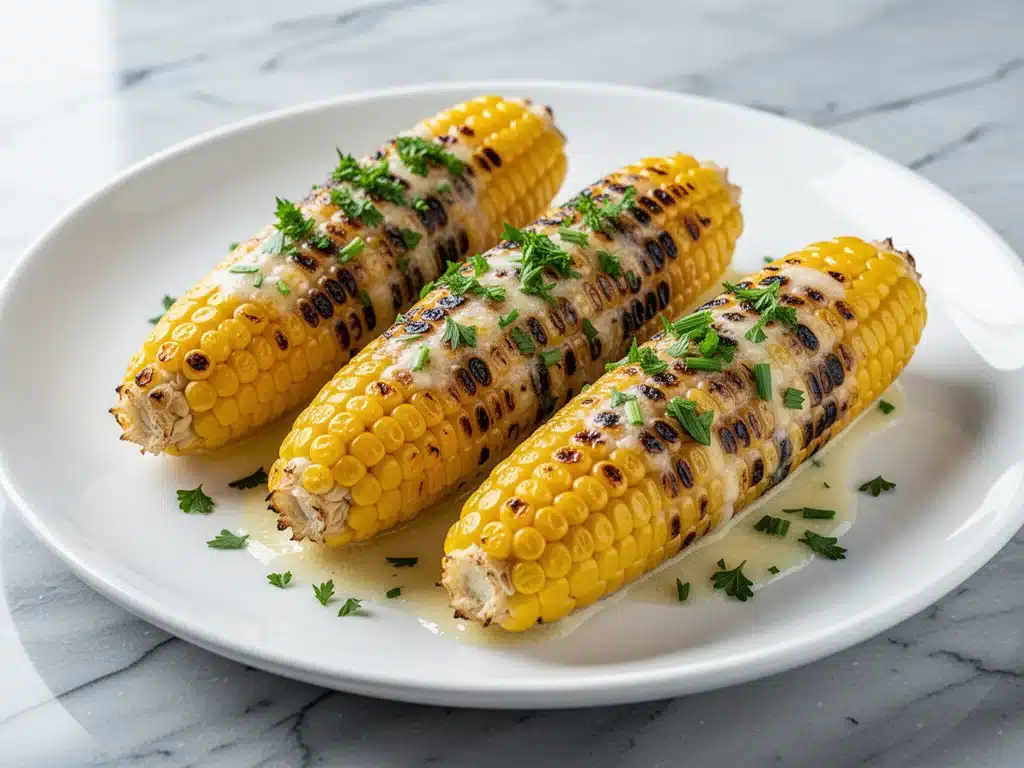
I have a confession to make. For years, I treated corn on the cob like a chore. You know the kind—standing over the stove, waiting for a pot of water to boil, dealing with those pesky silken threads that get stuck between your teeth, and then the frantic race to butter every single inch before it got cold. It felt like a weekend project, something you only made when you had an hour to spare and a full family to feed. It wasn’t dinner; it was a side dish event.
Then, about two summers ago, I was exhausted. It was one of those Tuesday nights where the kids were screaming, the dog was barking at a leaf, and I had exactly twelve minutes to figure out dinner. I didn’t have time to boil a massive pot of water. I didn’t have time to shuck three dozen ears of corn. So, I did something radical. I threw a few frozen ears directly into a skillet with a generous knob of butter, some minced garlic, and a handful of fresh herbs I had lying around. I covered it, let it steam-fry for ten minutes, and called it dinner.
I expected mush. I expected disappointment. Instead, I got something magical. The corn was tender but still had a snap, the butter had caramelized slightly in the pan, and the garlic had infused every kernel with flavor. It was sweet, savory, herbal, and ridiculously easy. That accidental skillet corn changed everything. Now, Garlic Butter Corn on the Cob with Fresh Herbs is my go-to side dish for busy weeknights. It’s fast, it’s flavorful, and it actually tastes like summer, even in the middle of winter if you’re using frozen corn (don’t judge me).
I’ve tested this method so many times—boiling, microwaving, grilling, and finally landing on this skillet method—that I can say with total confidence: this is the best way to cook corn when you’re short on time. It’s not just convenient; it’s genuinely delicious. And once you try it, you’ll never look at a cob the same way again.
Why You’ll Love This Garlic Butter Corn Recipe
There are about ten reasons I keep making this corn recipe, but here are the big ones that will win you over too.
Stupid Simple — Seriously, if you can melt butter and chop an herb, you can make this. I’ve walked my teenage son through it over FaceTime while I was at work. There’s no shucking, no boiling water, and no messy cleanup. Just a skillet and a lid.
Lightning Fast — 15 minutes from start to finish. That’s it. I make this on weeknights when I get home at 6:30 PM and the oven is already too hot to use. It’s faster than boiling water even comes to a boil.
Flavor Bomb — Plain boiled corn is fine. But corn simmered in garlic butter with fresh thyme and parsley? That’s restaurant-quality. The garlic doesn’t burn because it’s protected by the butter and the lid, so it turns sweet and mellow instead of sharp and bitter.
Flexible Cooking Method — I use frozen corn because it’s cheap and available year-round, but fresh corn works too. I’ve also used this method for garlic butter ribeye steak sides, and the flavor profile is surprisingly similar. If you can cook corn, you can master this.
Makes Amazing Leftovers — Okay, let’s be real. Corn on the cob doesn’t really “leftover” well in the traditional sense because you don’t want to eat cold, sticky corn off the cob the next day. But the garlic butter sauce? That stuff is gold. I scoop the extra butter out of the pan and drizzle it over roasted potatoes or grilled chicken the next day. It’s liquid flavor.
This is my go-to when I need a side dish that feels special but requires zero effort. No complicated techniques, no weird ingredients, just reliable, delicious food that makes everyone happy.
Ingredients You’ll Need
Here’s the best part: you probably have most of this already. This isn’t a recipe that requires a special trip to the store. It’s pantry-friendly and fridge-clearing.
For the Corn:
Frozen corn kernels (3 cups / 450g) — I know, whole cobs sound more traditional, but frozen kernels cook evenly, don’t require shucking, and absorb the butter better. If you prefer whole cobs, use 4-6 ears of fresh or frozen corn. Cut them in half for easier handling. I buy frozen corn in bulk because it’s always ready.
Unsalted butter (4 tablespoons / 60g) — Use good quality here. Salted butter works, but since we’re adding salt later, unsalted gives you more control. I use European-style butter when I have it because it has a richer flavor, but regular butter is fine.
Garlic (4-5 cloves, minced / about 2 tablespoons) — Yes, five cloves. Don’t skimp. Fresh only—no jarred garlic in this recipe. The texture and flavor of fresh garlic are crucial for that aromatic base. I mince it finely so it distributes evenly.
Heavy cream or milk (2 tablespoons / 30ml) — This is the secret weapon. A splash of cream or milk helps create a silky sauce that coats the corn. It also prevents the butter from burning. Half-and-half works too if you want something lighter.
Fresh herbs (2 tablespoons chopped) — Parsley is classic, but I love mixing it with thyme. Fresh thyme leaves are incredible here. If you don’t have fresh herbs, 1 teaspoon of dried thyme works, but fresh makes a huge difference. I grow parsley on my windowsill just for this.
Sea salt (½ teaspoon, or to taste) — Adjust based on whether you’re using salted or unsalted butter. Taste as you go.
Black pepper (¼ teaspoon, freshly cracked) — Adds a nice bite. Freshly cracked is best.
Optional Add-ins:
- Red pepper flakes (½ teaspoon) — If you like a little heat, this adds a nice kick.
- Lemon zest (1 teaspoon) — Brightens everything up. Great for summer.
- Grated Parmesan (2 tablespoons) — For an extra savory twist. I sprinkle it on right before serving.
Equipment Needed

You don’t need fancy equipment for this. Here’s what I actually use.
Large skillet or sauté pan — 12-inch works best. I prefer stainless steel or cast iron because they hold heat well, but non-stick works too. Just make sure it has a lid. If your skillet doesn’t have a lid, you can use foil or a baking sheet to cover it.
Wooden spoon or spatula — For stirring. Silicone works too. Don’t use metal on non-stick.
Sharp knife — For chopping herbs and mincing garlic. Dull knives make you cry more—learned this the hard way.
Measuring spoons — Pretty standard stuff. Dollar store versions work fine.
Serving platter — Any large plate or platter works. I like to serve it family-style so everyone can grab a handful.
That’s it. No fancy gadgets, no special tools. Just basic kitchen stuff you already own.
How to Make It: Step-by-Step
Alright, let’s make this! I’m walking you through exactly how I do it, including the little tricks I’ve picked up.
Step 1: Prep Your Ingredients (3 minutes)
Before you start cooking, mince your garlic and chop your herbs. I know it seems fussy, but it makes the actual cooking way less stressful. Once you start cooking, things move fast. Set out your butter and cream so everything is within arm’s reach.
Step 2: Melt the Butter (2 minutes)
Heat your large skillet over medium heat. Add the butter and let it melt. Don’t let it brown! We want it just melted and foamy. If it starts to brown, lower the heat immediately. Browned butter tastes nutty, which is great for other dishes, but not what we want here.
Step 3: Sauté the Garlic (1 minute)
Add the minced garlic to the melted butter. Stir constantly for about 30-60 seconds. You’ll smell it become fragrant and amazing. Do not let it burn! Burnt garlic tastes bitter and ruins the whole dish. If it starts to sizzle too loudly, take the pan off the heat for a second.
Step 4: Add the Corn and Cream (5 minutes)
Pour in the frozen corn kernels and the heavy cream (or milk). Stir well to combine. The corn will start to thaw and heat up. Let it simmer for about 4-5 minutes, stirring occasionally. The cream will reduce slightly and start to coat the corn. You’ll see the liquid bubbling and thickening.
Step 5: Season and Finish (2 minutes)
Stir in the chopped herbs, salt, and pepper. Taste the corn. Does it need more salt? Add a pinch. More pepper? Go for it. If you’re adding red pepper flakes or lemon zest, do it now. Toss everything together for another minute so the flavors meld. The corn should be tender but still have a little snap.
Step 6: Serve
Remove from heat and serve immediately. I like to sprinkle a little extra fresh herbs on top for garnish. It looks pretty and adds a burst of freshness. This pairs beautifully with my smoky chipotle shredded beef barbacoa bowls for a complete meal.
Total Time: About 15 minutes (5 minutes active, 10 minutes mostly hands-off)
Expert Tips & Tricks
Here’s everything I’ve learned from making this dozens of times. These tips will save you from my mistakes.
Don’t Overcrowd the Pan
If you’re cooking a huge batch, do it in two batches. Overcrowding the pan steams the corn instead of sautéing it, and you lose that nice caramelization. I know it’s annoying, but it makes a difference.
Frozen Corn is Fine (Actually, Better)
I know purists might cringe, but frozen corn is picked at peak ripeness and flash-frozen. It’s often sweeter than “fresh” corn that’s been sitting on a truck for three days. Plus, no shucking. Win-win.
Low and Slow with Garlic
Garlic burns easily. Keep the heat at medium, not high. If your stove runs hot, drop it to medium-low. You want the garlic to release its flavor, not turn into charcoal.
Save the Pan Sauce
That buttery, garlicky liquid left in the pan? Don’t throw it away. Dip your bread in it. Drizzle it over steak. It’s liquid gold.
Fresh Herbs at the End
Add your herbs in the last minute of cooking. If you add them too early, they’ll wilt and lose their bright flavor. You want that fresh pop.
Variations & Substitutions
Once you’ve nailed the basic version, here’s how you can mix it up. I’ve tried all of these.
Cajun Style
Add 1 teaspoon Cajun seasoning and ½ teaspoon smoked paprika. Totally different vibe—spicy and smoky. Great with grilled meats.
Lemon Herb
Add the zest of one lemon and 1 tablespoon of lemon juice at the end. Brightens everything up. Perfect for spring.
Cheesy Garlic
Stir in ½ cup of shredded cheddar or mozzarella in the last minute. Cover and let it melt. It’s like corn casserole in skillet form.
Vegan Version
Use olive oil or vegan butter instead of dairy butter, and skip the cream. Add a splash of coconut milk for richness. It’s still delicious.
Whole Cob Method
If you’re using fresh corn on the cob, score the kernels with a knife first, then follow the same steps. Or, cook whole cobs in the skillet with a splash of water, covered, for 10-12 minutes, then finish with the garlic butter.
Serving & Storage
How to Serve:
I usually serve this straight from the skillet at the dinner table—it looks rustic and stays warm. But here are other ways I’ve enjoyed it:
Side Dishes:
- Grilled chicken or steak (try this cast iron ribeye steak for a perfect pairing)
- Roasted potatoes
- Simple green salad with balsamic vinaigrette
- Beans or lentils
Toppings Bar:
When I have guests, I put out: extra Parmesan, red pepper flakes, fresh herbs, lemon wedges. Everyone customizes their bowl.
Storage Instructions:
Refrigerator: Store in an airtight container for up to 3 days. The corn will soften in the fridge—totally normal. Reheat in a skillet with a splash of water or milk to revive the creaminess.
Reheating: Best method: Add to a skillet over medium heat with a splash of milk or cream. Stir until heated through. Microwave sort of works but tends to dry it out. If you do microwave, add a splash of milk first and heat in short bursts.
Freezing: Honestly, this doesn’t freeze well because of the dairy. The sauce separates when thawed. Make it fresh or store in the fridge for up to 3 days.
Nutrition Information
I’m not a nutritionist, but here’s the breakdown if you’re tracking.
Per Serving (based on 6 servings):**
- Calories: 120
- Protein: 3g
- Carbs: 18g
- Fiber: 2g
- Sugar: 4g
- Fat: 5g
- Saturated Fat: 3g
- Cholesterol: 12mg
- Sodium: 180mg
What’s Good:
- Good source of fiber from corn
- Contains antioxidants from garlic and herbs
- Low calorie compared to creamy corn dishes
What to Know:
- Higher in fat from butter
- Contains dairy
- Moderate sodium (use low-sodium broth if needed, though this recipe doesn’t use broth)
My Take:
Look, this is comfort food with butter. It’s not a diet recipe. But it’s way better than canned creamed corn, costs less, and I know exactly what’s in it. When I want to make it lighter, I use less butter and more herbs. But usually? I just eat a reasonable portion and enjoy it.
Final Thoughts
So that’s my go-to garlic butter corn on the cob! I’ve probably talked your ear off at this point, but when you make a recipe this often, you have a lot to say about it.
This has saved weeknight dinners more times than I can count. It’s my answer to “what’s for dinner” when I’m tired, don’t want takeout, and still want something that tastes really good. My kids are happy, my husband’s happy, and I’m happy because I’m not stressed about cooking.
Make it yours! Try different herbs, add some spice, or drizzle it with balsamic glaze. The best recipes are the ones you adapt to your family’s tastes.
If you make this, drop a comment and let me know what you think! I love hearing how recipes turn out in your kitchen. And if something doesn’t work, tell me that too—I’m here to help troubleshoot.
Happy cooking! And I hope your kitchen smells half as good as mine does right now.
Frequently Asked Questions
Can I use fresh corn instead of frozen?
Absolutely. If you’re using fresh corn on the cob, you’ll need to cook it slightly longer. I recommend cutting the kernels off the cob first, then following the same steps. If you want to cook whole cobs, score the kernels with a knife, add them to the skillet with a splash of water, cover, and steam for 10 minutes before adding the butter and garlic. It works, but frozen is just easier.
Why did my garlic burn?
The heat was too high. Garlic burns very quickly, especially in butter. Always keep the heat at medium or medium-low. If your stove runs hot, drop it down. Stir constantly when you add the garlic, and remove it from the heat for a few seconds if it starts to sizzle too aggressively.
Can I make this ahead for a dinner party?
Sort of. You can prep the garlic and chop the herbs ahead of time. But I recommend cooking the corn fresh right before serving. It tastes best hot and creamy. If you must prep ahead, reheat gently in a skillet with a splash of milk to revive the texture.
Can I use olive oil instead of butter?
You can, but the flavor will be different. Olive oil doesn’t have that rich, creamy taste that butter provides. If you’re using olive oil, add a splash of coconut milk or cream to mimic the richness. But honestly, butter is the star here. Don’t skip it.
How do I reheat leftovers without it getting dry?
Add a splash of milk or cream to a skillet, add your leftover corn, and heat gently over low heat, stirring frequently. The extra liquid brings back the creamy texture. Microwave sort of works but tends to dry it out. If you do microwave, definitely add a splash of milk first and heat in short bursts, stirring between.
Can I double this recipe?
Yes! Double everything and use your biggest skillet. The cooking times stay roughly the same, but you may need to stir more frequently to prevent burning. If your skillet isn’t big enough, do it in two batches. It’s better to cook in smaller batches than to overcrowd the pan.
Pin This Recipe!
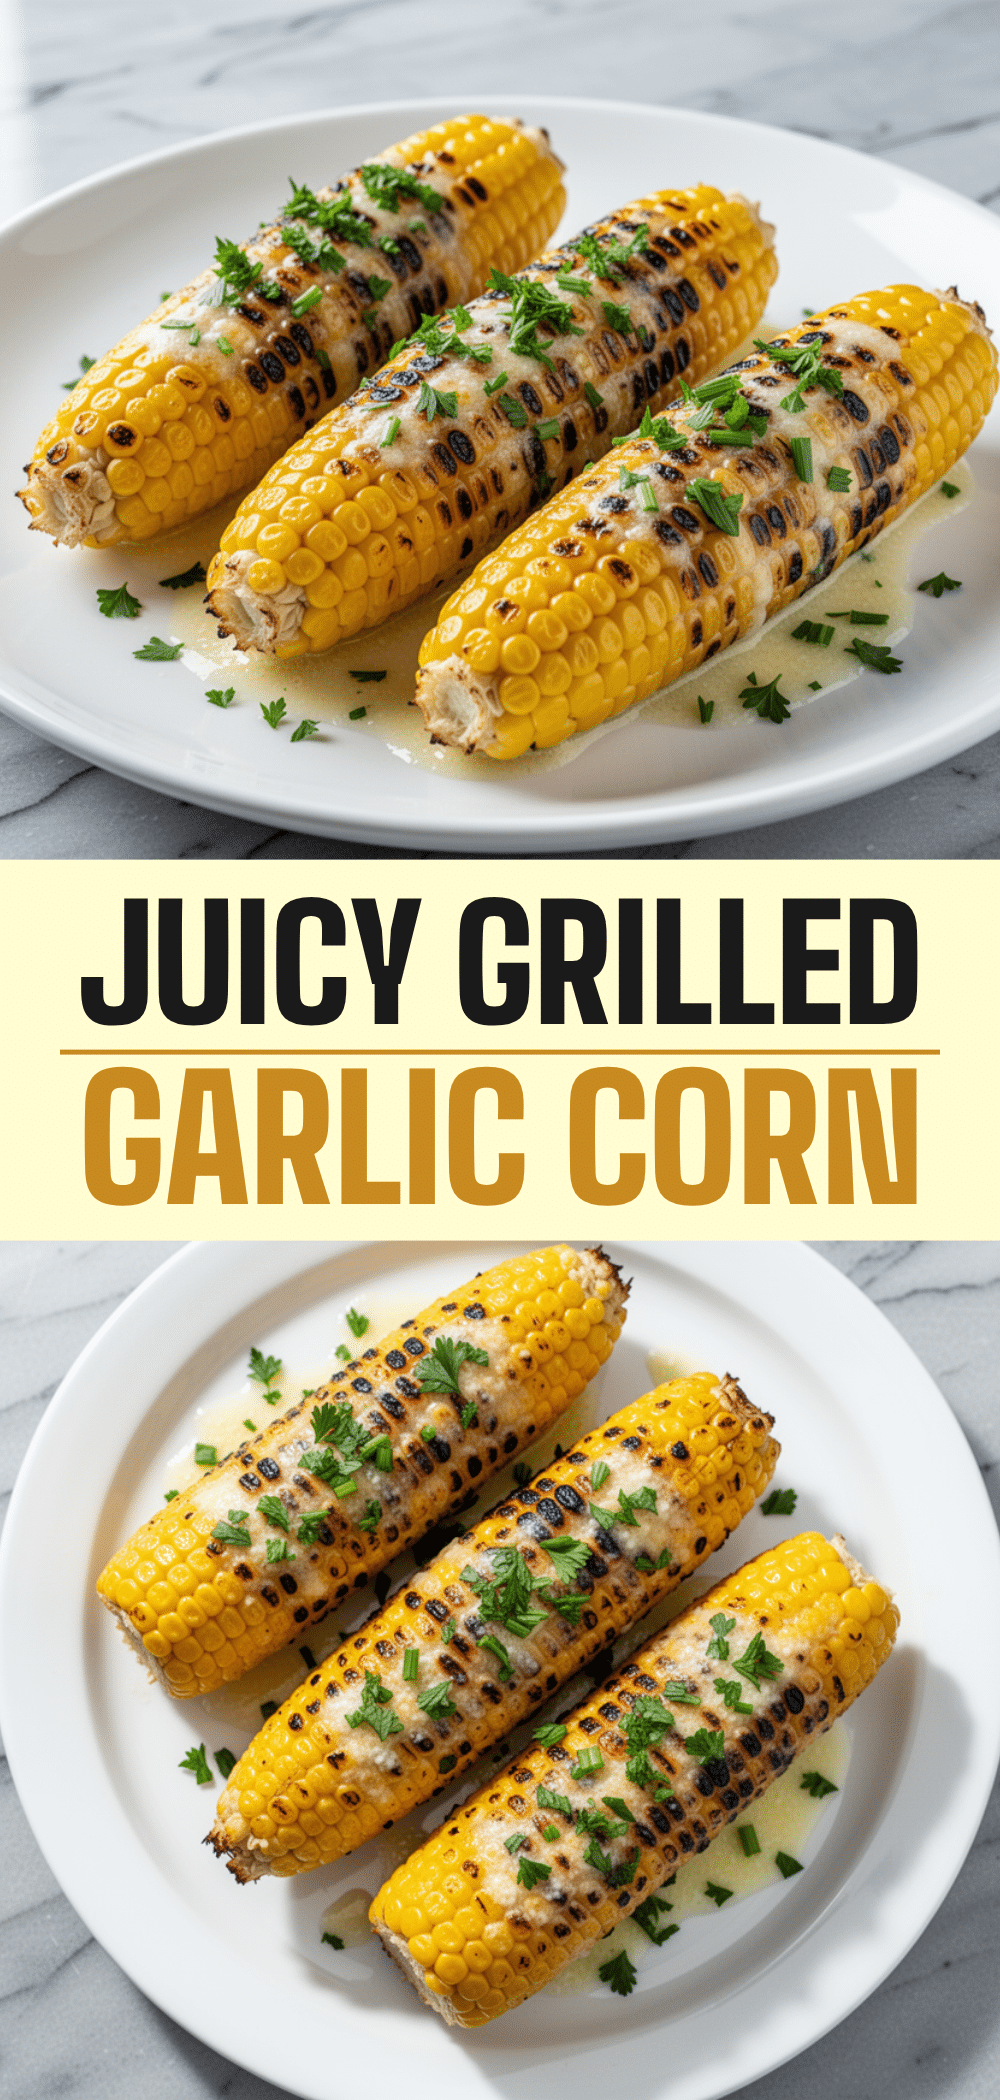

Garlic Butter Corn on the Cob with Fresh Herbs
- Total Time: 15 minutes
- Yield: 6 servings 1x
Description
A fast, flavorful weeknight side dish made by skillet-steaming corn in garlic butter and cream. This method is faster than boiling and delivers tender, caramelized corn with minimal cleanup.
Ingredients
- 3 cups frozen corn kernels (or 4–6 ears fresh/frozen corn, kernels cut off)
- 4 tablespoons unsalted butter
- 4–5 cloves garlic, minced
- 2 tablespoons heavy cream or milk
- 2 tablespoons fresh herbs, chopped (parsley and/or thyme)
- ½ teaspoon sea salt, or to taste
- ¼ teaspoon black pepper, freshly cracked
- Optional: ½ teaspoon red pepper flakes, 1 teaspoon lemon zest, 2 tablespoons grated Parmesan
Instructions
- Mince garlic and chop herbs. Set out butter and cream.
- Heat a large skillet over medium heat. Add butter and melt until foamy, but do not let it brown.
- Add minced garlic to the melted butter. Stir constantly for 30-60 seconds until fragrant, being careful not to burn.
- Add frozen corn kernels and heavy cream (or milk) to the skillet. Stir to combine.
- Simmer for 4-5 minutes, stirring occasionally, until the corn is heated through and the cream has reduced slightly to coat the corn.
- Stir in chopped herbs, salt, and pepper. Add optional ingredients like red pepper flakes or lemon zest if desired.
- Toss for another minute to meld flavors. Serve immediately, garnished with extra fresh herbs if desired.
Notes
Do not overcrowd the pan; cook in batches if making a large amount to ensure proper caramelization. Garlic burns easily, so keep heat at medium and stir constantly. Frozen corn is recommended for convenience and even cooking, but fresh corn works if kernels are scored or cut off first. Save the leftover garlic butter sauce to drizzle over steak or potatoes.
- Prep Time: 3 minutes
- Cook Time: 12 minutes
- Category: Side Dish
- Cuisine: American
Nutrition
- Serving Size: 1 cup
- Calories: 120
- Sugar: 4
- Sodium: 180
- Fat: 5
- Saturated Fat: 3
- Carbohydrates: 18
- Fiber: 2
- Protein: 3
Keywords: garlic butter corn, skillet corn, weeknight dinner, easy side dish, frozen corn recipe, garlic butter, fresh herbs, quick recipes


